DIY: STEP BY STEP On How I Constructed The Plumbing Work Of a Plastic Fish Pond.
Good day to you all here in the DIYhub community. It’s always a pleasure to be among people with a creative mindset. Every day would always be a day to learn something and gain additional knowledge to what one has learned before.
Today I would be sharing with the community HOW I CONSTRUCTED THE PLUMBING OF A PLASTIC FISH POND
Fish farming is also another lucrative business in the agricultural industry. It has always been about giving back to the community and this is done by farmers who are ready to keep their hands dirty for the people to survive.
Having a fish farm could be different ways which are either by having a pond to rear them or fishing directly from large water bodies. There are different types of ponds and it depends on the financial capability of the farmer. We have the concrete pond, the tarpaulin pond, the earthen pond, and the plastic water tank.
As an agriculturist, I would love to practice my profession and this is what made me take the step toward constructing the fish pond.
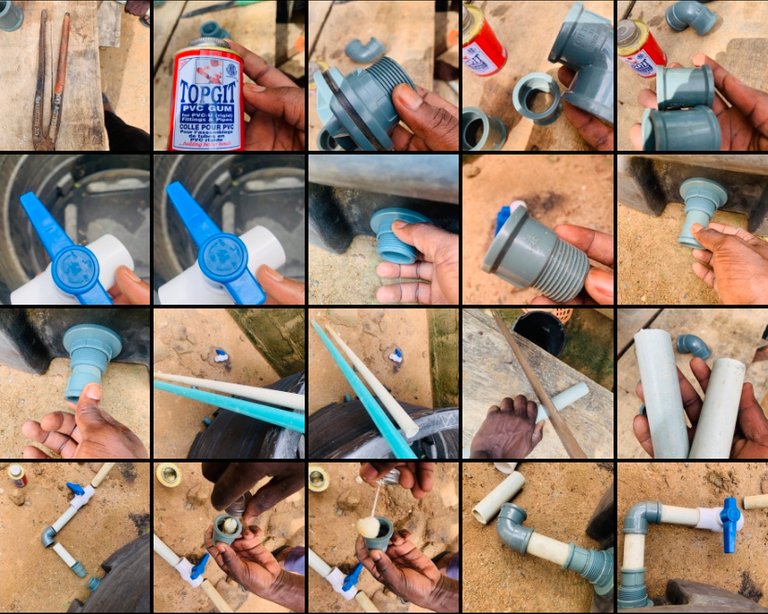
Group screenshot of my captures. All images are mine.
TOOLS/MATERIALS

- SAW
- KNIFE
- PVC GUM
- PIPES
- MEASURING TAPE 📏
- CHISELS
- WASHERS
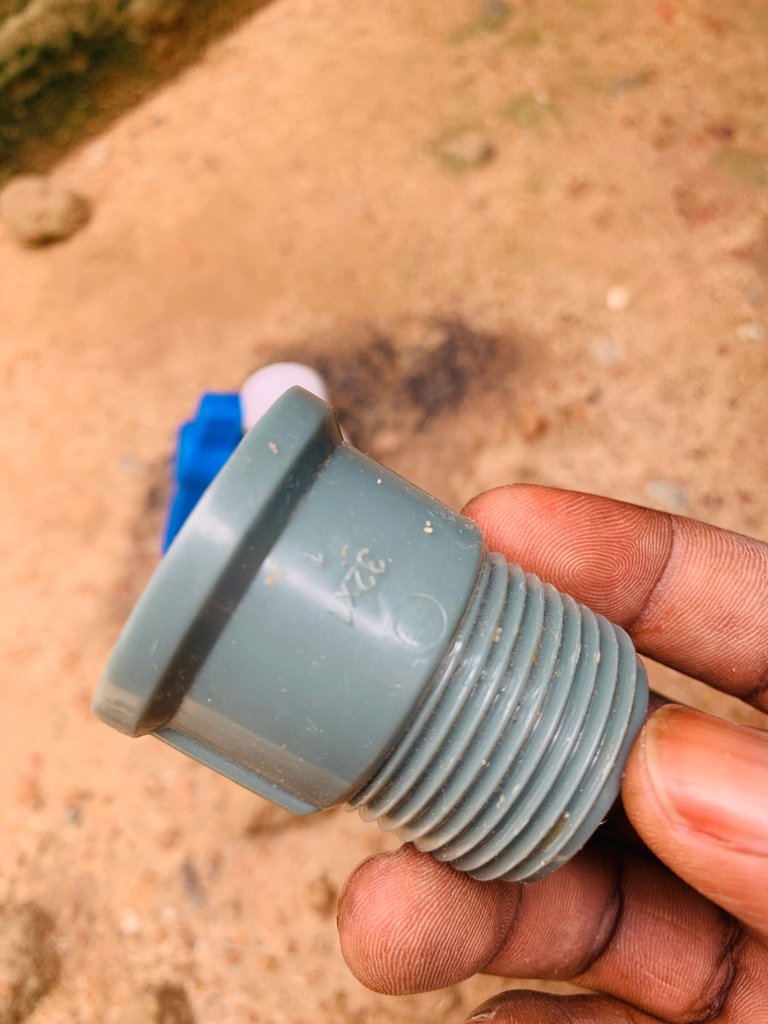
- CONNECTORS
STEP-BY-STEP PROCESS
STEP 1: DRILLING THE PLASTIC TANK
The first thing to do was to drill the plastic tank for a hole that would serve as a channel outlet for the water stored. Without this, there is no way the water in the tank would be removed.

Sometimes some tanks come with company-drilled holes and might be in one or two directions. But if not then you have to make sure you drill yours.
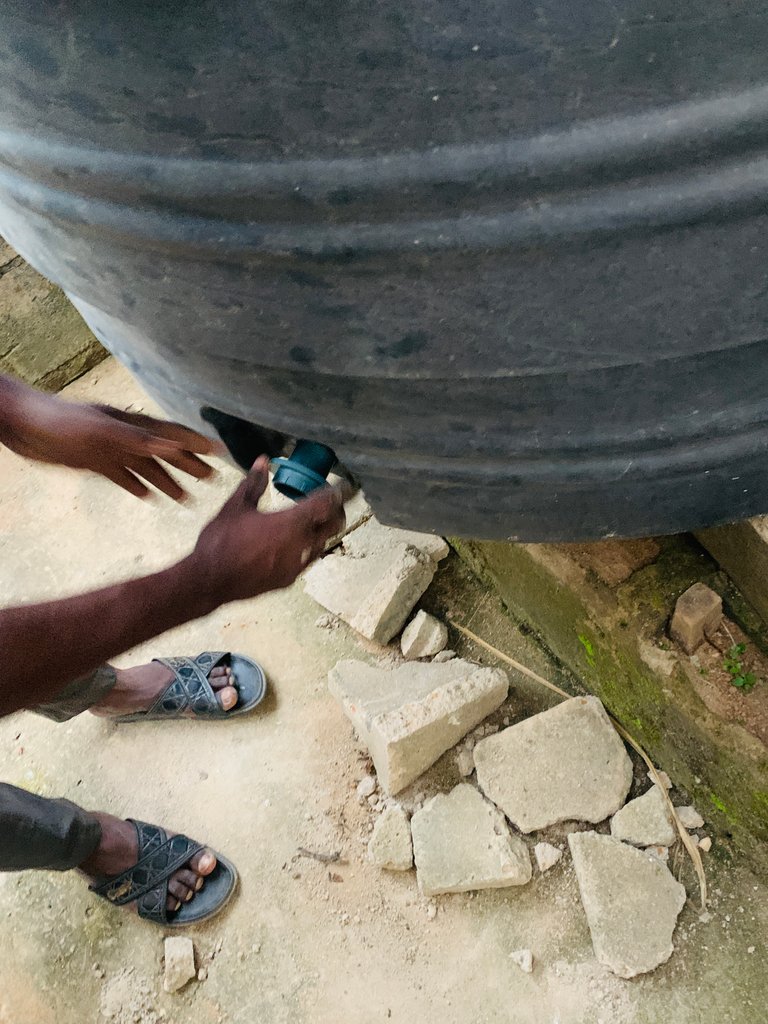
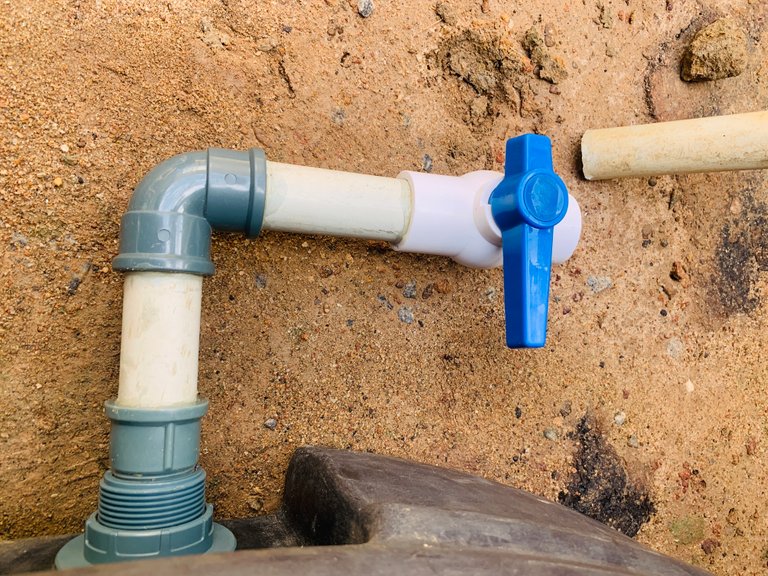
STEP 2: FITTING THE WASHER
The next process after drilling the hole in the tank is to fit in the washer. The washers are like a bolt and nut that has round rubber in between. You make sure you lose it and then set the washer with the round rubber on the inner part of the tank, this is to be able to seal off the leakages of water from the tank and make it firm to the tank wall.
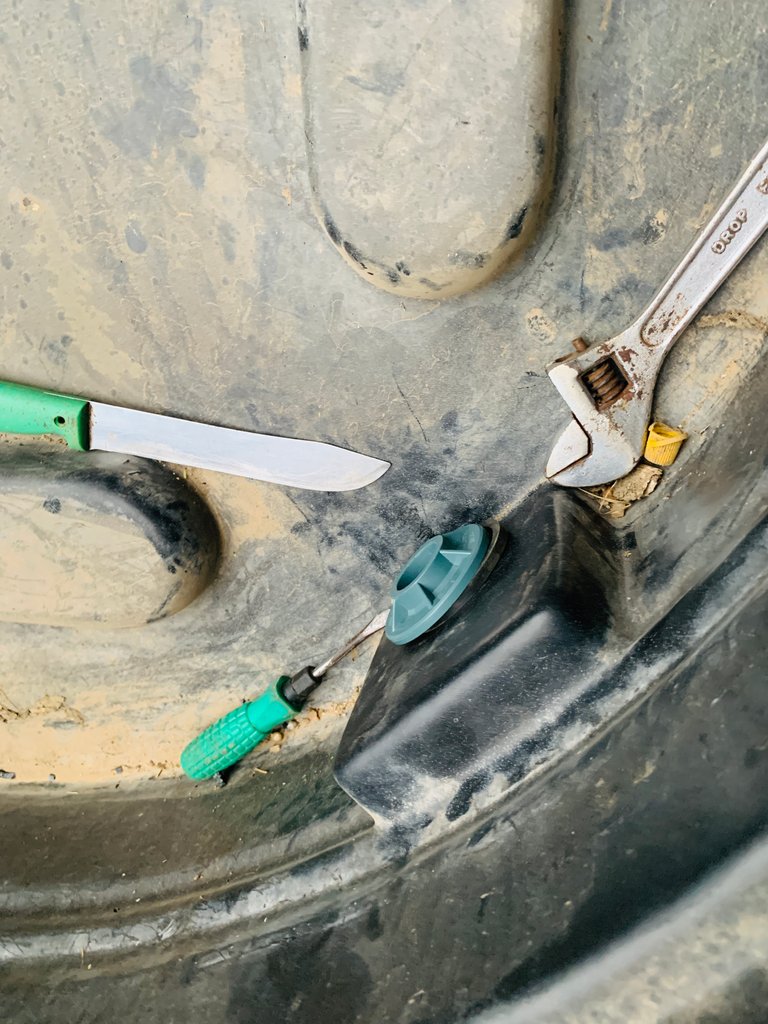
The next thing to be done is to tape the washer with the plumber's tape, this is to prevent leakage from the washer threads. Then after that, you can tighten the nut to the washer from the outside. Make sure it is well-screwed.
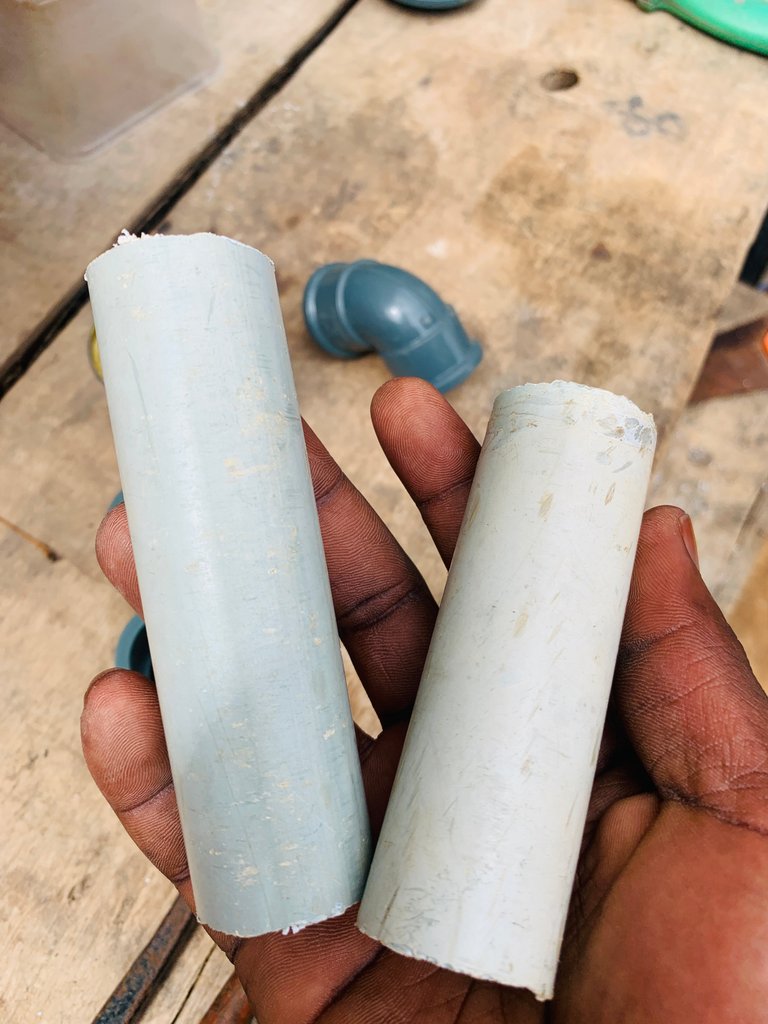
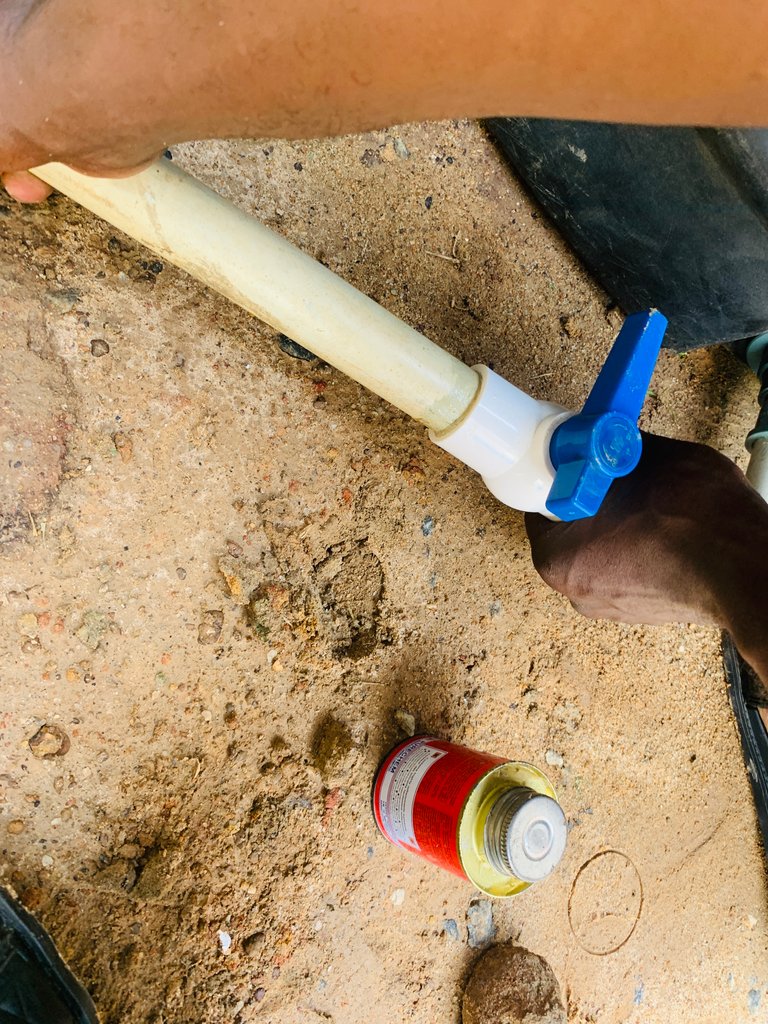
STEP 3: CUTTING OF PIPES

After fitting the washer the next step to take is cutting out the pipes into sizes. The cutting stage is one of the most difficult and important stages. Using the measuring tape you can get the size of the pipe directions and how you want it to be directed.

The aid of the saw made it easier to cut out the pipes into sizes
STEP 4: PREVIEW AND CONNECTING
The cutting was successful and I got all sizes and the required numbers.
A preview of how the connection would work out was laid on the ground to see how it would go perfectly.
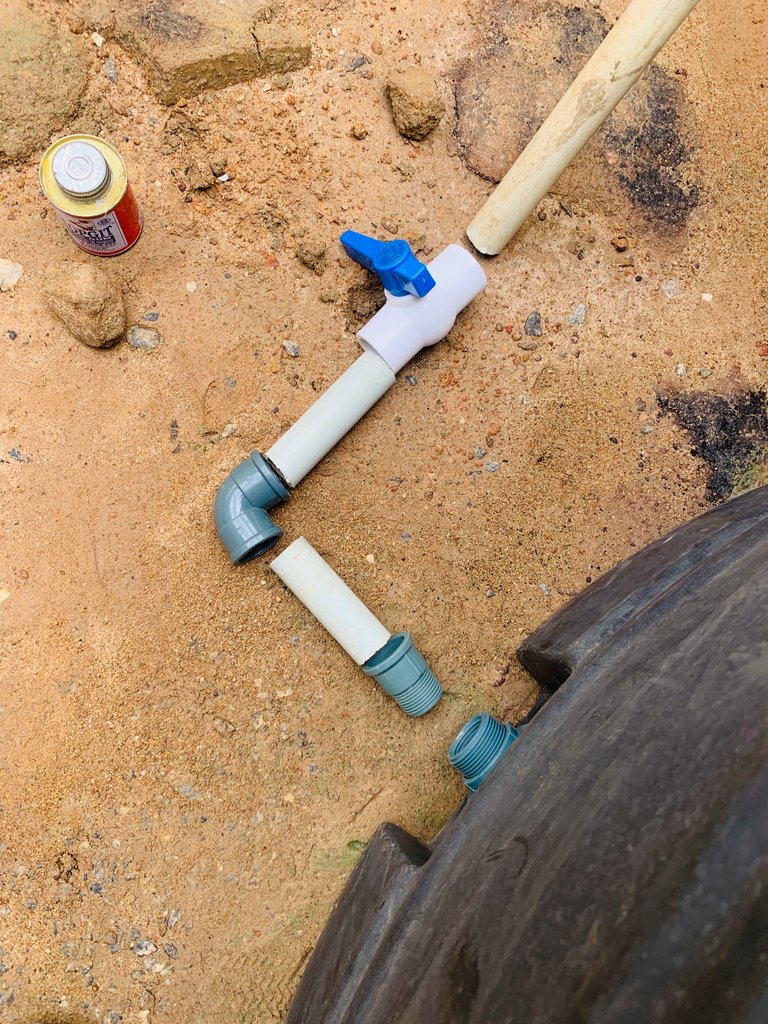
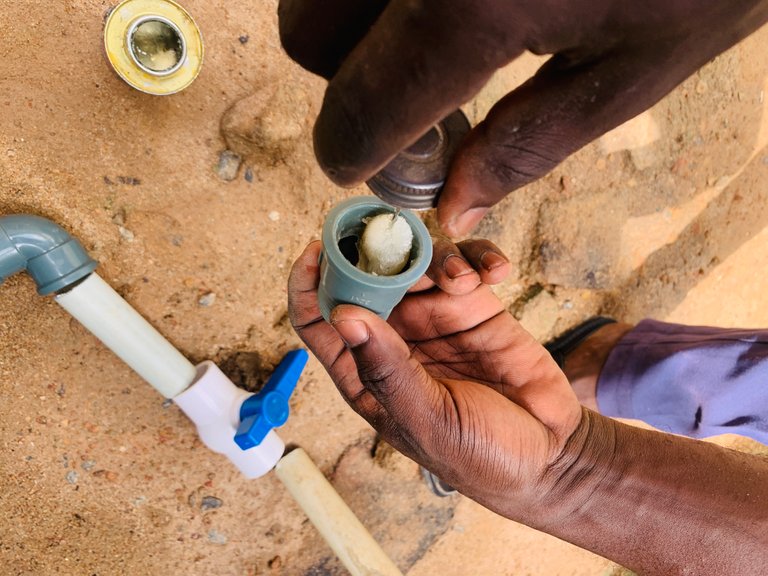
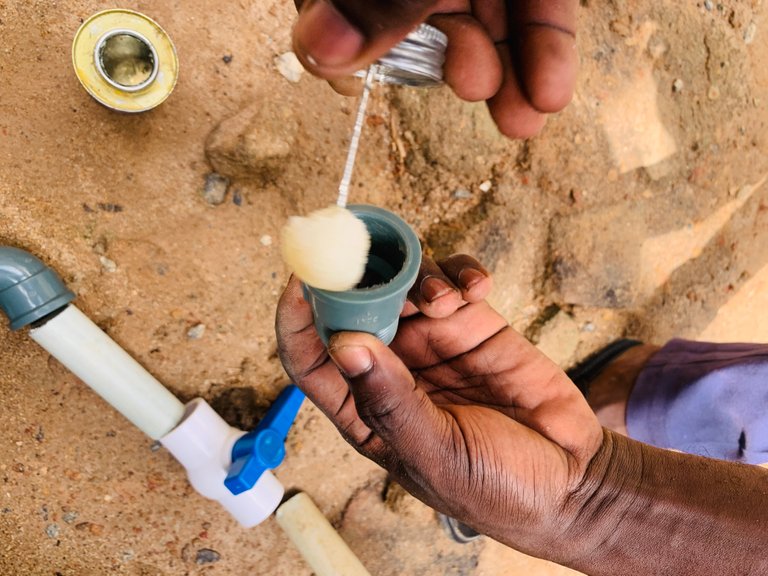
Then the next thing is to apply the gum to the pipes and the connectors too. The first step to take in connection was to fit the pipe holder into the washer connected to the tank.

After that was done successfully, then the gum was applied to the tip of the pipes and inside the connectors.
There are different types of connectors, angle connectors, and straight connectors.
The layout preview was followed and the process was successful.
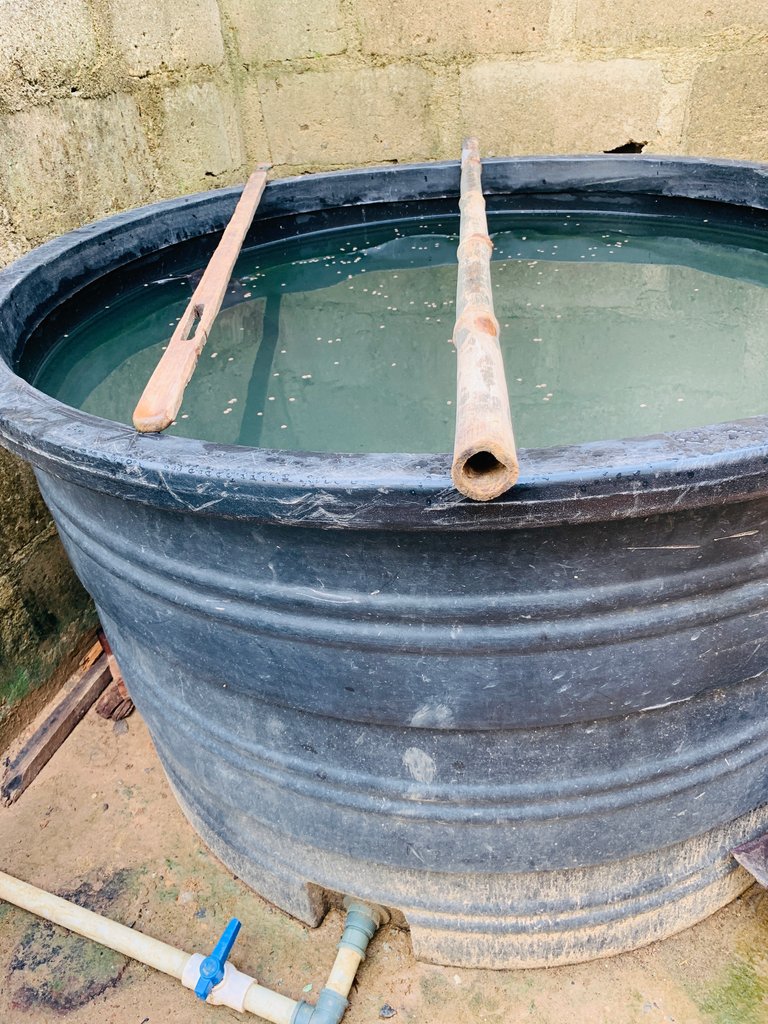
STEP 5: THE VIEW
Finally! The job is done.
The plumbing work is complete and the pond was tested by adding water to the tank. It’s nice seeing the job done.
This is all about today's homesteading experience. See you again next time.

Do you have your own fishing farm? I'm glad you fix it and share with us step by step.
Yeah I have one.
Oh that's good :) I haven't much idea about the rearing fish I hope to share with us some aspects of it in future.
Yeah I would do that. But still on the process of making progress on my farm. When the time comes I will do well to share
I never knew you were into fish farming. It’s a very good business and I’ve seen a lot of individuals make make money from it. I wish you all the best.
Constructing the fish pond looks easy but I know it took a lot of your time. Well, I know it’s all worth it. 😄
Hehe. My lady is here. 😂. And yeah it looks easy. But it took me hours to handle. Thanks so much for stopping by. I appreciate
Your lady is here to support you.😂 I hope you don’t forget her when business is booming.
This looks like an easy process, but I’m sure it’s not when you’re trying it for the first time. I’m interested to learn more about this fish farming. It sounds like fun and like something lucrative, because I don’t see many people doing it here. That’ll mean less competition.
It is lucrative too. I am yet to get a balance of it. But with time everything will turn out fine. I believe.
And yeah. Then can you start up a fish farm over there??
I’m thinking of it. I’m thinking of a lot of things, actually. I want to dive a little into homesteading. I’m either going to do poultry or fish farming. Just haven’t decided which one yet or when I’ll start. Might take a long time before I start because I have to do a lot of research and prepare for the financial costs too.
Yeah. That’s great. The marketing is where the deal is. You can take your time and get your research done. And you can always get back to me about it. I pray God help us.
Good work @abdul-qudus for your effort of construction of a simple plastic fish pool
Yeah thanks so much. I really appreciate,
looks like an easy process for you. Nice work
Water is really necessary for a fish pond. It great how you took us through the required steps.✨
My least favorite plumbing issue is when something starts dripping. It’s not just annoying; you never know when a small leak will turn into a big problem. If you know what I mean, don’t put off dealing with these things. Even for saving money – it’s water you’re paying for, and it’s just dripping onto a towel on the floor. If you need to fix a leak, I recommend Ben's Plumbing https://bens.plumbing/services/plumbing/leak-detection/. They’re some of the best in Seattle, and I’ve used their services, so I suggest you consult a plumber as soon as possible.
Totally agree with you—those little drips can turn into major headaches if ignored. I had a similar issue under my kitchen sink, and what looked minor ended up being a bigger leak inside the cabinet. I also used Ben’s Plumbing leak detection service https://bens.plumbing/services/plumbing-seattle/leak-detection/, and they were super quick and professional. Definitely worth calling them before things get worse.
Posted by Waivio guest: @waivio_alex-boltman
There’s a big difference between DIY waterproofing and professional systems. Surface coatings might help temporarily, but they rarely solve the root issue. True protection requires a more complete approach. While researching, I checked Mississauga waterproofing and it helped me understand how proper installation can prevent recurring problems.