[Eng/Eng] Drawing and coloring SpongeBob SquarePants/Dibujando y coloreando a Bob Esponja
English Version
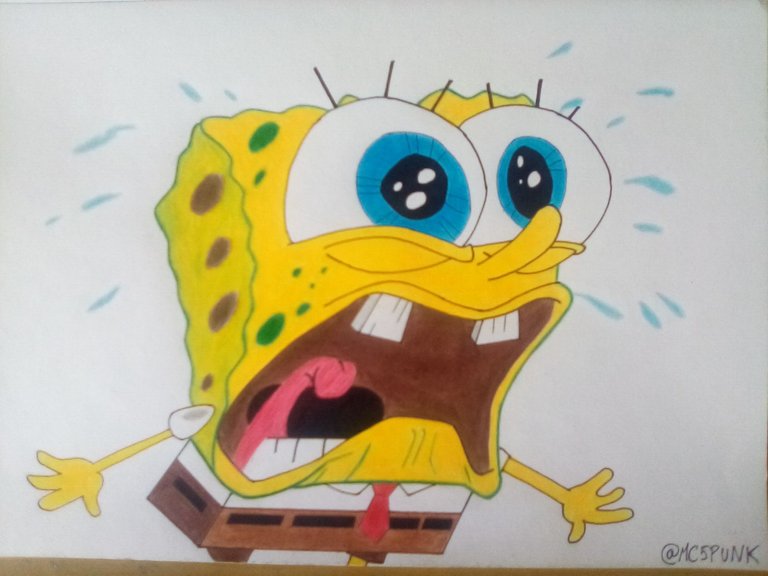
Here we are again to bring you more content related to drawings, this time we will see the step by step for the elaboration of SpongeBob; where I reconstructed a reference image that I found on the Internet in very small dimensions.
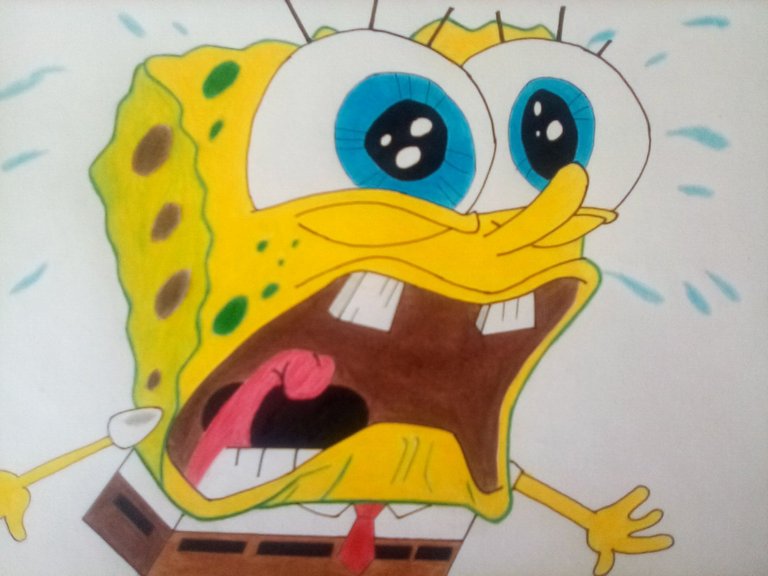
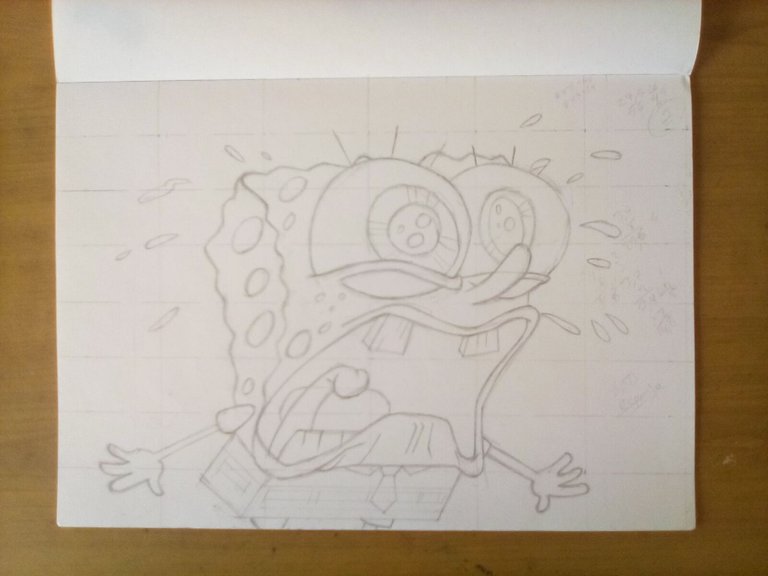
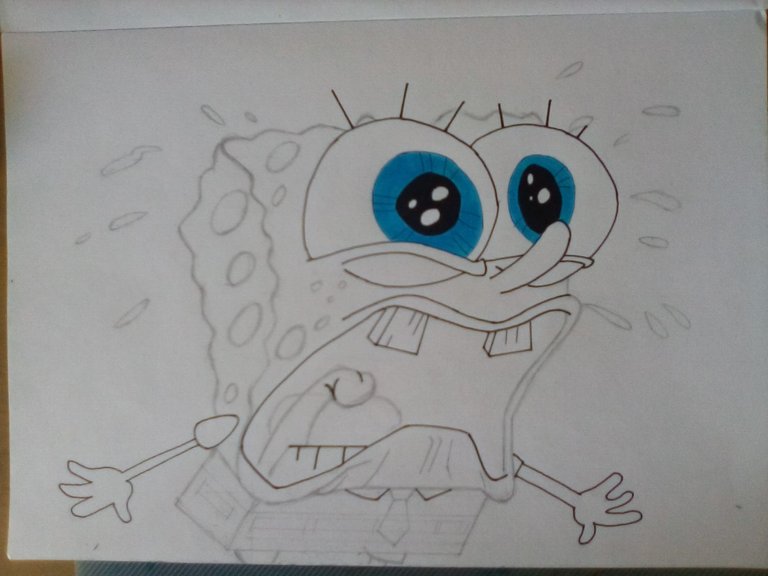
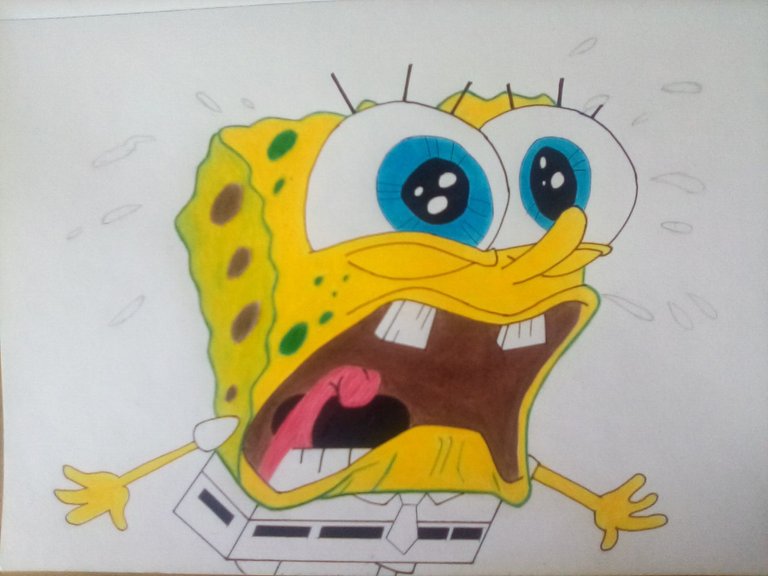
Now, to begin we will have to make the sketch. Then for the line art we mark some lines with a pen, while others will be drawn with a ballpoint pen (given the thickness of the line). We color the eyes with black and blue. We mark the lines that give shape to its body with green color. We apply greenish yellow on one side of the character, while the front area will be only yellow. In the mouth we use: pink on the tongue, brown on the mouth walls, and black inside. To finish: light brown on the front and brown on the bottom of the pants, and red on his tie. Blue with white on the tears.
And that's it! We have concluded with our work 😃 What do you think? 😁
I hope this will serve as motivation for you to do it. And remember that you can comment at the end of this post, I'll be reading them and giving feedback. I also appreciate all the support received from all of you.
Without more to say I'll see you in a next installment.
Until then 😎👍.
Materials used:
- Cardboard (drawing pad);
- Eraser;
- Paintbrush;
- Pencil sharpener;
- Crayola colored pencils; HB pencils;
- HB.. pencil
- Ballpoint pen;
- Stylus;
- Ruler.
Source of the images
Images captured with my Amazon Fire 8 tablet.
Versión en Español
Ya nuevamente entre ustedes para traerles más contenido referentes a los dibujos, en que para esta ocasión veremos el paso a paso para la elaboración de Bob Esponja; en donde yo reconstruyó una imagen de referencia que hallé en Internet en dimensiones muy pequeñas.
Ahora, para comenzar tendremos que hacer el boceto. Después para la línea de arte marcamos con un estilografo algunas líneas mientras que otras serán trazadas con un bolígrafo (dado el grosor de la linea). Coloreamos los ojos con el color negro y azul. Marcamos las líneas que dan forma a su cuerpo con el color verde. Aplicamos amarillo verdoso a un costado del personaje, mientras que el área frontal será tan sólo amarillo. En la boca usamos: rosado en la lengua, marrón en las paredes bucales, y negro en su interior. Para finalizar: marrón claro en el frente y marrón al acostado del pantalón, y rojo en su corbata. Azul con blanco en las lágrimas.
Y listo! Hemos concluido con nuestro trabajo 😃 Que les parece? 😁
Espero que esto les sirva de motivación para hacerlo. Y recuerden que pueden comentar al final de esta publicación, los estaré leyendo y dando respuesta. También agradezco todo el apoyo recibido por parte de todos ustedes.
Sin más que decir nos vemos en una próxima entrega.
Hasta entonces 😎👍
Materiales usados:
- Cartulina (block de dibujo);
- Borrador;
- Brocha;
- Afilador de lápiz;
- Lápices de colores Crayola.;
- Lápiz HB.;
- Bolígrafo;
- Estilografo;
- Regla.
Fuente de las imágenes
Imágenes capturadas con mi tableta Amazon Fire 8.

Great drawing!
Thanx 😄
In no time that area would be filled with tears😂
That's right 😂