HOW TO CUT AND SEW ELEGANT IRO AND BUBA (BLOUSE & WRAPPER) WITH WHITE LACE FABRICS
Hey lovelies ❤️
It's your favorite girl @debbie-ese 😍
Welcome to my blog 🤗

It is with great pleasure that I bring you another amazing design on blog today. But before I proceed I will like to shout out to all the creative hands that share their handworks, crafts and special skills with us on this platform, you guys are the best. Sometimes, I just keep seeing a lot of creativity on my timeline and I'm blessed to be a part of the this big #Needlework community.
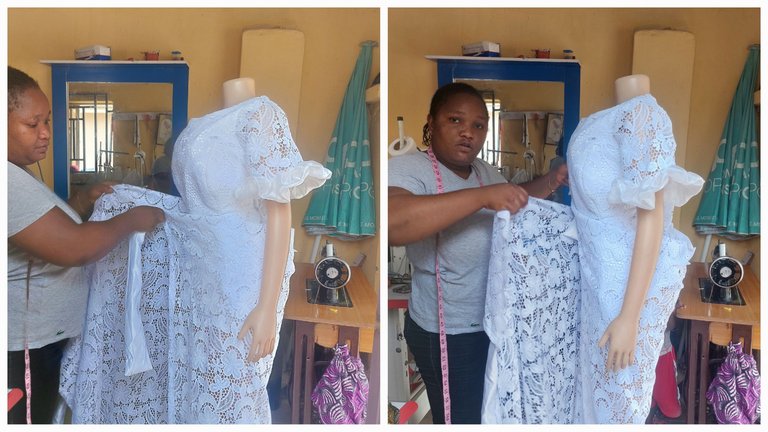
Moving forward, this dress is a blouse and wrapper (iro and buba) that I made for a client and it was made with a sparkling white lace fabrics. Lace fabrics are known for their detailed patterns and timeless elegance which speaks class. It speaks more class when the fabric is white.
I faced quite some challenges in the making of the dress but in the end I was able to create a masterpiece. There was no power supply during the time I started making the dress so I had to use my manual sewing machine and an iron that I constructed that I place on my cooking gas (some people use charcoal iron in this situation). I so much dislike sewing with manual machine but when deadline looms I don't have a choice but to use it. However, on the second day of making the dress when I was working on the finishing the power was available so I was able to use the Industrial machine to roundup.
What You Need
- Lace fabric
- Satin fabric
- White lining
- Breast pad
- Hairstay
- Tailoring chalk
- Zipper
- Scissors
Step by Step
The measurements we are working with is shoulder 16", bust 47", underbust 42", bustline 16", half length 19", waist 45", hip 53", length (blouse) 30".

We are making a blouse, so we will start by talking the line measurement from the shoulder to the nipple point, then from the shoulder to the underbust, then shoulder to waist (the point where you have the belly button), then shoulder to the length of the blouse.
From the shoulder to nipple point we would be making use of 12", underbust is 16", nipple span 10", half length is 19", length of blouse is 30". These are the line measurement.
Next, we would create the darting. We'd take the nipple span divided by 2 which is 10"/2 = 5". So, you would take the 5" on your nipple point then come down to the underbust and reduce the 5" by 0.5 which is 4.5". Mark 4.5" at the underbust, half length and at top length. Connect these broken lines which will give a sort of curve.

Then move to the shoulder which is 16"/2 which is 8". Then the depth of the armhole is 9" due to the size of the client. The depth of the armhole will be divided into two which is 4.5", so mark it with your tailoring chalk.
Connect the irregular line that we talked about earlier to the 4.5" in the armhole which will give us a curve around the bust area
Fron the underbust all the way down take 2.5".

At the blouse length where you have the space of 2.5", look for the mid-point and connect it to the 2.5" half length area. It will give you something like a half triangle. Repeat it for both sides. This will give the blouse some form of flair at the belly area which will not make it to be too tight.
From the underbust where 2.5" was marked, connect it 1" below and connect your lines.

Next you take all the body measurements divided by 4 and add allowances. For the purpose of this dress we are using 7.5".
To cut the back pattern, take all the line measurement, and your regular dart (without the curve for bustier using 1.5" from the waist to the underbust).
Take the body measurements, bust which is 47"/4, underbust is 42"/4, waist is 45"/4, hip is 47"4.
At the down part of the blouse ensure you add extra 2" apart from the allowance.
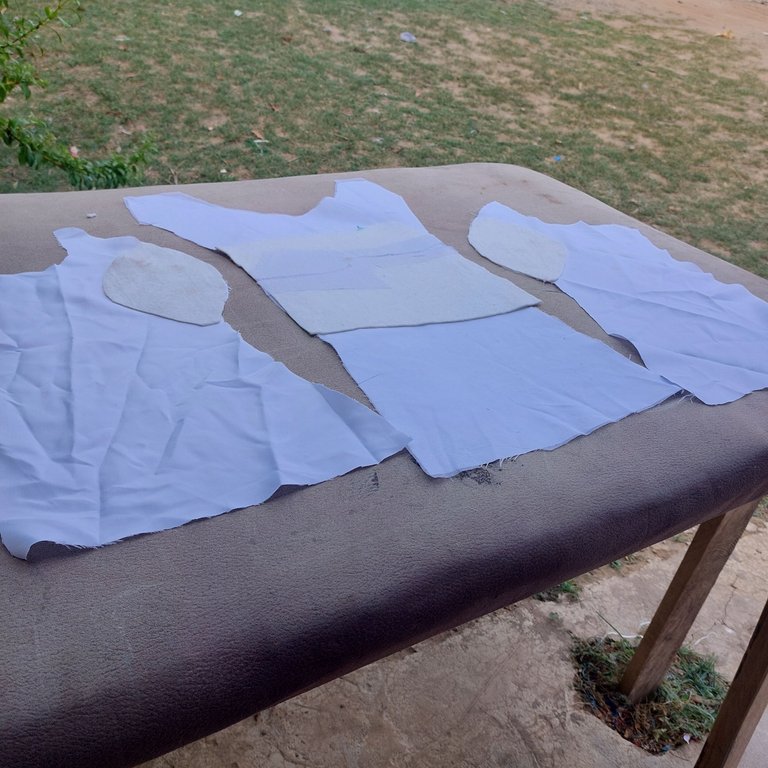
Use this pattern to cut the lace, satin and lining.
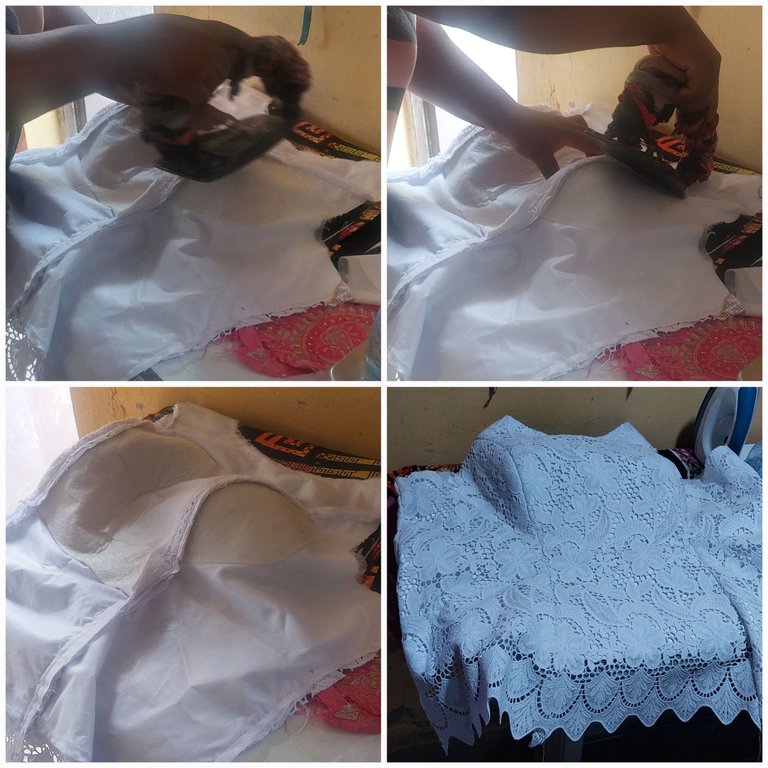
We will add hairstay on the lining and satin by using a pressing iron.
On the front pattern, cut your breast pad and iron it in the pattern.

Head to your sewing machine and join the front and back piece together appropriately.
Next, iron all seam open to enable the cup form well
Use the lining to turn the neck of the blouse and attach your zipper to the back pieces. Ensure your zipper is well attached before you proceed.
Now, use your bodice measurements to shape the blouse.
Cut the sleeves and attach to the blouse.

That's all for the blouse.
For the wrapper we are using 2yards and 15". Cut it out and hem the edges and then attach satin belt to enable the customer to tie the wrapper properly.
ABOUT ME

Just a quick reminder:
The text and photos on this blog was created by me, unless I state otherwise.
The cover images are designed using Canva with strict adherence to elements that are licenced for use under their terms.
Photographs are taken with my Samsung Galaxy A52 - 64MP Camera and other amazing features that absolutely capture the moment in high quality.
Lastly, do not use any of my content either text or image without asking me for authorisation. In other words, unauthorised used of my content is highly prohibited.
View or trade
LOHtokens.@debbie-ese, You have received 1.0000 LOH for posting to Ladies of Hive.
We believe that you should be rewarded for the time and effort spent in creating articles. The goal is to encourage token holders to accumulate and hodl LOH tokens over a long period of time.
@tipu curate
Upvoted 👌 (Mana: 36/46) Liquid rewards.
Beautiful and creative thanks for sharing dear
Thanks dear. Thanks for visiting my blog @marylove1.
You are welcome ma
Congratulations @debbie-ese! You have completed the following achievement on the Hive blockchain And have been rewarded with New badge(s)
Your next target is to reach 1250 upvotes.
You can view your badges on your board and compare yourself to others in the Ranking
If you no longer want to receive notifications, reply to this comment with the word
STOPCheck out our last posts:
I love your work with the lace fabric.
Thank you so much. Your comments mean a lot to me