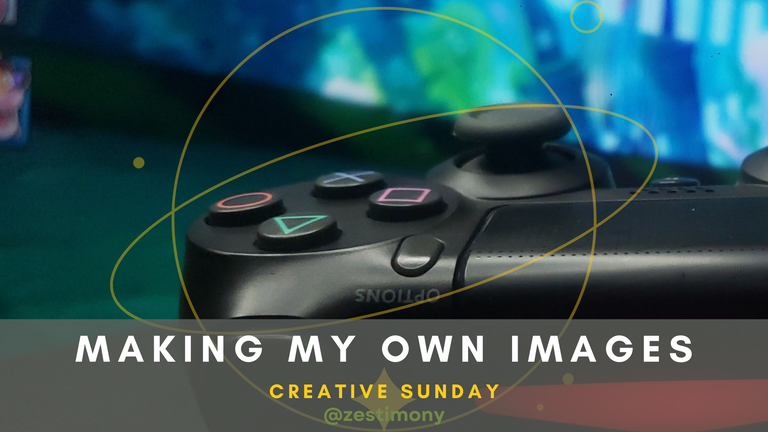
Creating my Own Stock Images
Visuals, in form of images, photos, videos, infographics and more, remain vital part of any content be it an article, a blog post, or social media post. For me they really tell a story, and add a bit more flair to written texts.
As a content creator, I have always relied on free stock images from websites like Pixabay and Pexels to accompany my content, which has actually been okay for the most part. But something goes wrong occasionally, the same image I end up using for my cover image, is being used by someone else, which may be quickly interpreted as a lack of uniqueness.
It is for this reason, I have recently decided to transition from using free stock images to creating my own images by taking my own photos. In this #creative-sunday post (after a long while), I will share with you the processes involved in making this possible.
This is the process I am embarking on going forward and hope it helps me create contents that are not just unique in thoughts, but also unique in looks.
Step 1: Determine the Type of Images You Need
The first step to creating your own images is to determine the type of images you need for your content. It is crucial to choose the right images that convey your message and create a lasting impression on your audience.
So, based on the theme/title of your content and the overall message, you have to brainstorm on what type of images are a best fit for your content. For this content, we will be assuming that I am writing about my fitness band - MI Bank 4, thus, it would be wrong introducing images that are unrelated entirely.
Step 2: Gather the Equipment

This image summarizes every tool I used, a ring light, a product photo box, my camera, and some coloured backgrounds for building the prop with the product photo box stuff.
To take high-quality images, you need some basic equipment such as a smartphone camera, a tripod, a ring light, and some props builder. Here is a breakdown of each of these items and their functions:
Smartphone Camera: A smartphone camera is the most important equipment for taking high-quality images. Ensure that your smartphone has a high-resolution camera that can capture high-quality images. The fact is if you know your craft well, you can even do without the rest of the things in this list, only a smartphone camera can be enough.
For me, I would always recommend a flagship device even though it's old, my personal device of choice is my old Samsung Galaxy S9 and LG G6, quite old, but the cameras get the job done with a few little neat tricks.
Tripod: A tripod is necessary to keep your smartphone steady and avoid blurry images. You can use a regular tripod or a smartphone tripod depending on your preference and your budget. Don't feel pressured to go overboard with your purchases.
Ring Light: A ring light helps to create an even light source and reduces shadows in your images. It is especially useful when taking images in low light conditions. It could be entirely optional, but if your budget could acomodate one, it is nice to have one around.
Props Builder: Props builder includes any props or materials that you need to add to your images to make them more engaging and interesting. For instance, if you are taking pictures of food, you may need plates, utensils, or garnishes.
As parts of my prop, I have some plain backgrounds (even a cardboard paper would do), and even a cheap product photography box.
Step 3: Learn Basic Photography Skills
With all the materials needed ready and available, the next step is to learn. The truth is that, this should even come as step 2, as with the right skills, you can make high quality images with just a camera (but since you're ready for this business, follow the step as they come).
To take high-quality images, you need to learn some basic photography skills. I've surfed the net and could conclude on a few important skills to learn. This includes understanding composition, lighting, and editing (this is in no way all you need to know, but it is more than good enough to get started).
Composition: Composition refers to how the elements in your image are arranged. You need to learn how to place your subject in the right position to create a visually appealing image.
Lighting: Lighting is crucial in photography. You need to learn how to use natural light or artificial light sources to create a well-lit image. A ring light can be used to add light in low-light environments.
Editing: Basic editing skills are necessary to improve your images' quality further. You can use free editing apps on your smartphone or desktop to adjust brightness, contrast, and saturation.
Step 4: Set up Your Shooting Environment
Once you have gathered your equipment and learned basic photography skills, the next step is to set up your shooting environment. Choose a location that has good lighting and is free from distractions. You can use a table or a flat surface to set up your props.
Step 5: Take Your Photos
Once you have set up your shooting environment, it's time to take your photos. Here are some tips to help you take high-quality images:
Use the rule of thirds: Divide your image into thirds horizontally and vertically and place your subject along one of the lines or intersections. This will create a visually appealing composition.
Keep it simple: Avoid cluttering your images with too many elements. Keep them simple and focused on the message you want to convey.
Experiment with angles: Take pictures from different angles to create a variety of images.
Use the timer function: Use the timer function on your smartphone to avoid blurry images caused by shaking the phone.
Another important thing to remember is to take your time, and be patient. Good photographers are ready to take up to a hundred shot to in the end, obtain one usable result, and you should be ready to be that photographer. Don't be in a hurry to start and finish, take your time!
Another Pro tip, learn how to use the Pro mode on your phone as it gives you more control over the look and feel of the photo. Images for work are not simply point and shoot photos.
Step 6: Edit Your Photos
Once you have taken your photos, it's time to edit them. You can use free editing apps like Photoroom, Snapseed, Lightroom, or VSCO to edit your images. Here are some basic editing skills to help you improve your images:
Adjust brightness and contrast: Adjust the brightness and contrast of your images to make them more visually appealing. This can help to make dark images brighter and vice versa.
Crop and straighten: Crop your images to remove any unwanted elements and straighten them to create a more balanced composition.
Use filters: Filters can help to enhance your images and create a specific mood or tone.
Step 7: Store and Use Your Images
Once your images are set and ready, the next move is to save them and use them. You don't have to build a stock image website or upload your images to one to save them securely, you can simply save them to a folder on your PC or your smartphone, but if you need a more secure storage that is fail-proof, you can use Google Drive or Dropbox to save them securely online.
Now that you have taken, edited and stored your images, it's time to use them in your content. You can use them in blog posts, social media posts, or any other content that requires visuals.
Benefits of Creating Your Own Images
Creating your own images has several benefits, including:
Unique and original content: By creating your own images, you can create unique and original content that stands out from others.
Control over your images: You have complete control over the images you create, allowing you to create the perfect image to convey your message.
Cost-effective: Creating your own images can be cost-effective in the long run since you don't have to pay for stock images.
It can make you some money: Creating your own images can make you some money in the long run as you can sell these images on websites such as iStock and more, so make sure they are excellent enough to merit someone's hard earned funds.
In the End
Creating your own images is a great way to add a personal touch to your content and create unique and original visuals. With some basic equipment and photography skills, you can take high-quality images that convey your message and create a lasting impression on your audience. Don't be afraid to experiment with different techniques and styles to find what works best for you.
Outputs
Remember, I told you I was aiming to create a photo of my fitness band. Here is an unedited sample of one of the photos. Editing it may make it look entirely different and more detailed as I shot in RAW:
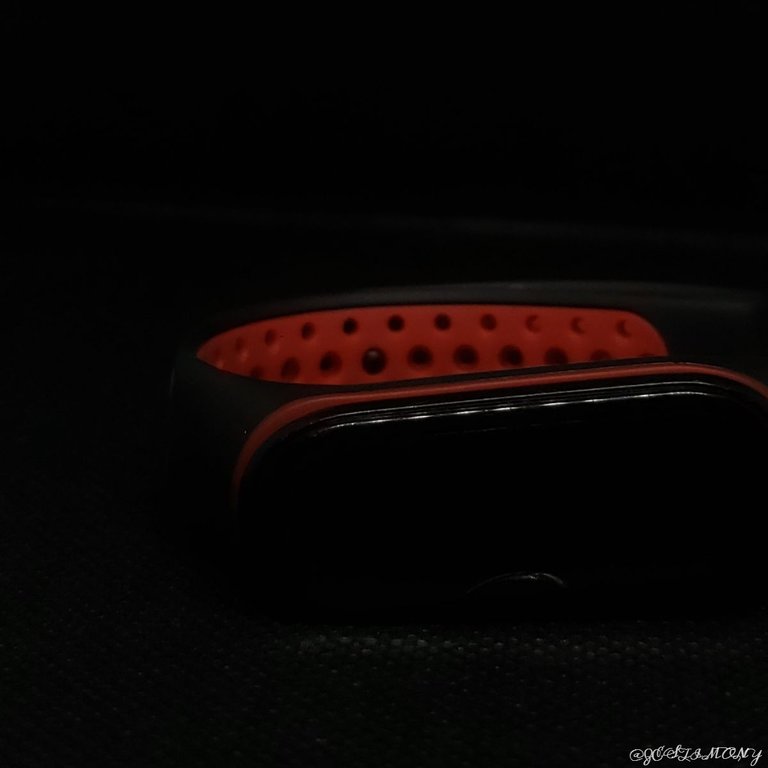
The image clearly looks quite dark and I hope to correct this in post. And maybe, if I had turned on the band's display, it would have looked much better.
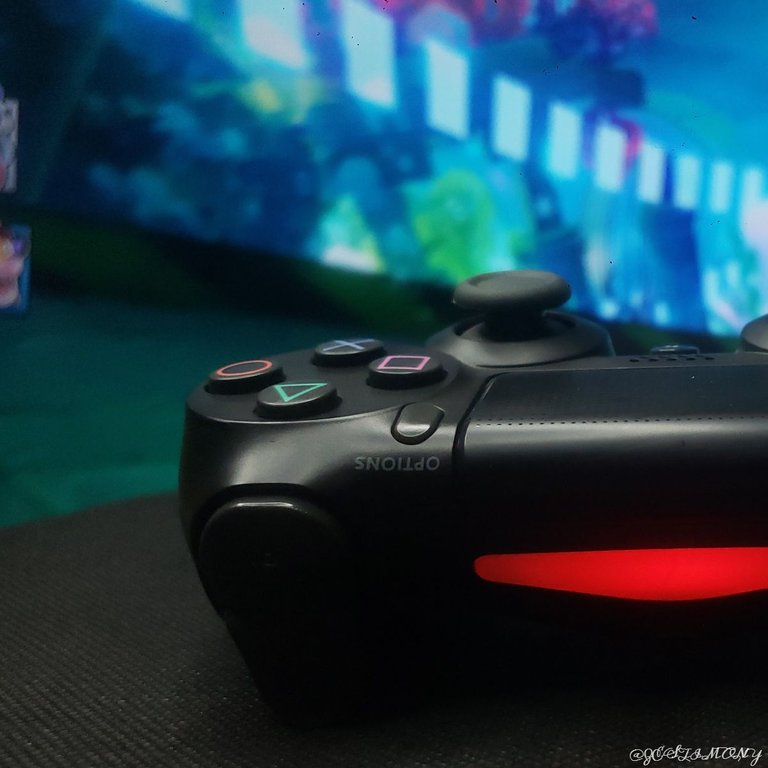
I didn't just take photos of my fitness band, I also took photos of a PlayStation 4 controller, this time, with the TV as my background:
Happy creating! #cc #creatives #creative-sunday
https://leofinance.io/threads/@zestimony/re-leothreads-25hteats
The rewards earned on this comment will go directly to the people ( @zestimony ) sharing the post on LeoThreads,LikeTu,dBuzz.
Great advice! I'm always taking pictures with my phone of all sorts of items, the trick is to remember what you've taken and how to find it. I always prefer using my own photos over Pixabay or others.
Posted Using LeoFinance Beta
That's really nice. It just gives your work a very strong touch of uniqueness. Thanks a lot for stopping by, I've followed you so I don't miss out on your unique works.
With respect to remembering what one has taken, that's really an issue and maybe, I could figure out something and tag you later in the future if I do.
I have a pretty good memory for shots I've taken and for some reason I can always remember WHERE I took them. I find the search by location on my phone to be amazing for finding specific photographs.
That's really nice. Phones are now very smart, you can even search by text, or even by a description of the photo. I use Google Photos and it's incredible how AI is changing how things are done these days.
I told a friend on here sometime back that I'd prefer taking my own photos to using stock images. I already know all what I need and am hoping to get them soon. Editing might just pose a little issue tho.
I really cannot wait to build a quality gallery and do some documenting.
Everyone should try this. It's bliss.
And growth is certain.
Exactly so, @josediccus is an excellent example of such bloggers that do almost 100% unique contents including people like @brianoflondon amongst numerous other successful bloggers, and they are thriving more. It is a recipe to growth, and you should jump in too. But don't wait till u get all these things oh! Just start pointing and shooting and doing the little u can.
I had wanted to wait until things were in place but, I just might reconsider
WOW! Though the process is not too simple, but I think that I can give it a trial. I need a good camera to start.
Thanks for sharing.
Lol. What phone do you use? Most phones these days already have solid cameras. The process is honestly tedious - especially doing it with the aim of trying to bring in the best possible results. It is honestly tedious, but fun.
Yes dear. I will try and give it a trial.
Wow
Just wow
Zest dear....Ur creativity is super unique
You are always searching for unique ways to do things better. I have visited most of Ur creative Sunday post and what I have seen so far is nothing but uniqueness.
Weldon my dear
This is amazing
Creating Ur own image makes lots of sense
We are coming up o oo 😂
Lol. Nkem wey be madam! Stop whining me joor.
But is fine shall, I try hard to stand out, but its not easy shall. Sometimes, you just standout and end up shooting yourself. But it doesn't mean we'll stop at that.
Creating your own photos is nice shall. As a mother of young soldiers and future creatives, you can use them to achieve this self. The early they start doing these things, the more likely they'll become high level professionals in the future.
Wow...another insight
Thanks but I am not whining you oo 😂👍
That's a good point you gave and it helped awaken some creativity in me. I'll make effort to use my own pictures for my blogs subsequently. Thanks so much for sharing.
Welcome Sapphirekay. It feels good to be touching lives through my blog 😂
I can't wait to see what you will come up with.
There is reasonable evidence that this article is machine-generated. Posting such content is considered fraud.
Fraud is discouraged by the community and may result in the account being Blacklisted.
Guide: Why and How People Abuse and Defraud
If you believe this comment is in error, please contact us in #appeals in Discord.