🌳Giving new soil to a bonsai tree planted in our house🌳


Hello my loving Asean Hive community,
Welcome back to my small garden new post. It's been about 1 month since I've been writing again on hive. In the past, I often talked about the plants in my small garden, but these days I don't talk about the plants. Today I will tell you about the time I spent with my father in the small garden for small plants. First, I will tell you about the weather conditions in my area. Even though my area is mountainous, the weather is very hot. But since it rains every night, there is nothing to worry about for the plants.


Next month is the rainy season in our country. So this month we start planting plants for the rainy season and we can also repair the plants that have been planted. Today, I will exchange a new soil for a bonsai tree planted in our house with my father. My father is very fond of plants, so about 4 years ago, my father planted some Banyan tree as bonsai.

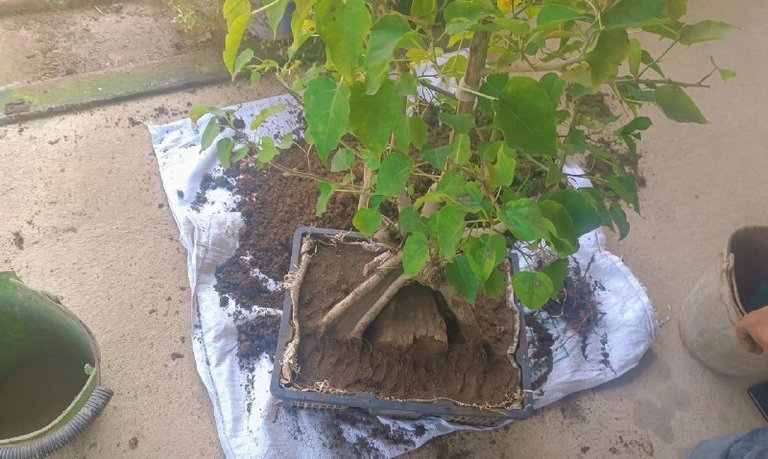
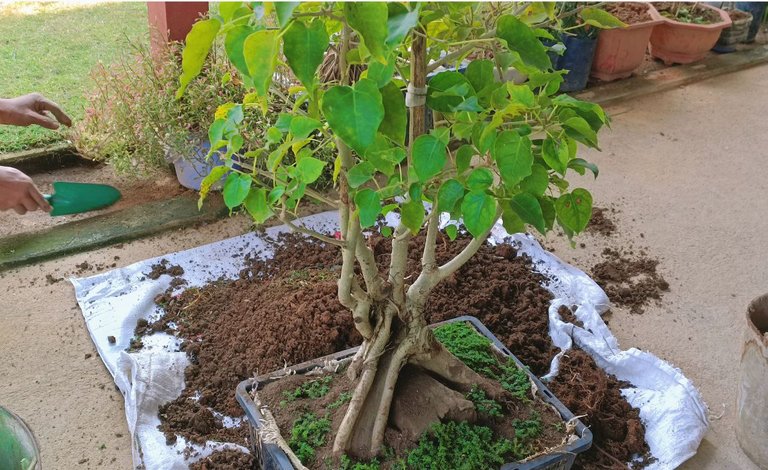
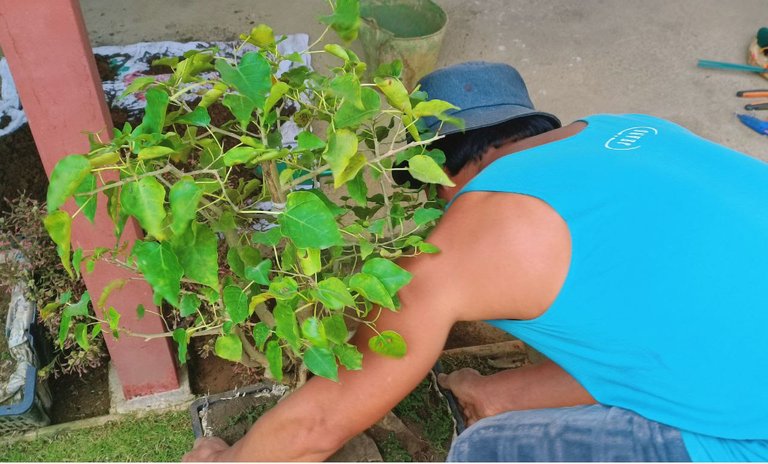
Today, I have chosen one of the largest plants out of the many. Since the plant has not yet change up the soil since it was planted, there is no more nutrients in the soil. First, my father pulled the plant out of the pot. Even though we call it a flower pot, we plant the plant in a basket similar to a bonsai pot.
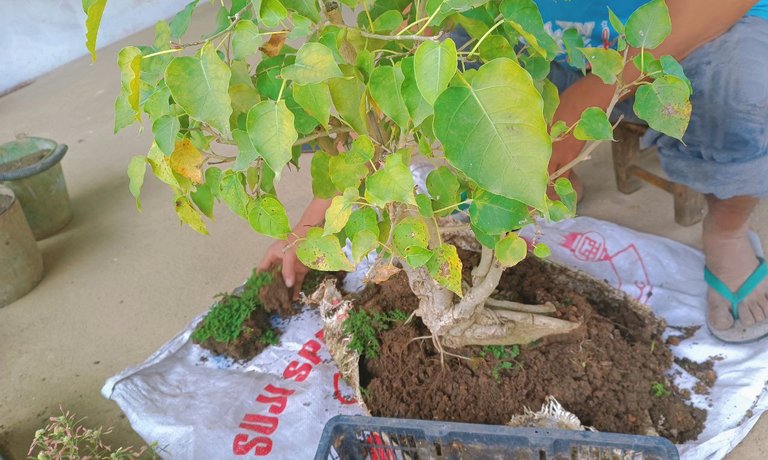
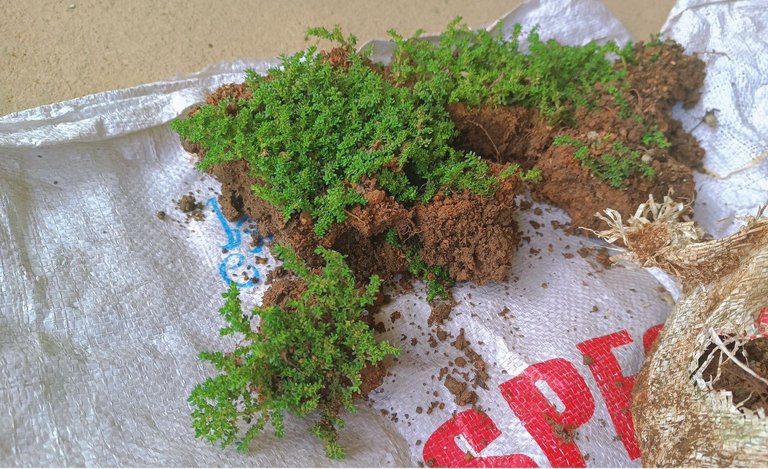
We first removed the moss plants growing next to the bonsai.


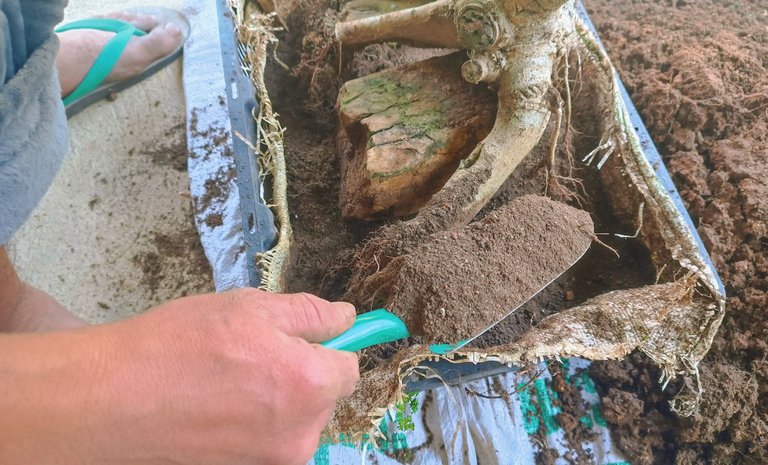
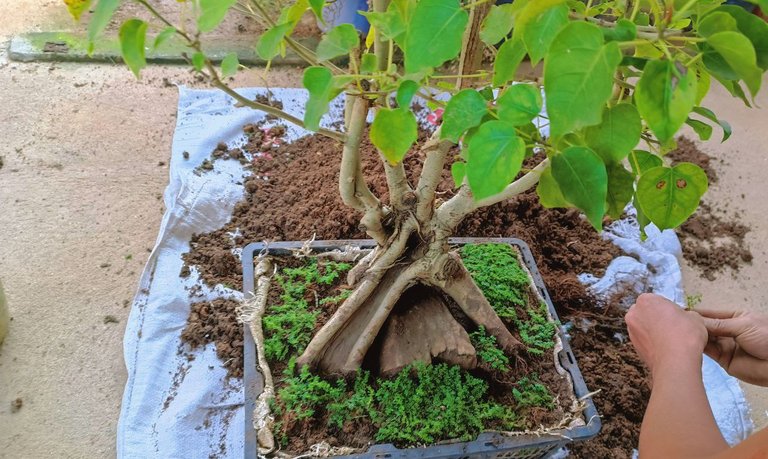
Because the root of this banyan is V-shaped, my father used to place a brick at the base of the root. Therefore, the brick had to be taken out first, and the ground was made open.

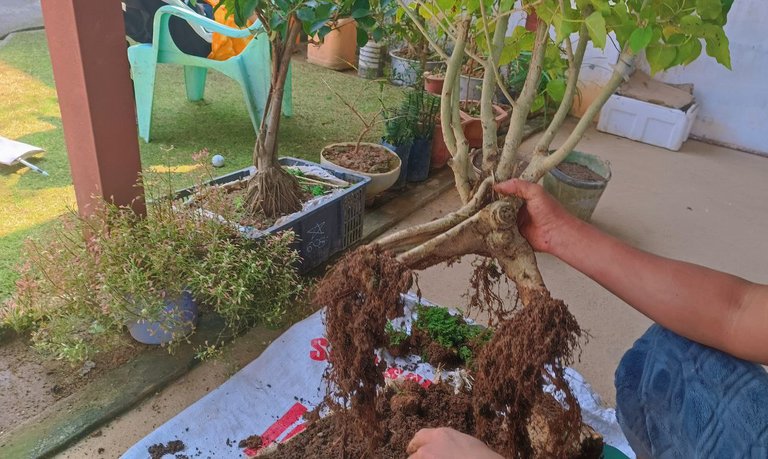
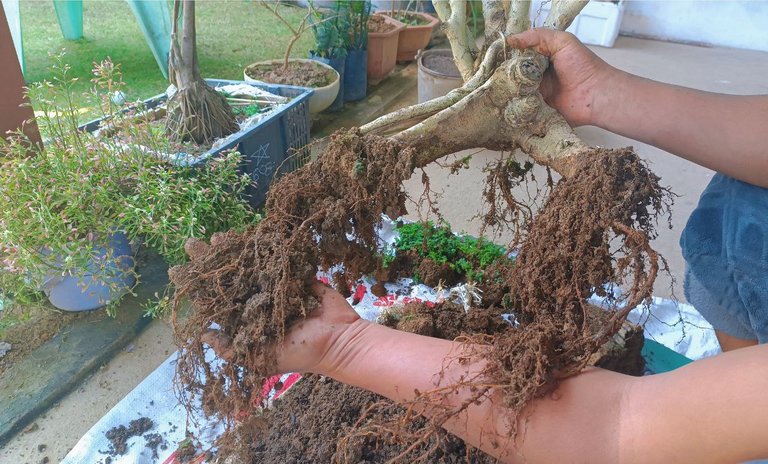
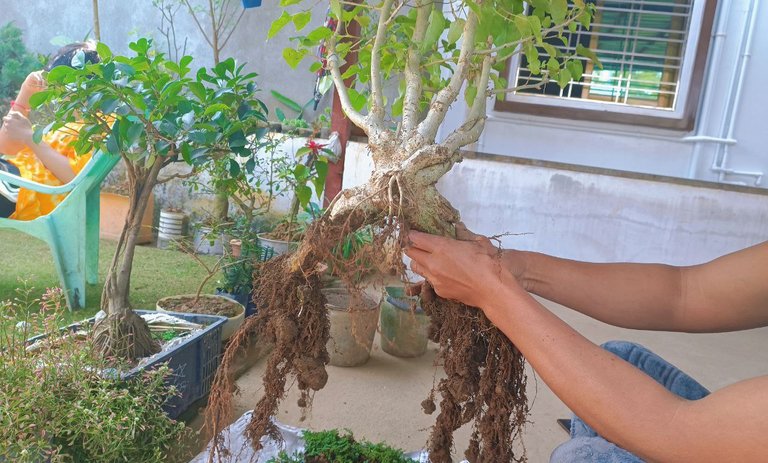
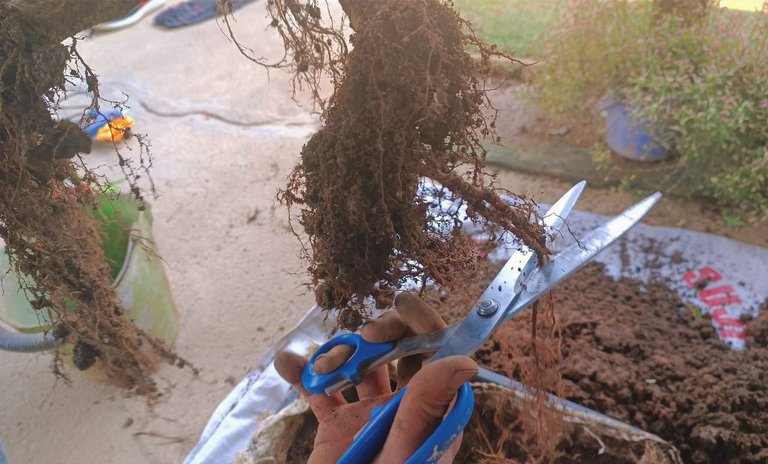

It was only after doing as shown above that I was able to pull out all the roots. The small roots were too numerous and stunted, so my father cut off all the other roots, leaving only the water-drinking roots.

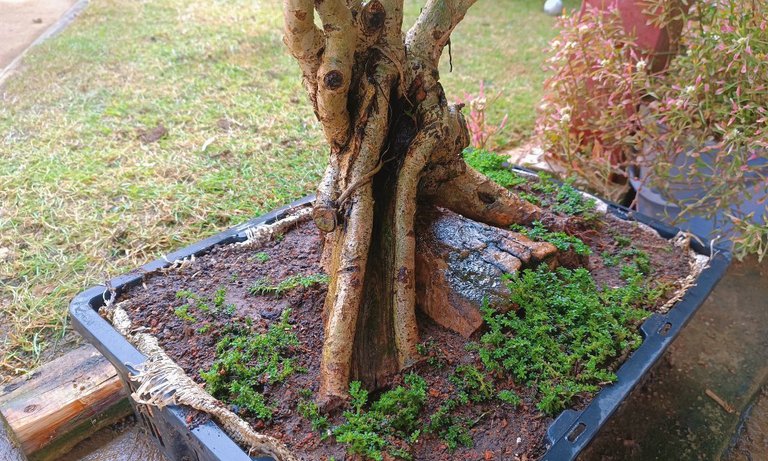
Now that the plant has been fixed, it's time to fix the soil. My father removed all the old soil. I don't know how the compost was made because I didn't help when it was composted. My father made 2 types of soil, which I have shown in the picture above.


My father put a bag of wheat straw into the basket. Then my father poured sand into it. The second layer is compost that my father made himself.
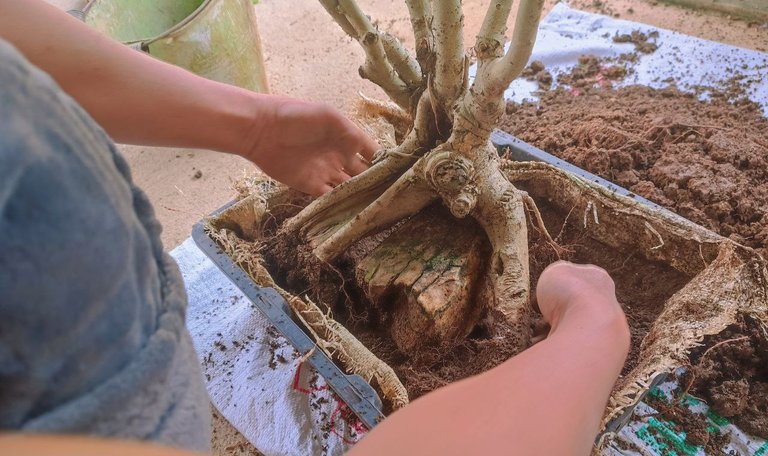
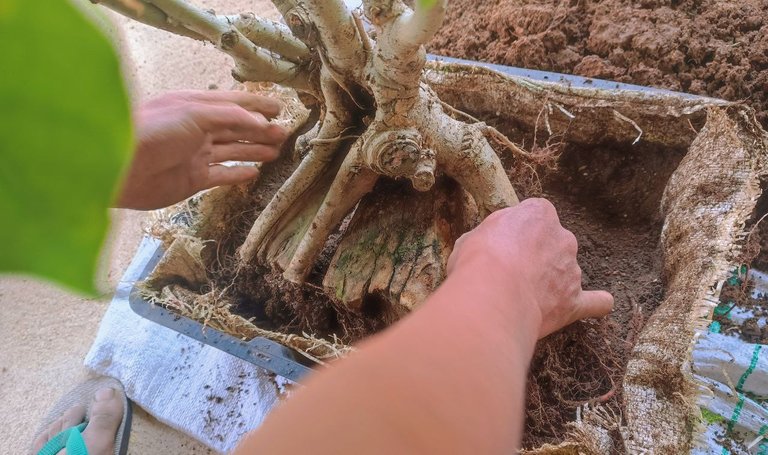
Then my father placed a brick on the ground. In the middle of the brick, my father placed the V-shaped trunk of the banyan. Then the remaining compost is piled around.
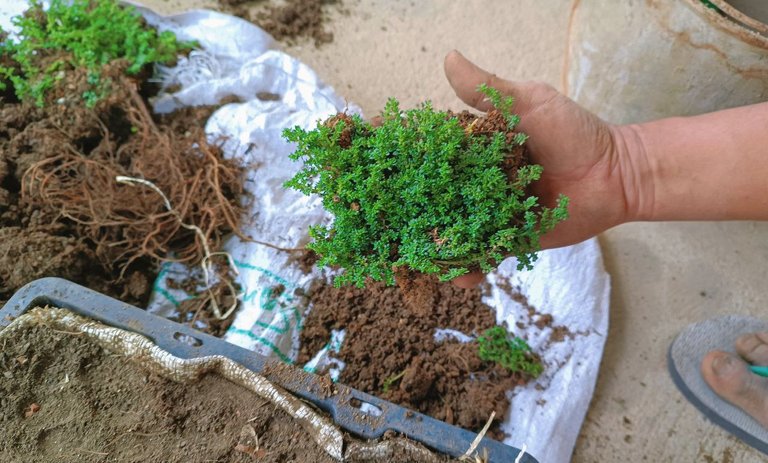
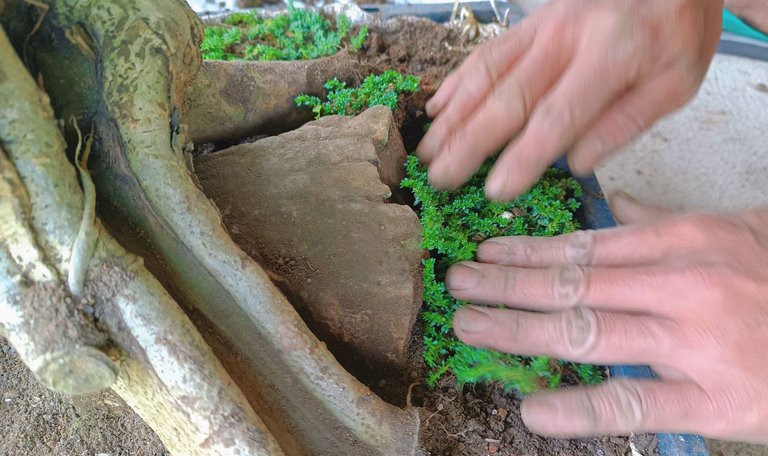
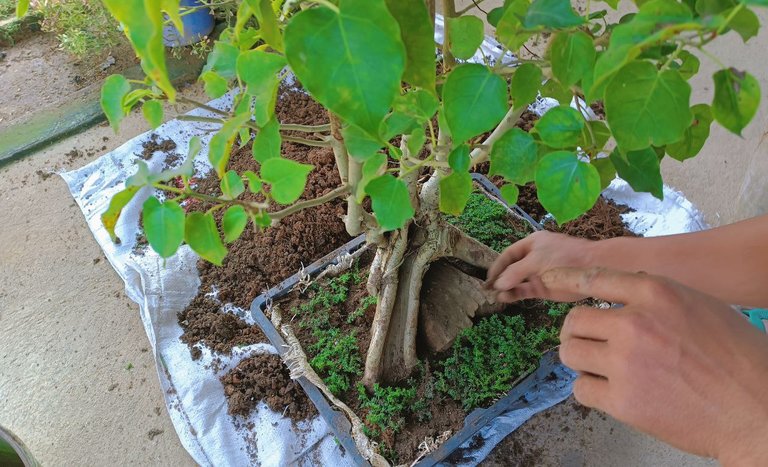
In the next step, my father placed the removed moss plants around the banyan.


In the final step, my father put some compost next to the moss plants and watered them.
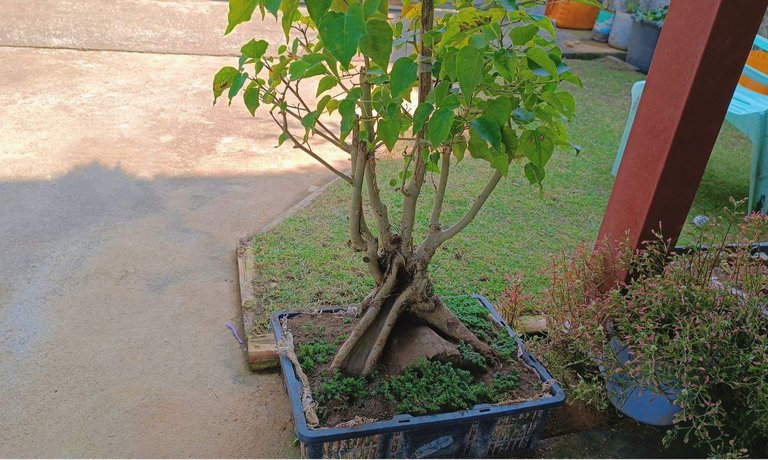
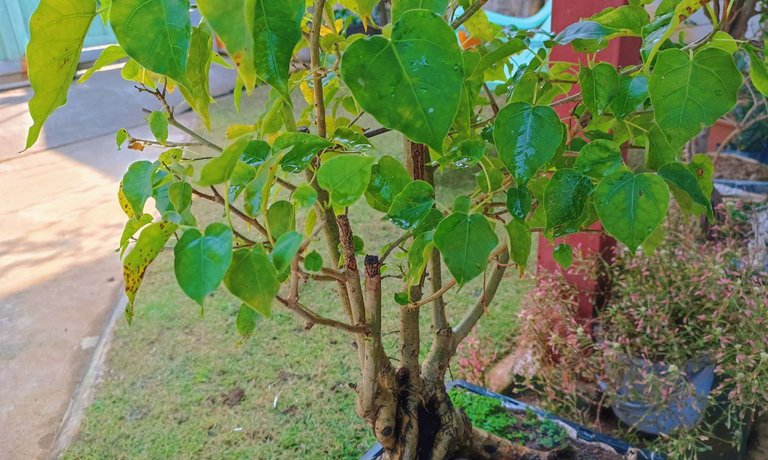

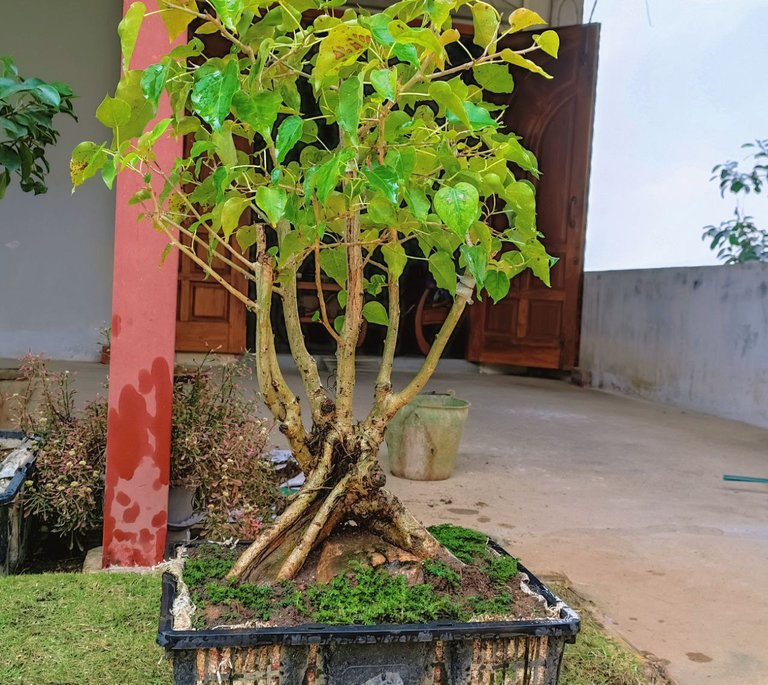


Since it rains every night these days, there is no need to water the plants these days. Some of the pictures I took today are listed above. That's it for today. I'll be back tomorrow with a new handmade post. That's all for today. Thank you. See you next post. 🍇

It is interesting to me that when you transplant, you cut the roots. We never cut the roots. Or does that only apply to bonsai?

Actually, this plant has not yet reached the bonsai stage. It is still in the wild stage. If the roots are not cut, the height of the plant can grow quickly. Thank you very much for your interest.💛
Ok, understand. Thank you for the explanation.
⋆ ᴛʜᴇ ᴘʟᴀᴄᴇ ғᴏʀ sᴏᴜᴛʜᴇᴀsᴛ ᴀsɪᴀɴ ᴄᴏɴᴛᴇɴᴛ ᴏɴ ʜɪᴠᴇ
⋆ sᴜʙsᴄʀɪʙᴇ ᴛᴏ ᴛʜᴇ ᴀsᴇᴀɴ ʜɪᴠᴇ ᴄᴏᴍᴍᴜɴɪᴛʏ
⋆ ғᴏʟʟᴏᴡ ᴛʜᴇ ᴀsᴇᴀɴ ʜɪᴠᴇ ᴄᴏᴍᴍᴜɴɪᴛʏ ᴠᴏᴛɪɴɢ ᴛʀᴀɪʟ
⋆ ᴅᴇʟᴇɢᴀᴛɪᴏɴ ʟɪɴᴋs 25 ʜᴘ⇾50 ʜᴘ⇾100 ʜᴘ⇾500 ʜᴘ⇾1,000 ʜᴘ