📷 TUTORIAL: How to create and edit epic Lensball Pictures in a Metro Station [EN/DE]

Hey guys! Today it's once again about my area of expertise, glass ball photography. This time I was travelling with my crystal ball in the Prague underground and found a great opportunity to create some interesting shots. However, this turned out to be especially true in post-processing. That's why I'd like to briefly explain how I went about it in this tutorial.
Hallo Leute! Heute geht es wieder einmal um mein Spezialgebiet, die Glaskugel-Fotografie. Diesmal war ich mit meiner Glaskugel in der U-Bahn von Prag unterwegs und fand dort eine tolle Möglichkeit, interessante Aufnahmen zu kreieren. Dies stellte sich aber vor allem in der Nachbearbeitung heraus. Deshalb möchte ich euch in diesem Tutorial kurz erklären, wie ich vorgegangen bin.
For the shooting itself, I sat down on a metal bench right next to the tracks and placed my glass ball on it. I placed my camera directly behind it and waited until a train arrived. The exposure time was set to one second to capture the light trails of the train and the aperture was set to F13 to capture the entire sphere in focus. Above you can see how the result came out of the camera, without processing. I only cropped the RAW file to 4:5 format.
Für die Aufnahme selbst setzte ich mich auf eine Metallbank direkt an den Gleisen und legte meine Glaskugel darauf. Meine Kamera platzierte ich direkt dahinter und wartete bis ein Zug einfuhr. Ich stellte die Belichtungszeit auf eine Sekunde, um die Lichtspuren des Zuges abzubilden und die Blende auf F13, um die gesamte Kugel scharf abzubilden. Oben seht ihr, wie das Ergebnis aus der Kamera kam, ohne Bearbeitung. Ich habe die RAW-Datei nur auf das 4:5-Format zugeschnitten.
Now I made the first edits in Adobe Lightroom. For example, I corrected the exposure as well as the white balance and added a vignette. You can see the result above. The image below shows the photo after further processing in Adobe Photoshop. Here I removed people from the image, added a radial blur filter at the edge and continued to work on the overall look of the picture.
Nun nahm ich in Adobe Lightroom die ersten Bearbeitungen vor. Ich korrigierte zum Beispiel die Belichtung und den Weißabgleich und fügte eine Vignette hinzu. Das Ergebnis seht ihr oben. Das untere Bild zeigt dann das Foto nach der weiteren Bearbeitung in Adobe Photoshop. Hier entfernte ich Personen aus dem Bild, fügte einen radialen Weichzeichnungsfilter am Rand hinzu und arbeitete weiter am Gesamtlook des Bildes.

Now I duplicated the layer, mirrored it horizontally and worked with a layer mask and the brush tool to mirror different areas. Unfortunately, in such cases it is not enough to simply mirror half of the image, as the Lensball also swaps left and right in its image. You therefore have to mirror half of the glass sphere in reverse in order to achieve the result below.
Nun duplizierte ich die Ebene, spiegelte sie horizontal und arbeitete mit einer Ebenenmaske und dem Pinsel-Werkzeug, um verschiedene Bereiche zu spiegeln. Leider reicht es in solchen Fällen nicht aus, einfach die Hälfte des Bildes zu spiegeln, da die Glaskugel noch zusätzlich bei ihrer Abbildung links und rechts vertauscht. Man muss also die Hälfte der Glaskugel umgekehrt spiegeln, um das Ergebnis unterhalb zu erhalten.

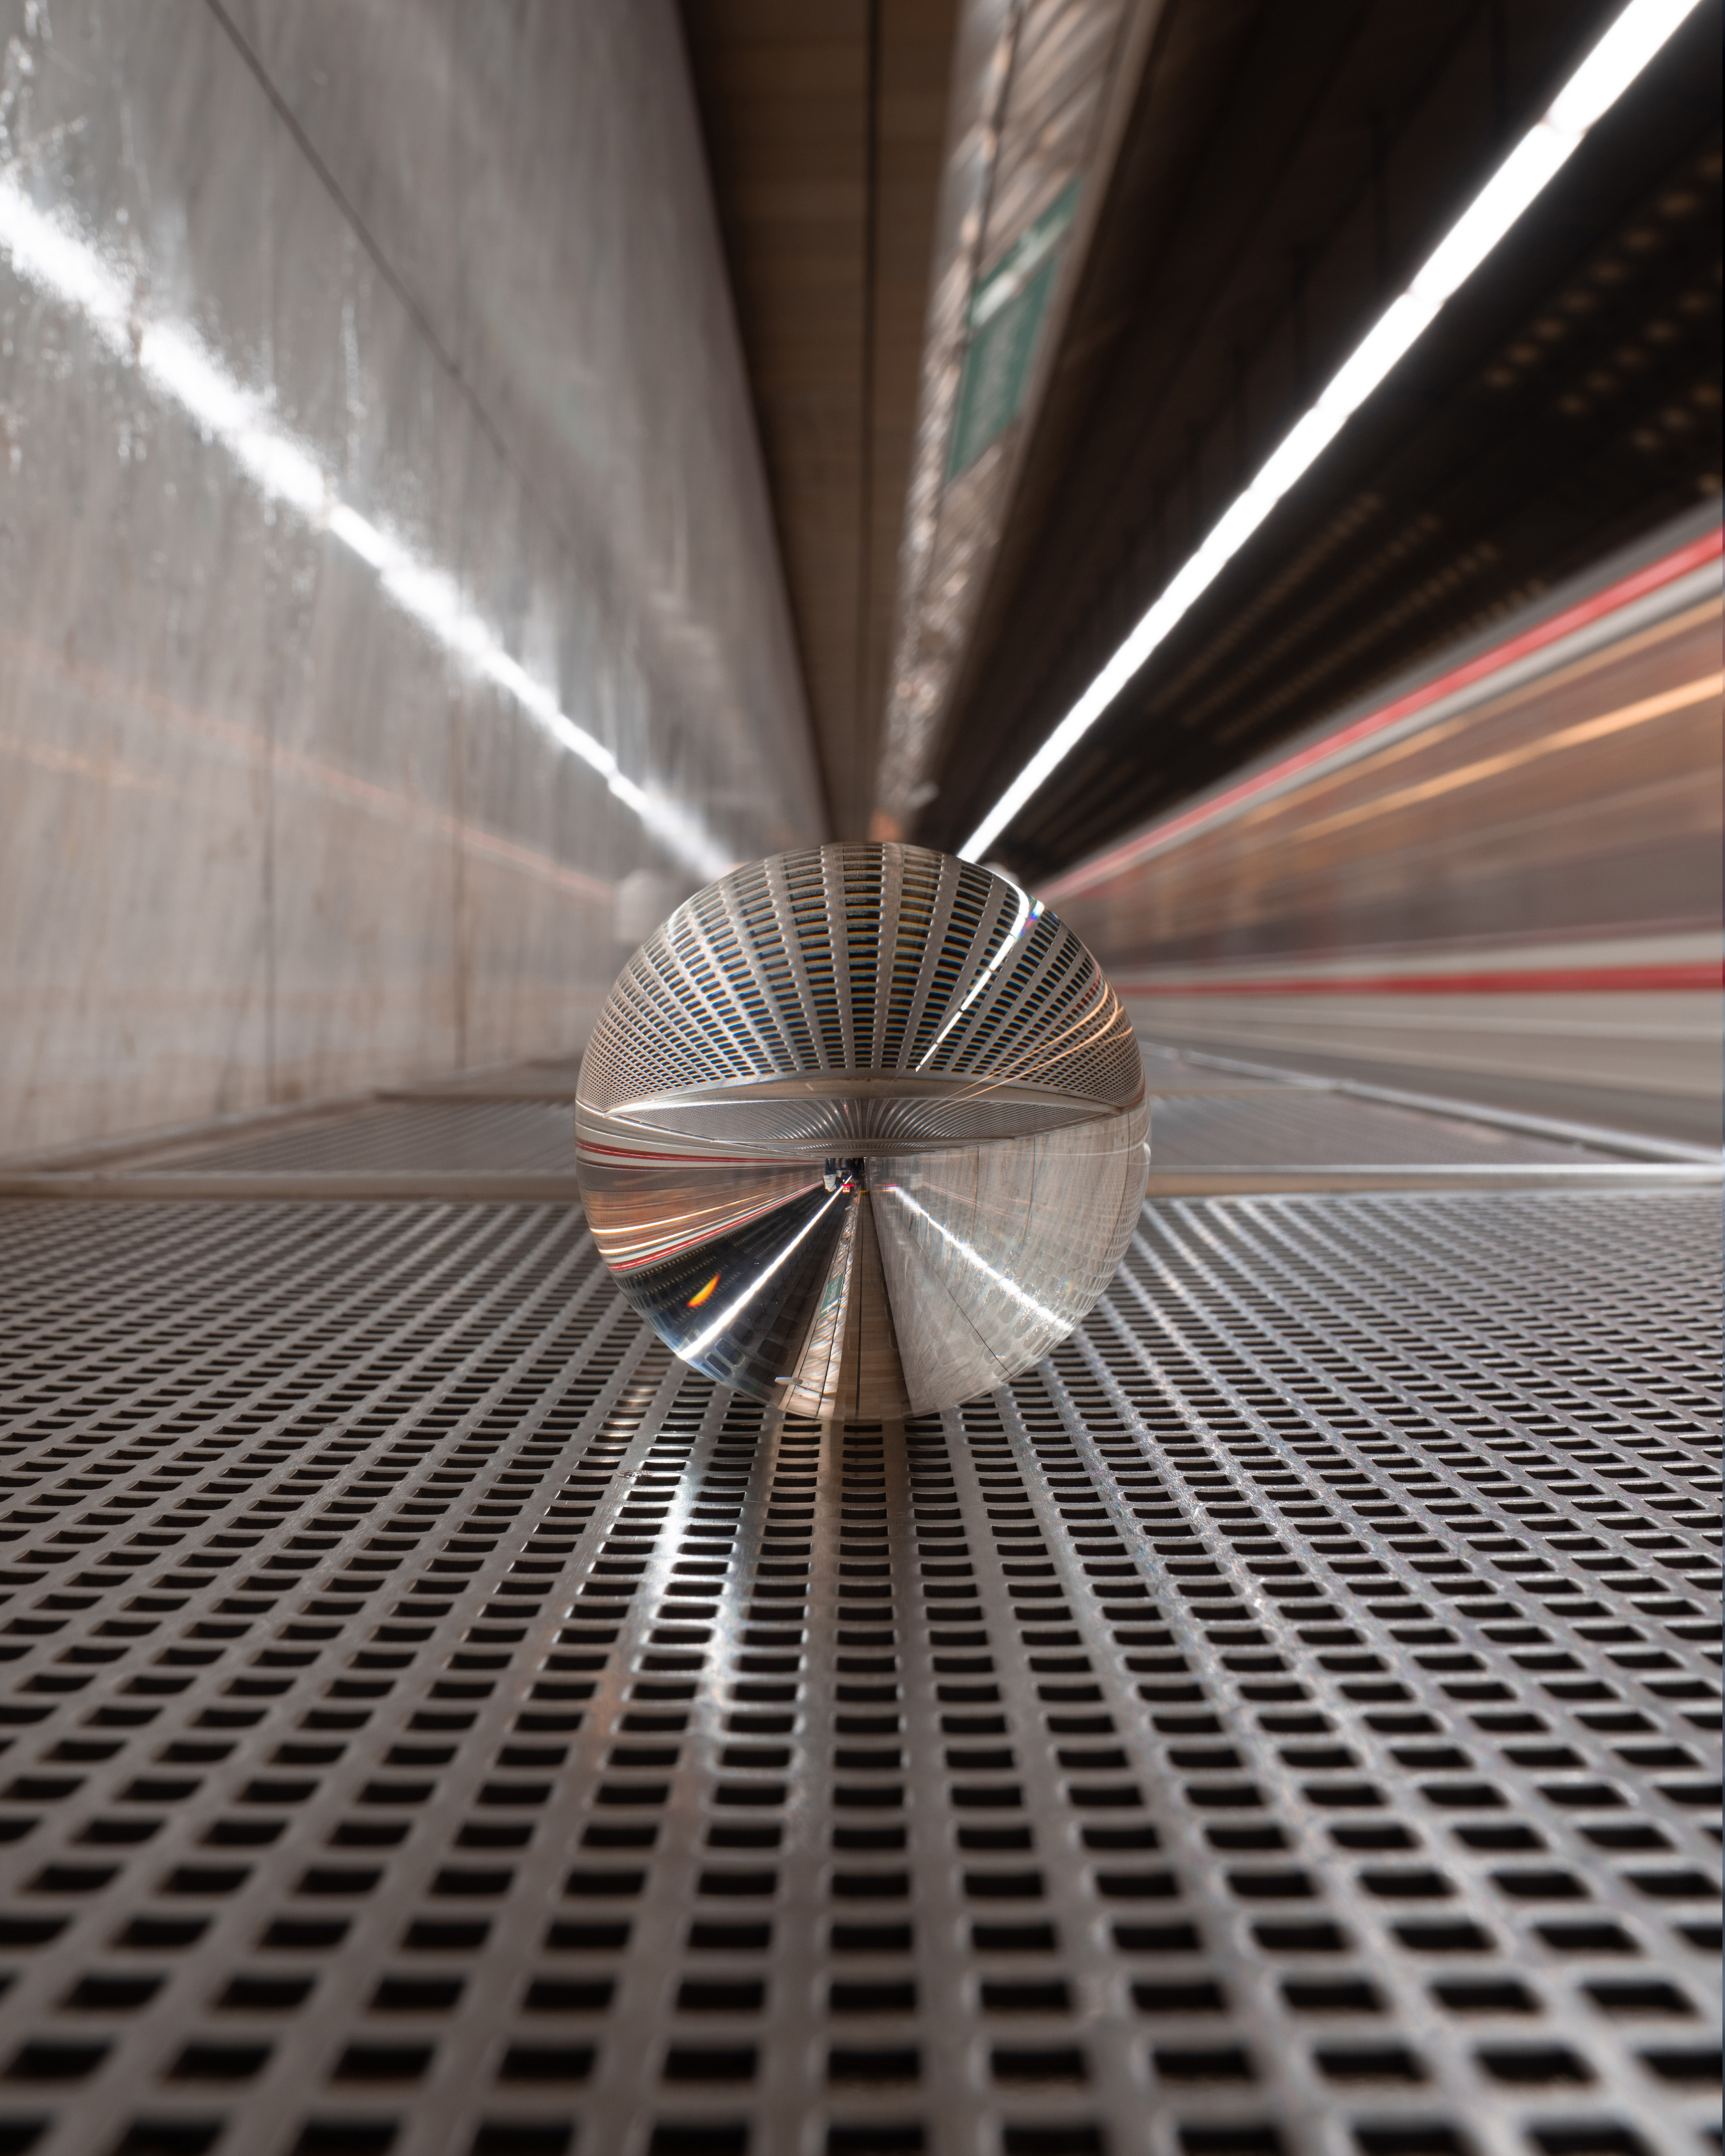
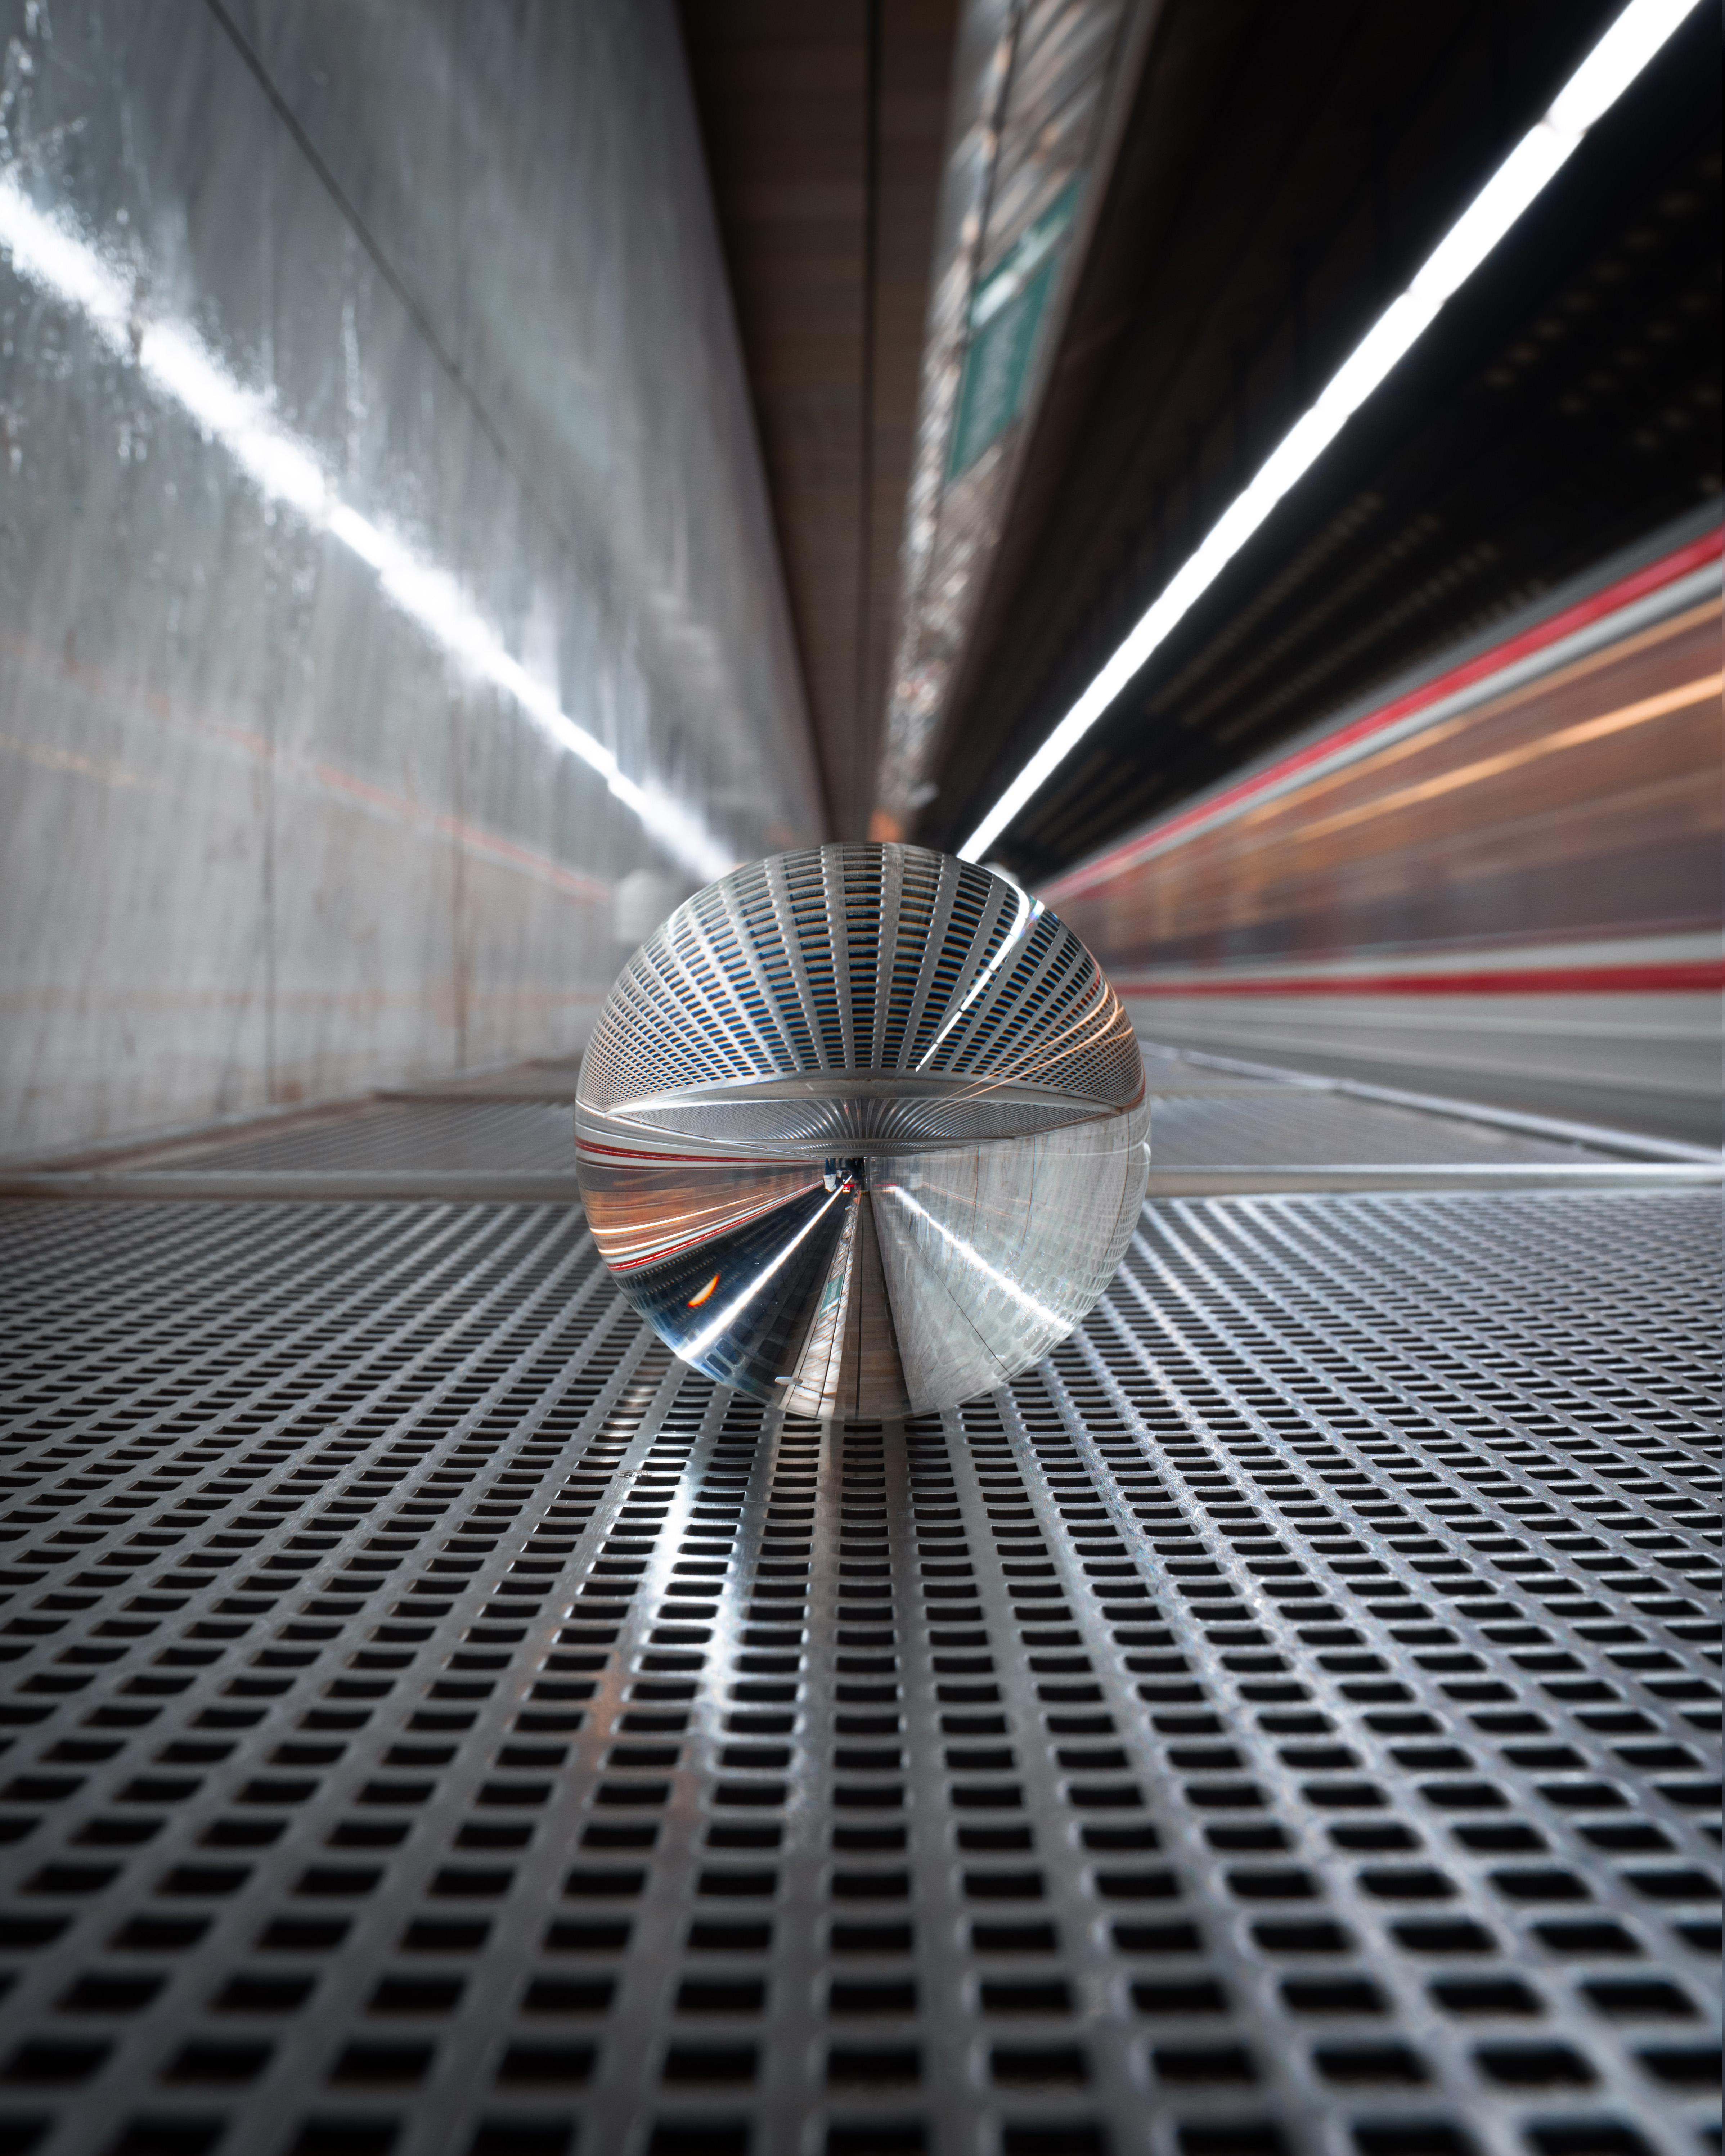
When I was happy enough with the edit to make the reflection look deceptively real, I merged all the layers and went back into the Camera RAW module to really make the shot pop. Here I mainly worked on the colours and contrasts. I also added a few diffusion effects for the highlights in some areas. You can see my final result below. I hope you like it.
Als ich mit der Bearbeitung so zufrieden war, dass die Spiegelung täuschend echt wirkte, fügte ich alle Ebenen zusammen und ging nochmals in das Camera-RAW-Modul, um die Aufnahme wirklich zum Strahlen zu bringen. Hier arbeitete ich vor allem an den Farben und Kontrasten. Auch ein paar Diffussionseffekte für die Highlights fügte ich an einigen Stellen noch hinzu. Unten seht ihr mein finales Ergebnis. Ich hoffe, es gefällt euch.

Looking for more creative Ideas?/Auf der Suche nach weiteren kreativen Ideen?
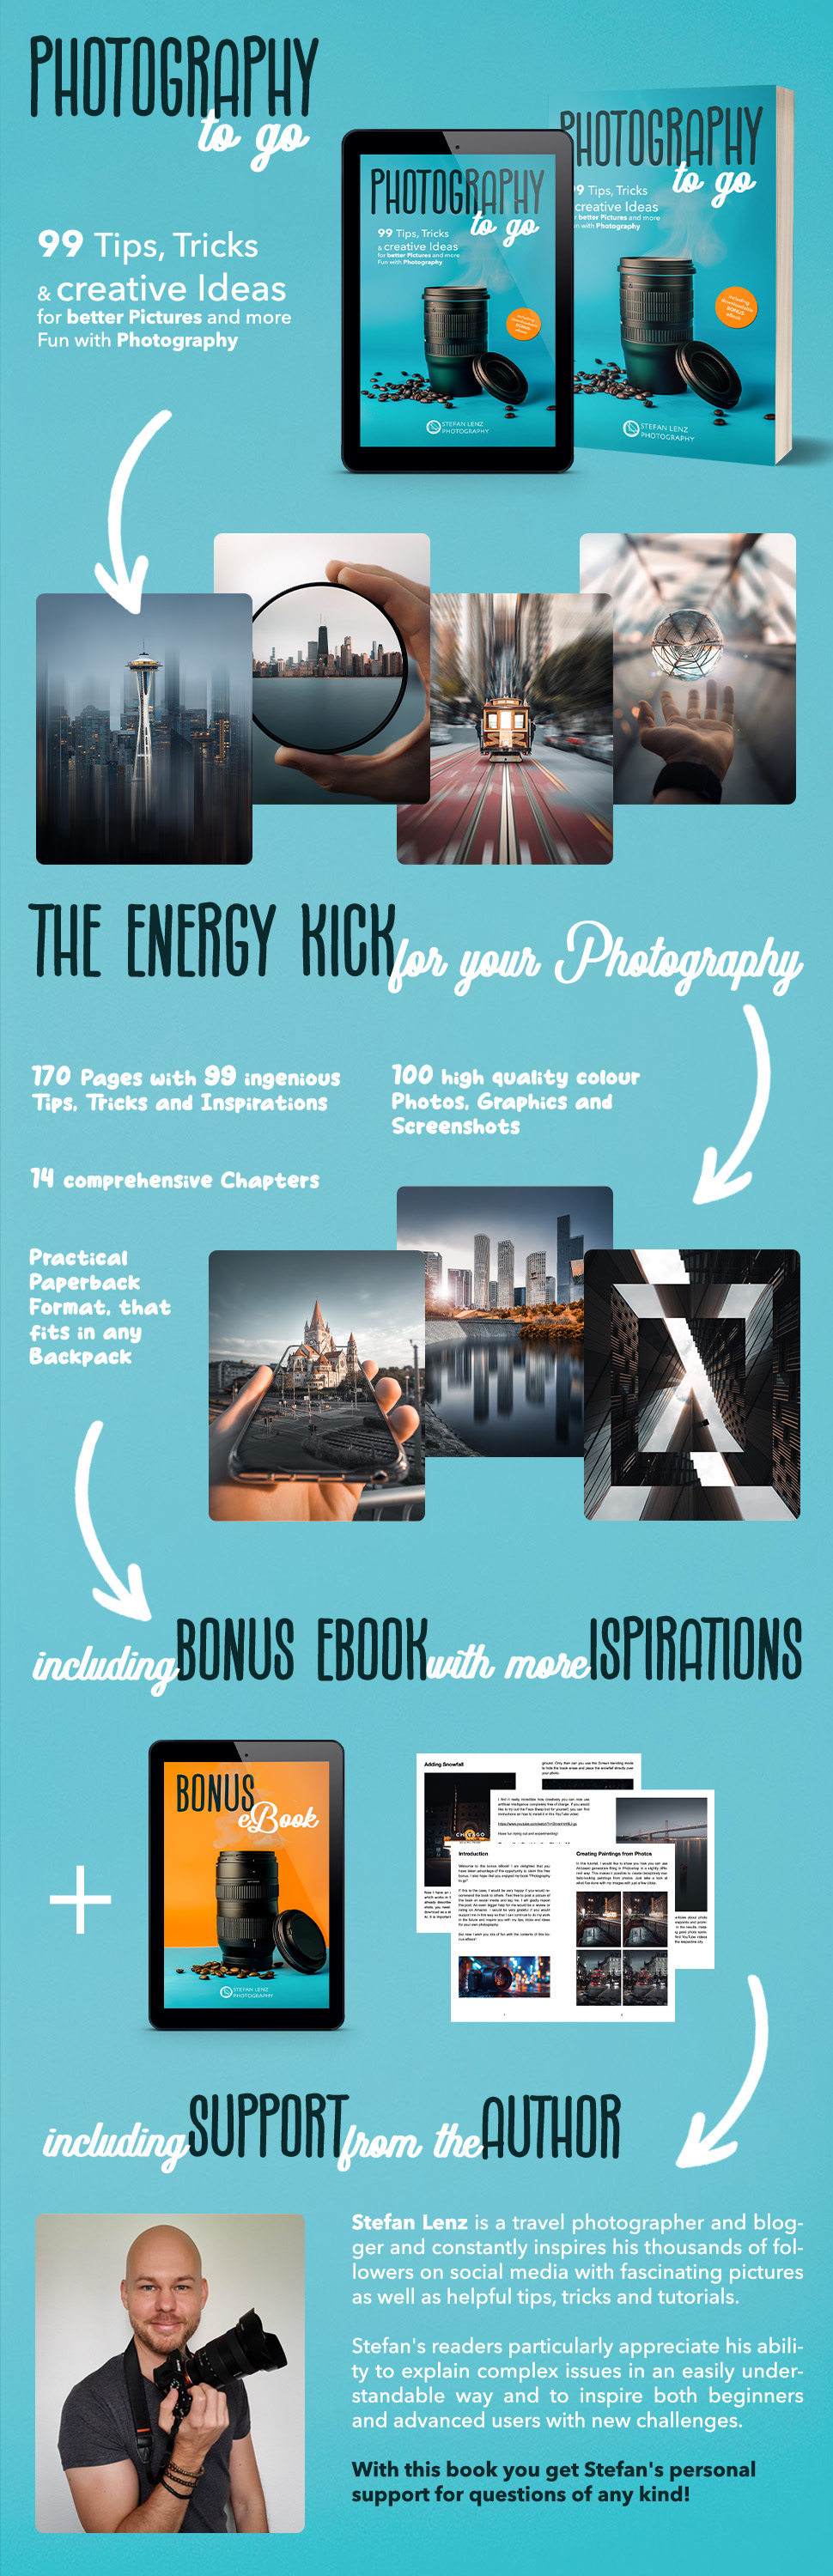
In my latest book "Photography to go" you can find more inspirations like this! It's my most comprehensive photography guide so far, which I've been working on for over one and a half years. Among other things, you'll find 99 practical tips, tricks and creative ideas that I've collected in my many years of work as a photographer. You can buy the book and get more information about it here:
In meinem neuesten Buch "Fotografie to go" könnt ihr weitere Inspirationen wie diese finden! Es handelt sich um meinen bisher umfangreichsten Fotografie-Ratgeber, an dem ich über eineinhalb Jahre lang gearbeitet habe. Darin findest du unter anderem 99 praktische Tipps, Tricks und kreative Ideen, die ich in meiner langjährigen Arbeit als Fotograf gesammelt habe. Hier kannst du das Buch kaufen und nähere Informationen dazu erhalten:
*: affiliate link / Werbelink
See you soon!/Bis bald!
Stefan

Excellent, and I'm sorry my city doesn't have a subway. Otherwise I would have filmed something like this myself, it's too good
!DIY
Thank you so much 🙏 So we have something in common – my city also doesn't have a subway unfortunately 😅 That's why I enjoy shooting in subway stations even more, when I'm on travels 😊