Lightpainting fun with geometric stencils - Light Painting on Hive [ 🇬🇧 ENG./ 🇩🇪 GER.]
Today's post is about geometric stencils in combination with other techniques, such as the use of prismatic glass and camera rotation.
In recent weeks and months, it has been raining and snowing almost non-stop in my part of the world. The uncomfortable and cold weather makes light painting outside, under the open sky, impossible. In order not to get completely rusty, I went back to my heated studio. Much more pleasant and cosy than freezing my fingers off outside.
In meinem heutigen Beitrag geht es unter anderem um geometrische Schablonen, in Kombination mit anderen Techniken, wie den Einsatz von Prismen-Gläsern und Camera Rotation.
In den letzten Wochen und Monaten regnet und schneit es fast ununterbrochen in meinen Breitengraden. Das ungemütliche und kalte Wetter macht Lightpainting drau0en, unter freien Himmel unmöglich. Um nicht völlig einzurosten, habe ich mich mal wieder inmein geheiztes Studio begeben. Wesentlich angenehmer und gemütlicher, als sich draußen die Finger abzufrieren.
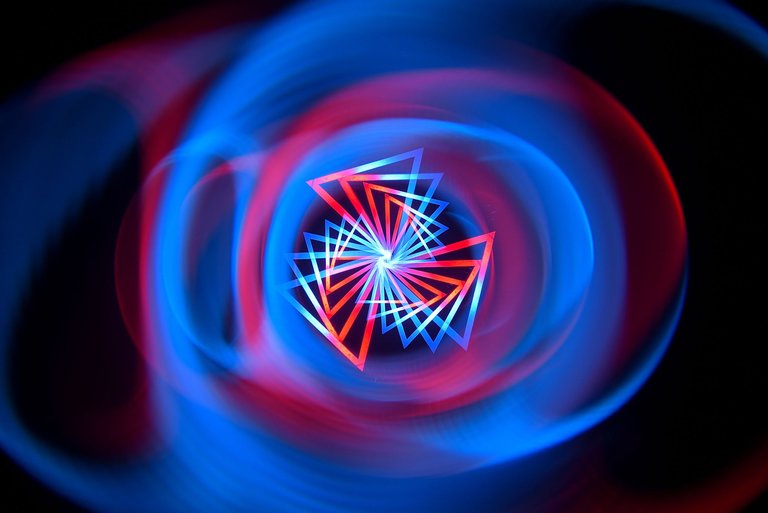
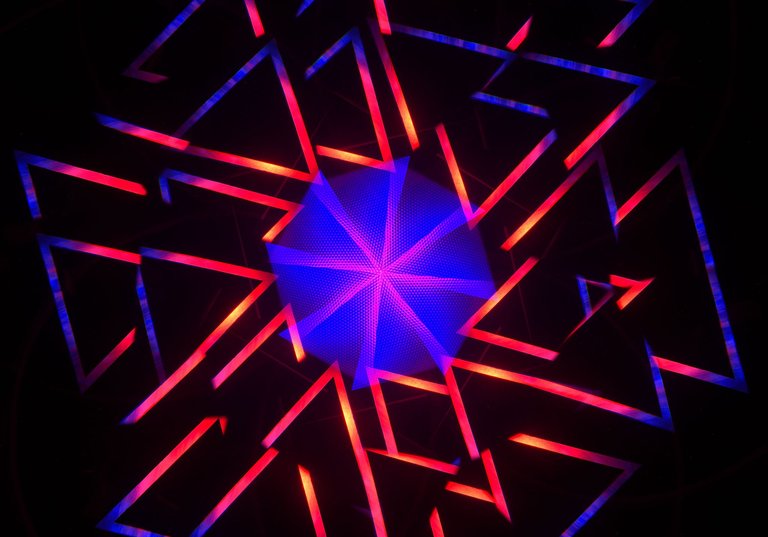
Nikon D750 | ISO 100 | Sigma 28-70 mm @ f/11 & f/16 | 461 sec. exposure time
Let's start with the cover shot. The picture was taken in several steps, during a long exposure like all my pictures!
Part 1: For the first part of the shot I used a prism ("halo prism") and an LED ring. I taped the centre of the prism shut to leave space for the second part.
Part 2: To create the light figure in the centre, I mounted the camera on a second tripod, which I had already aligned exactly with the triangular stencil. The stencil was illuminated from behind with two torches (red and blue). As I only have two arms, I fixed the torches behind the stencil on a lamp stand with a clamp.
Los gehts mit dem Titelbild. Das Bild entstand in mehreren Schritten, während einer Langzeitbelichtung wie alle meine Bilder!
Teil 1: Für den ersten Teil des Bildes hab ich ein Prisma ("Halo-Prisma") und einen LED-Ring benutzt. Die Mitte des Prismas habe ich zugeklebt, um Platz zu lassen für den zweiten Teil.
Teil 2: Um die Lichtfigur in der Mitte zu erstellen, habe ich die Kamera auf einem zweiten Stativ montiert, welches ich vorher schon exakt auf die Dreiecks-Schablone ausgerichtet habe. Die Schablone wurde von hinten mit zwei Taschenlampen (rot und blau) beleuchtet. Da ich nur zwei Arme besitze, habe ich die Lampen hinter der Schablone auf einem Lampenstativ mit einer Klemme fixiert.

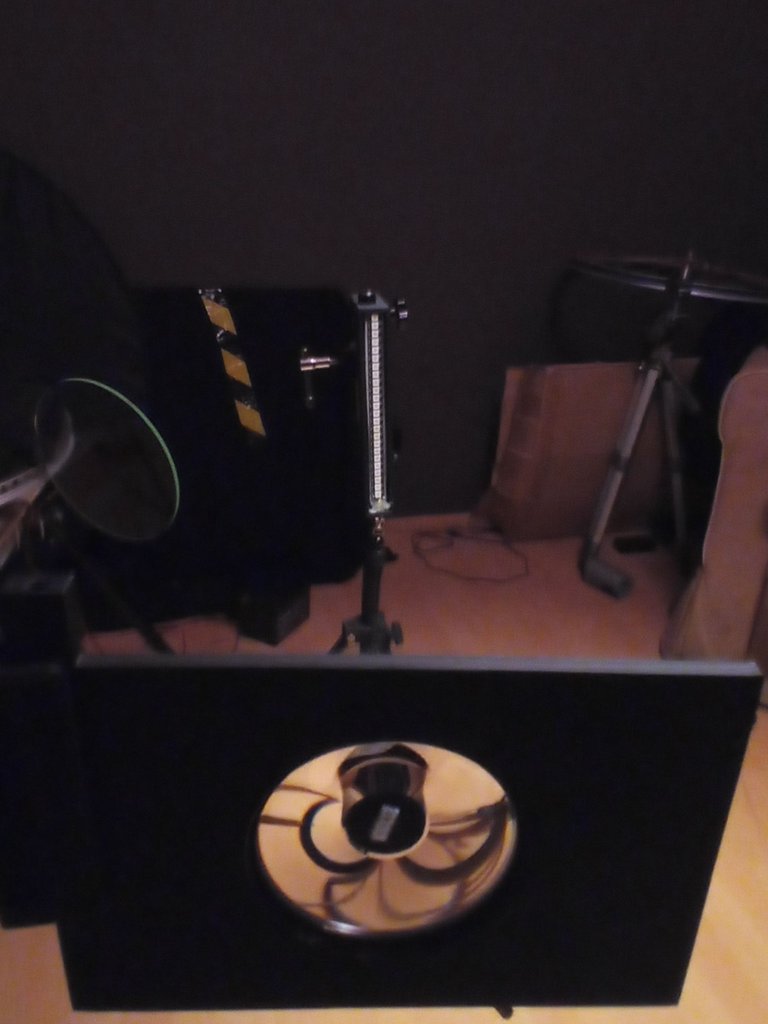
(Behind the Scenes) Schablone / Stencil
Here are a few impressions from behind the scenes.
I aligned the camera in front of the stencil and, as already mentioned, illuminated it from behind with two colours. The combination of zooming and rotating (3x120°) then creates the light figure as you can see in the finished image. The stencil was only exposed for 1 second at a time, after which I capped the lens each time and rotated or zoomed the camera further.
To rotate the camera around the optical axis, I mount it on my Camera Rotation Tool (CRT).
Hier mal ein paar Eindrücke von hinter den Kulissen.
Die Kamera habe ich vor der Schablone ausgerichtet und wie bereits erwähnt, von hinten mit zwei Farben beleuchtet. Durch die Kombination von zoomen und rotieren (3x120°) entsteht dann die Lichtfigur, wie Ihr sie im fertigen Bild seht. Die Schablone wurde jeweils nur 1 Sekunde belichtet, danach habe ich jedes Mal das Objektiv abgedeckt und die Kamera weiter rotiert bzw. gezoomt.
Zum rotieren der Kamera um die optische Achse, montiere ich diese auf meinem Kamera Rotation Tool (CRT).
(Behind the scenes) Prisma
In another example photo, you can see the prism together with the holder. My honourable colleague Sven @lichtkunstfoto kindly 3D-printed the mount for me. The holder with the screwed-in prism is placed between the camera and the light. The light passes through the prism, is refracted and then reaches the camera's sensor. The refraction of light in the prism creates the effect in the image. Because the prism is not firmly screwed to the lens, I am more flexible and can "play" with the effects, depending on how I want them in my frame. However, the alignment is not so much fun, you learn patience and that violence is not a solution.
In einem weiteren Beispielbild seht Ihr das Prisma samt Halterung. Die Halterung hat mir freundlicherweise der geschätzte Kollege Sven @lichtkunstfoto im 3D-Druck erstellt. Die Halterung mit dem eingeschraubten Prisma wird zwischen Kamera und Licht platziert. Das Licht geht durch das Prisma, wird gebrochen und landet anschließend auf dem Sensor der Kamera. Durch die Lichtbrechung im Prisma entsteht der Effekt im Bild. Dadurch dass das Prisma nicht fest mit dem Objektiv verschraubt ist, bin ich flexibler und kann mit den Effekten "spielen", je nach dem wie ich sie in meinem Bild haben möchte. Allerdings ist die Ausrichtung nicht so lustig, da lernt man Geduld und das Gewalt eher keine Lösung ist.
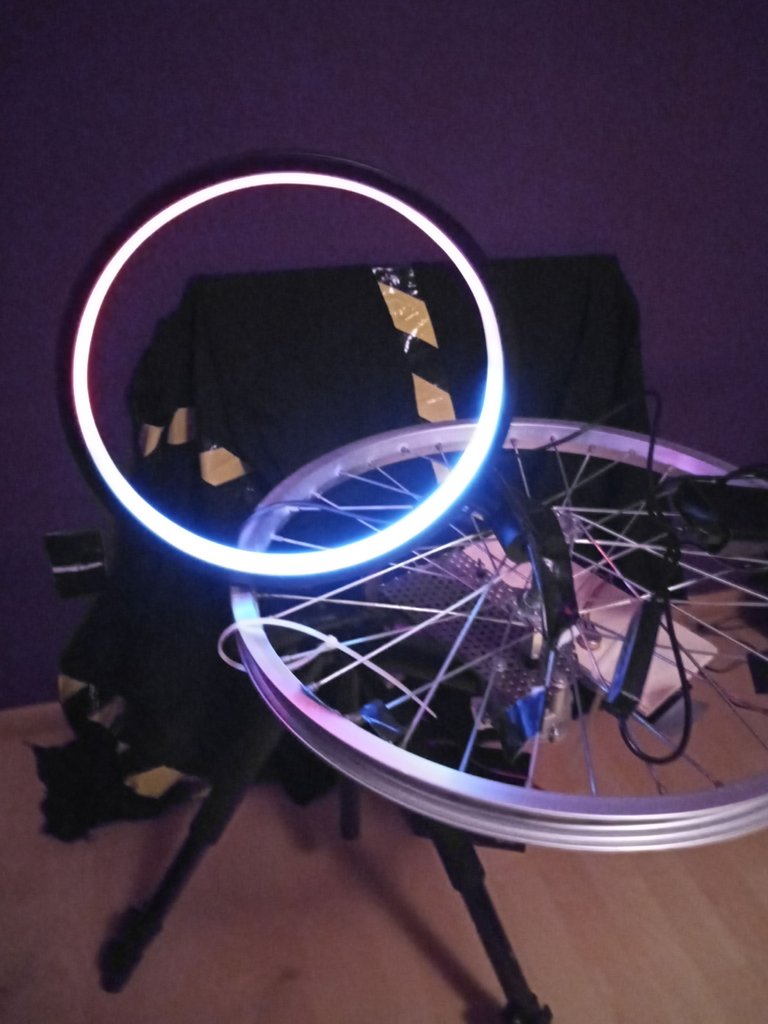
(Behind the scenes ) LED-Ring
The LED ring light is actually intended as a decorative lamp, but also works for light painting. The colours of this ring can be programmed. I chose red and blue for my picture. To better control the light, I mounted the ring on an old bicycle rim, which I later rotated during the exposure.
Das LED-Ringlicht ist eigentlich als Dekolampe gedacht, funktioniert aber auch für Lightpainting. Dieser Ring ist in den Farben programmierbar. Ich habe für mein Bild rot und blau ausgewählt. Den Ring habe ich zur besseren Steuerung des Lichts auf einer alten Fahrradfelge montiert, die ich später während der Belichtung gedreht habe.

In the next image, the realisation was similar to the first image. The triangular stencil was replaced with a square stencil. I swapped the "halo prism" from the cover shot for a prism with a square in the centre (see picture below).
Im nächsten Bild war die Umsetzung ähnlich, wie im ersten Bild. Die dreieckige Schablone wurde gegen eine quadratische Schablone ausgetauscht. Das "Halo-Prisma" aus dem Titelbild habe ich gegen ein Prisma mit Quadrat in der Mitte getauscht (siehe Bild weiter unten).
Nikon D750 | ISO 100 | Sigma 28-70 mm @ f/11 & f/14 | 377 sec. exposure time
In my small studio at home, I set up two sets again for this shot. Set 1 for the light figure in the centre (zooming and rotating the stencil) and set 2 for the background with a stencil through a prism.
As I have already mentioned in previous posts, the most important part of creating a successful image is the preparatory work. In other words, aligning the camera on the tripod and the stencils and prisms.
In meinem kleinen Studio zuhause, hab ich mir für dieses Bild wieder zwei Sets aufgebaut. Set 1 für die Lichtfigur in der Mitte (zoomen und rotieren der Schablone) und Set 2 für den Hintergrund mit einer Schablone durch ein Prisma.
Wie ich bereits in früheren Beiträgen erwähnt habe, ist der wichtigste Teil, damit ein Bild gelingt, die Vorarbeit. Also das Ausrichten der Kamera auf dem Stativ und der Schablonen und Prismen.
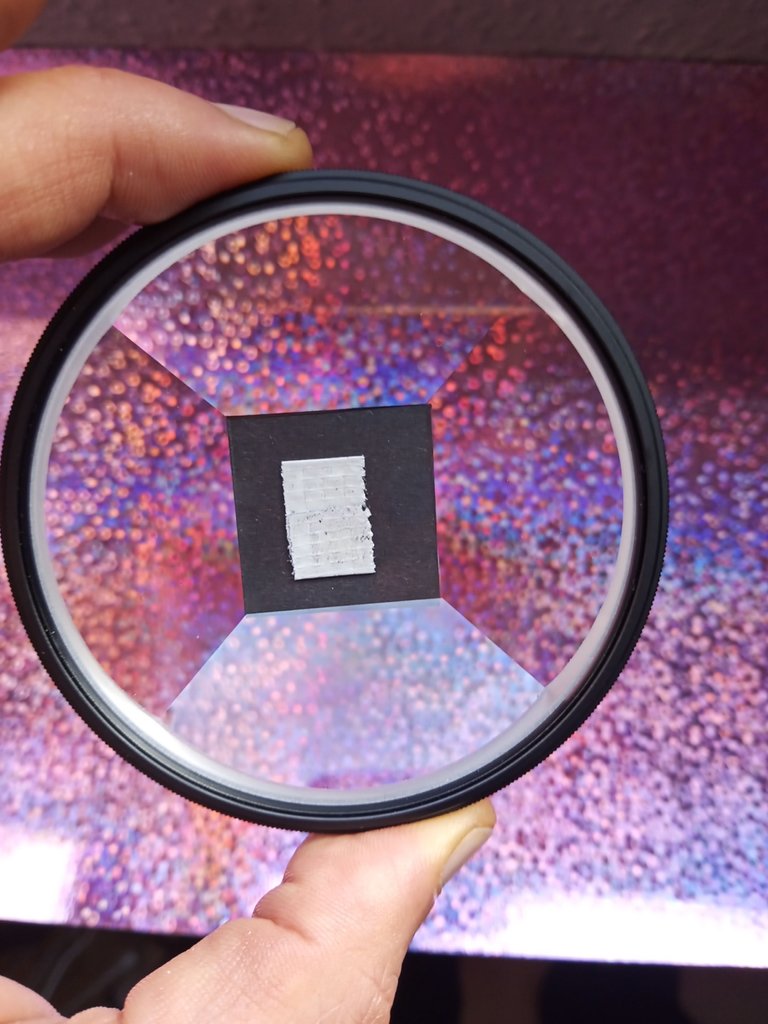
(Behind the scenes) Prisma mit Quadrat
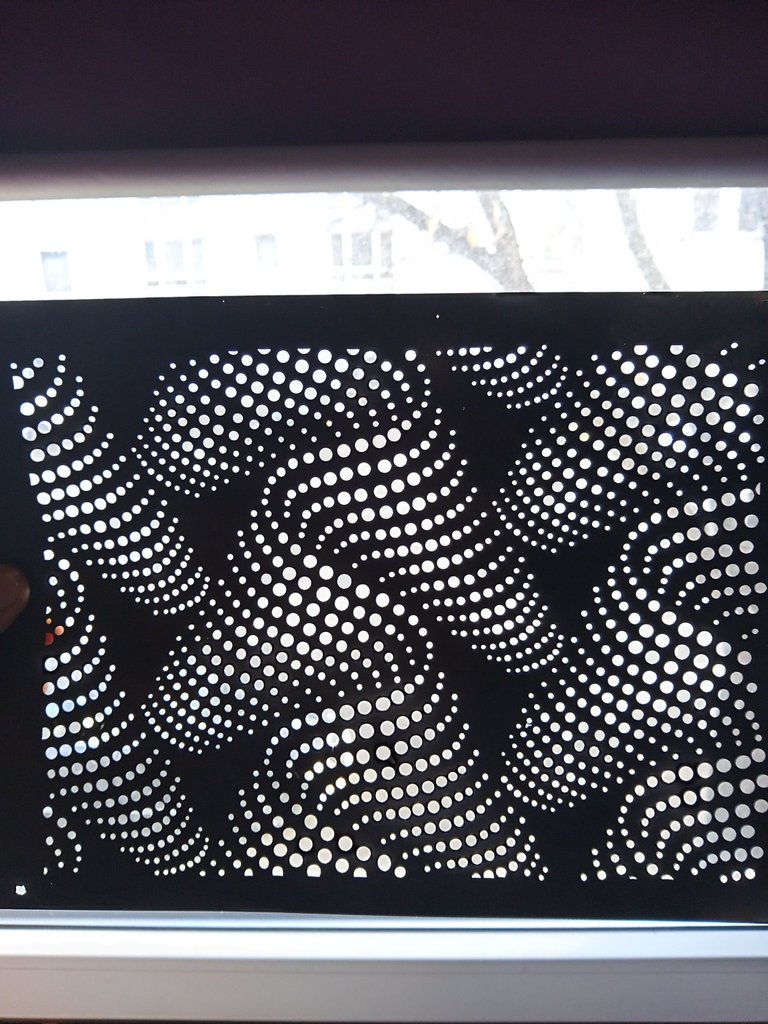
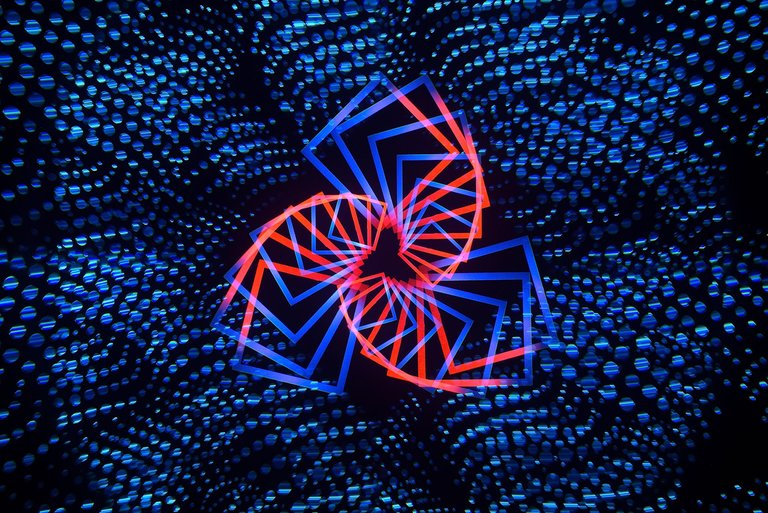
(Behind the scenes) "Dots-Schablone"
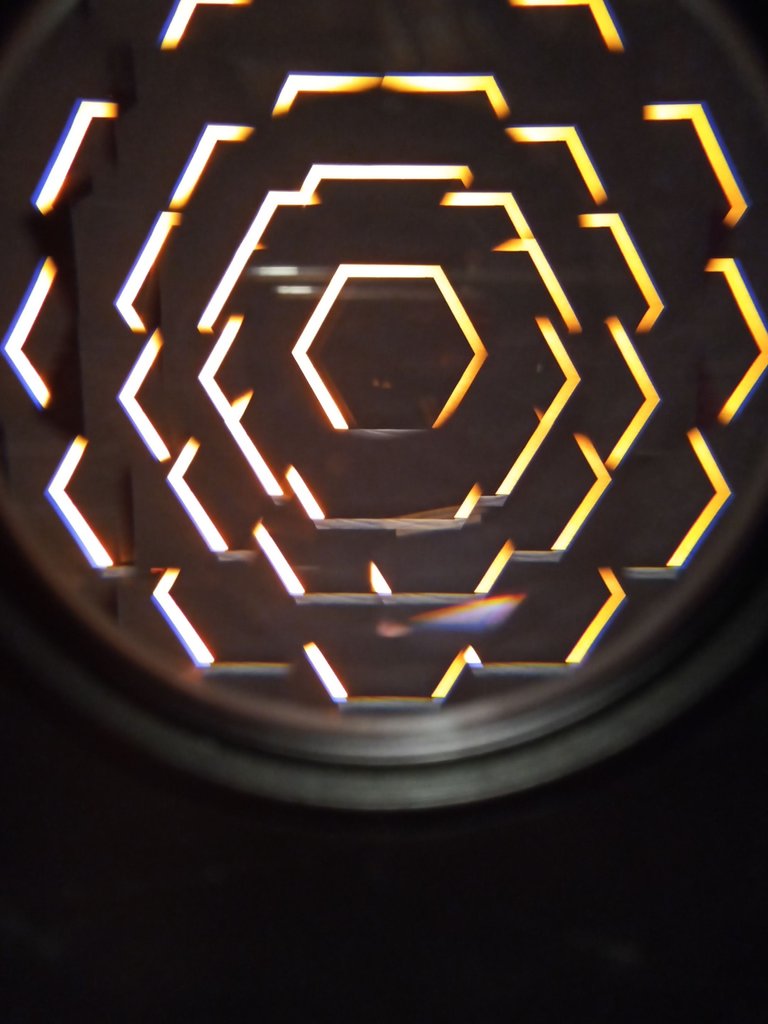
I also used a stencil and a prism in the following shot. A hexagon stencil and a "kaleidoscope prism" were again placed in front of the camera. However, I made a "pentagon" out of the hexagon, which is "open" at the bottom, so that I could paint the "bokeh floor" into the frame in another set. Another torch was positioned behind the model and some fog was blown into the scene. My ugly woodchip wallpaper didn't really fit as a background.
To get the tunnel effect into the image, I zoomed the effect in the prism.
Auch im folgenden Bild nutzte ich eine Schablone und ein Prisma. Eine Sechseck-Schablone und ein "Kaleidoskop-Prisma" wurden wieder vor der Kamera platziert. Aus dem Sechseck habe ich allerdings ein "Fünfeck" gemacht, was unten "offen" ist, damit ich hier in einem weiteren Set den "Bokeh-Boden" ins Bild malen konnte. Hinter dem Model wurde eine weitere Lampe positioniert und noch etwas Nebel in die Szene gepustet. Meine hässliche Raufasertapete passte jetzt nicht so als Hintergrund.
Um den Tunneleffekt ins Bild zu bekommen, hab ich den Effekt im Prisma gezoomt.
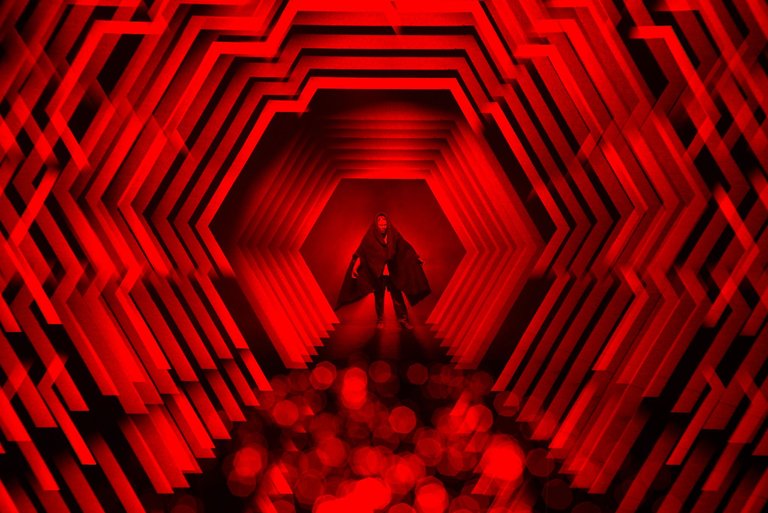
Nikon D750 | ISO 100 | Sigma 28-70 mm @f/4 , 10, 16 | 335 sec. exposure time
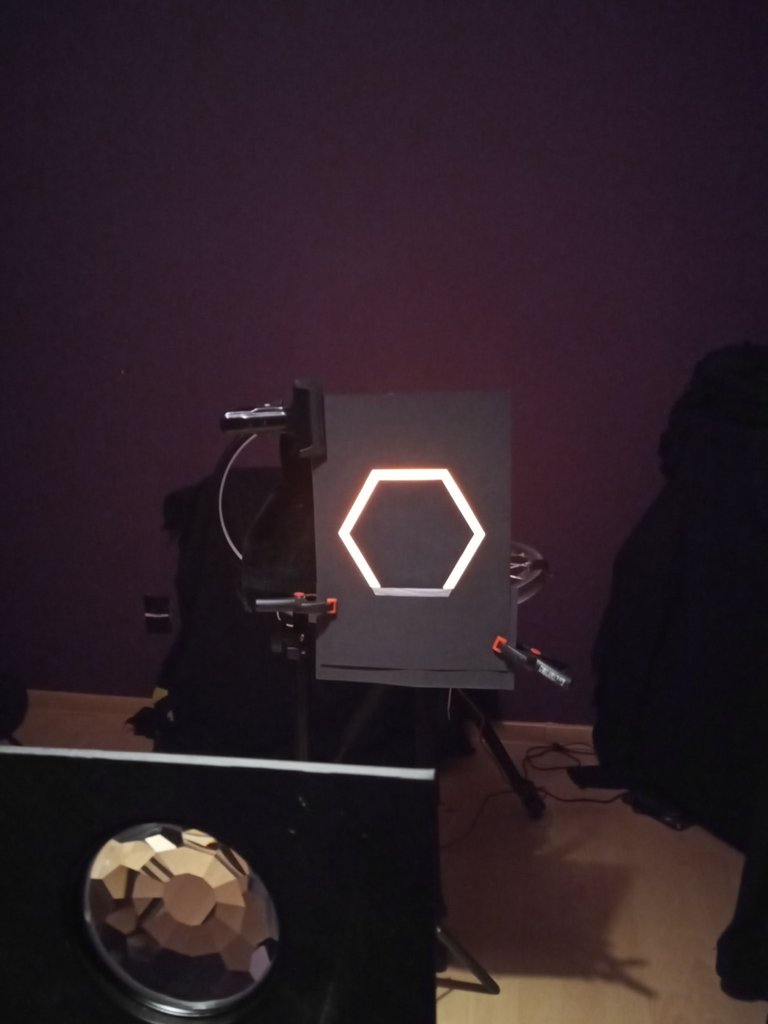
(Behind the scenes) Sechseck-Schablone mit Kaleidoskop-Prisma / Hexagon-Stencil with Kaleidoscope-Prism
Here is an example photo of what the effect looks like through the prism. Depending on the alignment of the camera to the prism and the light in front of the prism, you can create different effects.
Hier mal ein Beispielbild, wie der Effekt durch das Prisma aussieht. Je nach Ausrichtung von Kamera zu Prisma und Licht vor dem Prisma, kann man so verschiedene Effekt erzeugen.
(Behind the scenes) Blick durch ein Prisma / View through a prism
An approx. 20 cm tall figure was used as a cheap and willing model. I illuminated it from behind with a torch. To make the light behind the model look a little "softer", I blew some smoke behind the model.
Als billiges und williges Model kam eine ca. 20 cm große Figur zum Einsatz. Die ich von hinten mit einer Taschenlampe beleuchtet habe. Um das Licht hinter dem Model etwas "weicher" aussehen zu lassen, habe ich etwas Nebel hinter das Model gepustet.
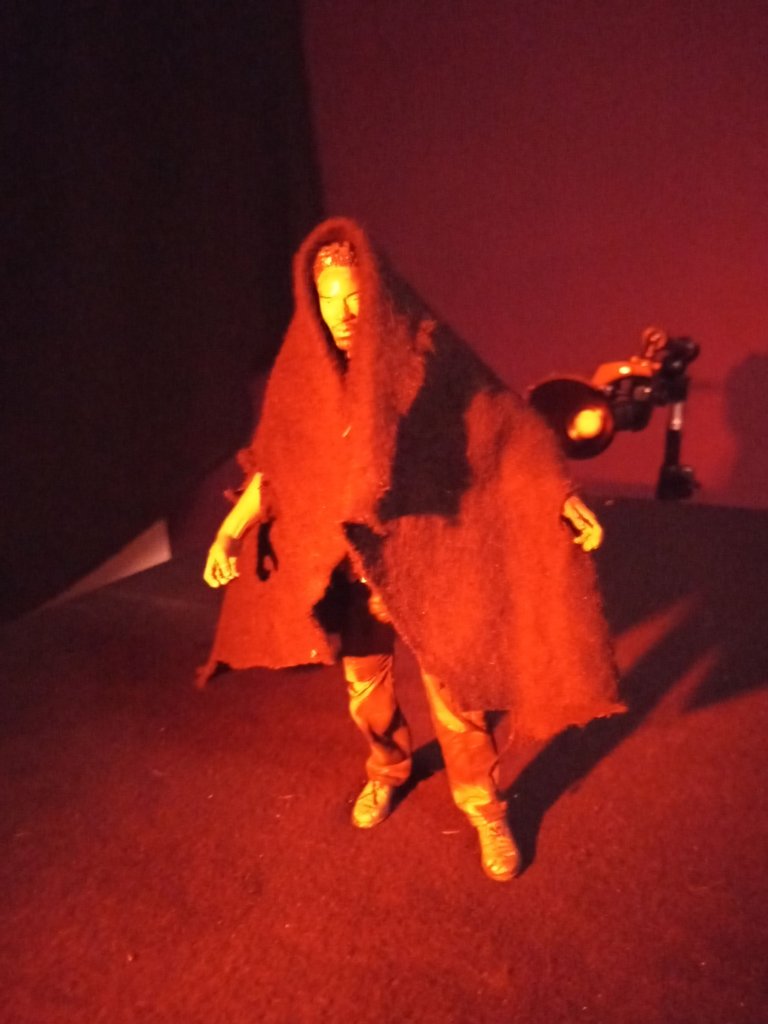
(Behind the scenes) Model with backlight
My little plastic friend was also used as a model in the following shot. The principle is similar to the previous one.
I just changed the stencil and prism. I used an octagon stencil for the zoomed prism effect. Behind the model I used a hexagon stencil. I used a kaleidoscope prism again as the prism, but with this prism the light is refracted into twelve "parts".
Auch im folgenden Bild kam mein kleiner Plastik-Freund als Model zum Einsatz. Das Prinzip ist ähnlich im vorherigen Bild.
Ich habe lediglich Schablone und Prisma gewechselt. Für den gezoomten Prisma-Effekt habe ich eine Achteck-Schablone benutzt. Hinter dem Model eine Sechseck-Schablone. Als Prisma nutzte ich wieder ein Kaleidoskop-Prisma, allerdings wird bei diesem Prisma das Licht in zwölf "Teile" gebrochen.
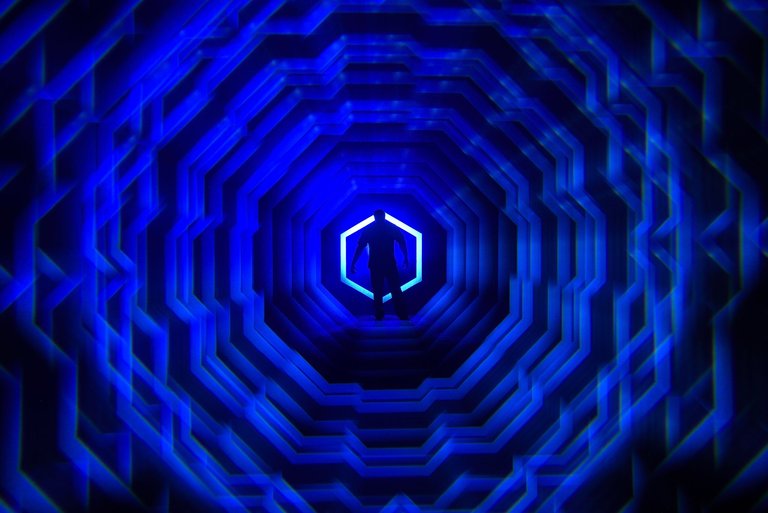
Nikon D750 | ISO 100 | Sigma 28-70 mm @ f/16 | 279 sec. exposure time
I'll leave the next two images as they are, without a detailed description of the steps I took. I used geometric stencils, various prisms, effect paper, a dog toy, tripods and, of course, light. Camera rotation technique was used in both pictures.
Die nächsten beiden Bilder lasse ich einfach mal so stehen, ohne eine detaillierte Beschreibung meiner Arbeitsschritte. Verwendet habe ich geometrische Schablonen, verschiedene Prismen, Effektpapier, ein Hundespielzeug, Stative und natürlich Licht. In beiden Bildern kam Camera Rotations Technik zum Einsatz.
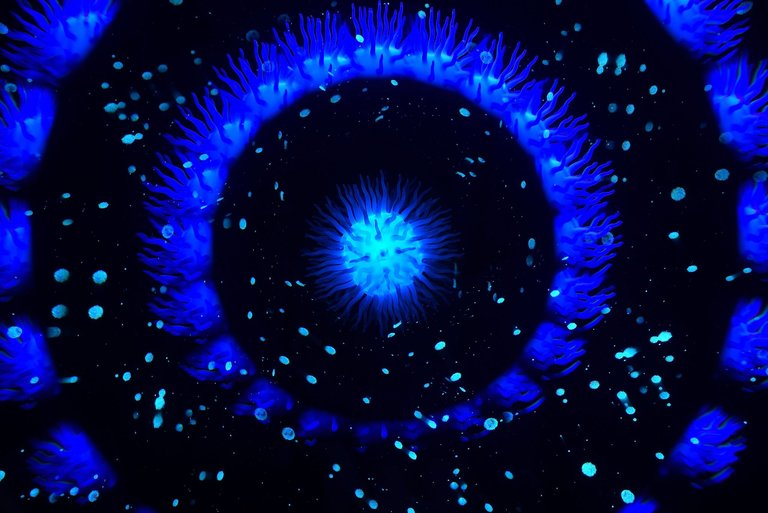
Nikon D750 | ISO 100 | Sigma 28-70 mm @f/16 | 359 sec. exposure time
Nikon D750 | ISO 100 | Sigma 28-70 mm | 317 sec. exposure time
And here we are at the end of my blog post. I hope you enjoyed this little excursion into the crazy world of light. See you next time here on Hive.
All the best Stepko
Und schon sind wir am Ende meines Beitrags. Ich hoffe der kleine Ausflug in die verrückte Welt des Lichts hat gefallen. Bis zum nächsten mal hier auf Hive.
Alles Gute Stepko
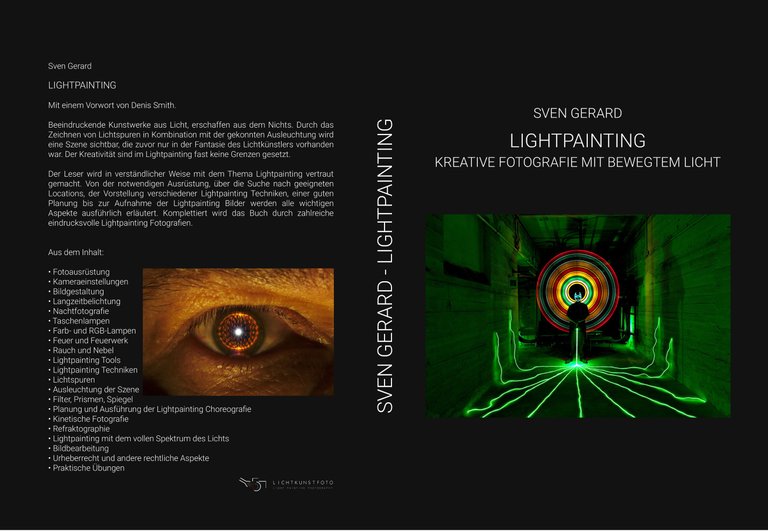
Are you curious and want to find out more about light painting? Would you like to create your own light art pictures in the dark out of nothing, using only light? Then I have a brilliant book tip for you: The appreciated light artist colleague Sven Gerard aka. @lichtkunstfoto has published his brand new book! And the book has it all! Sven Gerard @lichtkunstfoto has compiled his decades of experience in the field of long exposure, night photography and light painting and shares his knowledge in his book.
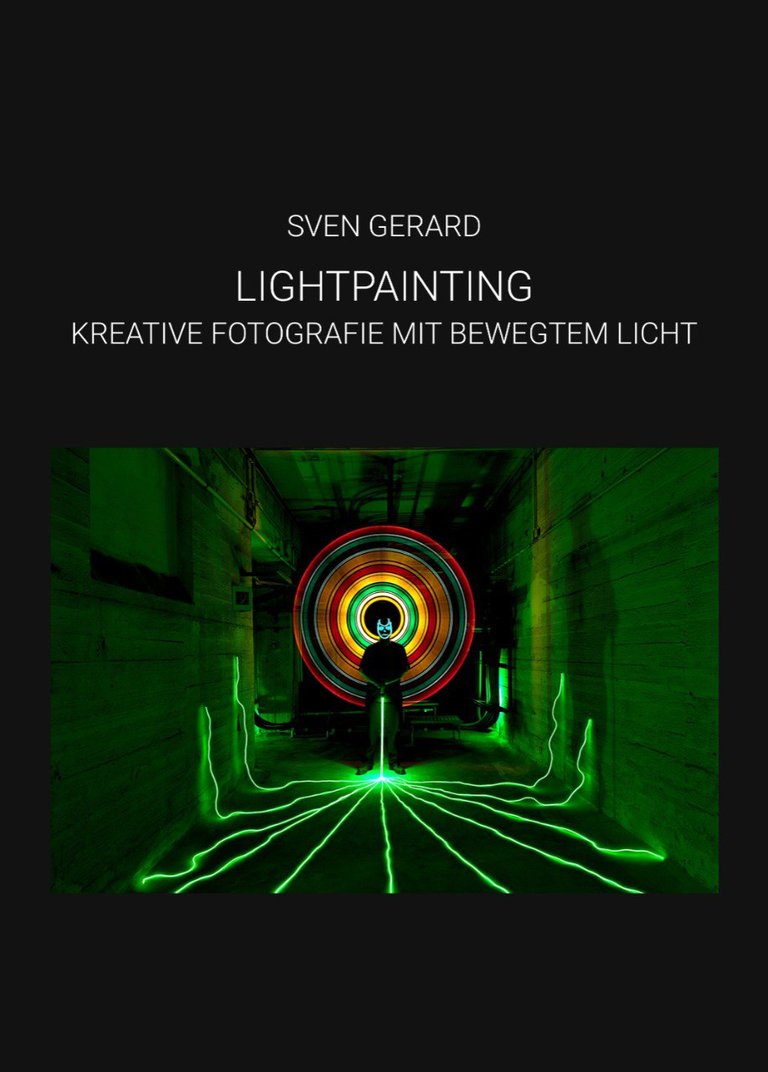
LIGHTPAINING - Creative photography with moving light is now available in the online shop of Lichtkunstfoto.de
CURRENTLY only available in German language!
Du bist neugierig geworden und willst mehr über Lichtmalerei erfahren? Du möchtest selber mit deiner Kamera Lichtkunstbilder in der Dunkelheit aus dem Nichts, nur mit Licht erschaffen? Dann habe ich einen genialen Buchtipp für Dich: Der geschätzte Lichtkünstler-Kollege Sven Gerard aka. @lichtkunstfoto hat sein nagelneues Buch veröffentlicht! Und das Buch hat es in sich! Sven Gerard @lichtkunstfoto hat seine jahrzehntelange Erfahrung im Bereich Langzeitbelichtung, Nachfotografie und Lightpainting zusammengetragen und teilt sein Wissen in seinem Buch.
LIGHTPAINING - Kreative Fotografie mit bewegtem Licht ist ab sofort erhältlich im Onlineshop von Lichtkunstfoto.de
AKTUELL nur in deutscher Sprache erhältlich!
©️ Sven Gerard @lichtkunstfoto
©️ Sven Gerard @lichtkunstfoto
Stepko Light Painting Photography
My Name is Stefan aka Stepko, I am a Lightpainting Artist, currently based in Hannover, Germany.
Darkness is my canvas and I love to create artworks out of light.
If you like my art you can join me on
Facebook , Flickr and Twitter for more Light Painting Photography.
You like the art of light painting and want to see more amazing shots, then visit these Artists, they will blow your mind: @fadetoblack @martbarras @fastchrisuk @lichtkunstfoto @dawnoner @oddballgraphics @gunnarheilmann @candelart @marlasinger666 @ryuslightworks @maxpateau @yo-hoho @lacelight @ryuslightworks @maximepateau @neilru75 @lightstabeu and follow them and/or give them an upvote.
We are Light Painters
To help and support the LightPainters community here on Hive I would appreciate your delegation of HivePower. Any amount is appreciated. It does not require much to get started, we are happy for any gesture.
How to delegate?
Delegate 50HivePower, [50HP]
Delegate 250HivePower, [250HP]
Delegate 500HivePower, [500HP]
Delegate 1000HivePower, [1000HP]
All the Hive Power will help to upvote the artist's contribution as part of the LightPainters community.
Ganz grosses kino wie immer!
Miss mir umbedingt das buch auf weihnachten gönnen :)
Danke fürs teilen, und schöne sunntig no :)
Greez us dr schwiz :)
!BEER
!invest_vote
ICh danke dir Sandy. Freut mich immer, wenn es gefällt, was da so aus meinem Kopf kommt 😁.
Ja, das Buch kann ich dir echt empfehlen, gut geschrieben, voll mit viel Wissen und praktischen Tipps. Normalerweise bin ich nicht so der Werbe-Onkel, und empfehle nur Sachen, die ich auch selber nutze oder gut finde. Falls du es dir gönnst, wünsche ich dir viel Spaß damit. Gruß in die Schweiz 😎
View or trade
BEER.Hey @stepko, here is a little bit of
BEERfrom @sandymeyer for you. Enjoy it!Learn how to earn FREE BEER each day by staking your
BEER.@sandymeyer denkt du hast ein Vote durch @investinthefutur verdient!
@sandymeyer thinks you have earned a vote of @investinthefutur !
Wow! Was für ein Post! Sehr anregend und aufschlussreich. Die Bastelei wird dir irgendwann den Beinamen Daniel Düsentrieb einbringen 👍🤣 Wann gibst du mal einen Workshop?
Vielen Dank Ralf!
Workshop? Wird etwas schwierig, da die Techniken ja schon etwas spezieller sind.
für den Beinamen Daniel Düsentrieb bin ich handwerklich eher nicht so talentiert. Meine Sets sind ja eher immer im Ghetto-Stil aufgebaut. 😂
Genau dieser Ghetto-Stil macht den Reiz aus. Ich finde deine Kreativität und Geduld herausragend. Die Bilder sprechen für sich.👍
Oh danke Ralf, dass freut mich sehr. 😎
Sehr coole Bilder @stepko.
Und vielen Dank für die Erwähnung meines Buches.
Vielen Dank Sven. Dein Buch muss erwähnt werden, schließlich hat mich Dein Wissen, was du ja nun mit dem Buch teilst, sehr geholfen. 🤓
Das freut mich sehr. 🙂
Awesome techniques, very cool and creative results, I like it! :)
@tipu curate
Upvoted 👌 (Mana: 1/51) Liquid rewards.
Thanks for your kind words. I appreciate your support very much. 😎
Very nice post! You manage really well with the stencils 😀
Thanks mate, experimenting with stencils is a lot of fun. My aching hands to cut the stencils by hand is not so much fun. 🙄
I may have to buy a maschine to do the work for me. 😜
I know a couple of "stencils masters" but I would be nice for me to do it on my own 😉
!LOL
Posted using Hive Images
lolztoken.com
We have the same taste in clothes.
Credit: reddit
@stepko, I sent you an $LOLZ on behalf of hivephoto
(6/10)
Feine Bilder.
Congratulations @stepko! You have completed the following achievement on the Hive blockchain And have been rewarded with New badge(s)
Your next target is to reach 9000 upvotes.
You can view your badges on your board and compare yourself to others in the Ranking
If you no longer want to receive notifications, reply to this comment with the word
STOP