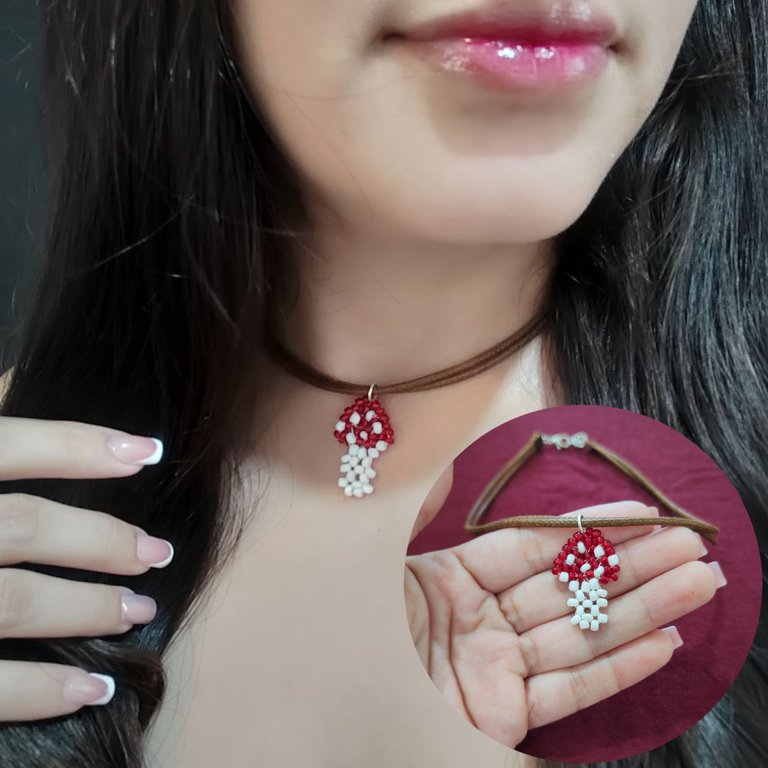
🇪🇸|🇺🇲 Mushroom themed bead charm. 🍄
Bienvenidos || Welcome

Ha pasado mucho tiempo desde la última publicación en este increíble espacio pero como lo que nos gusta nunca es olvidado aquí estoy en esta ocasión para enseñarle cómo realice un encantador dije de táctica de hongo con mostacillas blancas y rojas para ser sincera es la primera vez así que no fue tan sencillo y tengo que perfeccionar la práctica y técnica pero poco a poco iré trabajando en ello, sin más dilaciones iniciemos:
It has been a long time since the last publication in this incredible space but as what we like is never forgotten here I am on this occasion to show you how to make a lovely mushroom charm with white and red beads to be honest it is the first time so it was not so easy and I have to perfect the practice and technique but little by little I will work on it, without further delay let's start:
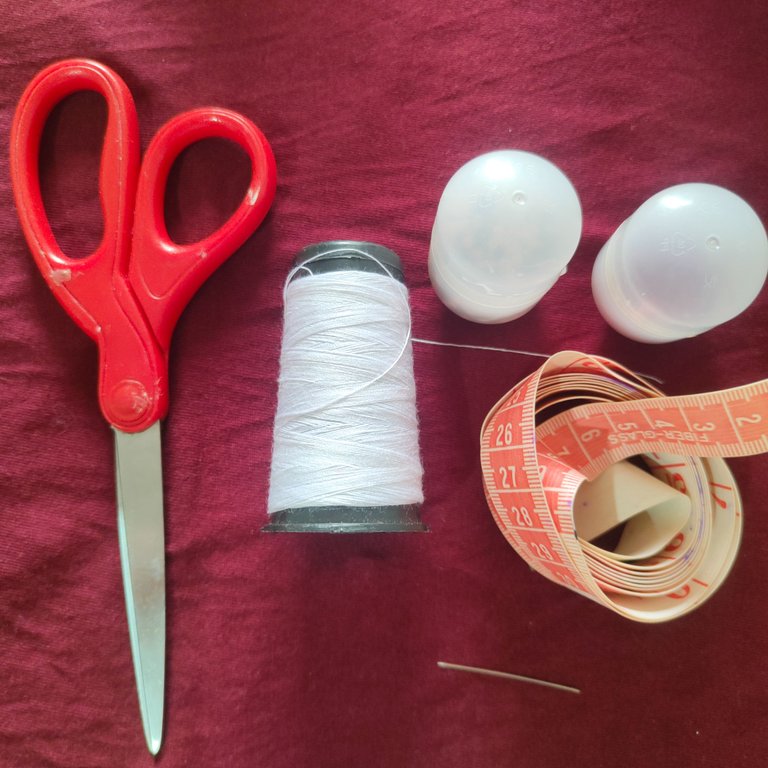
Materiales || Materials
🍄 Mostacillas blancas.
🍄 Mostacillas rojas.
🍄 Hilo nailon.
🍄 Aguja.
🍄 Tijera.
🍄 Cinta métrica.
🍄 Arito de bisutería.
🍄 Collar de cuerina.
🍄 White beads.
🍄 Red beads.
🍄 Nylon thread.
🍄 Needle.
🍄 Scissors.
🍄 Tape measure.
🍄 Jewelry earring.
🍄 Leather necklace.
Pasos ||Steps
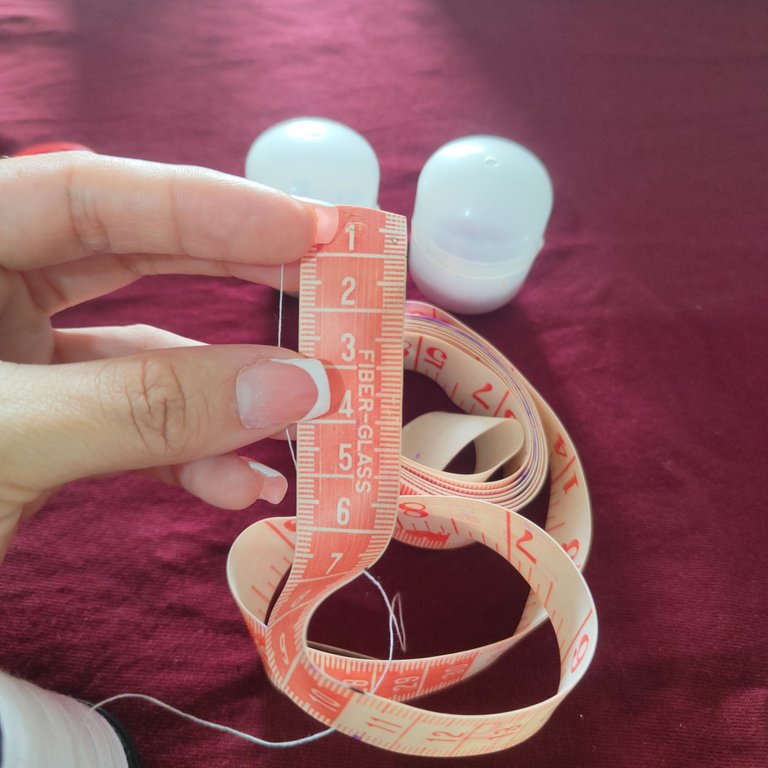
🍄 Paso 1. Iniciaremos ahora midiendo con nuestra cinta métrica 50 cm de hilo nylon con este será suficiente para elaborar nuestro dije de mostacilla de temática de honguito.
🍄 Step 1. We will start now by measuring with our tape measure 50 cm of nylon thread with this will be enough to make our mushroom themed bead charm.
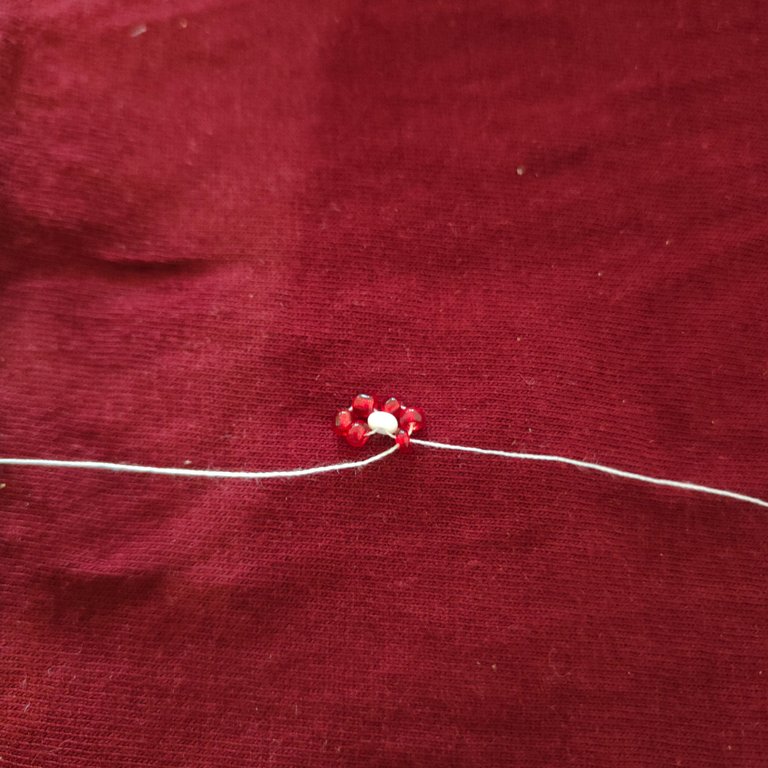
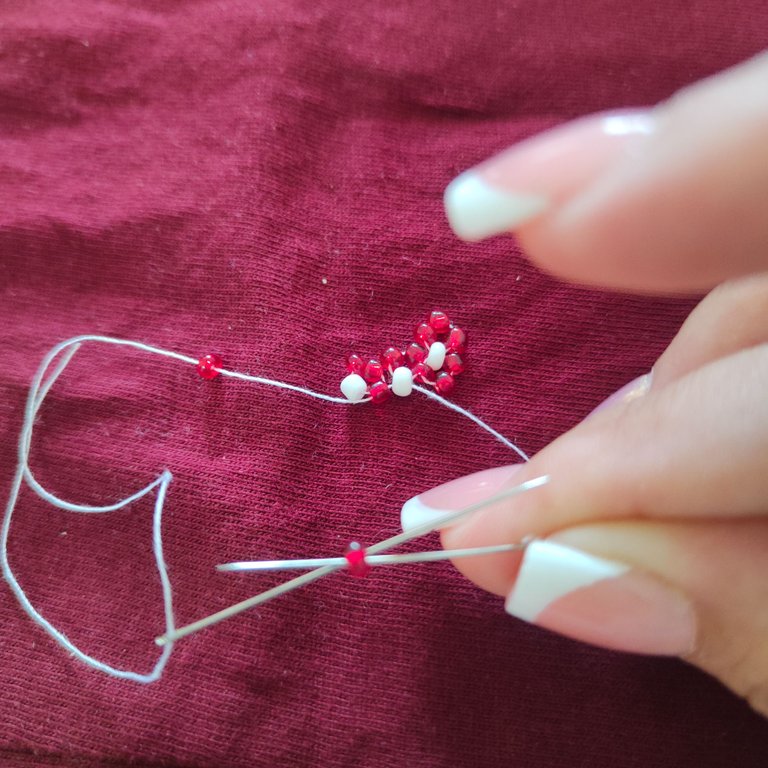
🍄 Paso 2. Antes de comenzar con la elaboración de nuestro honguito vamos a insertar en cada extremo del hilo una aguja, Lo siguiente será agregar 4 mostacillas de las cuales, las tres primeras seran rojas y última en agregar blanca, en esta última mostacilla la aguja de cada extremo pasará mediante ella formando así un círculo con las mostacillas ajustaremos estas en el centro del hilo.
🍄 Step 2. Before starting with the elaboration of our mushroom we are going to insert in each end of the thread a needle, The following will be to add 4 beads of which, the first three will be red and last to add white, in this last bead the needle of each end will pass through it thus forming a circle with the beads we will adjust these in the center of the thread.
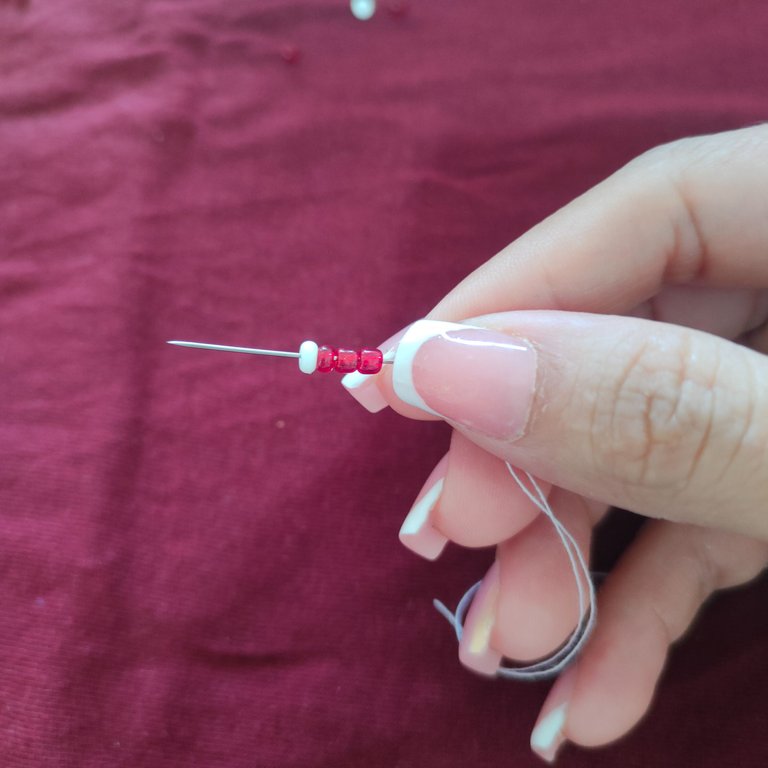
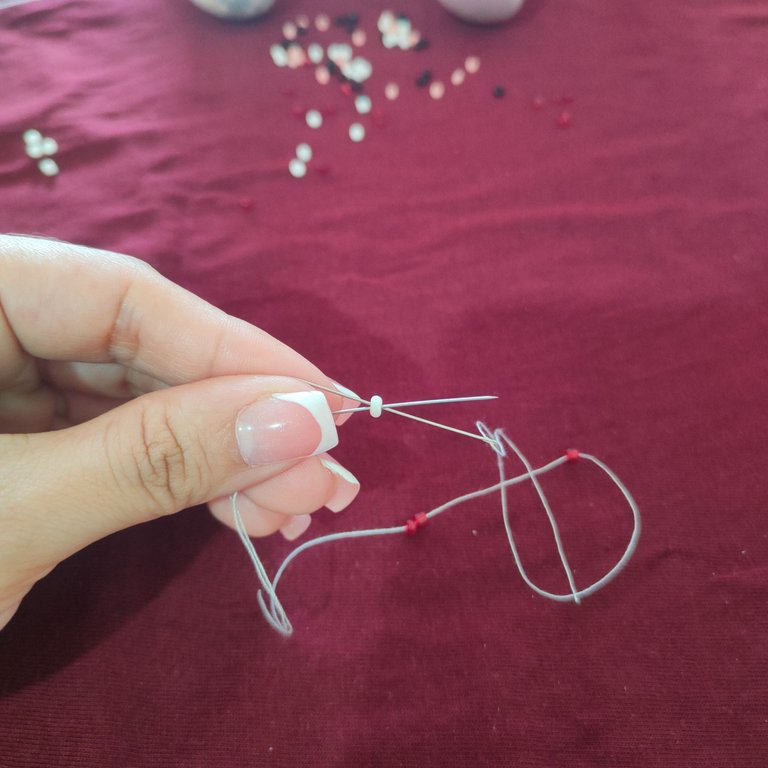
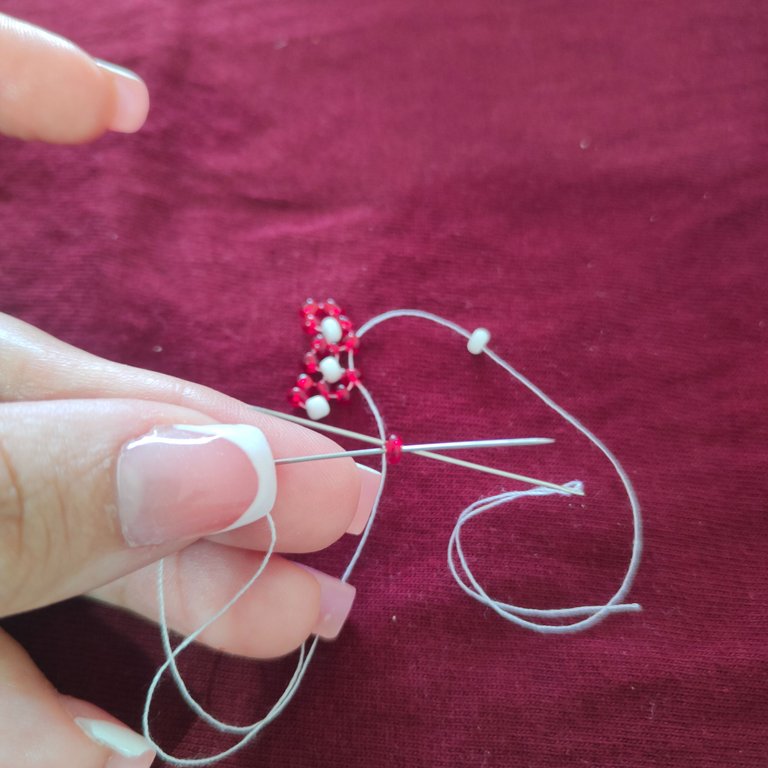
🍄 Paso 3. Seguidamente vamos a insertar dos mostacillas rojas del lado derecho de la estructura de nuestro honguito, y para darle una forma circular agregaremos una tercera mostacilla la cual con ambas agujas vamos a atravesar en sentido contrario, creando así una forma circular en este extremo de nuestro honguito.
🍄 Step 3. Next we will insert two red beads on the right side of the structure of our mushroom, and to give it a circular shape we will add a third bead which with both needles we will cross in the opposite direction, thus creating a circular shape at this end of our mushroom.
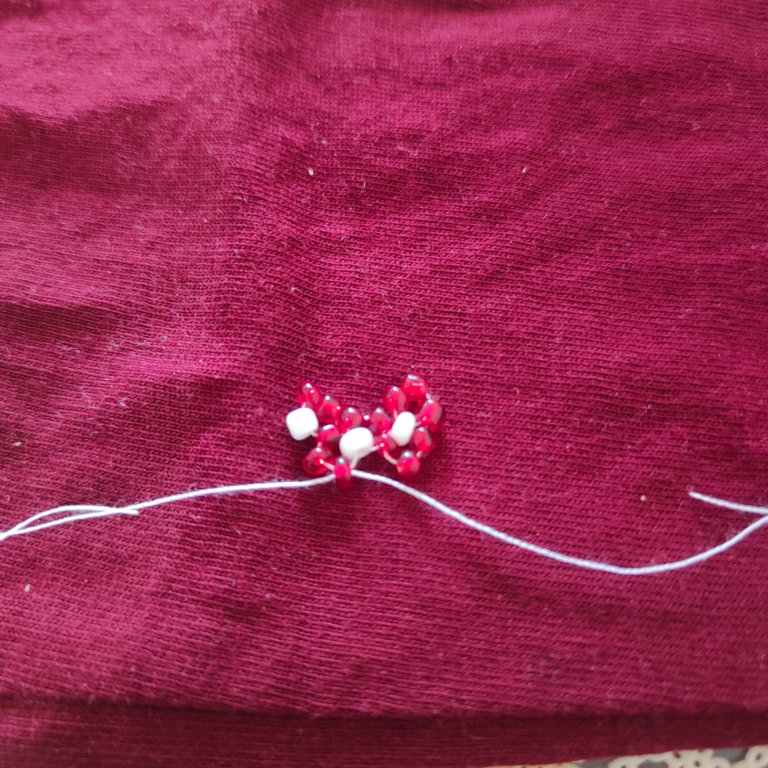
🍄 Paso 4. En esta misma parte del hilo vamos a agregar dos mostacillas rojas y una mostacilla blanca la cual atravesaremos con ambas agujas en sentido contrario como en pasos anteriores hemos realizado.
🍄 Step 4. In this same part of the thread we are going to add two red beads and a white bead which we will cross with both needles in the opposite direction as in previous steps we have done.

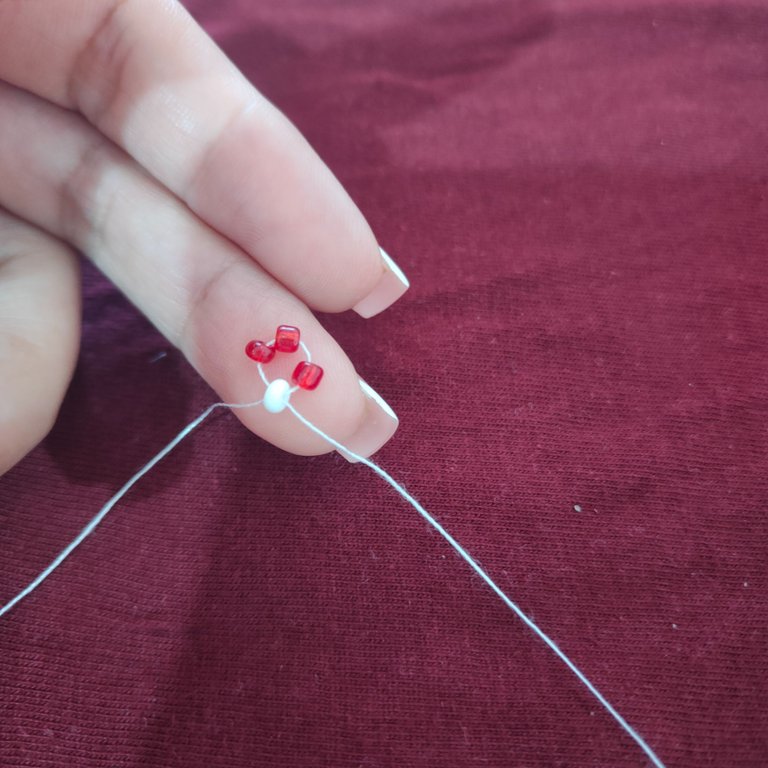
🍄 Paso 5. Seguidamente vamos a ensartar una mostacilla roja una blanca y dos rojas en la primera mostacilla que ensartamos vamos a atravesarla con nuestra aguja para así formar nuestro tercer círculo de mostacillas.
🍄 Step 5. Next we are going to thread one red bead, one white bead and two red beads on the first bead we threaded, we are going to pierce it with our needle to form our third circle of beads.
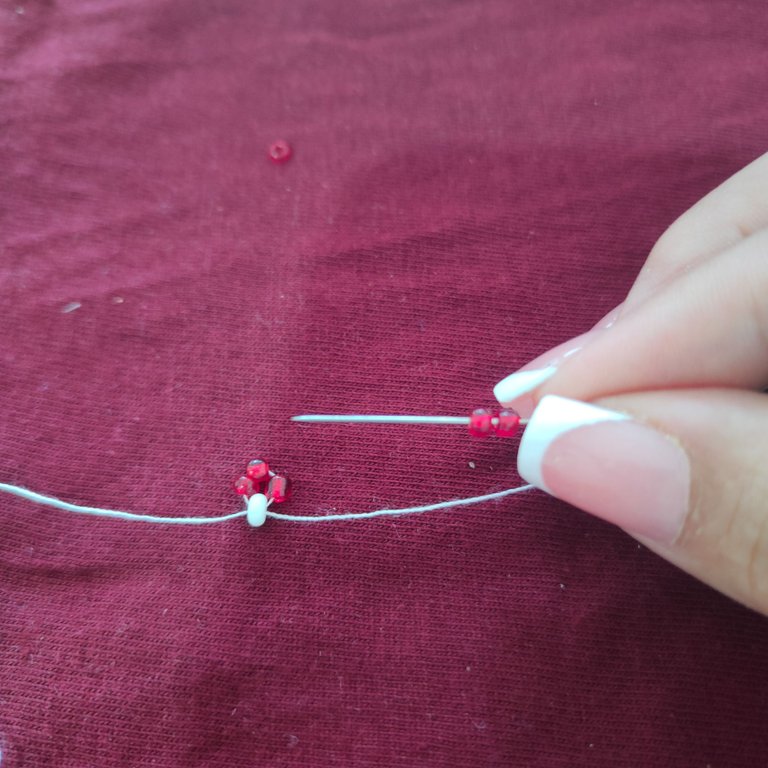
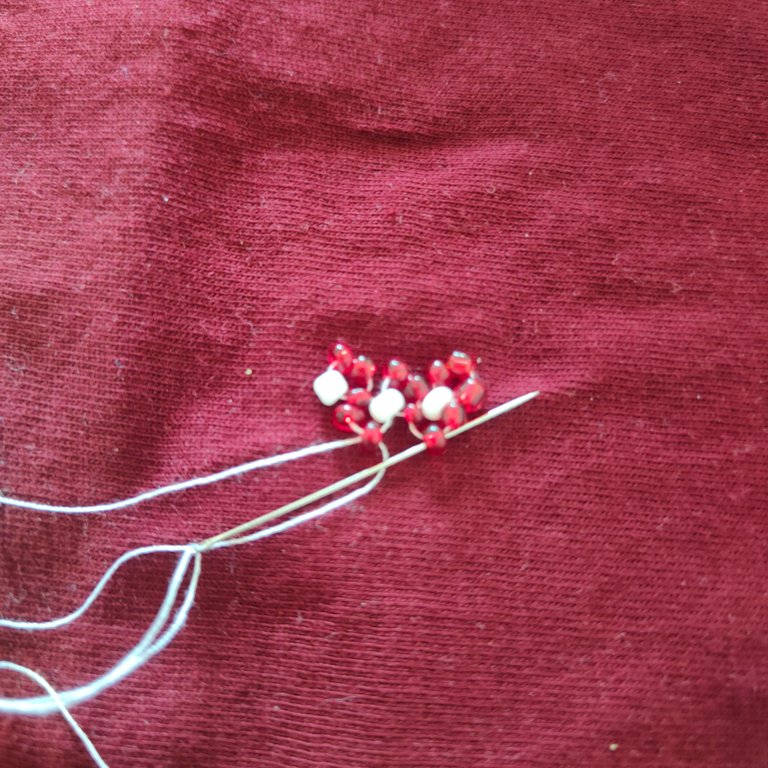
🍄 Paso 6. Continuaremos agregando dos mostacillas rojas y la última la atravesaremos por ambas agujas en sentido contrario.
🍄 Step 6. We will continue adding two red beads and the last one we will pass through both needles in the opposite direction.
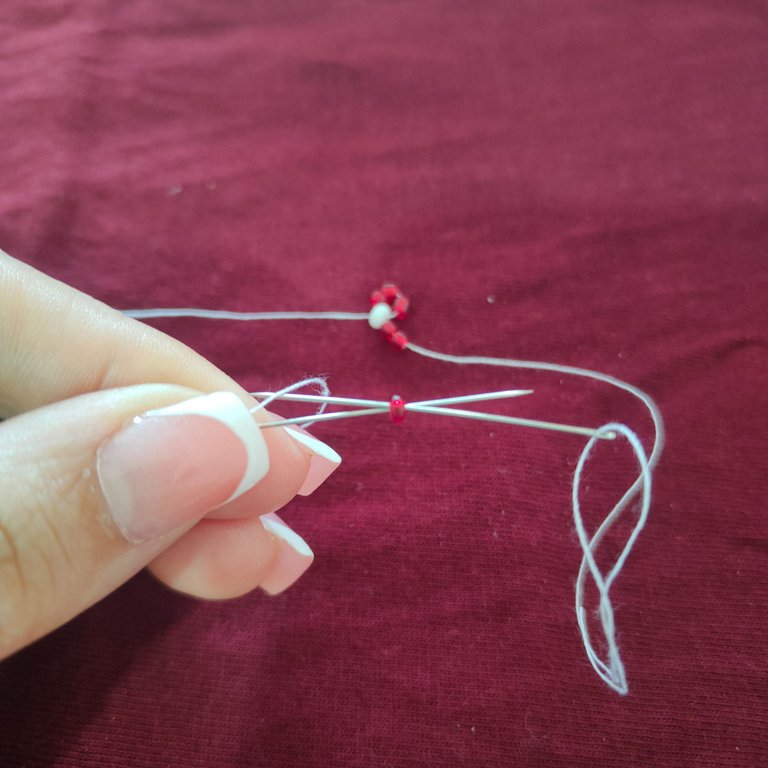
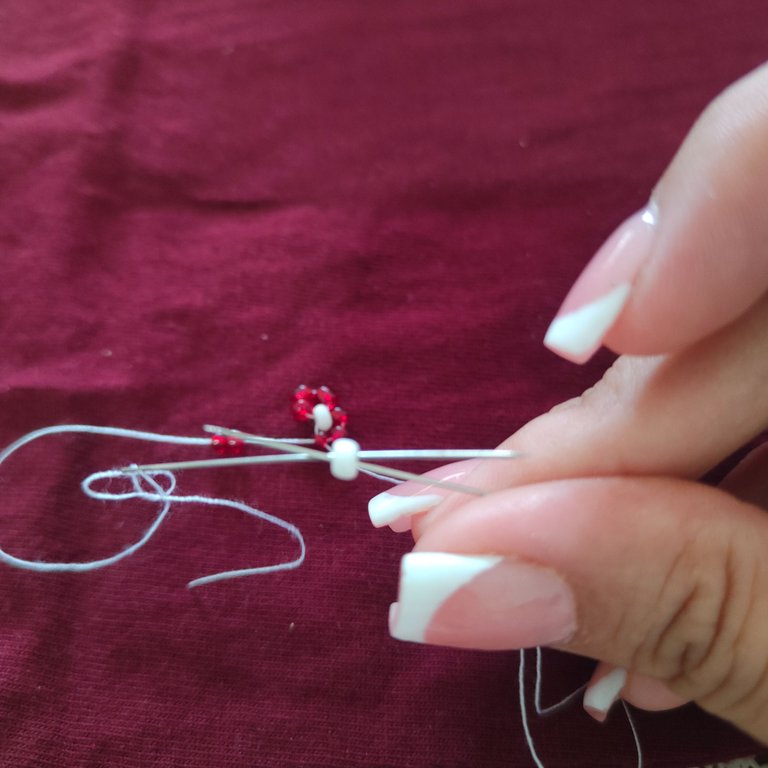
🍄 Paso 7. Ahora bien continuaremos pasando nuestra aguja de nuestro extremo del hilo izquierdo por la mostacilla que se encuentra a mano derecha una vez que hagamos esto vamos a introducir una mostacilla blanca seguidamente de una roja la cual atravesaremos con ambas agujas en sentido contrario.
🍄 Step 7. Now we will continue passing our needle from our end of the left thread through the bead that is on the right hand side once we do this we will introduce a white bead followed by a red one which we will go through with both needles in the opposite direction.
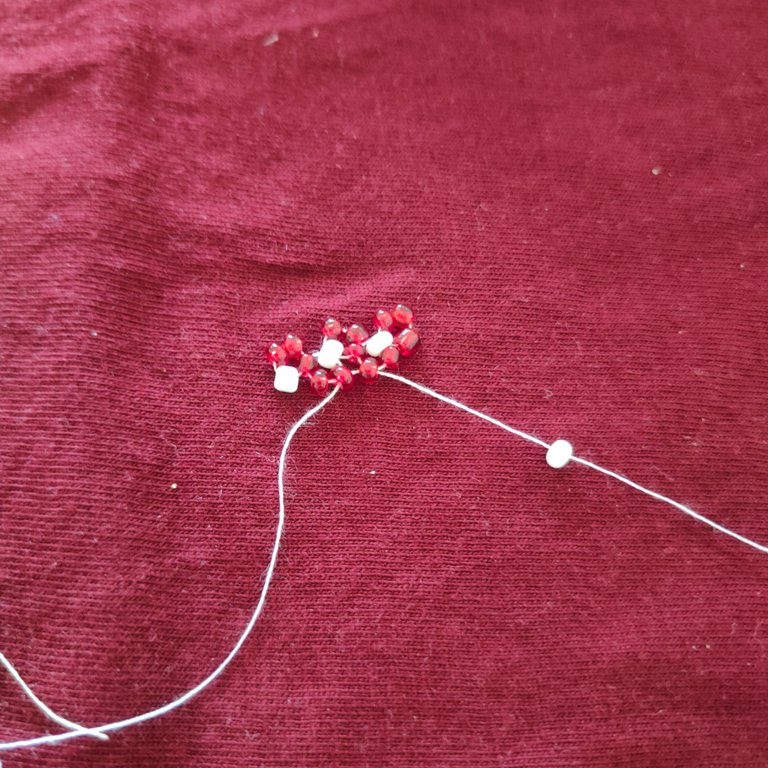
🍄 Paso 8. Agregaremos seguidamente una mostacilla blanca en cada extremo de hilo de nuestra estructura del hongo, continuaremos agregando una mostacilla blanca la cual vamos a insertar con ambas agujas en sentido contrario repetiremos este paso una vez más.
🍄 Step 8. Next we will add a white bead on each end of the thread of our mushroom structure, we will continue adding a white bead which we will insert with both needles in the opposite direction, we will repeat this step once more.
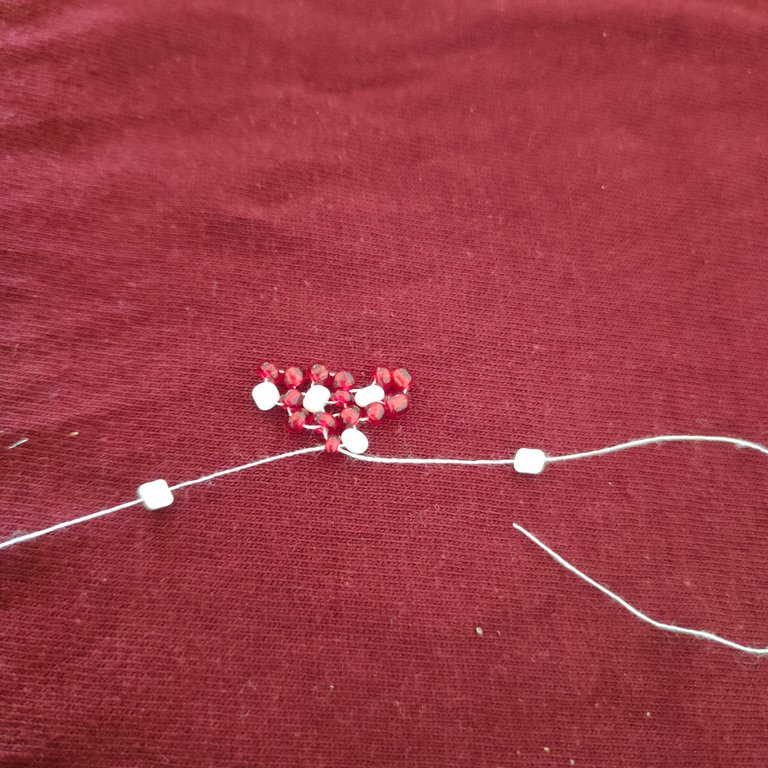
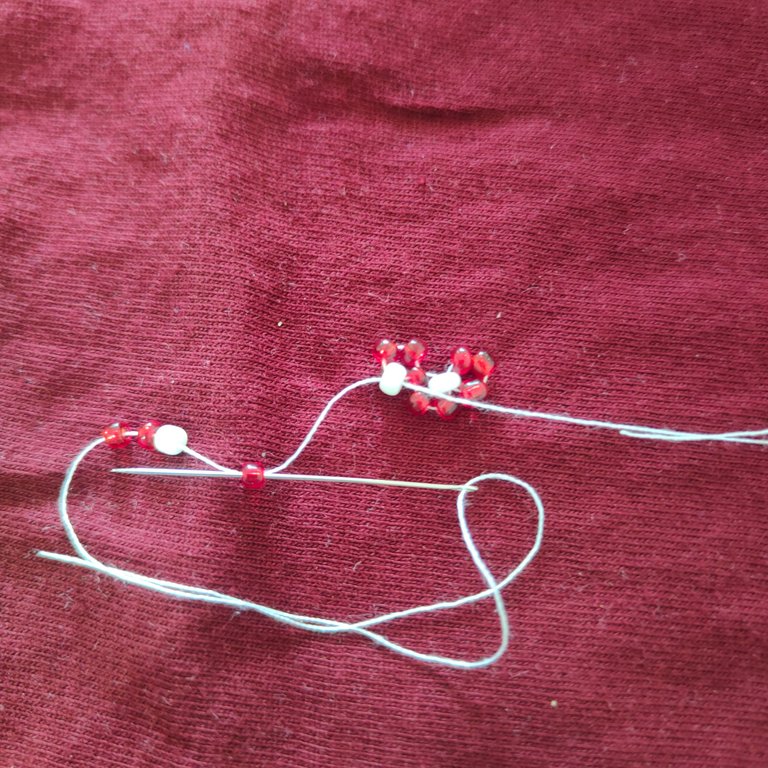
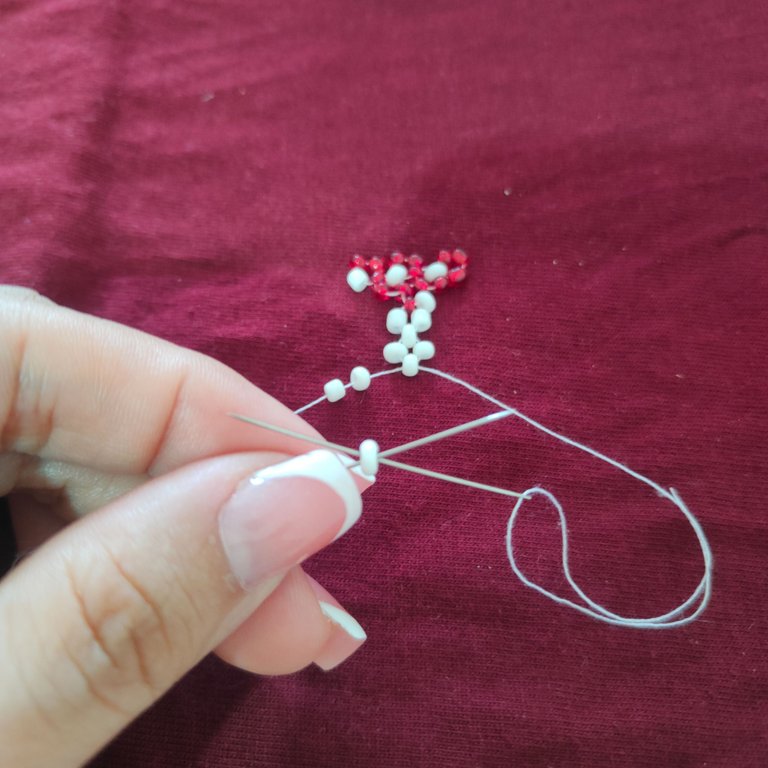
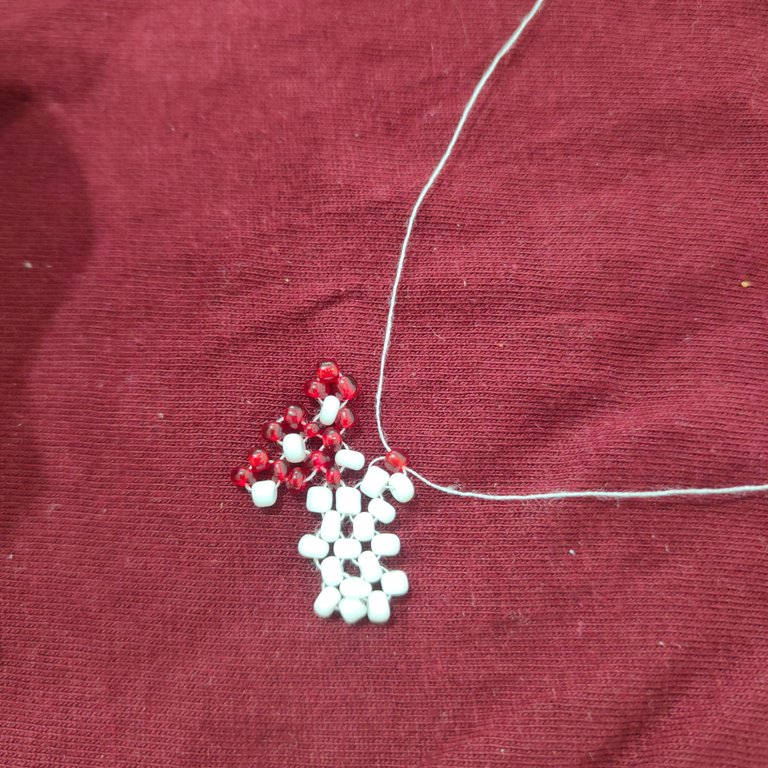
🍄 Paso 9. En este paso insertaremos dos mostacillas blancas en nuestro hilo del extremo izquierdo seguidamente vamos a agregar una mostacilla blanca la cual vamos a atravesar con ambas agujas, repetiremos este paso una vez más, ajustamos nuestro hilo y con nuestra aguja de nuestro extremo del hilo derecho vamos a atravesar o es vamos a ajustamos nuestro hilo y con nuestra aguja de nuestro extremo derecho vamos a atravesar la mostacilla blanca que se encuentra en nuestra parte superior que sobresale.
🍄 Step 9. In this step we will insert two white beads in our left end thread next we will add a white bead which we will pierce with both needles, we will repeat this step once more, we adjust our thread and with our needle of our right end thread we will pierce or is we will adjust our thread and with our needle of our right end we will pierce the white bead that is in our top part that protrudes.
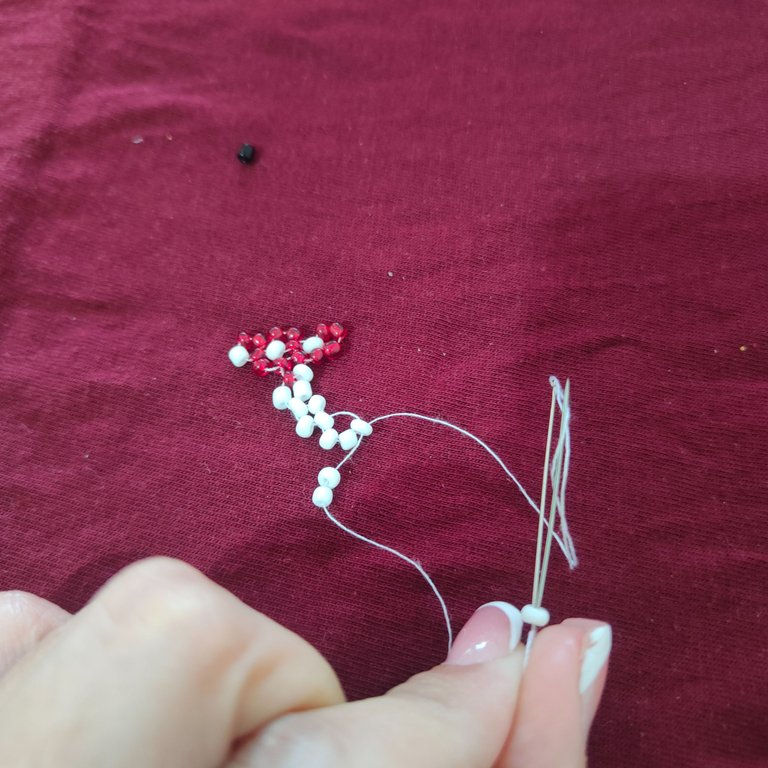
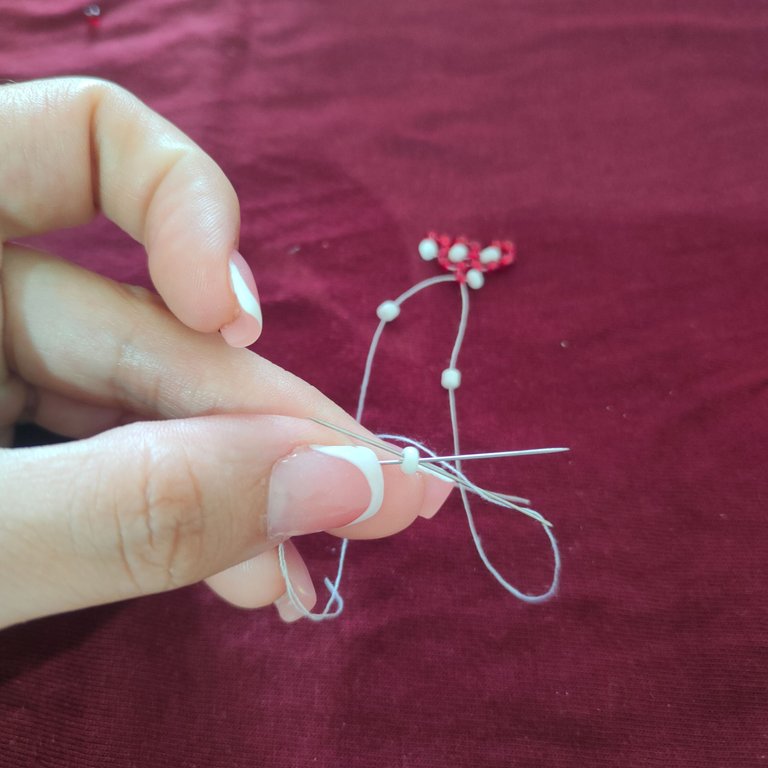
🍄 Paso 10. Para culminar la parte inferior de nuestro honguito continuaremos agregando una mostacilla blanca en el hilo inferior y agregaremos otra mostacilla la cual vamos a atravesar con ambas agujas en sentido contrario repetiremos este paso una vez más con mostacillas blancas al llegar donde están las mostacillas Rojas usaremos mostacillas Rojas repitiendo este mismo paso hasta llegar la parte superior del honguito el cual está constituido por mostacillas rojas mayormente.
🍄 Step 10. To finish the lower part of our mushroom we will continue adding a white bead on the lower thread and we will add another bead which we will cross with both needles in the opposite direction we will repeat this step once again with white beads when we reach where the red beads are we will use red beads repeating this same step until we reach the upper part of the mushroom which is mostly made up of red beads.
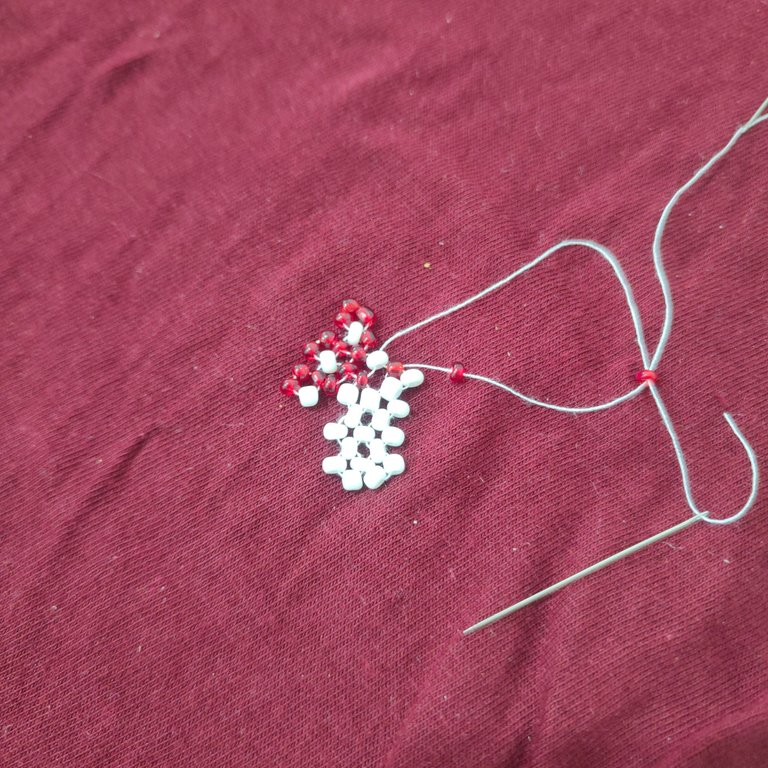
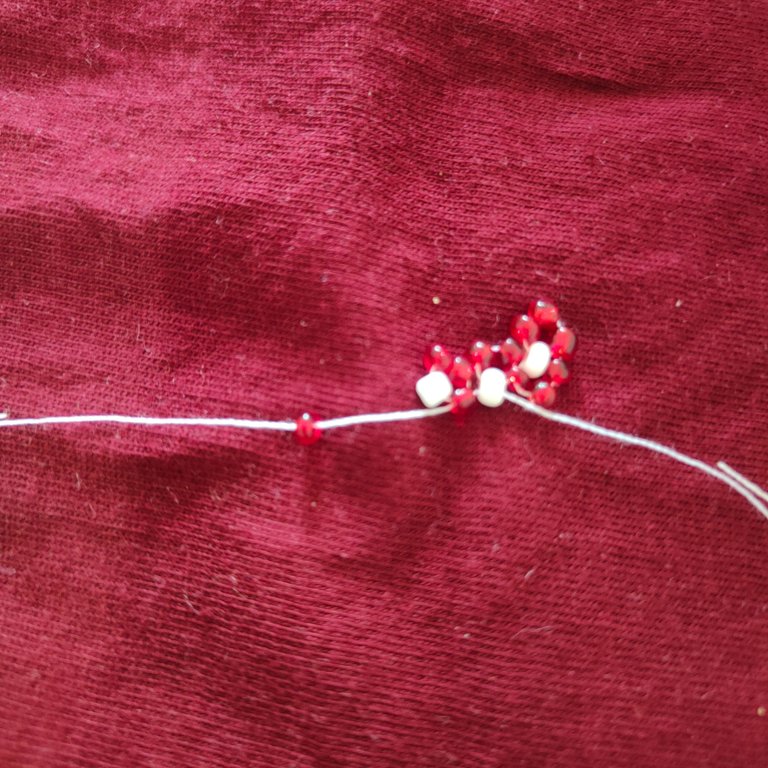
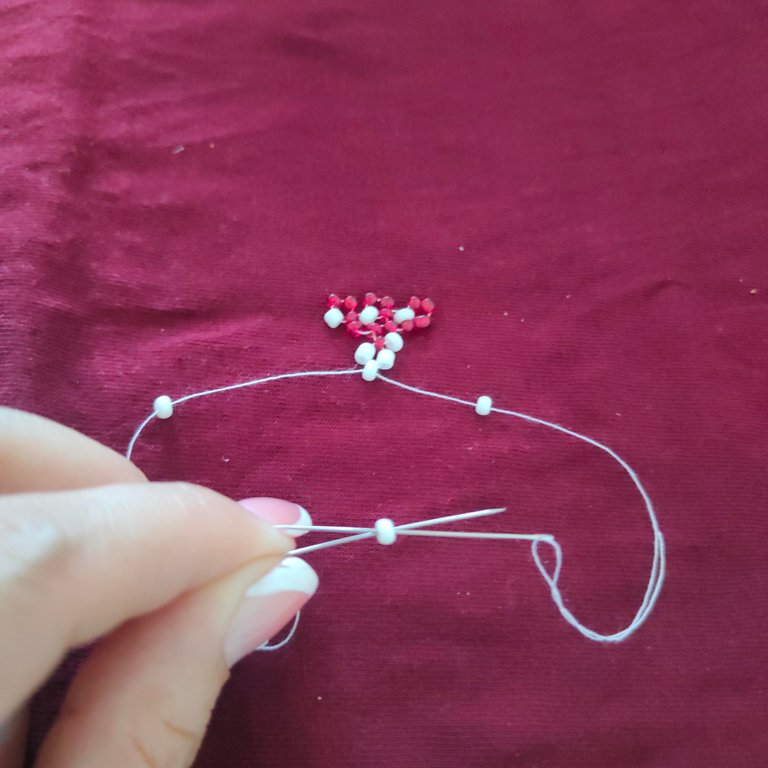
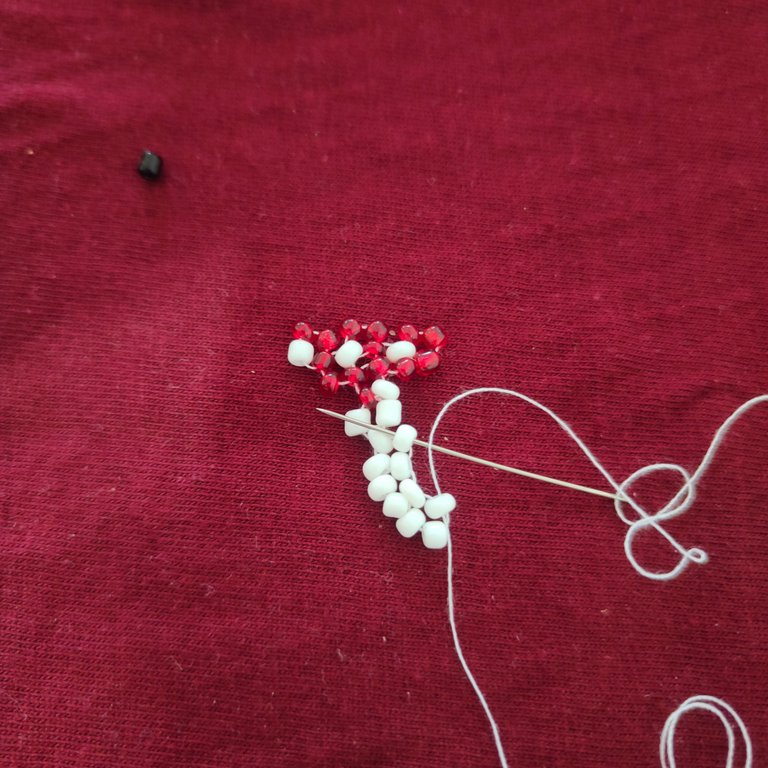
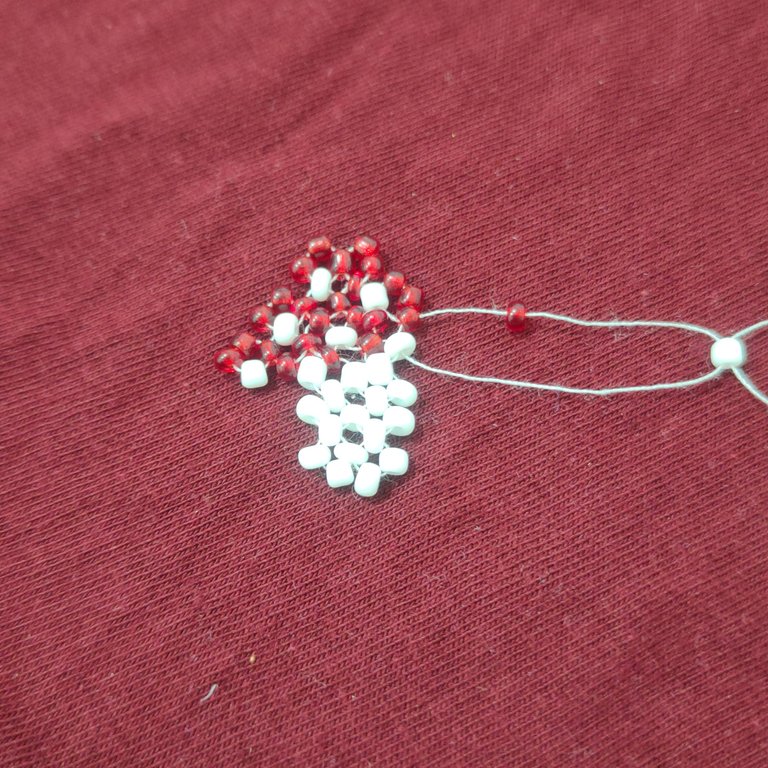
🍄 Paso 11. A llegar a la parte superior del honguito vamos a continuar con este mismo paso de agregar una mostacilla en un extremo del hilo y en el otro otra mostacilla que se va a atravesar con ambas agujas en sentido contrario pero con la diferencia que ahora vamos a ir hacia abajo para terminar de completar el extremo derecho superior de nuestro honguito, culminaremos realizando un nudo y pasando los hilos a través de varias mostacillas cortando y así dejando un acabado más prolijo sin hilos sueltos.
🍄 Step 11. When we reach the top of the mushroom we will continue with the same step of adding a bead at one end of the thread and at the other end another bead that will be crossed with both needles in the opposite direction but with the difference that now we will go down to complete the upper right end of our mushroom, we will finish making a knot and passing the threads through several beads cutting and thus leaving a neater finish without loose threads.
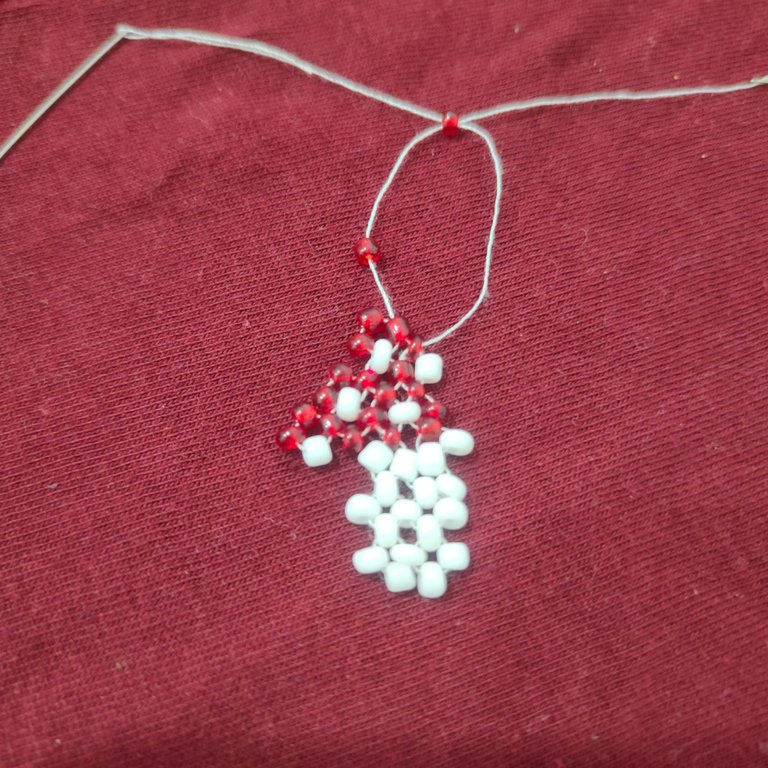
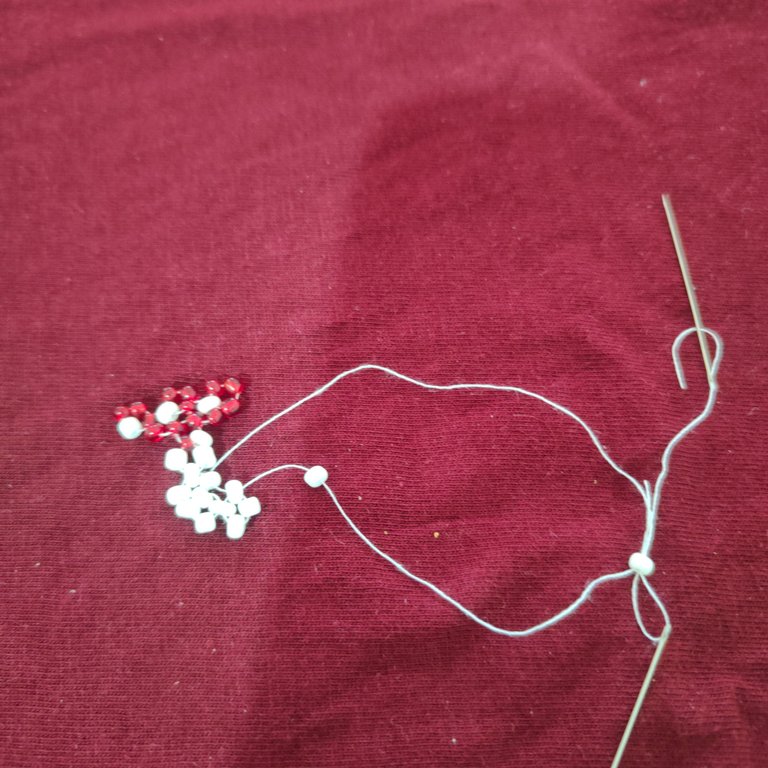
🍄 Paso 12. Por último agregaremos a la parte superior de nuestro dije de temática de honguito un arito de bisutería, para así poder insertarlo en nuestra cadena de cuerina y así poder ver el resultado final de nuestro dije.
🍄 Step 12. Finally, we will add to the top of our mushroom themed pendant a small costume jewelry earring, so we can insert it into our leather chain and see the final result of our pendant.
Resultado || Result
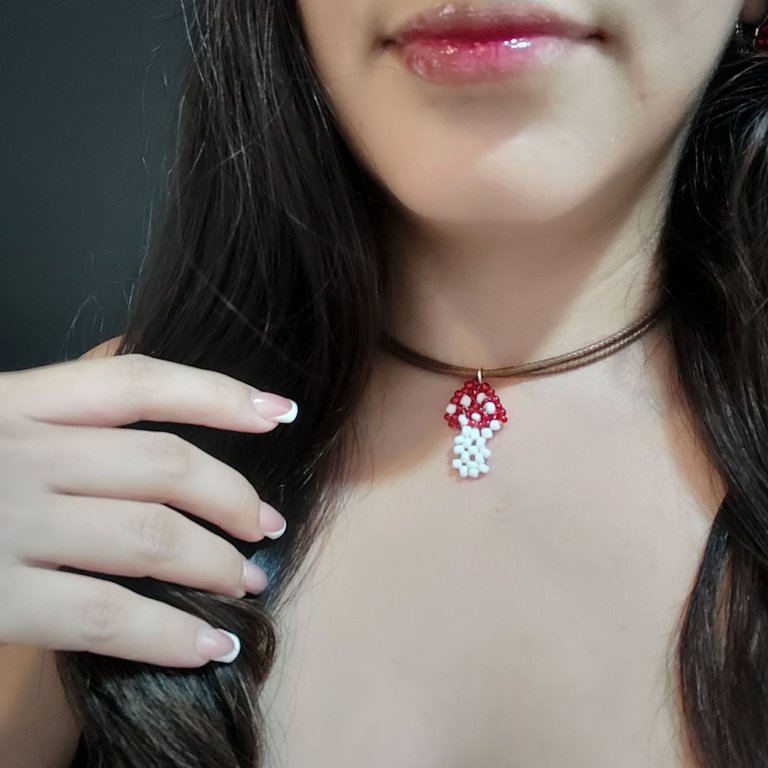
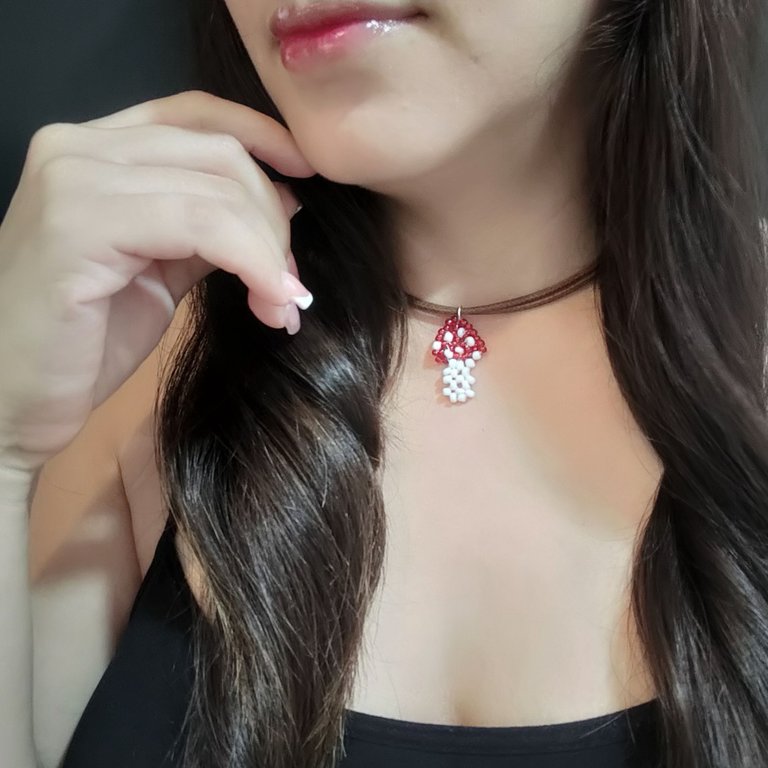
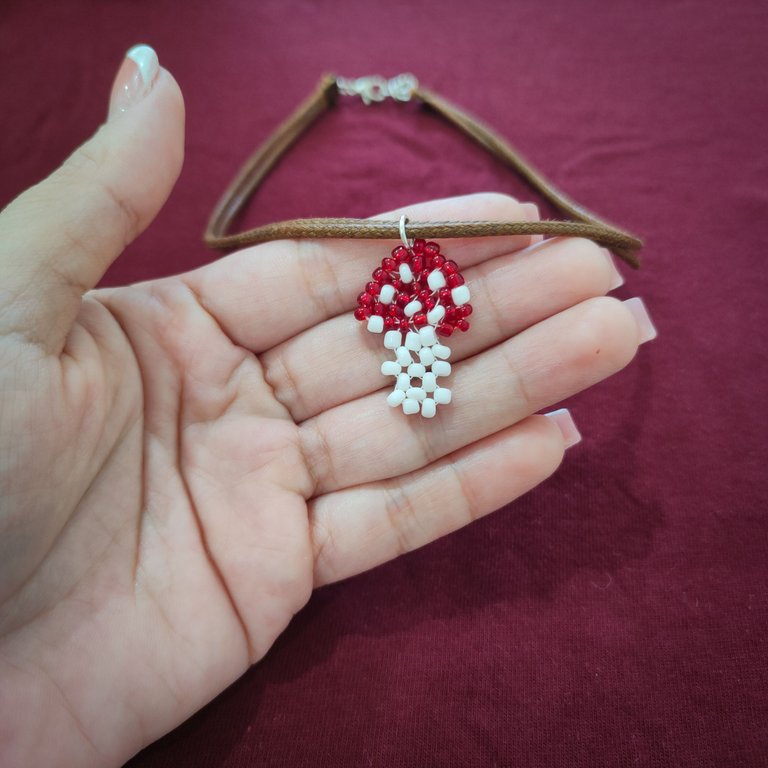
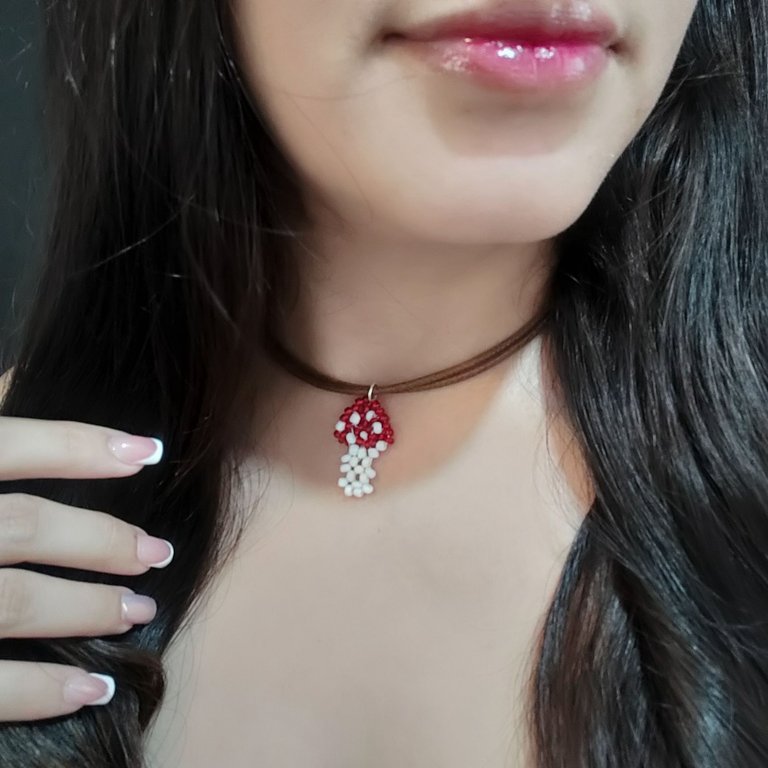
Sin duda fue un resultado que me encantó pero al ser el primero que realizo siento que le faltó un mejor acabado que lo haga ver aún un poco más prolijo así que espero poder seguir practicando realizando este dije para perfeccionarlo, como siempre ha sido un placer poder compartir con cada uno de ustedes el paso a paso, el tutorial de cómo realizar este hermoso dije de temática de honguito, esperando el mismo haya sido de su agrado espero estar pronto nuevamente en este espacio creativo, será hasta una próxima ocasión mi estimados amigos.
Undoubtedly it was a result that I loved but being the first one I made I feel that it lacked a better finish that makes it look even a little neater so I hope to continue practicing making this pendant to perfect it, as always it has been a pleasure to share with each of you the step by step tutorial on how to make this beautiful mushroom themed pendant, hoping it has been to your liking I hope to be soon again in this creative space, will be until next time my dear friends.
La creatividad no tiene límite. || There is no limit to creativity. ✨💎🎉🌷

COMMUNITY JEWELRY.

🎥Imágenes y vídeo creados con: |Images and video created with: Youcut video| Giphy | Canva |
🇪🇸 Traducido con DeepL
It looks so cute, stylish, and elegant. Love its color combination. Well done! Keep it up!
Ay amiga que cuchitura 😍😍😍... Pensé en Mario Bross apenas lo vi...😃
!discovery 45
This post was shared and voted inside the discord by the curators team of discovery-it
Join our Community and follow our Curation Trail
Discovery-it is also a Witness, vote for us here
Delegate to us for passive income. Check our 80% fee-back Program
Muy linda creación amiga. Es un diseño minimalista hermoso!
Se ve encantador y súper tierno 🥰
Qué bello hongo, me encantó. Además, parece fácil como lo muestras. Con poco materiales podemos hacer un dije tan bello como este.
Gracias por el tutorial y compartir tus conocimientos.