Poster #6 - Icy Lake | Fifth Spatial

Introduction
Hi, everyone! Though I've been subscribed to this community for a good while, this is my first time posting here. I'm honestly quite annoyed at myself for not engaging sooner, as a) there's just so much great content and talented artists here and b) it's quite on topic/related to what I've been working on and is interested in myself. But later is better than never, isn't it.
For the past 6 months I've been working hard on my first NFT art project that I ended up calling Fifth Spatial. It's a sci-fi themed art collection with the NFTs minted on WAX and all official information posted to its official account on Hive, @fifthspatial. If you're interested in learning more about the collection and the project itself, I'll put some links for you to check out down at the bottom.
This post is however not about shilling its NFTs but to showcase the art I've created for it, and to document the process of creating it. I've put my heart and soul into this project, and is simply really proud of the results. Hope you enjoy!
Tools and Process
The tools used to create this piece was my mobile phone camera, Blender and Photoshop.
Taking the photo
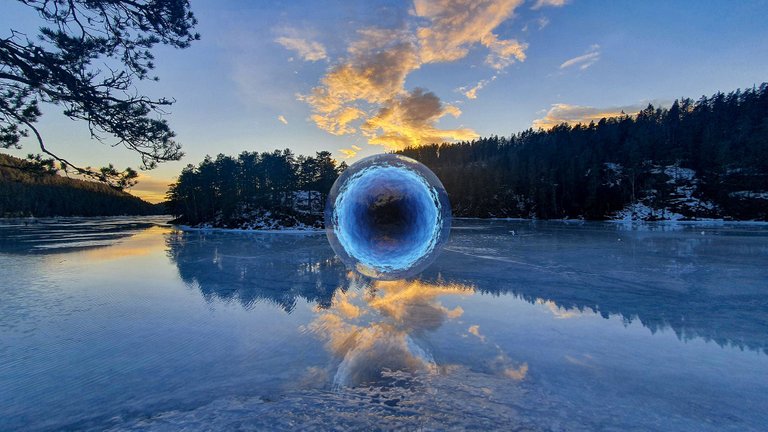
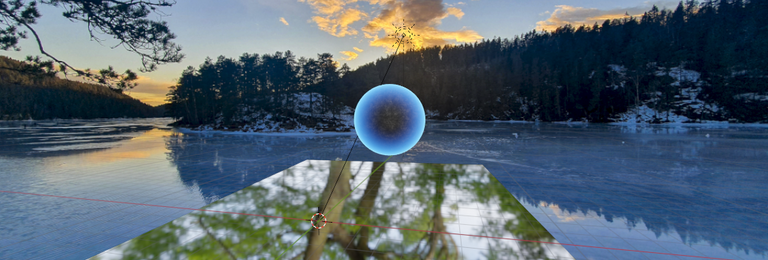
The photo was taken last winter, on a day with spectacular conditions; The lake was frozen and you could walk on the ice, but there was a layer of melted water on top, about 1-2 cm deep. Very fascinating phenomenon! And then of course, we managed to be there at sunset, which gave superb lighting conditions.
Aligning the photo and camera lens with the 3d perspective
Next imported the image into blender and attempt to align the camera to the perspective of the image. Notice the grid down at the bottom. On some of the posters in the collection, I used a software called fspy to help me align the camera to the perspective, but in this case I freehanded it.
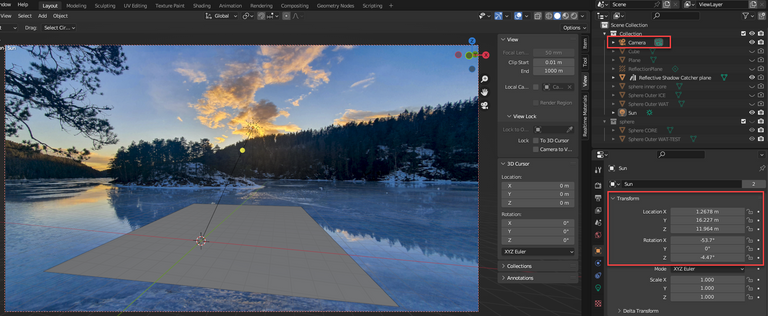
One interesting thing and super useful thing I learned in the process of making this, was that the photo files contained important data about focal length of the camera, which turned out to be crucial in aligning the perspective.
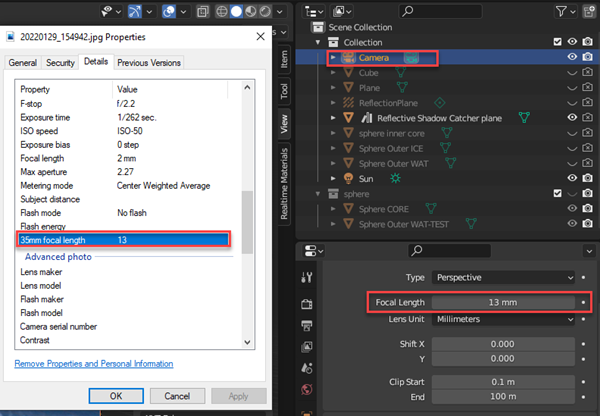
Matching the focal length in the Blender Cmera with the one in the photo properties made it a lot easier to get it right.
Lighting the scene
I placed the fake sun of the 3d scene at the approximate location of the real one in the photo, and attempted to match it direction and make it hit the center of the scene, as you can see here.

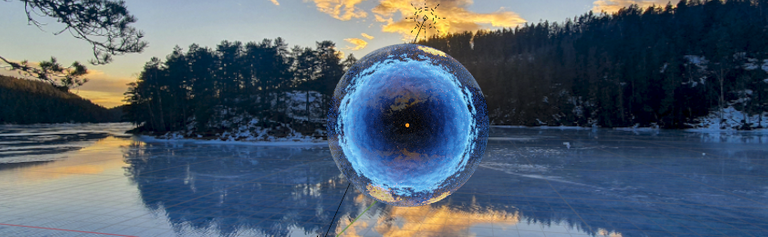
Adding the object (or 'hyperspatial')
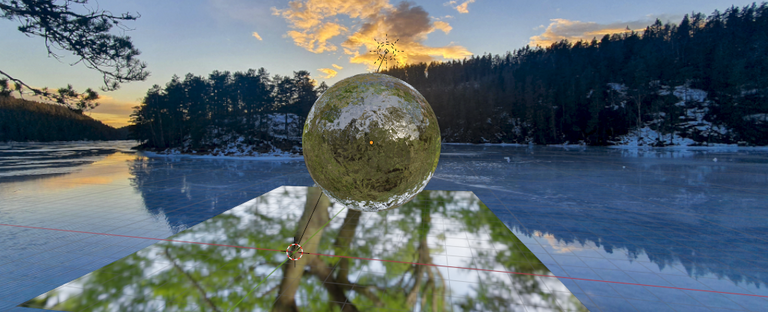
In this motive, I experimented with putting two objects inside each other. The outer one with a water-like material, and the core solid. In rendered view (the third image) we can see that it produced a really interesting looking result.
Creating a water reflection
You've probably noticed the plane below the object in several of the screenshots above. This plane is set to be what's called a "shadow catcher" in the 3d rendering world. A shadow catcher's job is to catch shadow/reflection of objects in the scene, but other than that it should not be visible.
You can see here how it looks in rendered mode;
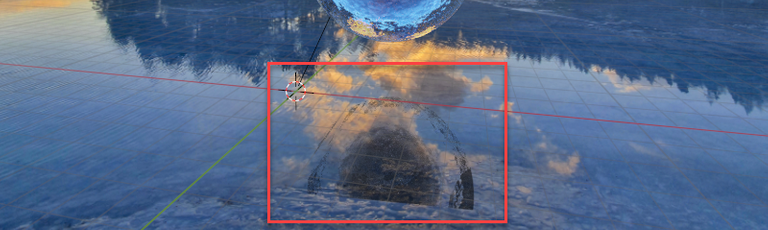
As you can probably see, this doesn't look very realistic yet. But just wait - Now we'll render the scene and get it into photoshop for some post-processing.
Post-Processing in Photoshop
Using the rendered reflection from the light catcher, I was able to create a pretty realistic looking reflection by simply duplication the sphere, turning it upside down, skewing it's perspective and doing som manual masking.
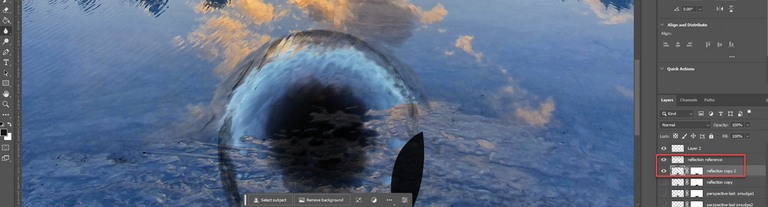
I know there are much better ways to do this directly in Blender, but this method worked excellent for the level that I'm currently at.
Hope you found this somewhat interesting or at least enjoyed the art! Stay tuned for the next installment of this series.
About the project
- Official blog/website: https://peakd.com/@fifthspatial
- Collection page on Neftyblocks: https://fifthspatial.com
Will take a look at Fifth Spatial during my free time! Looks cool!
Awesome <3
Congratulations @mightpossibly! You have completed the following achievement on the Hive blockchain And have been rewarded with New badge(s)
Your next target is to reach 1250 replies.
You can view your badges on your board and compare yourself to others in the Ranking
If you no longer want to receive notifications, reply to this comment with the word
STOPCheck out our last posts:
Congratulations @mightpossibly! You received a personal badge!
Wait until the end of Power Up Day to find out the size of your Power-Bee.
May the Hive Power be with you!
You can view your badges on your board and compare yourself to others in the Ranking
Check out our last posts: