[Esp/Eng] Dibujando a Ken (Street Figther)/Drawing Ken (Street Figther)
Saludos, amigos de la comunidad de @hivearte. Es un placer para mi el estar entre ustedes para traerles otro dibujo en donde se muestra el paso a paso para su elaboración. Y el dibujo que vamos a presentar se basa en uno de los personajes principales del videojuego Street Figther, Ken. Así que sin más preámbulos comencemos.
Greetings, friends of the @hivearte community. It is a pleasure for me to be among you to bring you another drawing where the step by step for its elaboration is shown. And the drawing that we are going to present is based on one of the main characters of the video game Street Figther, Ken. So without further ado let's get started.
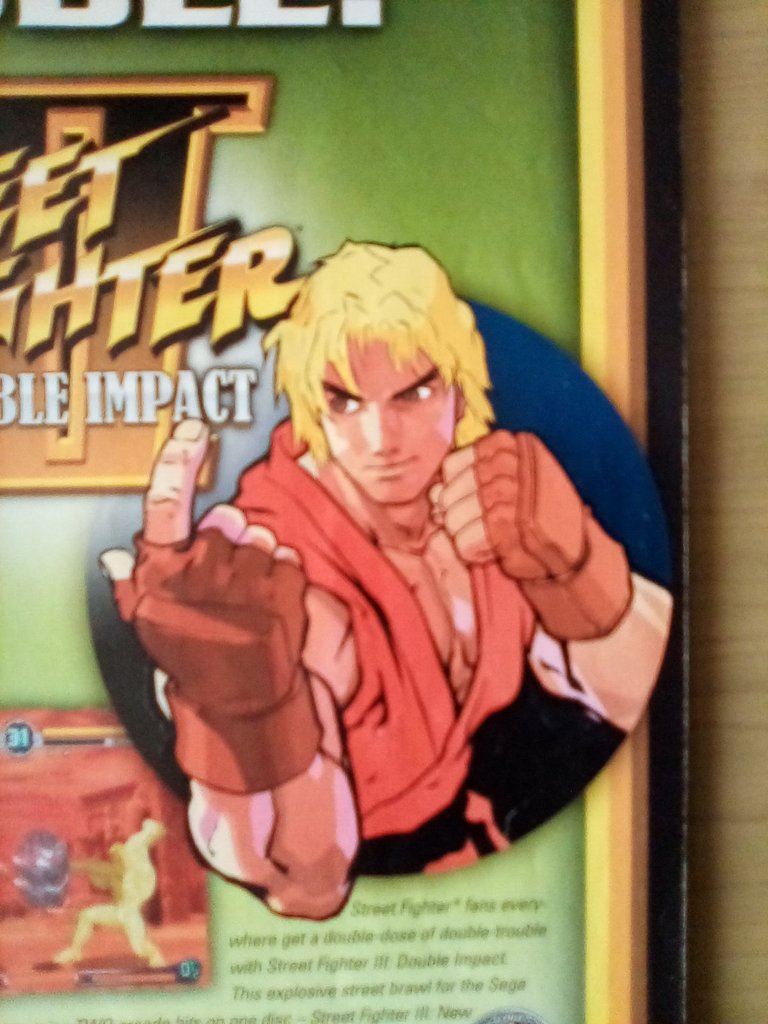
1- antes que nada, cabe decir que, este diseño fue extraído de una revista de videojuegos, la cual entre unas de sus páginas se estaba promocionando la salida a la venta del videojuego de Street Figther: Double Impact; para la consola Sega Dreamcast.
1- first of all, it should be said that, this design was taken from a video game magazine, which among some of its pages was promoting the release of the video game Street Figther: Double Impact; for the Sega Dreamcast console.
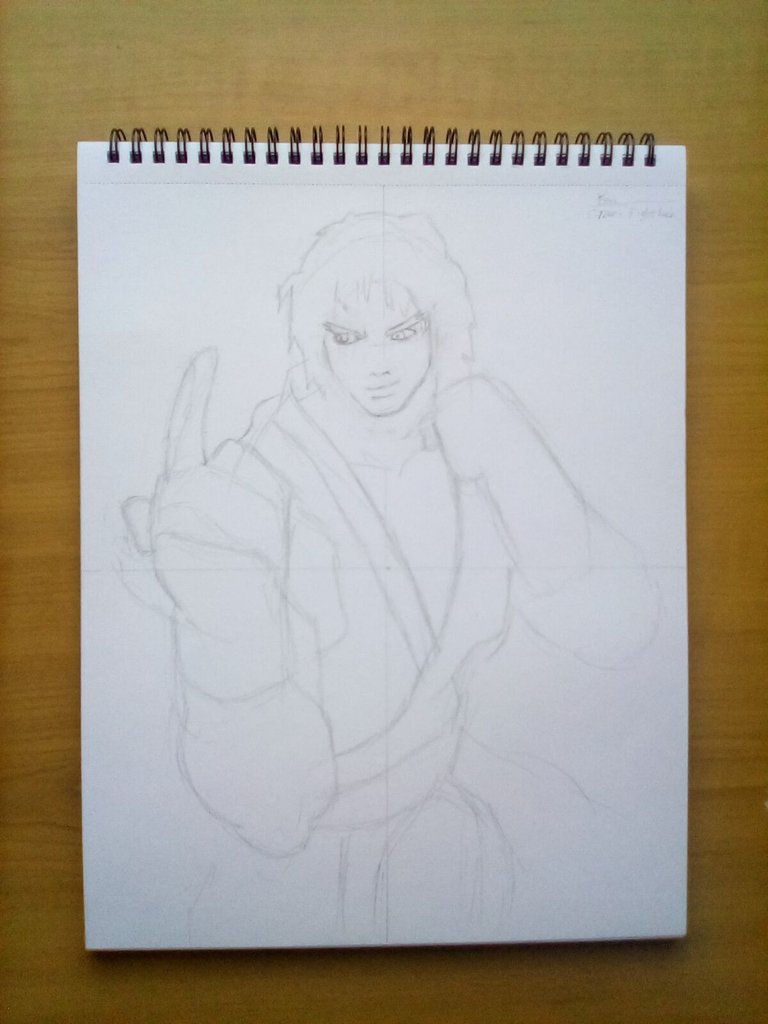
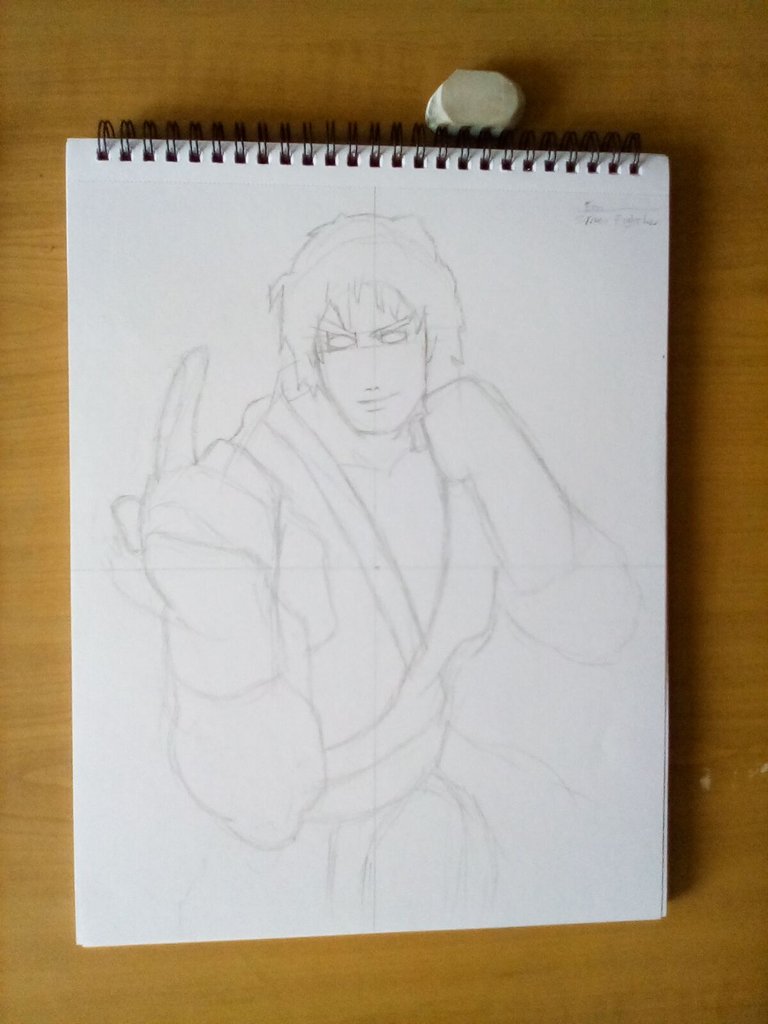
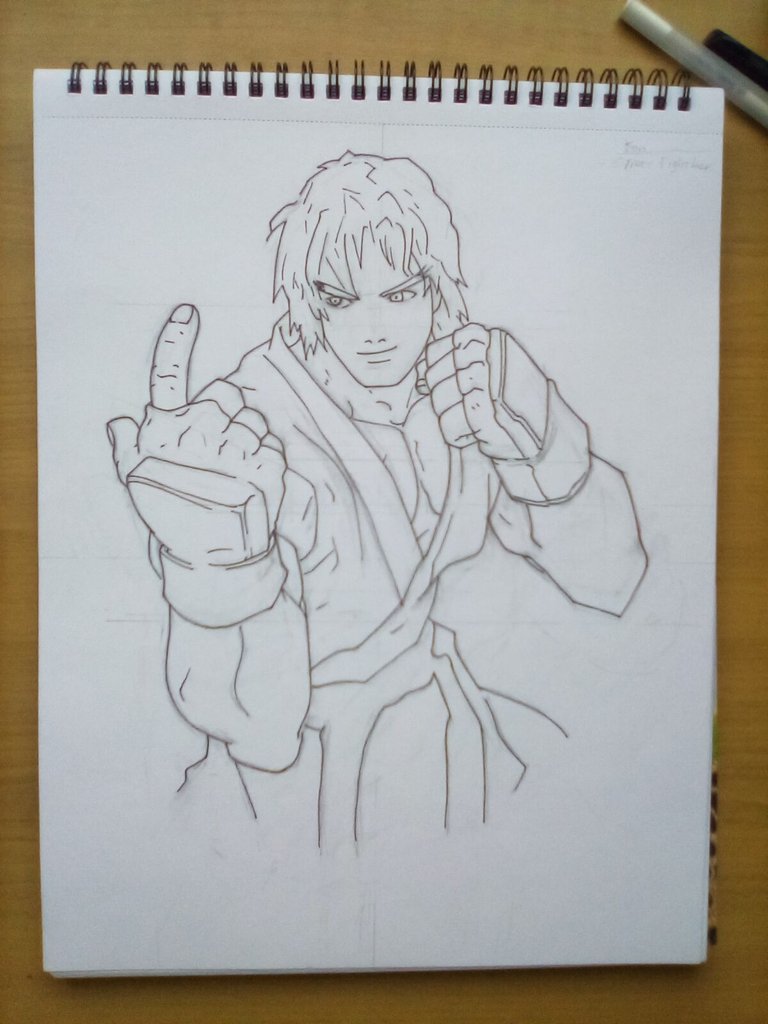
2- acto seguido, tomamos nuestro block -recomiendo los que están libre de acido, ya que permite conservar la calidad de la hoja y el dibujo ante el transcurso del tiempo- para trazar un par de líneas cruzadas entre si con un lápiz 3H, las cuales vendrían siendo el eje X y Y, teniendo como fin permitirnos situarnos justo en medio de la hoja. Para después, crear una silueta del personaje a la cual iremos dando forma hasta que logremos conseguir la imagen desea, la más parecida posible al original.
2- then, we take our block - I recommend those that are acid-free, as it allows to preserve the quality of the sheet and the drawing over time - to draw a couple of crossed lines with a 3H pencil, which would be the X and Y axis, in order to allow us to place ourselves right in the middle of the sheet. To then create a silhouette of the character to which we will be giving shape until we manage to get the desired image, the closest possible to the original.
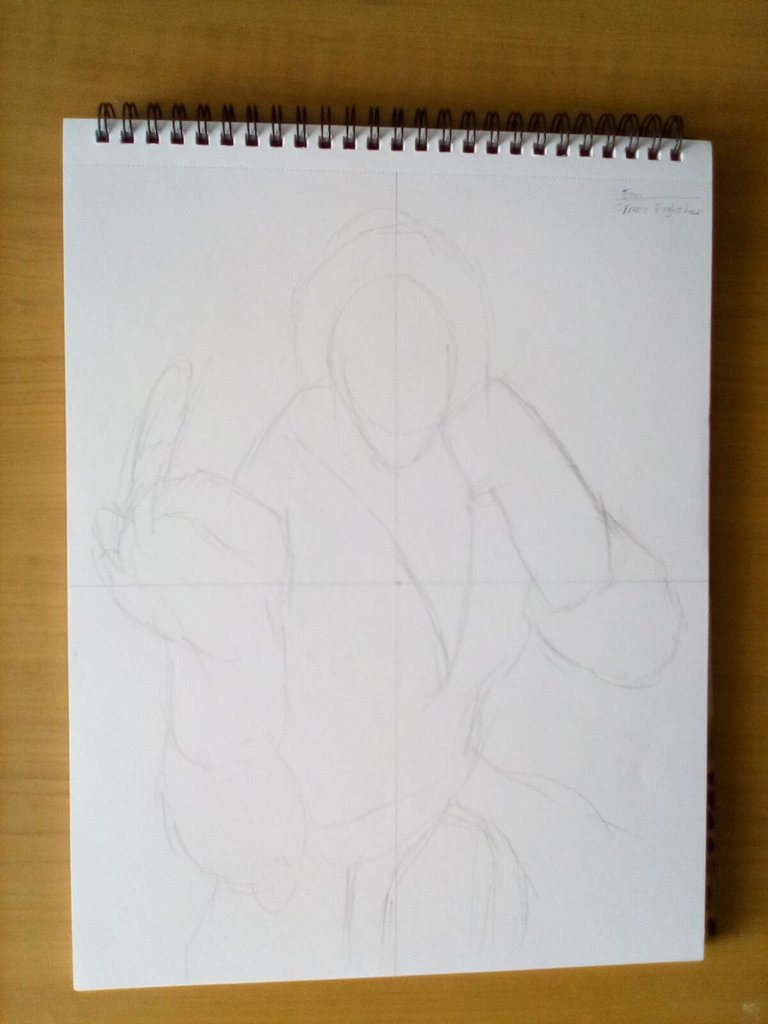

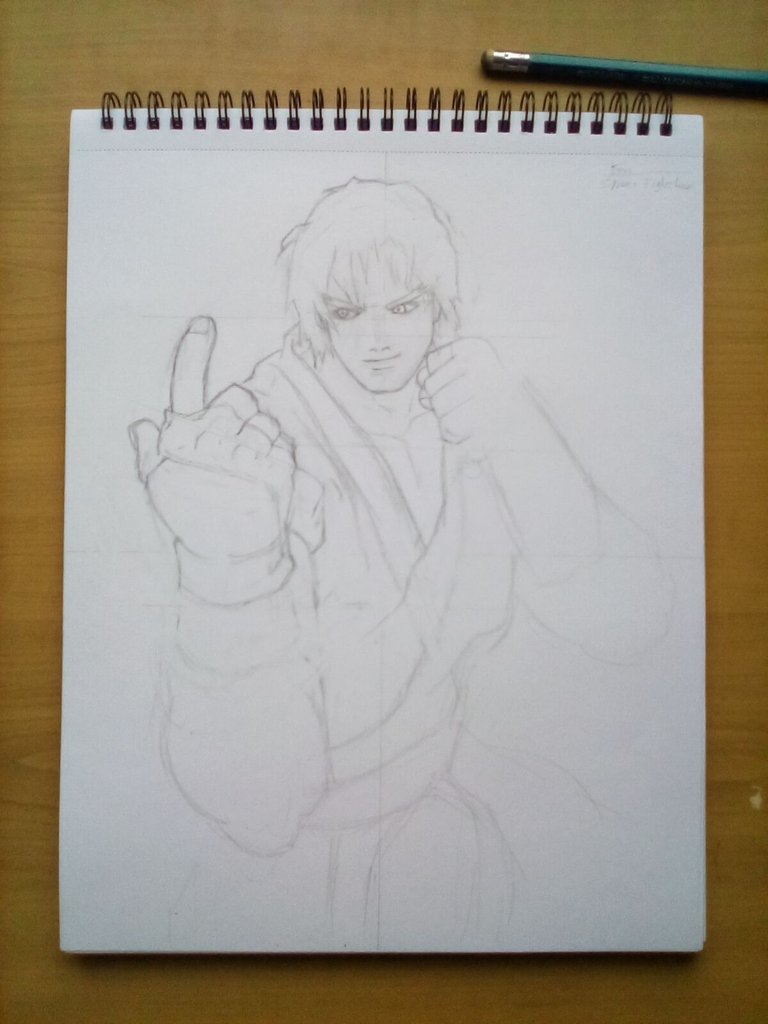
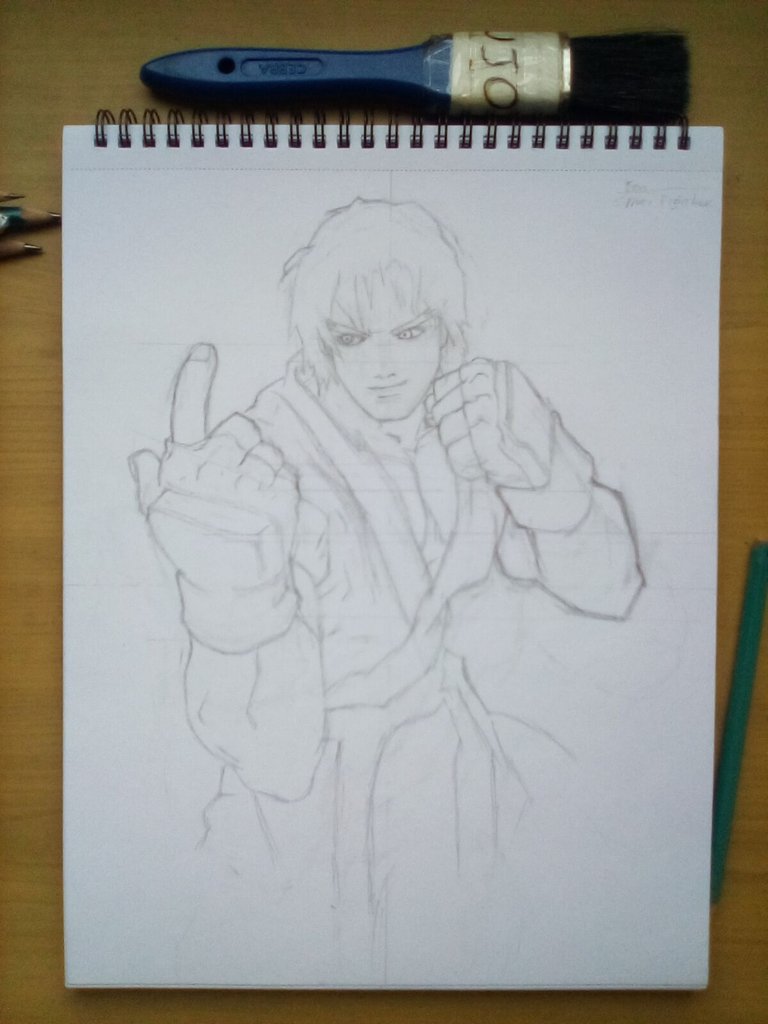

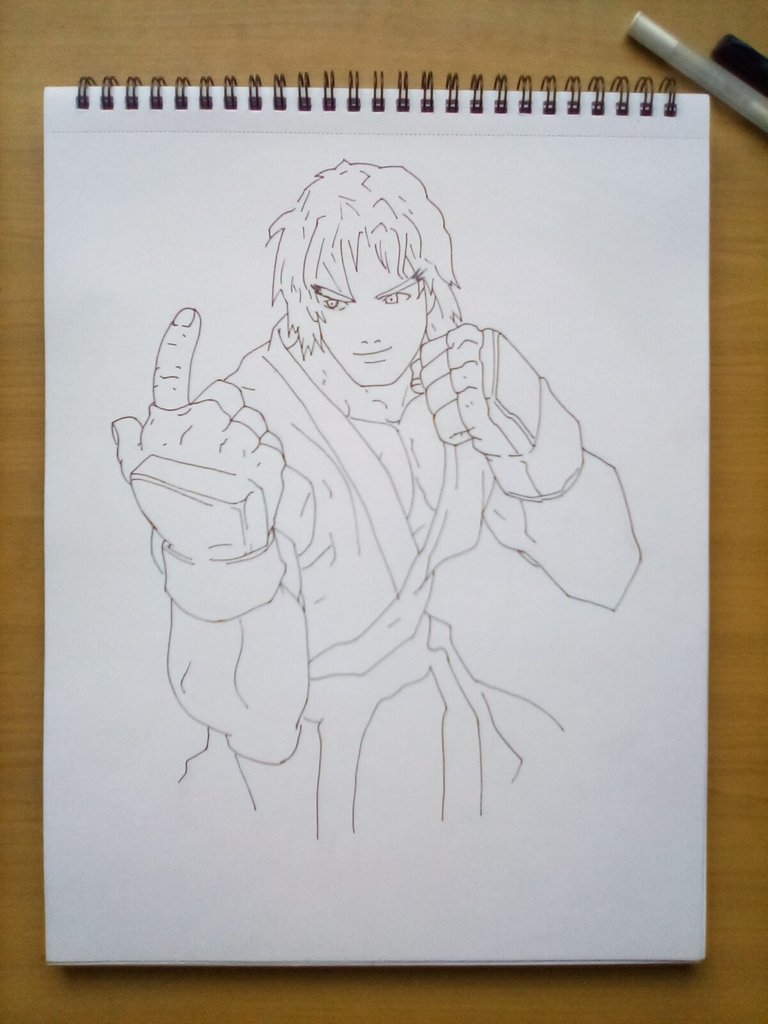
3- ya en este punto procedemos a usar un marcador de punta fina para después retirar todo el grafito con un borrador blanco escolar.
3- already at this point we proceed to use a fine-tipped marker and then remove all the graphite with a white school eraser.
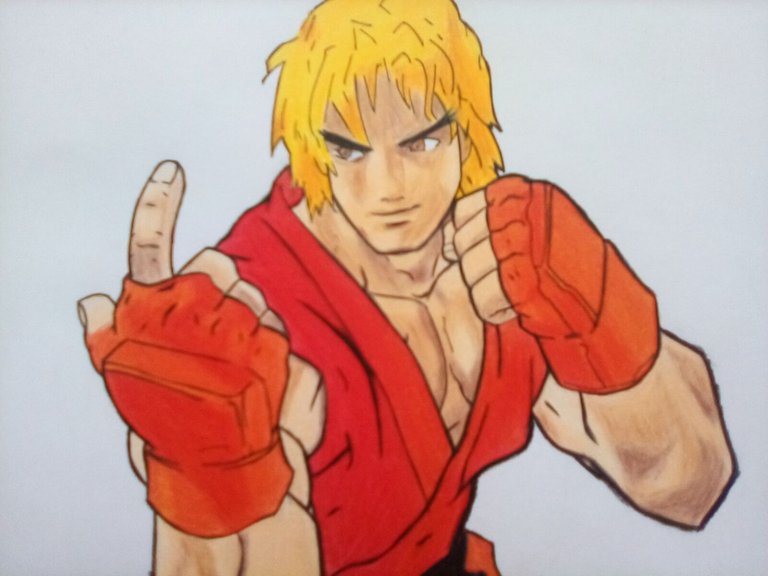
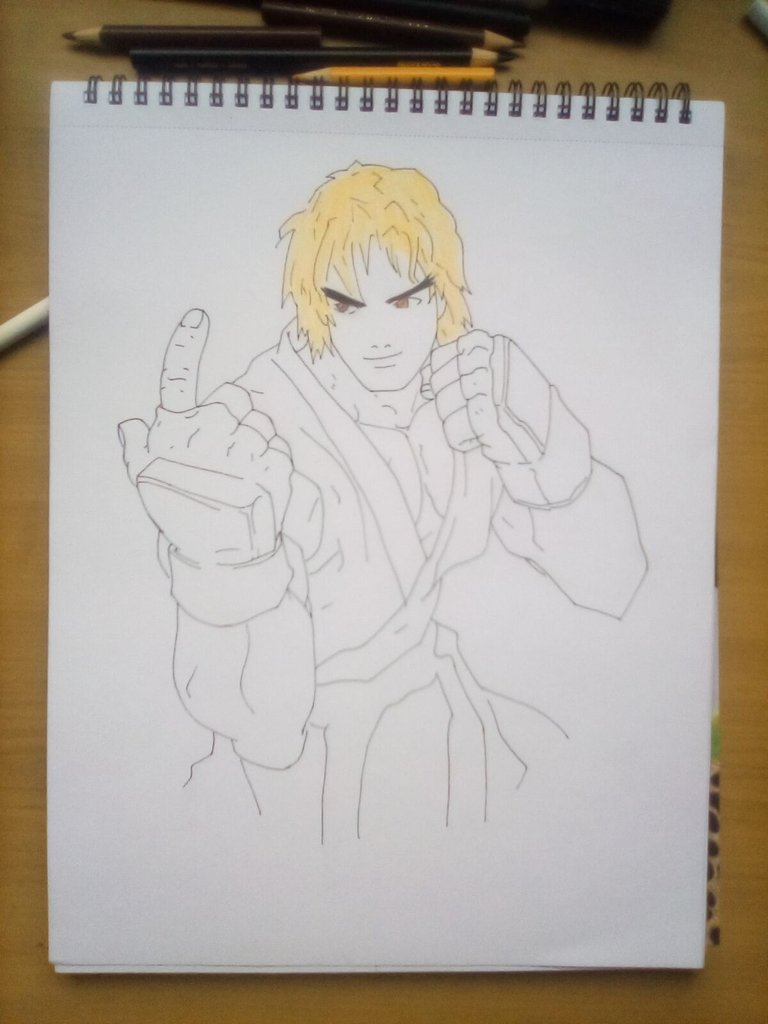
4- ahora, pintamos al personaje desde el cabello, en donde se aplicará una mezcla entre amarillo y marrón claro en las áreas oscuras, y tan sólo amarillo en las claras. En los ojos usamos marrón claro y marrón, para denotar efectos de luz y sombras. El rostro irá de durazno en las áreas claras, y mezcla de durazno con marrón claro y marrón en el resto.
4- now, we paint the character from the hair, where a mixture between yellow and light brown will be applied in the dark areas, and only yellow in the light ones. In the eyes we use light brown and brown, to denote light and shadow effects. The face will go peach in the light areas, and mix peach with light brown and brown in the rest.
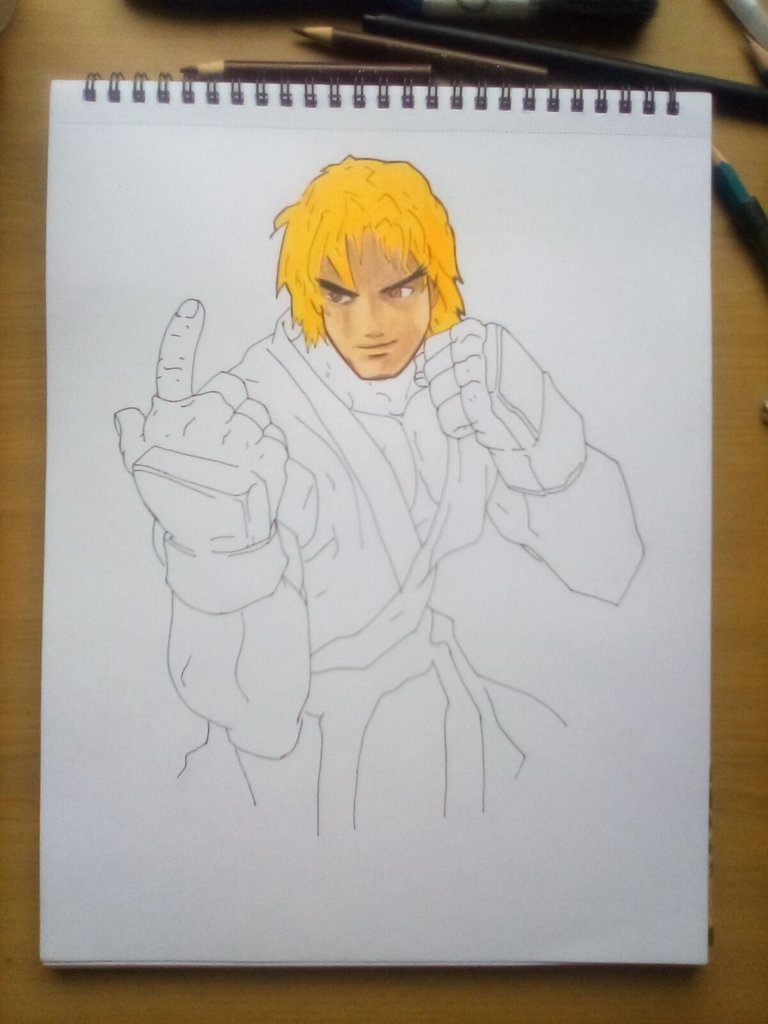
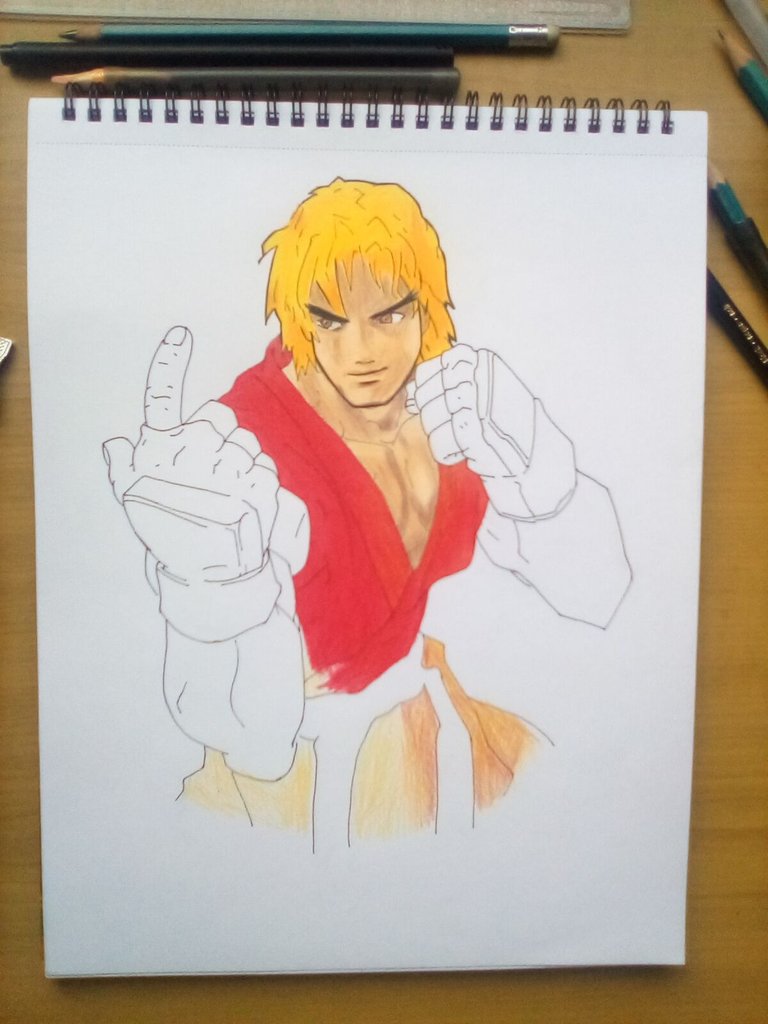
5- el traje contendrá un degradado va desde el amarillo, naranja y rojo.
5- the suit will contain a gradient ranging from yellow, orange and red.
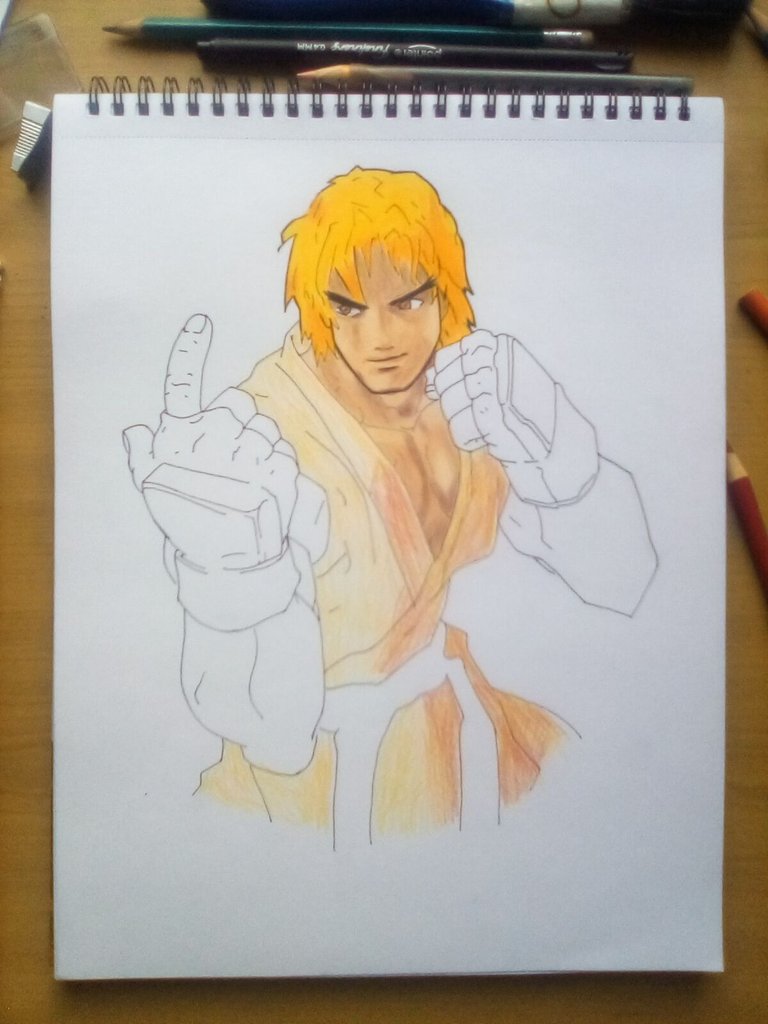
6- el guante también tendrá un degradado entre el amarillo, naranja (este será el color principal) y rojo. El resto del brazo tendrá los mismos colores de la cara.
6- the glove will also have a gradient between yellow, orange (this will be the main color) and red. The rest of the arm will have the same colors of the face.
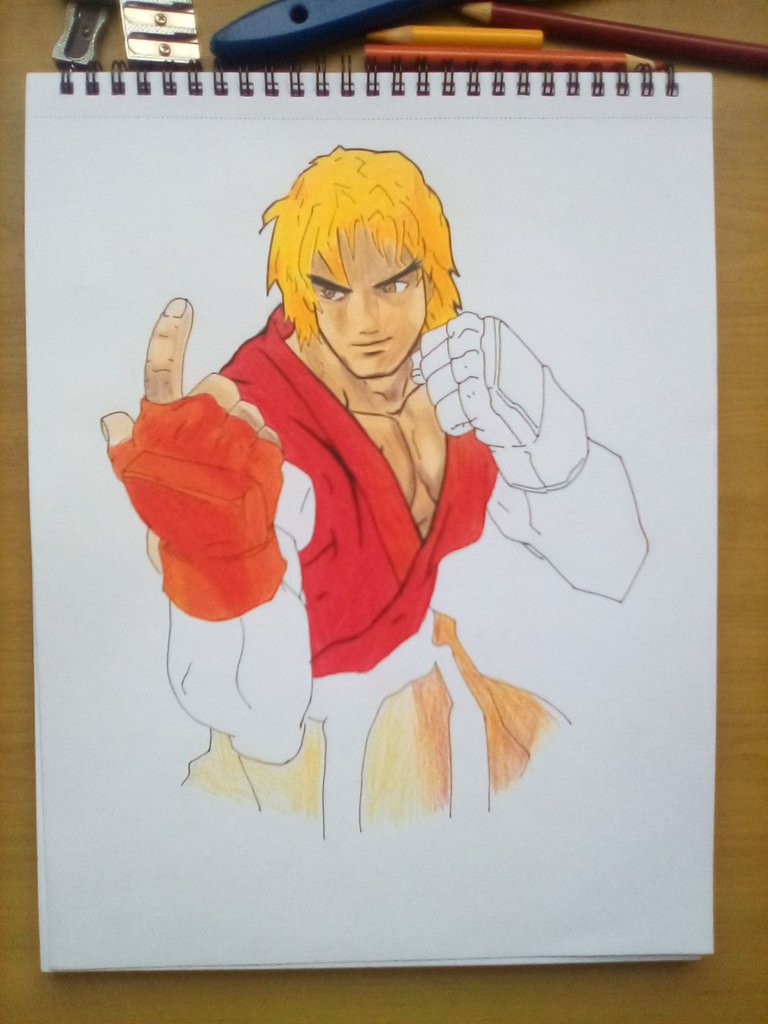
7- procedemos con los mismos colores ya antes mencionados en sus respectivas áreas, hasta completarlo todo.
7- we proceed with the same colors already mentioned above in their respective areas, until everything is completed.
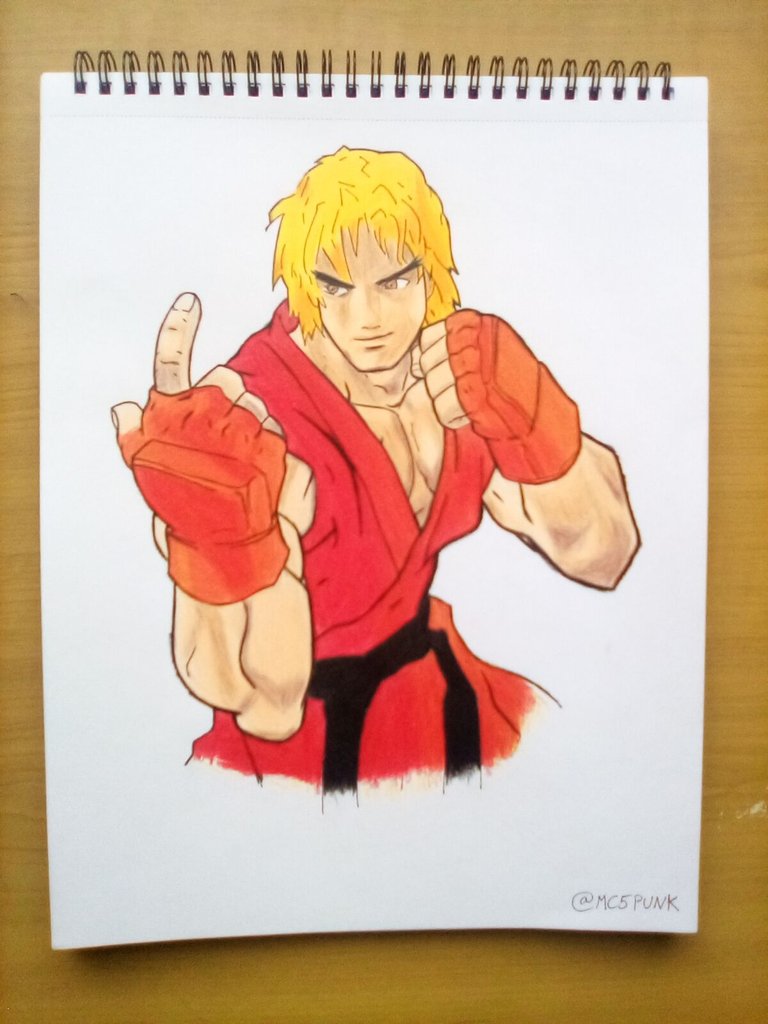
Y listo! Hemos concluido con nuestro trabajo 😃 Que les parece? 😁
And that's it! We are done with our work 😃 What do you think?
Espero que esto les sirva de motivación para hacerlo. Y recuerden que pueden comentar al final de esta publicación, los estaré leyendo y dando respuesta. También agradezco todo el apoyo recibido por parte de todos ustedes.
I hope this will motivate you to do it. And remember you can comment at the end of this post, I'll be reading and giving you feedback. I also appreciate all the support received from all of you.
Sin más que decir nos vemos en una próxima entrega.
Without more to say I'll see you in a next installment.
Hasta entonces😎👍
Until then 😎👍
Materiales usados/Materials used
Lápiz 3H;
Block Pointer;
Regla;
Brocha;
Lápices de colores Crayola;
Marcador de punta fina;
Borrador blanco escolar;
Afilador de lápiz.
3H Pencil;
Block Pointer;
Rule;
Brush;
Crayola colored pencils;
Fine point marker;
School white eraser;
Pencil sharpener.
Fuente de las imágenes/Source of the images
Imágenes capturadas con mi tableta Amazon Fire 8.
Images captured with my Amazon Fire 8 tablet.
Traducido con Deepl.com