FOCUS CHALLENGE: 2 modelos sencillos de Pulseras a crochet 🧶 [esp/eng]
Saludos amigos de Needle work Monday, deseo que todos tengan un feliz y bendecido día 🤗
Hoy vengo a unirme al desafío FOCUS CHALLENGE, les admito, no es sencillo tomar fotografías un poco profesionales sobre todo en la parte de la buena iluminación, me costó un poco, de verdad hice mi mayor esfuerzo, espero les gusten y aquí les dejo mi primera participación.
Estaba tejiendo y mi hija de 10 años quedó encantada, ella está entrando en la edad que desean andar arregladas y con muchos accesorios y me pidió que le hiciera unas Pulseras para ella lucirlas y que fuesen muy coloridas, para ella combinarse con sus atuendos, me pareció excelente su idea así que me puse manos a la obra y le hice 2 ideas fáciles y muy lindas, aquí les comparto el proceso, espero les gusten.
Con el tejido podemos inventar miles de maneras de hacer creaciones increíbles unas fáciles, otras no tanto pero con resultados hermosos, aquí te muestro estos sencillos pasos para crear dos lindas pulseras para que combines tus outfit de una manera original.

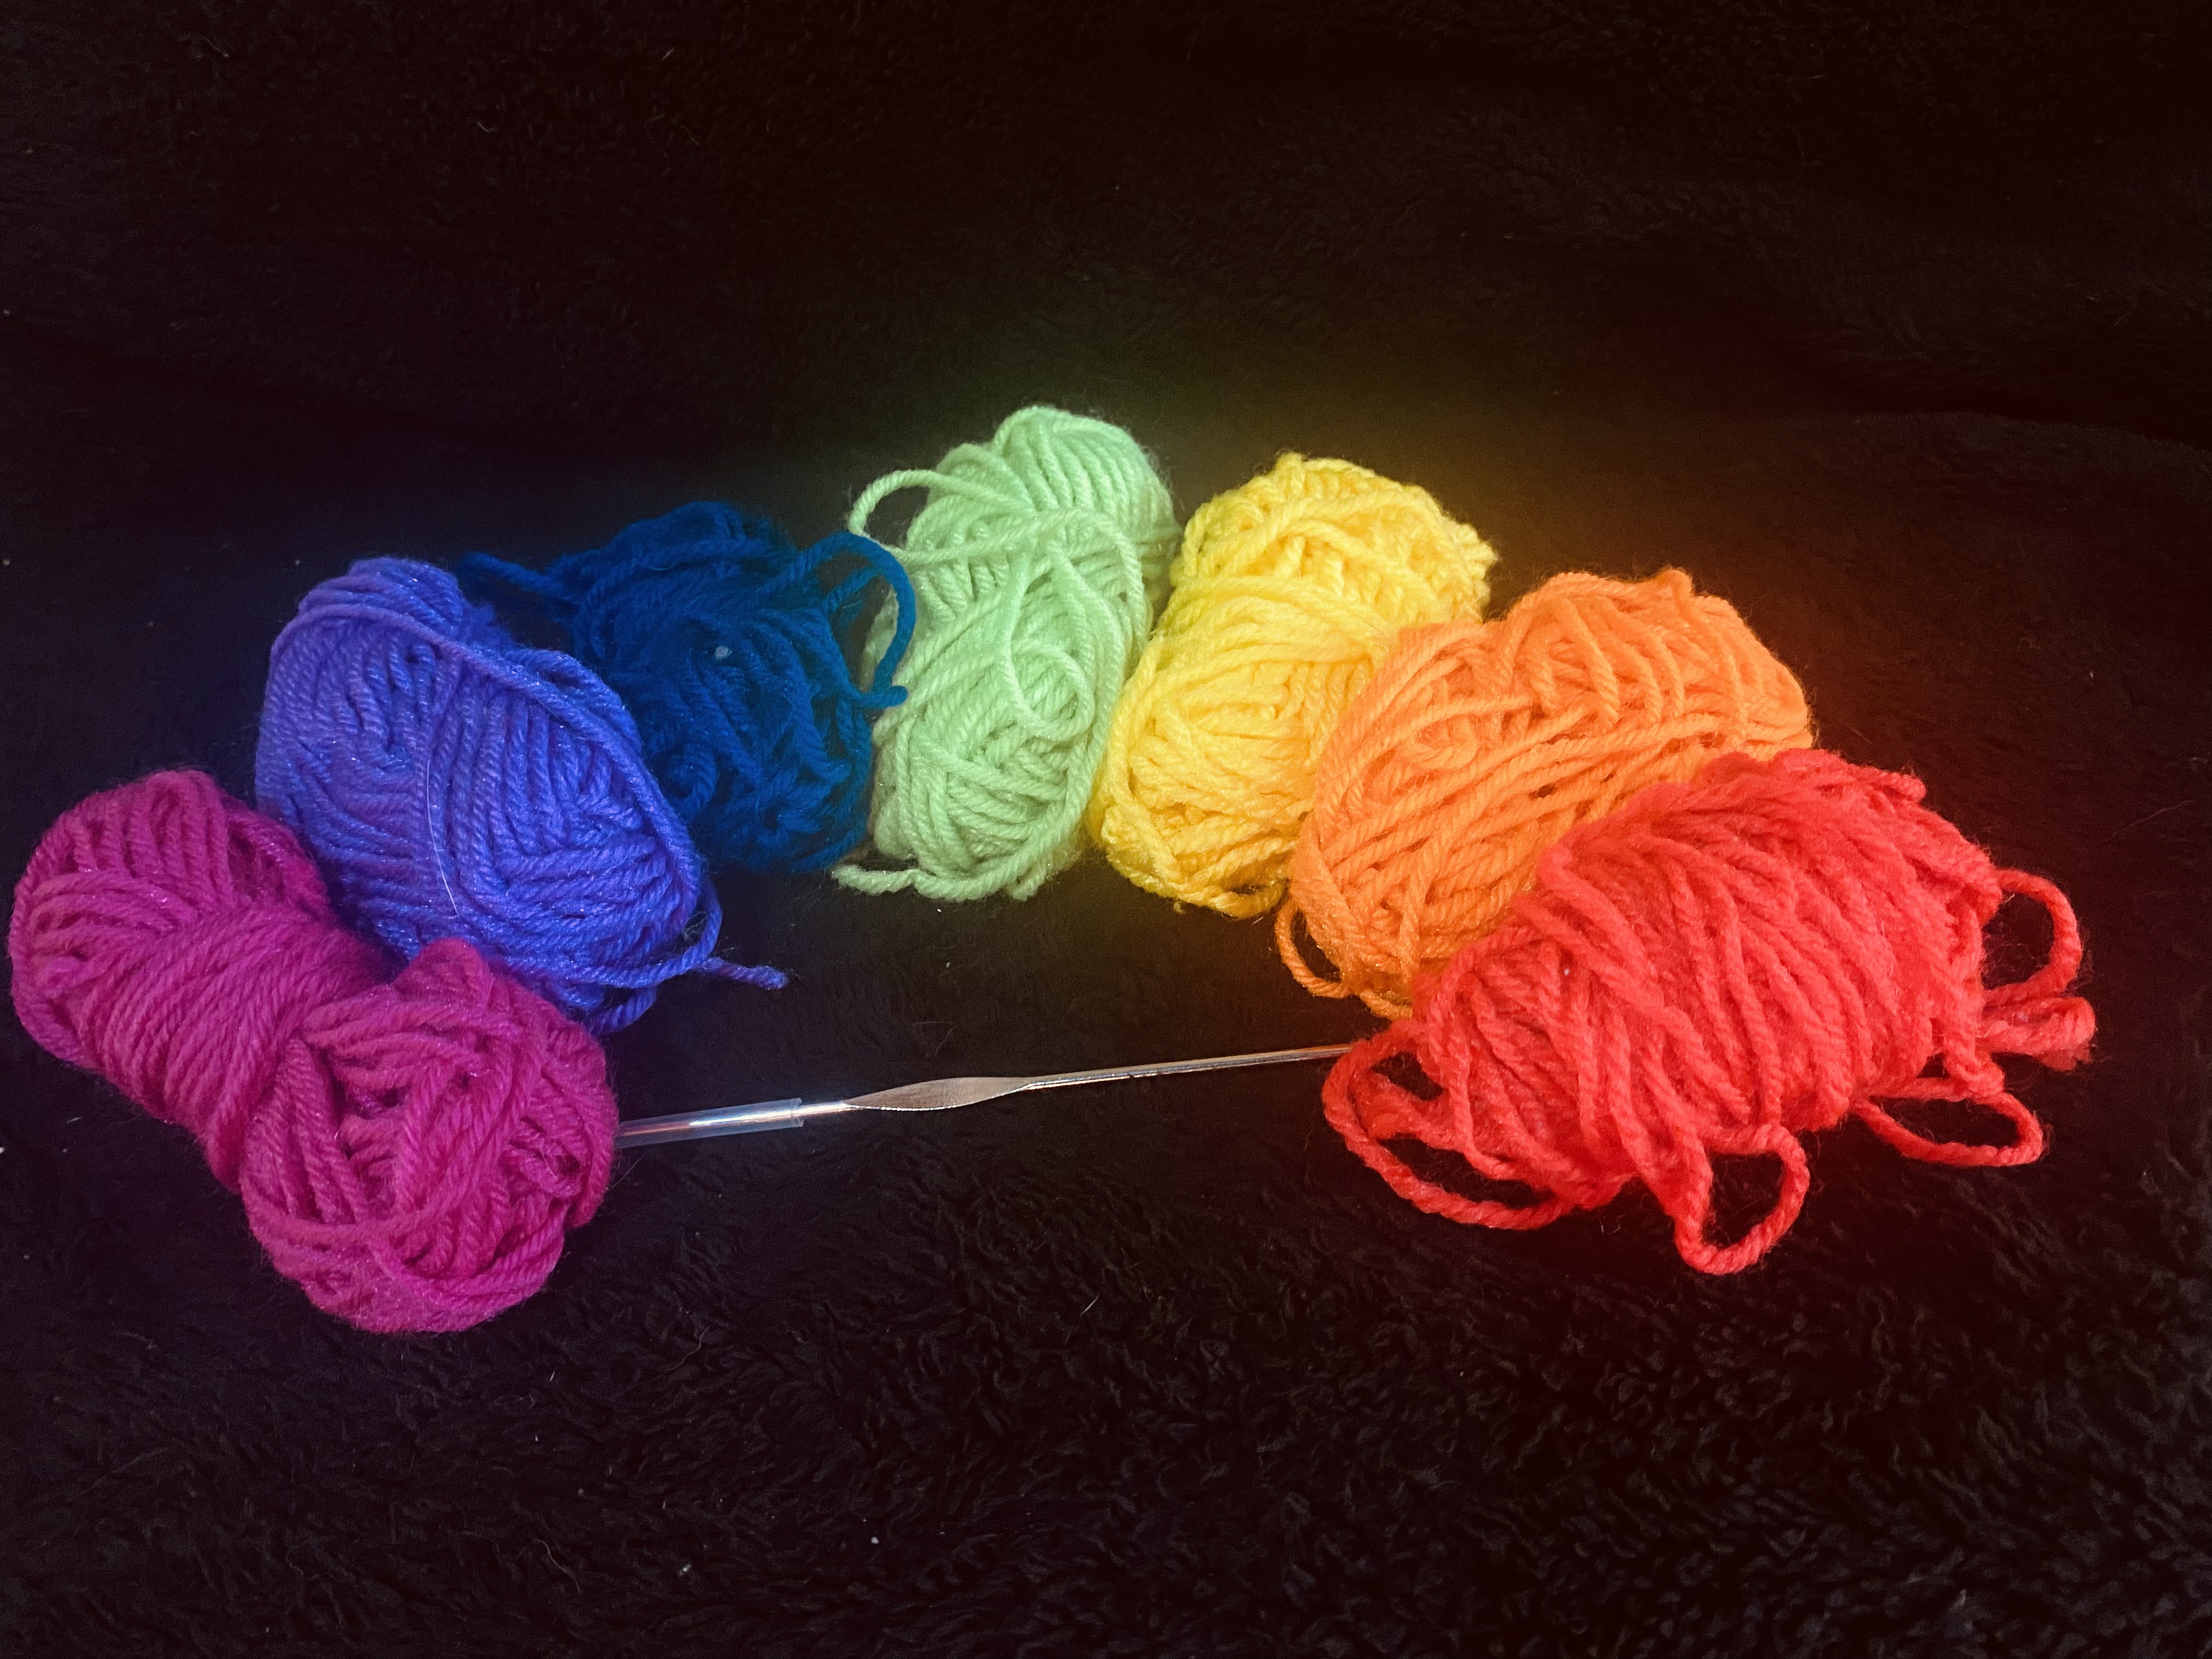
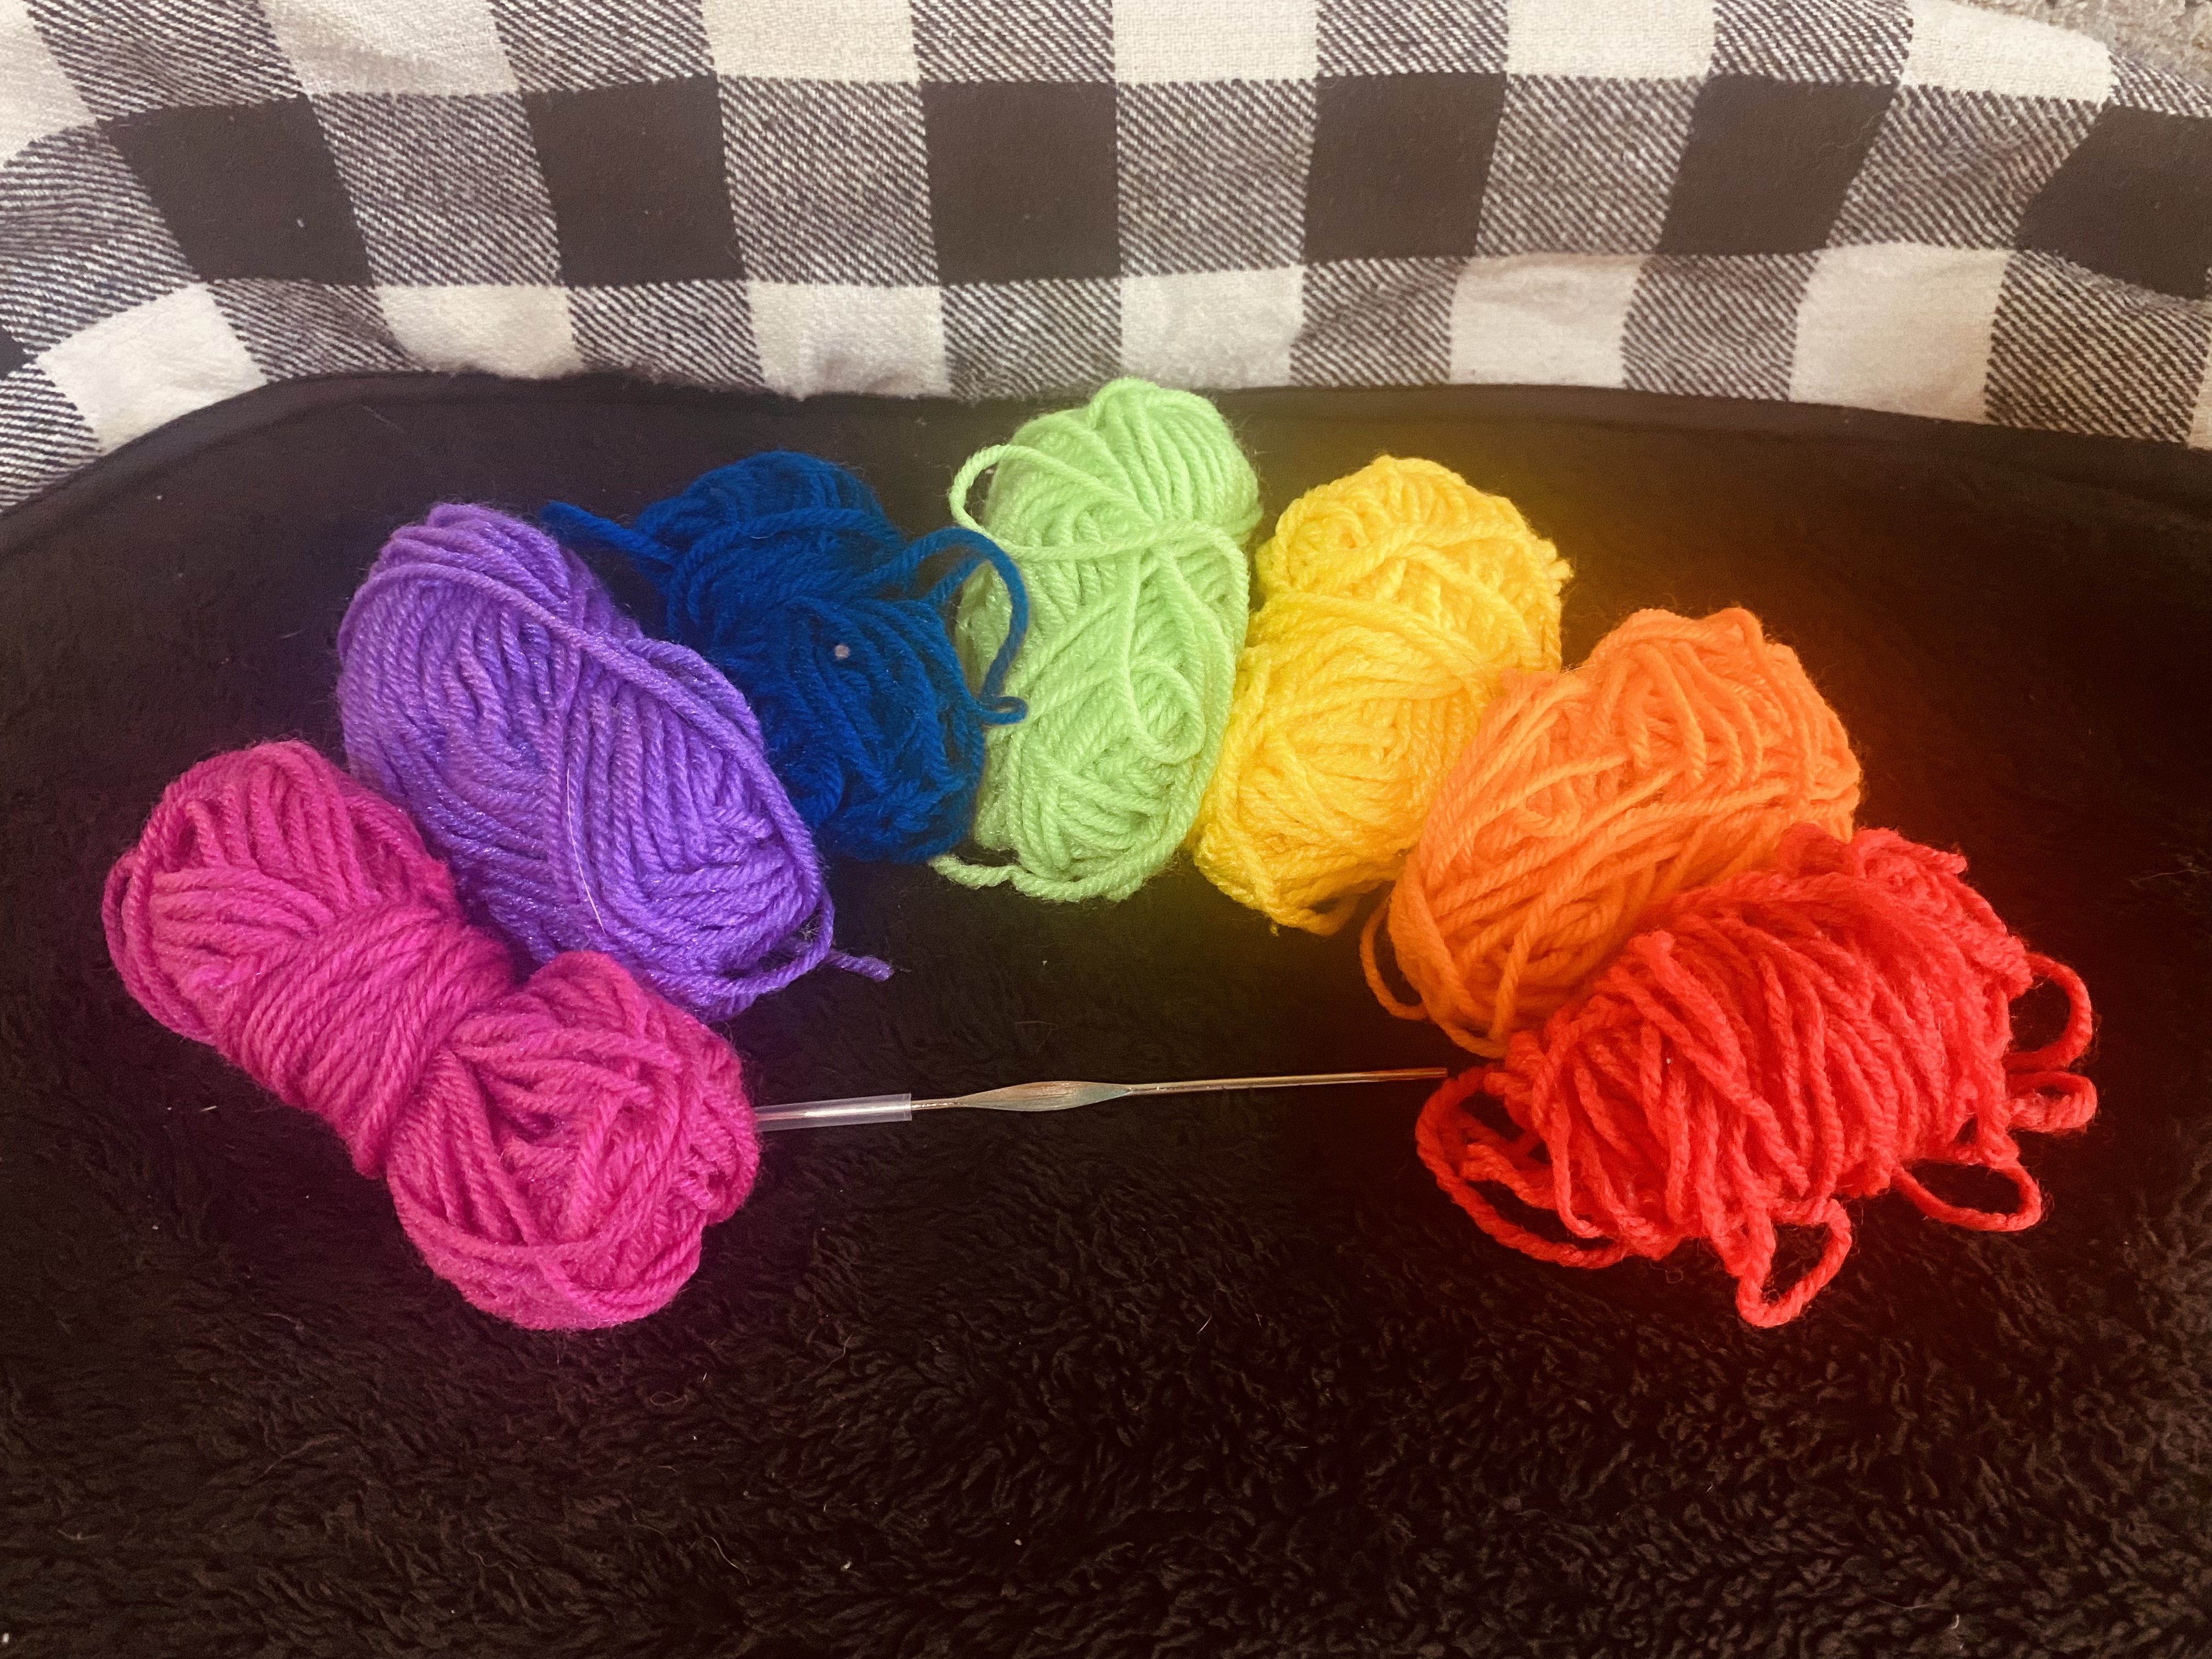
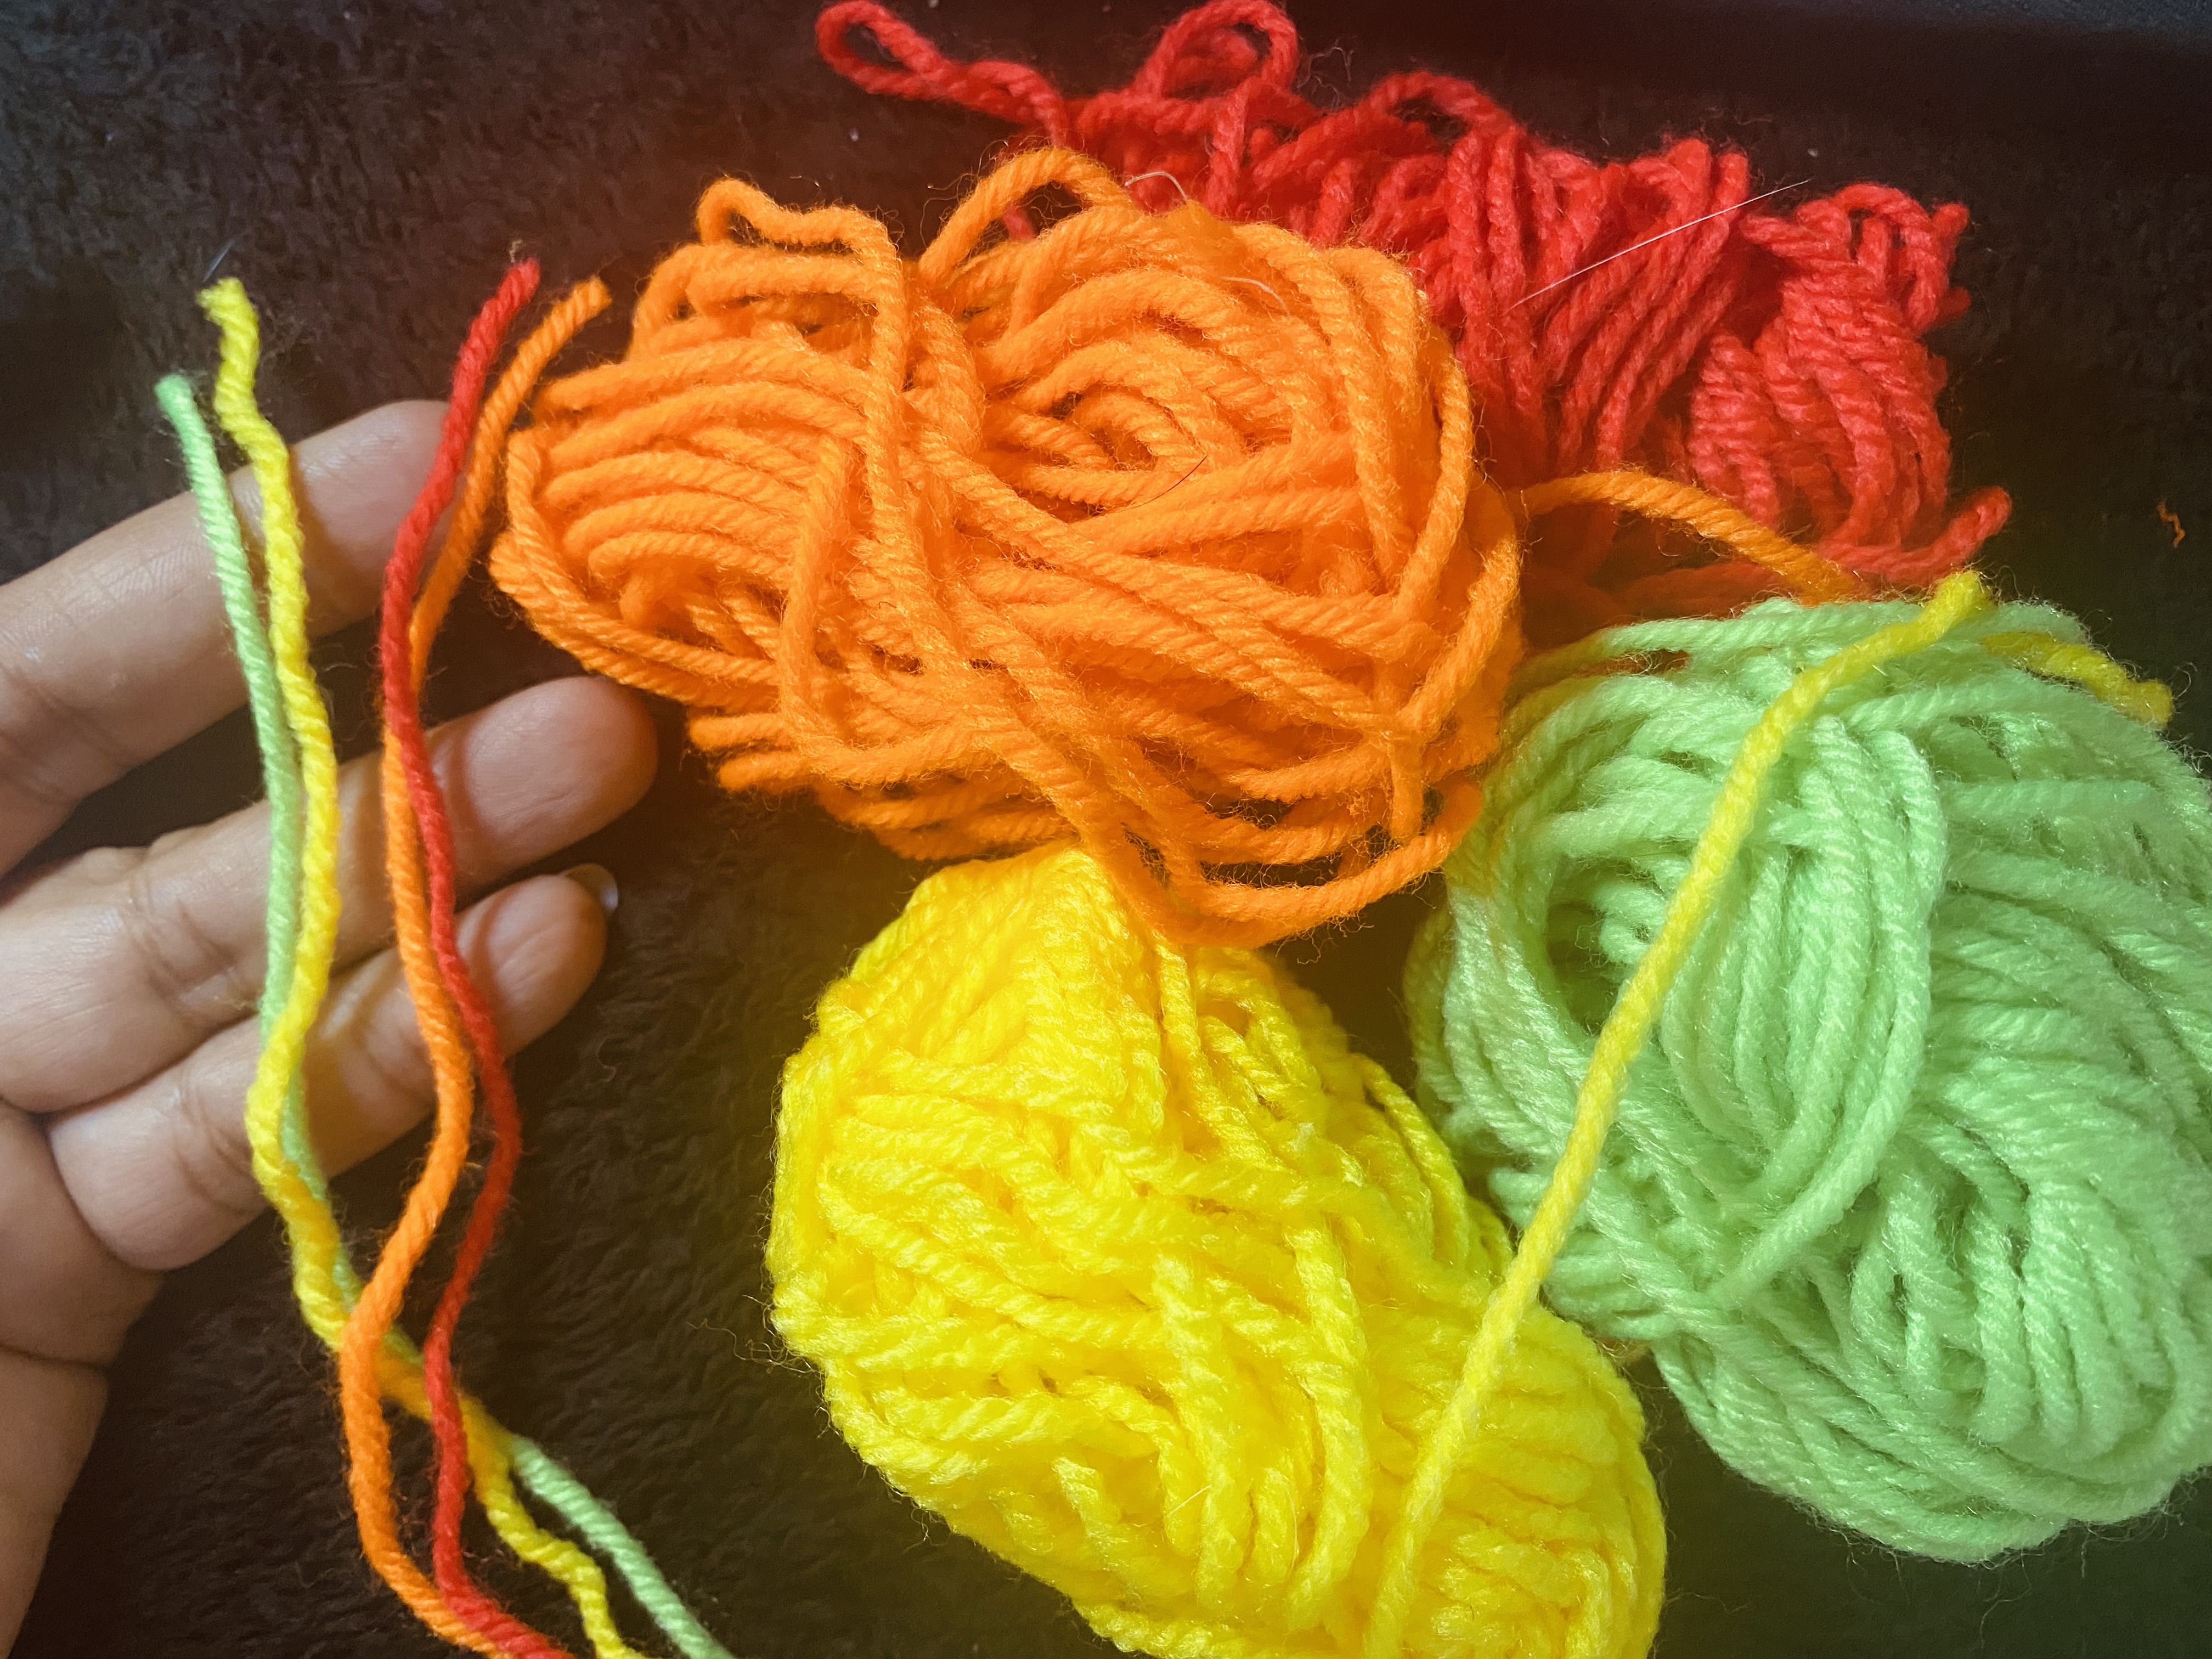
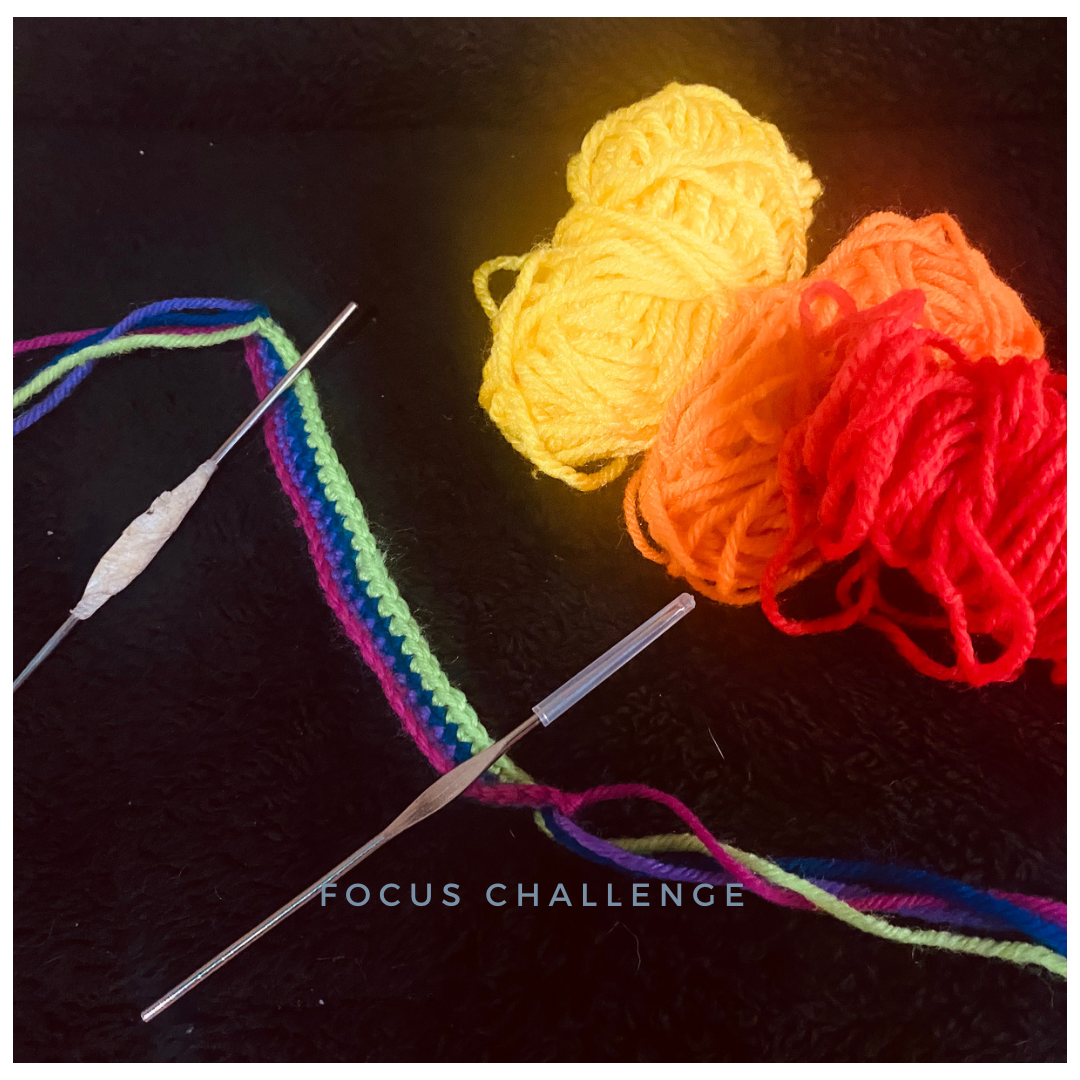
MATERIALES
- estambres de colores variados
- agujas de tejer
- tus hermosas manos y creatividad para dedicar solo unos minutos a hacer estas lindas pulseras

PASO A PASO
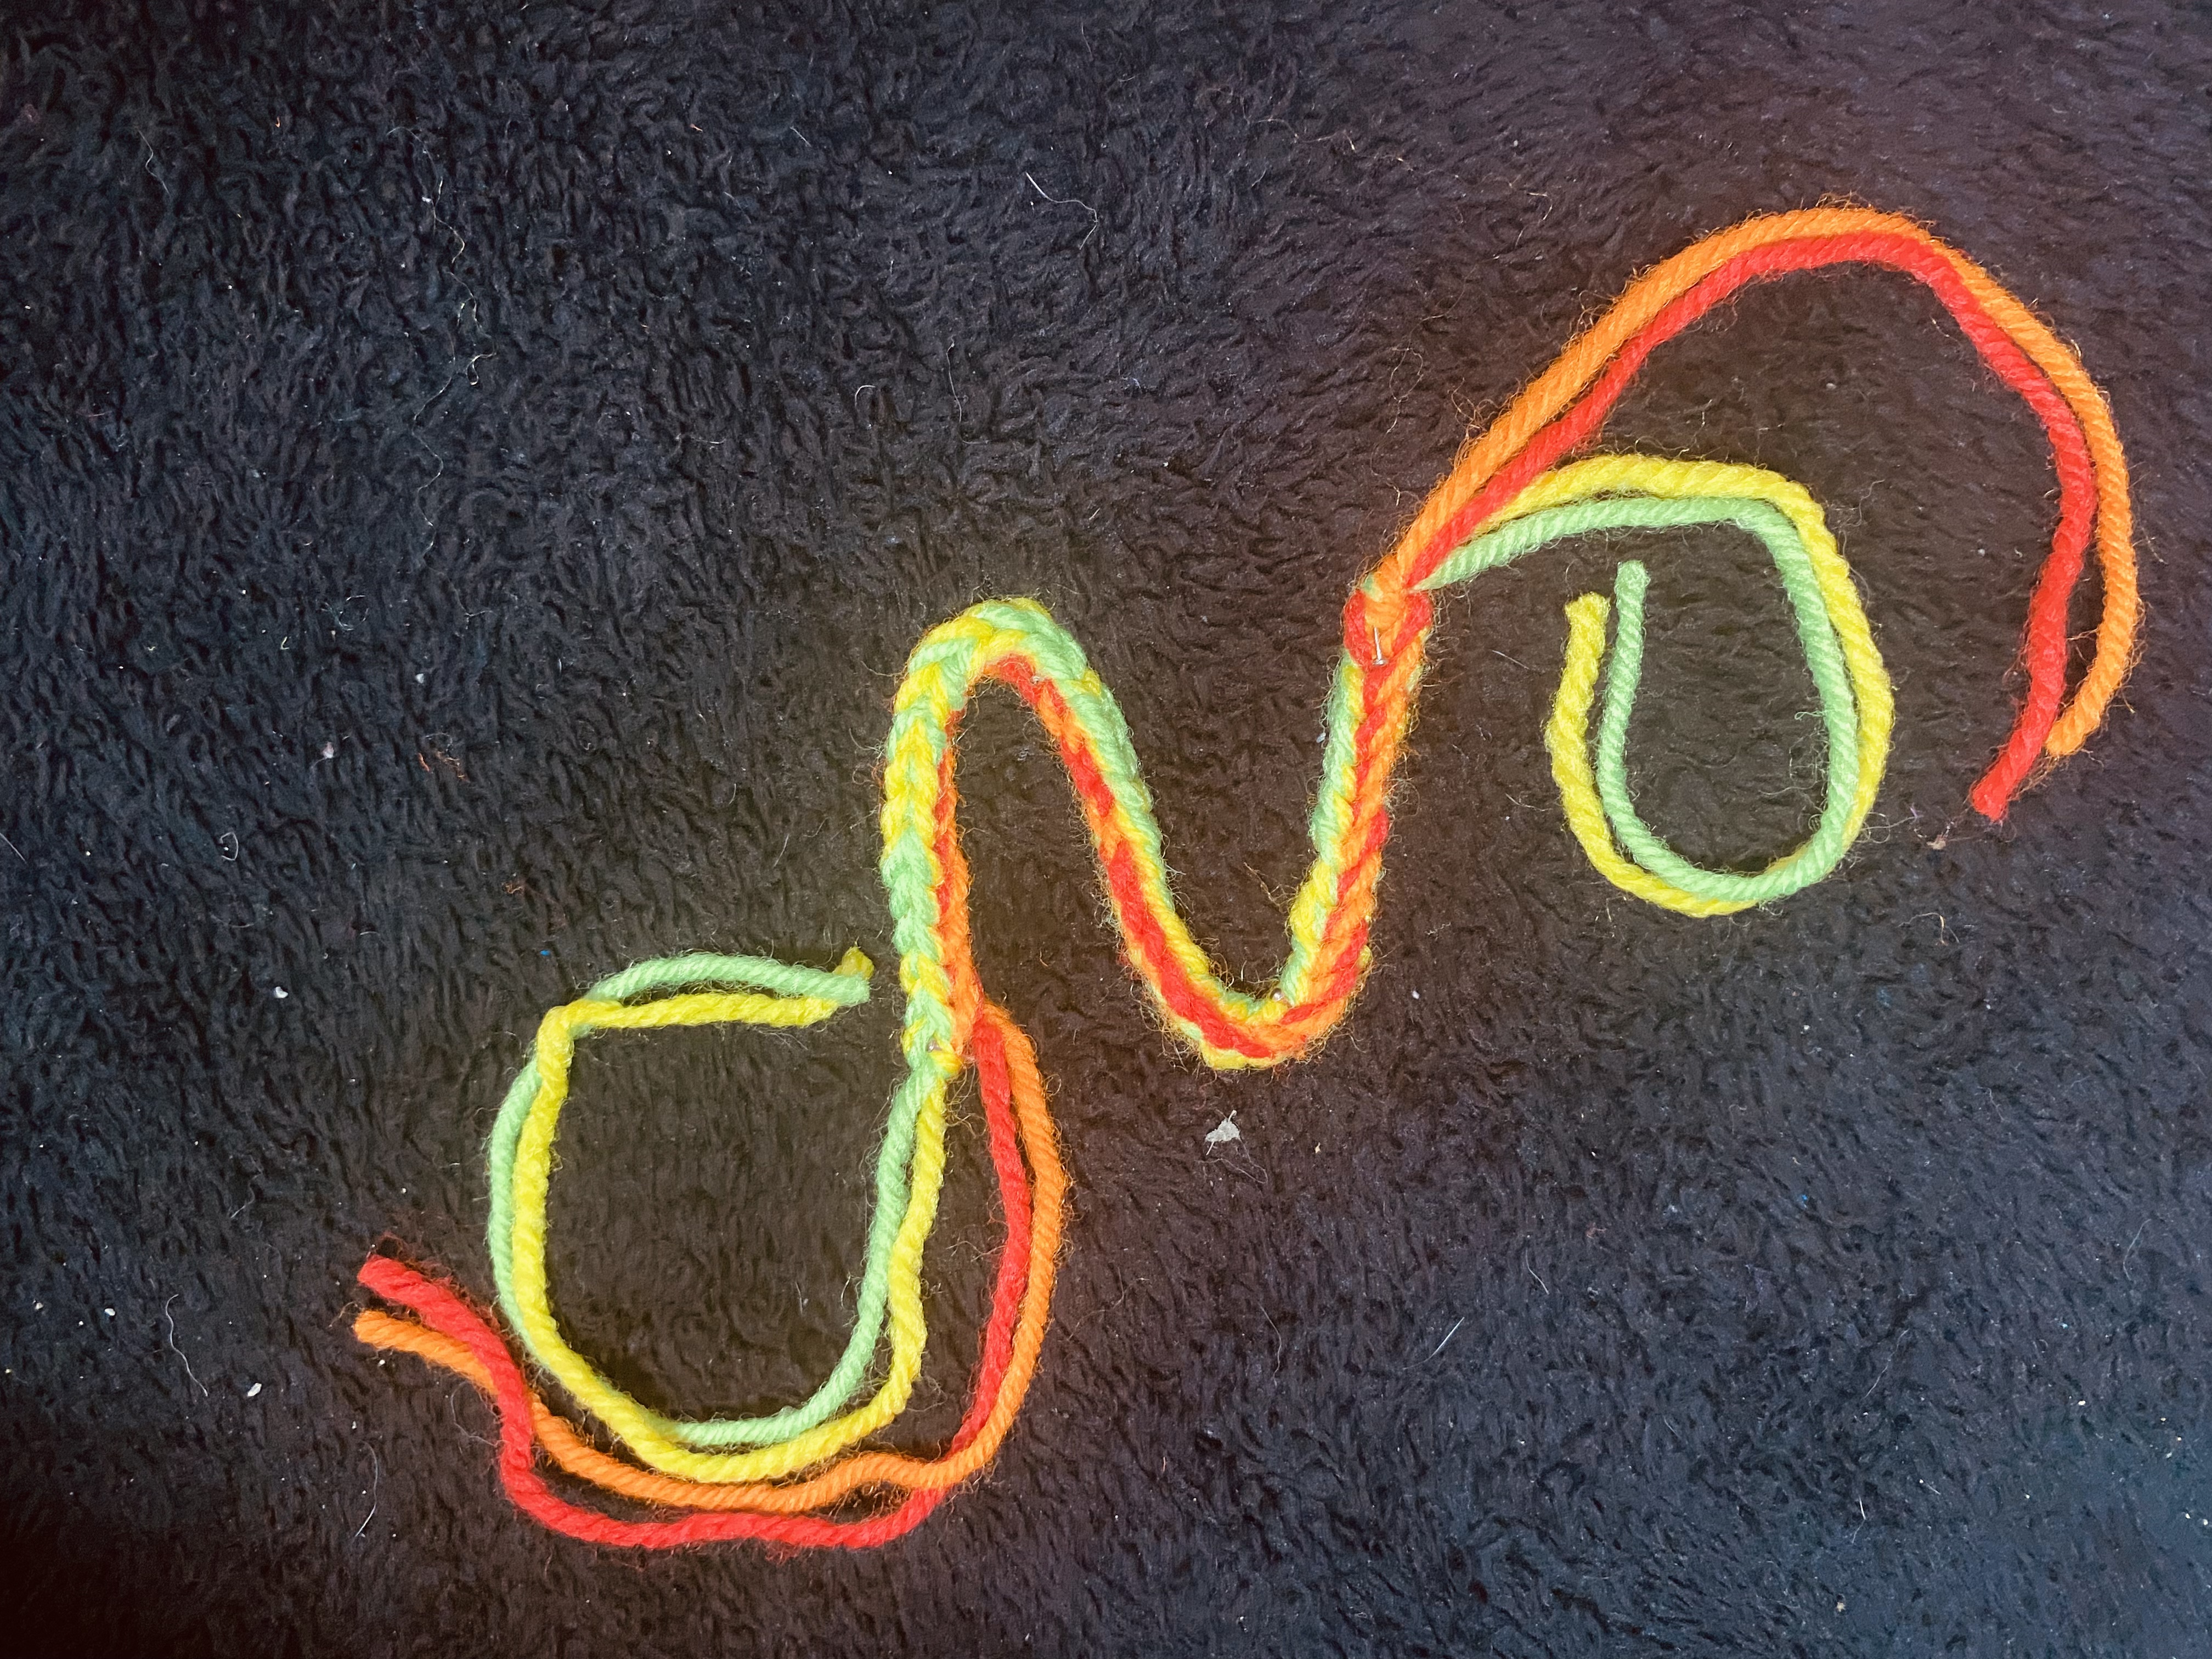
PRIMERA PULSERA
Para este tejido utilice aguja número 0, en esta marca de agujas este número es grueso y me servirá para la cantidad de hilos que utilizaré .
El primer modelo de pulsera es muy sencillo, vamos a tomar 4 colores diferentes de estambre, se gasta tan solo una tira de aproximadamente 60 cm de cada color.
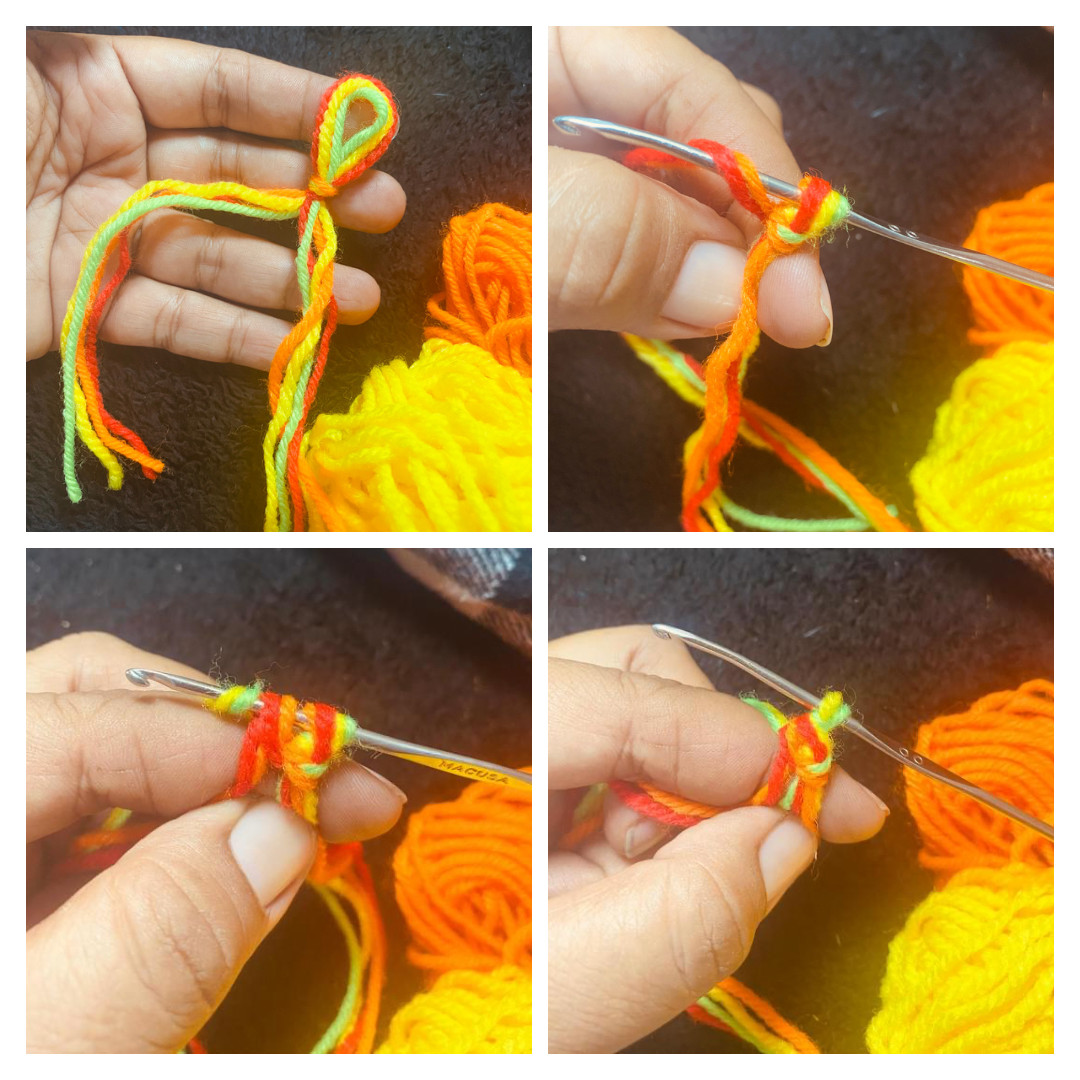
Hacemos la primera cadena para fijar el tejido, vamos a dividir a la mitad y trabajaremos el tejido de esta manera; 2 hebras la pasamos por encima de la aguja y hacemos un punto con las otras 2 hebras, repetimos este paso hasta lograr el tamaño deseado siempre manteniendo las 2 hebras de color en el tejido.
Ves que sencillo! Y puedes hacer increíbles combinaciones con la cantidad de colores que desees


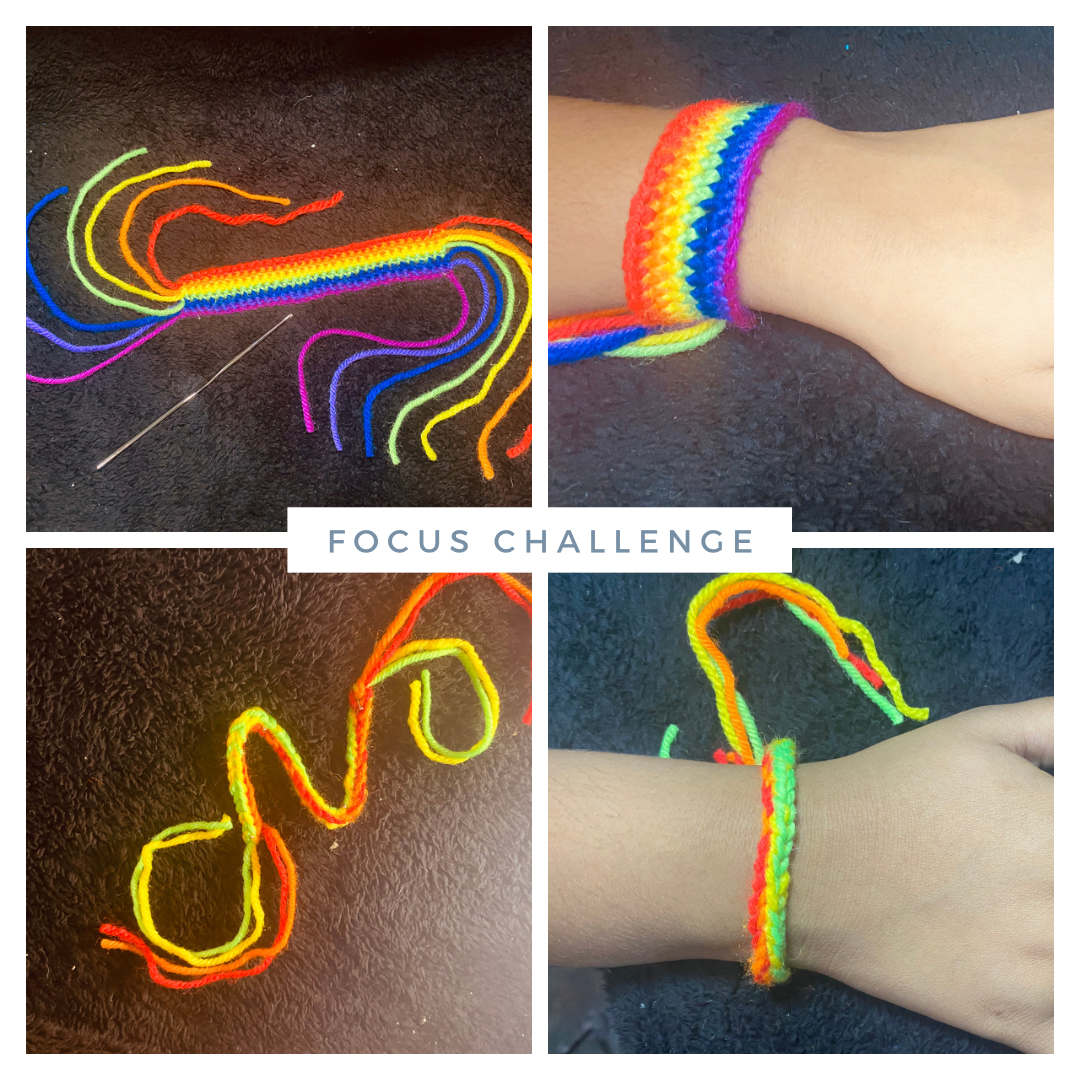
SEGUNDA PULSERA
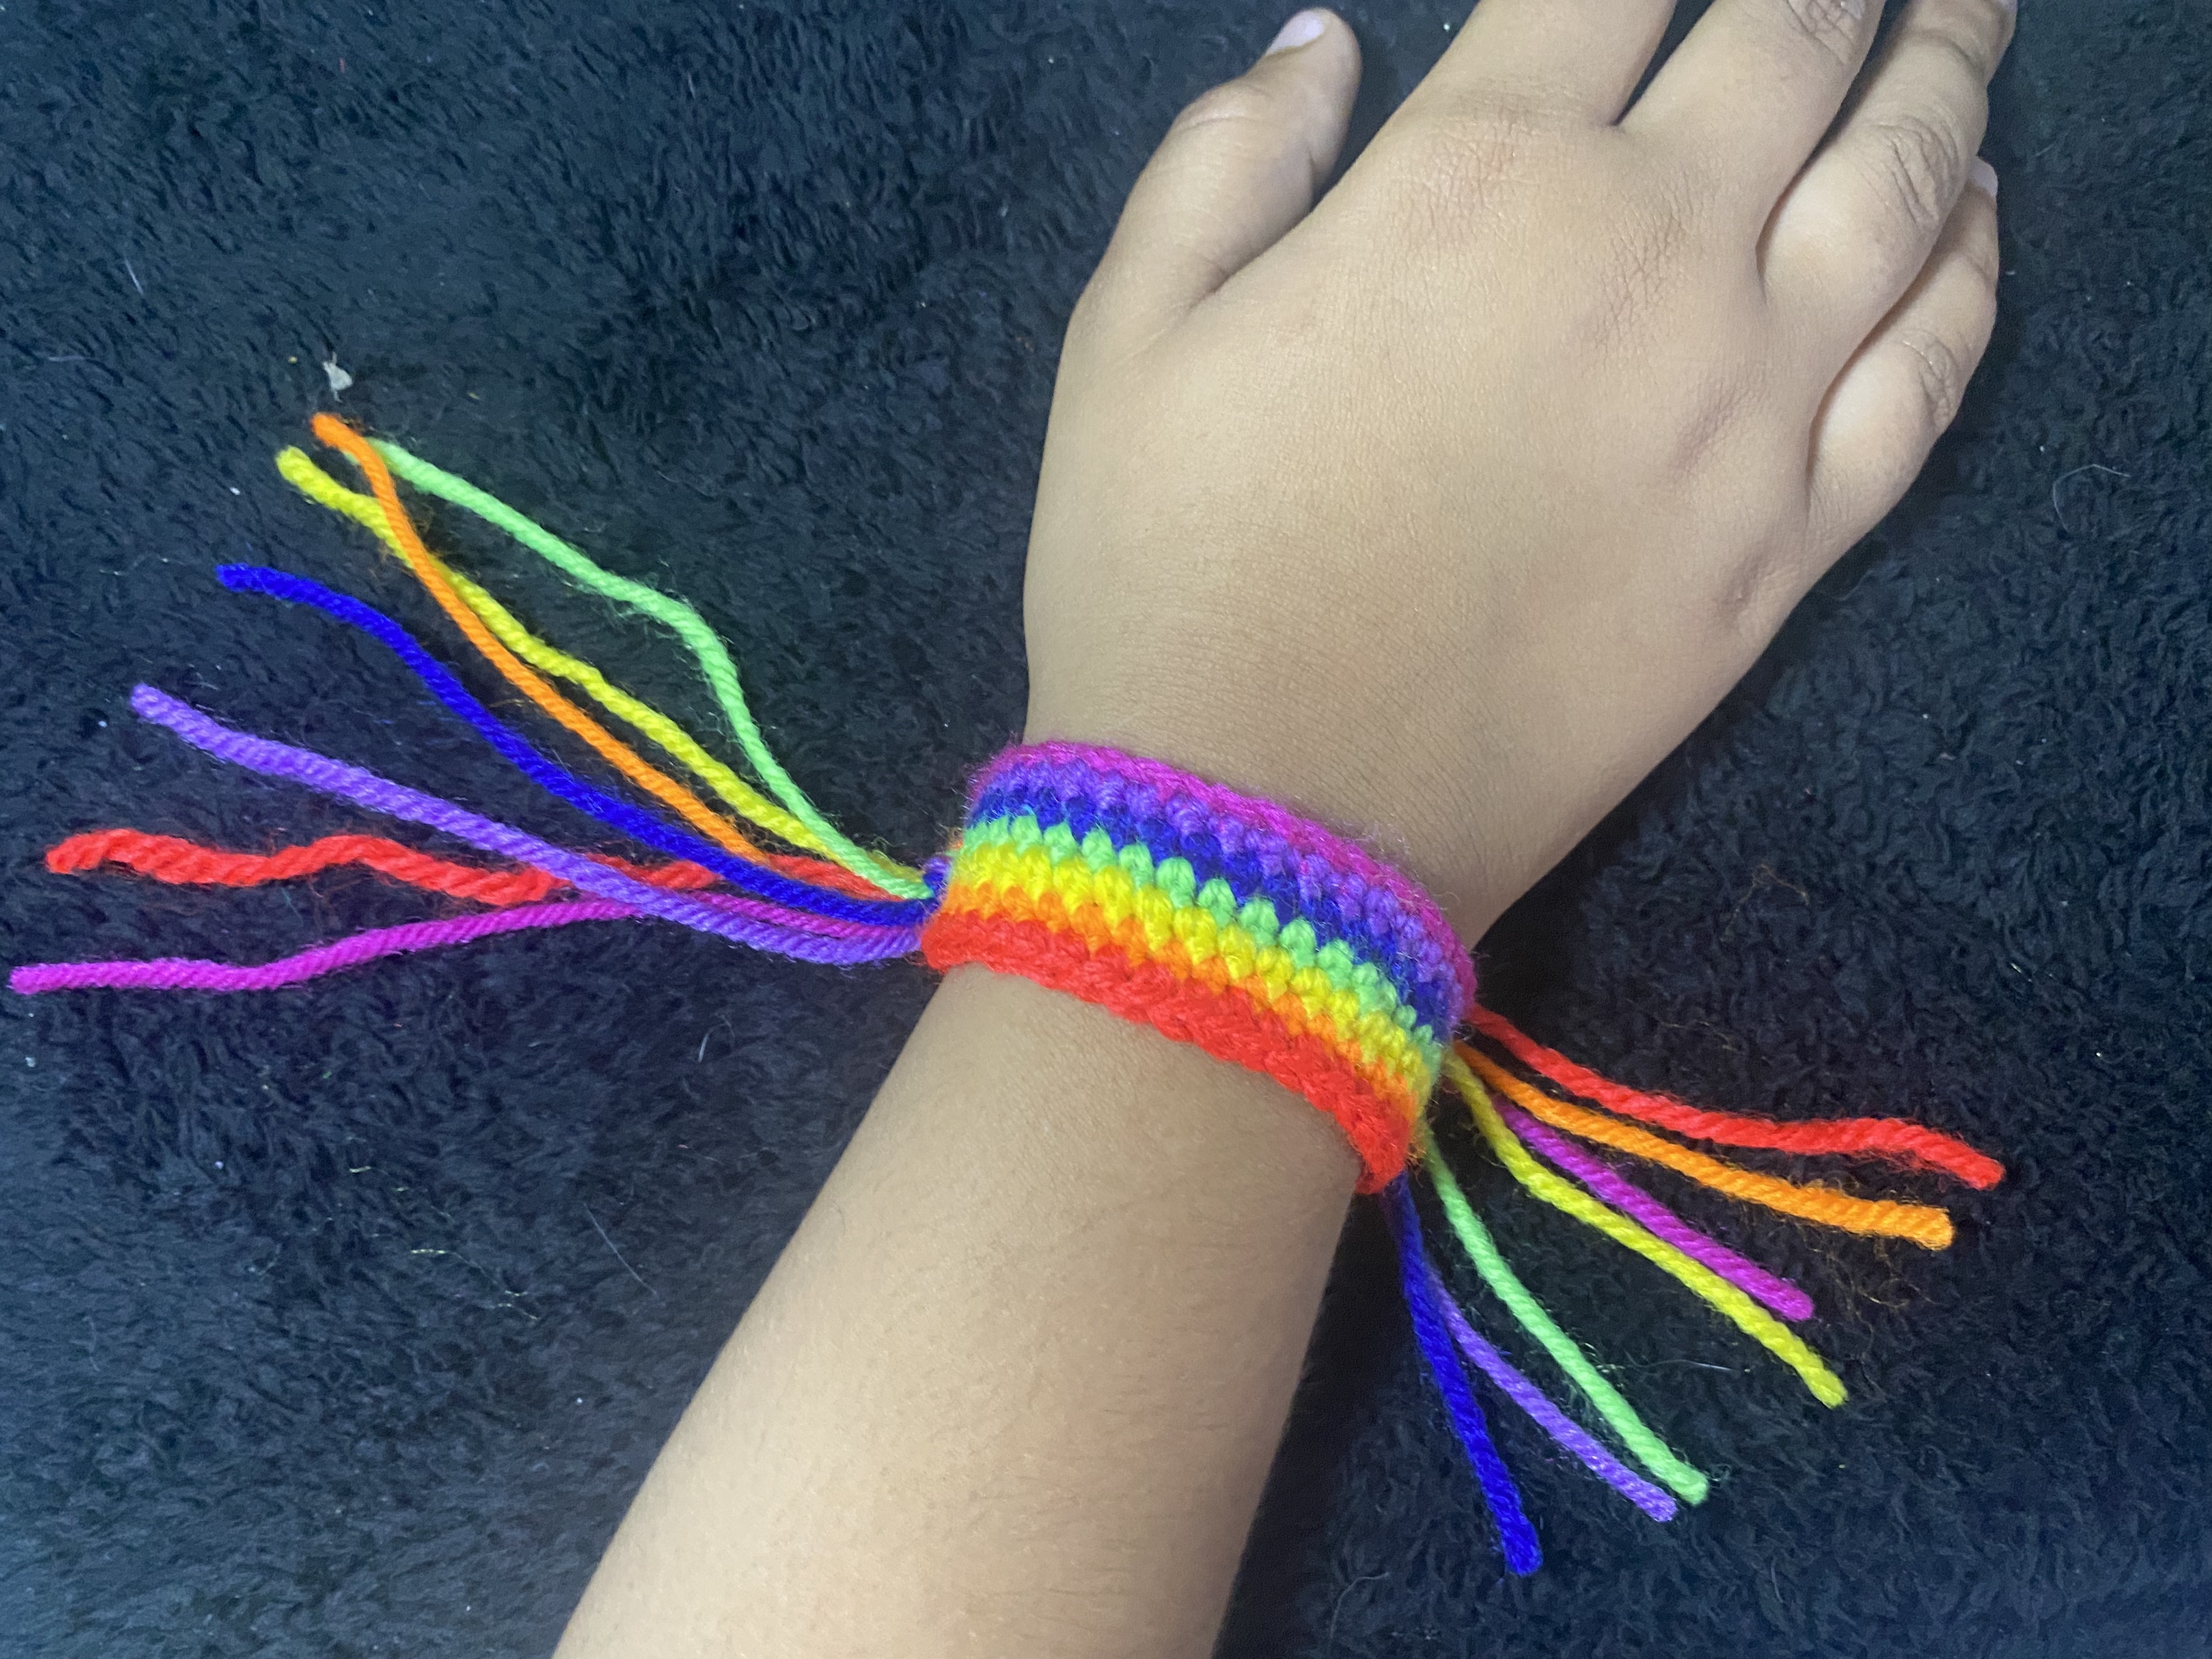
Para la segunda pulsera vamos a hacer una cadena de la cantidad de puntos que serán acordes al tamaño de tu muñeca, Esta pulsera la hice con 35 cadenas, ya que es para mi hija
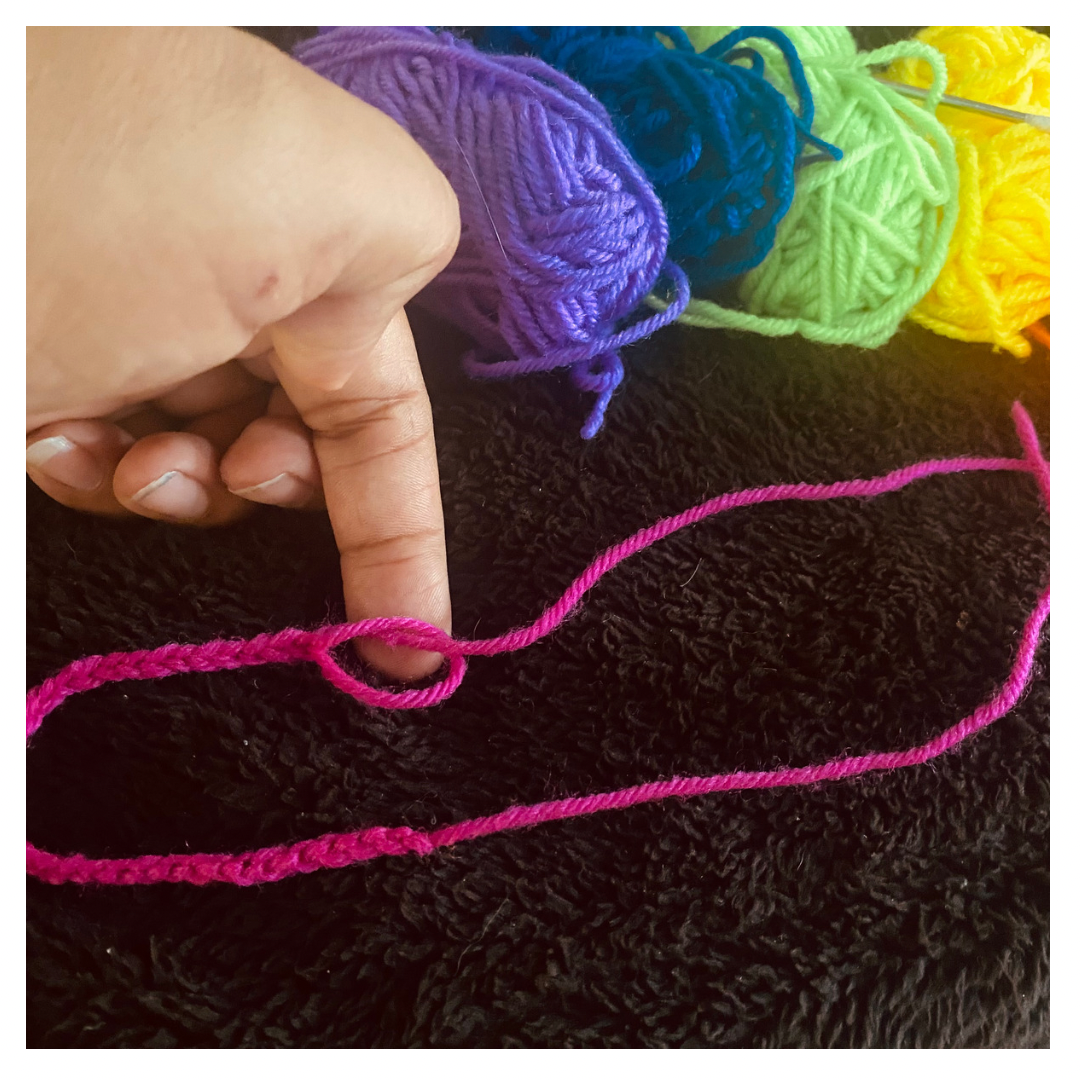
Dejamos aproximadamente 10cm de hilo en los extremos, vamos a tejer siempre en el mismo sentido, haciendo un punto bajo en cada punto y al finalizar cerramos cada vuelta y que no se nos olvide dejar un excedente de hilo para poder amarrar la pulsera y que sea decorativo
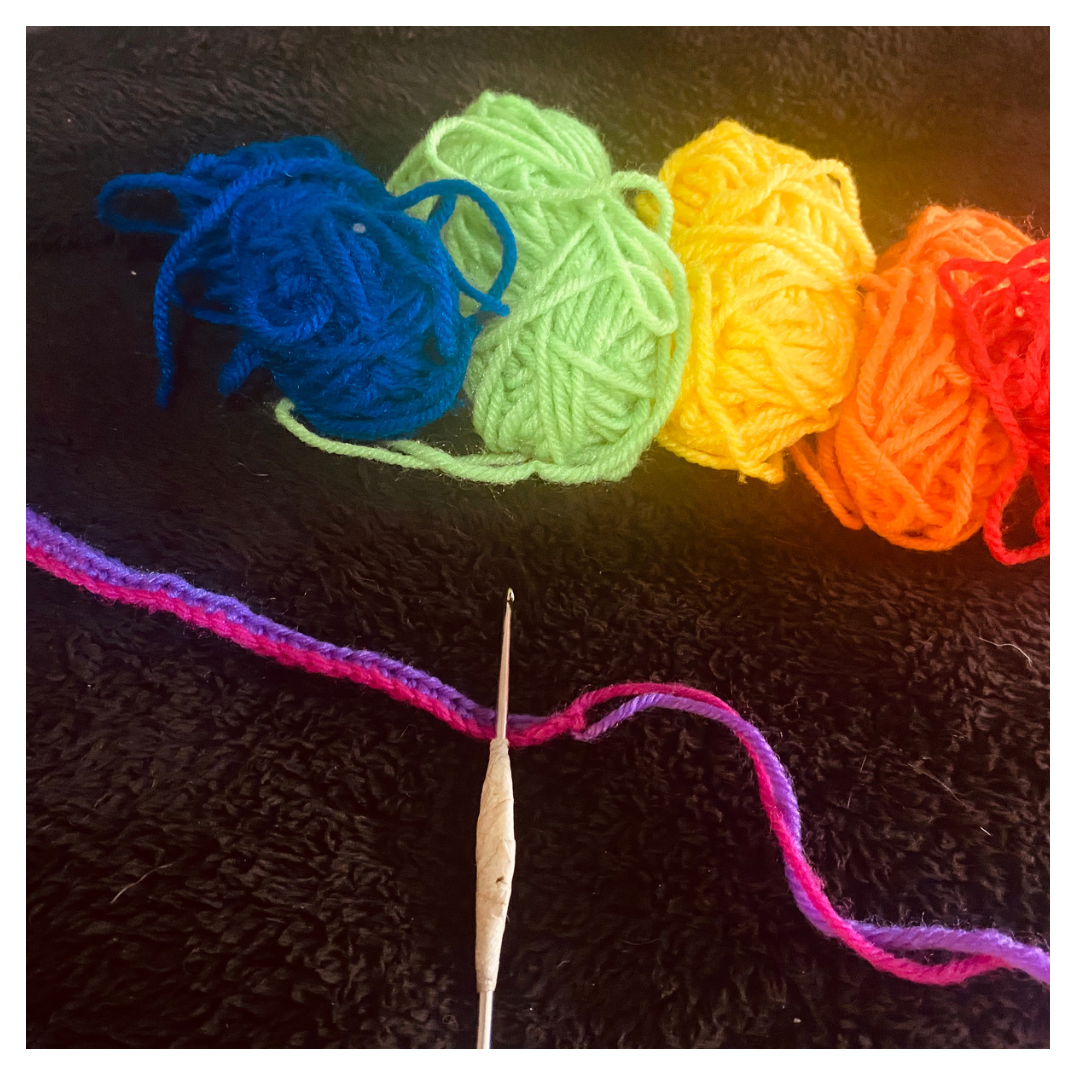
Cambiamos el color en cada vuelta, yo hice la secuencia de los colores del arcoiris ya que era lo que mi hija deseaba, lo bonito de este diseño es que se distingue cada color que le agregues y puedes combinar con todos los colores que desees.
En total fueron 7 vueltas, 7 colores diferentes guisándonos por la secuencia de colores del arco iris 🌈 y el resultado es hermoso un lindo arco iris para lucir de una manera original
Espero les haya gustado, me despido por hoy agradeciendo de agree mano por visitar mi post, hasta otra oportunidad ❤️🌈

Greetings friends of Needle work Monday, I wish you all have a happy and blessed day 🤗
Today I come to join the FOCUS CHALLENGE challenge, I admit, it is not easy to take unprofessional photographs, especially in the part of good lighting, it cost me a bit, I really did my best, I hope you like them and here I leave you my first participation.
I was knitting and my 10-year-old daughter was delighted, she is entering the age when she wants to be dressed up and with many accessories and she asked me to make her some bracelets for her to show off and to be very colorful, for her to combine with her outfits, I Your idea seemed excellent so I got to work and I made 2 easy and very nice ideas, here I share the process, I hope you like them.
With fabric we can invent thousands of ways to make incredible creations, some easy, others not so easy but with beautiful results. Here I show you these simple steps to create two beautiful bracelets so that you can combine your outfits in an original way.
MATERIALS
- stamens of varied colors
- knitting needles
- your beautiful hands and creativity to spend just a few minutes to make these cute bracelets
STEP BY STEP
FIRST BRACELET
For this fabric, use needle number 0, in this brand of needles this number is thick and it will be useful for the amount of threads that I will use.
The first bracelet model is very simple, we are going to take 4 different colors of yarn, only one strip of approximately 60 cm of each color is spent.
We make the first chain to fix the fabric, we are going to divide it in half and we will work the fabric in this way; We pass 2 threads over the needle and we make a stitch with the other 2 threads, we repeat this step until we achieve the desired size, always keeping the 2 colored threads in the fabric.
See how simple! And you can make incredible combinations with the number of colors you want
SECOND BRACELET
For the second bracelet we are going to make a chain with the number of points that will be according to the size of your wrist. I made this bracelet with 35 chains, since it is for my daughter
We leave approximately 10cm of thread at the ends, we are going to knit always in the same direction, making a single crochet in each point and at the end we close each round and do not forget to leave a surplus of thread to be able to tie the bracelet and make it decorative
We change the color in each turn, I made the sequence of the colors of the rainbow since it was what my daughter wanted, the beauty of this design is that each color that you add is distinguished and you can combine with all the colors you want.
In total there were 7 laps, 7 different colors guiding us through the sequence of rainbow colors 🌈 and the result is beautiful, a beautiful rainbow to look in an original way
I hope you liked it, I say goodbye for today thanking you for visiting my post, until another opportunity ❤️🌈

las fotos aquí compartidas son de mi propiedad tomadas con mi teléfono iPhone 11 y editadas en canva
Such beautiful and colorful bracelet
!discovery 30
!diy
Thanks 😊
This post was shared and voted inside the discord by the curators team of discovery-it
Join our Community and follow our Curation Trail
Discovery-it is also a Witness, vote for us here
Delegate to us for passive income. Check our 80% fee-back Program
You can query your personal balance by
!DIYSTATSThanks
Hola @marlynmont 👋
Yo aprendí a tejer con la aguja de acero número 0. Hasta hace pocos años fue la única que usé. Se teje muy bien con ese número.
Las pulseras se ven muy lindas, la multiplicidad de colores las hacen bastante llamativas. En las fotos se ven espectaculares, muy linda tu publicación.
En realidad a mi me gustan de punta fina pero para ese tejido la necesitaba un poco más gruesa 😊, gracias por el apoyo y comentario amiga, saludos 🖖
Hola @marlynmont gracias por unirte al concurso, los colores que elegiste para las pulseras están muy bonitos y llamativos, resaltan bastante por el fondo oscuro que elegiste para tus fotos. Me alegra que te hayas animado a participar, creo que todos aprenderemos mucho de este concurso. Saludos!
Si de verdad espero mejorar mucho mis fotografías, a veces no nos damos cuenta y solo tomamos la foto y no nos percatamos de lo que esta en el fondo o lo mal que la tomamos, me gustó mucho esta iniciativa, gracias por apreciar mi publicación 🥰, saludos 🖖
If I really hope to improve my photographs a lot, sometimes we do not realize it and only take the photo and we do not realize what is in the background or how badly we took it, I really liked this initiative, thanks for appreciating my publication 🥰 , greetings 🖖
What a colorful post! Good job for making an effort to present clear focused photos. It was smart that you used a dark background for the yarn. It helped it to stand out really nicely. Very nice closeups! One thing that would help to eliminate the foggy appearance is just making sure to clean the camera lens on your phone before snapping.
The bracelet is totally cute!! Thanks for joining in the challenge ~
Gracias por la sugerencia, poco a poco vamos aprendiendo a hacer excelentes fotografías 😊, me gustó mucho esta iniciativa, gracias por comentar, saludos 🖖
Yes, absolutely!! You’re welcome!! 😉
Thank you 🥰