Build another Star Tracker and how to use it - Astrophotography on HIVE
Astro Tracker Version 5
Seid gegrüßt, Freunde des nächtlichen Sternenhimmels. Vor einiger Zeit hatte ich hier über meinen letzten, selbstgebauten Astro Tracker berichtet. Ich hatte fast das komplette Gerät auf dem 3D Drucker hergestellt, inklusive der Zahnräder für das Getriebe. Leider ist das Teil viel zu unpräzise und somit ein Fall für den Schrott. Besonders ärgerlich ist das nicht. Ich musste nicht viele Teile kaufen, die Elektronik und die Kugellager kann ich wieder ausbauen und für neue Projekte nutzen. Und ich habe wieder etwas gelernt. Ein Aspekt den man nicht unterschätzen sollte.
Greetings, friends of the night sky. Some time ago I reported here about my last self-made astro tracker. I made almost the entire device on the 3D printer, including the gears for the transmission. Unfortunately, the part is far too imprecise and therefore a case for the scrap heap. That's not particularly annoying. I didn't have to buy many parts, I can remove the electronics and ball bearings and use them for new projects. And I've learnt something again. An aspect that should not be underestimated.
Die Konstruktion des neuen Trackers ist gar nicht so aufregend. Basis ist ein Nema17 Steppermotor mit angeflanschtem Plantengetriebe mit einer Untersetzung von 264:1. An der Achse des Getriebes wird die Kamera befestigt, ein Arduino steuert die Steps.
The construction of the new tracker is not that exciting. It is based on a Nema17 stepper motor with a flange-mounted planetary gearbox with a reduction ratio of 264:1. The camera is attached to the axis of the gearbox and an Arduino controls the steps.
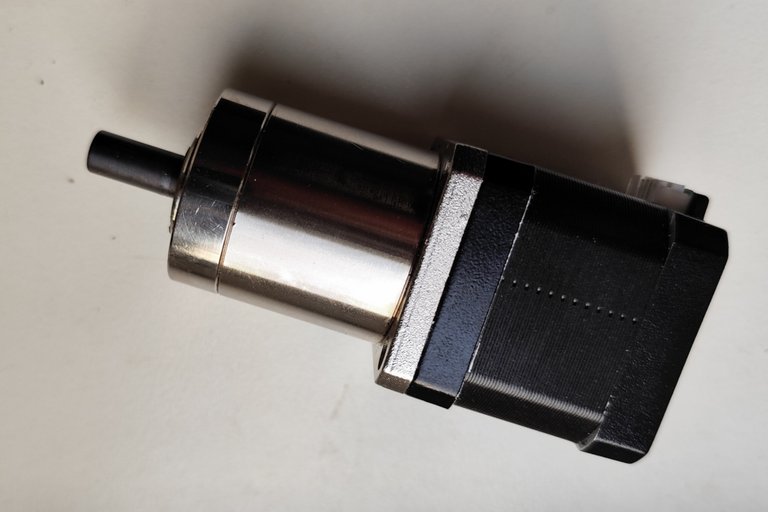
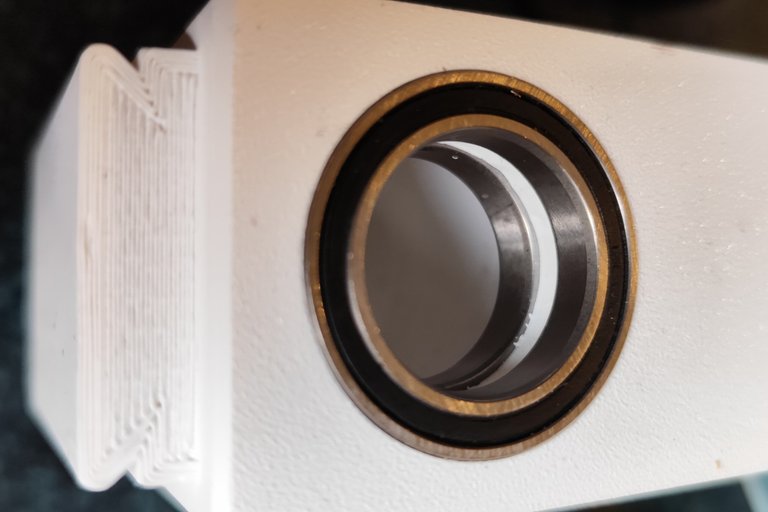
Ich wollte die Maschine so klein wie möglich bauen, ausreichend stabil sollte sie allerdings trotzdem sein. Ich entschied mich dafür den Motor mit dem Getriebe ohne zusätzliche Befestigungen im Gehäuse unterzubringen. In allen Richtungen sitzt der Motor ohne nennenswertes Spiel im Gehäuse. Die Verbindung zwischen Getriebe und Aufnahme für die Kamera wird spielfrei von zwei Kugellagern gehalten.
I wanted to build the machine as small as possible, but I still wanted it to be sufficiently stable. I decided to place the motor with the gearbox in the housing without any additional mountings. The motor sits in the housing in all directions without any significant play. The connection between the gearbox and the mount for the camera is held without play by two ball bearings.
Über dem Motor ist die Elektronik untergebracht. Ein Board inklusive Treiber zur Steuerung des Motors, ein Step Up Modul, welches 5V zu 12V DC konvertiert sowie der Arduino. Versorgt wird die Maschine über eine USB C Buchse, welche ich ins Gehäuse gebaut habe.
The electronics are housed above the motor. A board including a driver to control the motor, a step-up module that converts 5V to 12V DC and the Arduino. The machine is powered via a USB C socket, which I built into the housing.
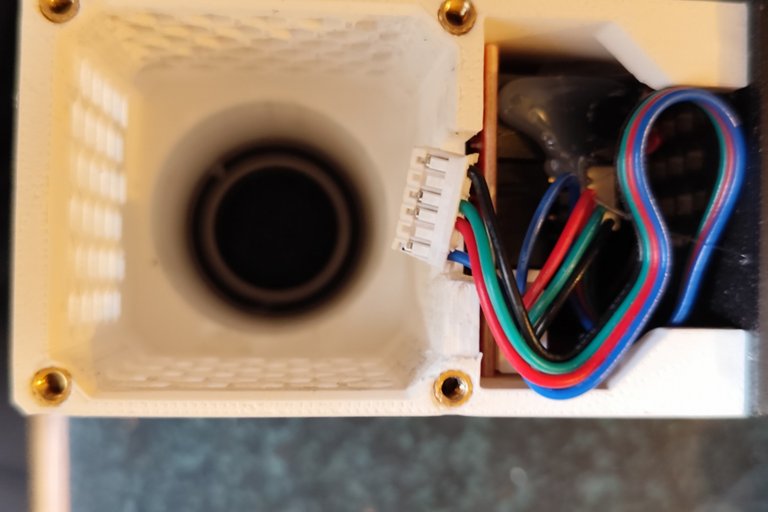
Darüber hinaus habe ich einen sechspoligen, dreistufigen Schiebeschalter eingebaut um den Tracker mit halber Geschwindigkeit betreiben zu können. Meine Idee dahinter ist, dass ich länger belichten kann, ohne dass die Sterne Striche ins Bild malen, aber auch ohne dass der Vordergrund durch die Drehung des Trackers verwischt. Ob diese Idee funktioniert bleibt abzuwarten. Getestet habe ich das bisher nicht weil im Moment der Mond die ganze Nacht hell leuchtet.
I have also installed a six-pole, three-stage slide switch to operate the tracker at half speed. My idea behind this is that I can expose for longer without the stars painting lines in the picture, but also without the foreground being blurred by the rotation of the tracker. Whether this idea works remains to be seen. I haven't tested it yet because the moon is shining brightly all night at the moment.

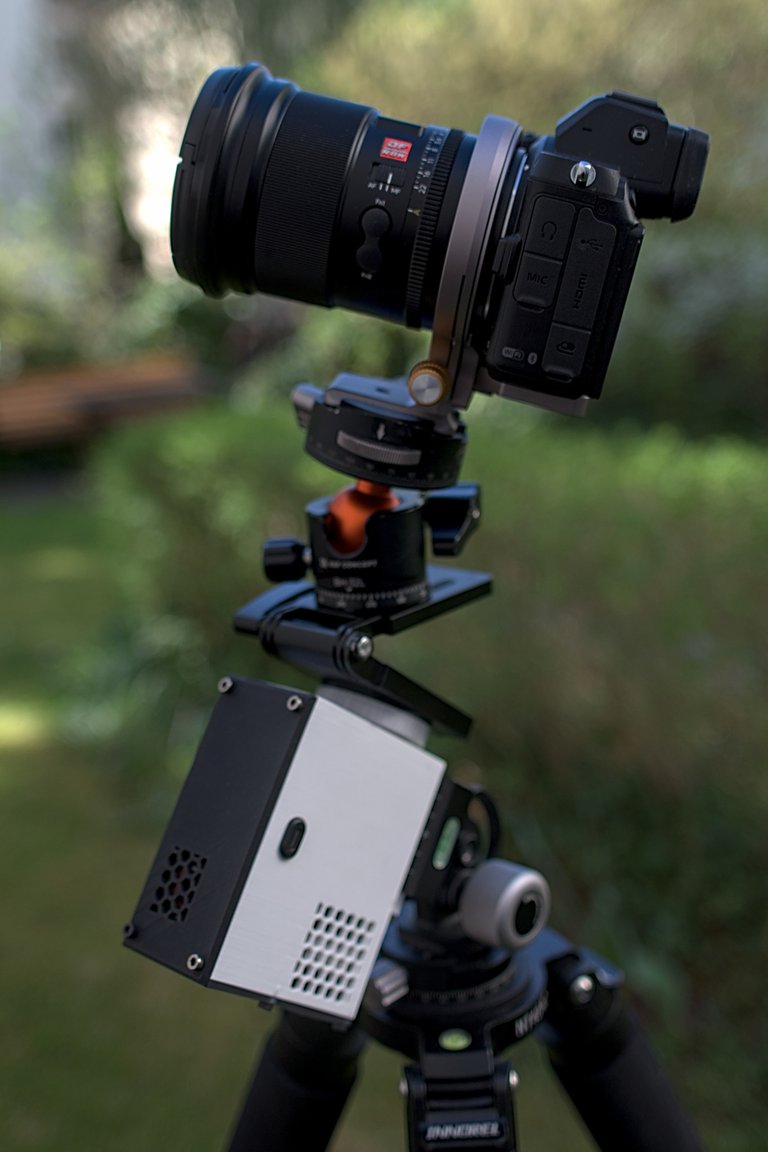
How to Setup
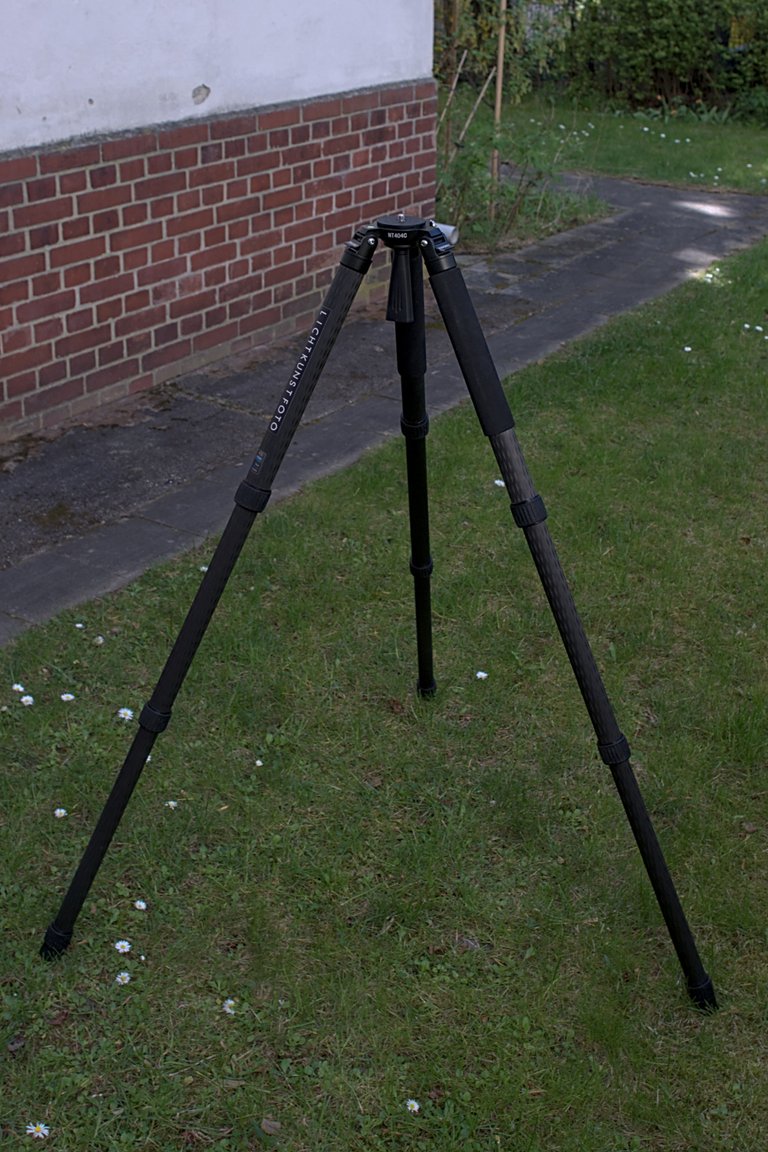
Zuerst stelle ich ein stabiles Stativ auf, in diesem Fall ein Innorel NT404C. Mit dem klapprigen Reisestativ für 39,90€ wird kein nachgeführtes Bild möglich sein, im schlimmsten Fall kippt der ganze Kram einfach um.
First I set up a stable tripod, in this case an Innorel NT404C. With the rickety travelling tripod for €39.90 it won't be possible to get a tracking shot, in the worst case the whole thing will just tip over.
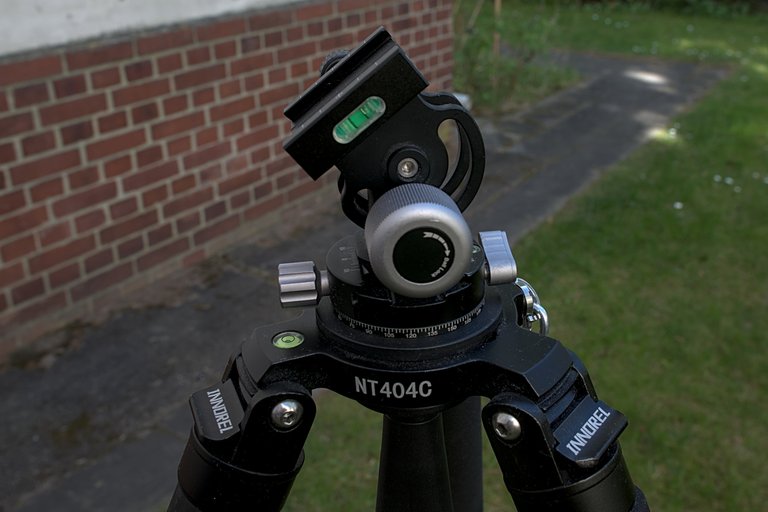
Danach richte ich die Aufnahme für den Stativkopf mit der eingebauten Nivellierbasis aus. Dazu befestige ich eine Wasserwaage darauf. Das Gehäuse dafür stammt ebenfalls aus dem 3D Drucker. Kaufen kann man so etwas meines Wissens nach nicht.
I then align the mount for the tripod head with the built-in levelling base. To do this, I attach a spirit level to it. The housing for this also comes from the 3D printer. As far as I know, you can't buy something like this.

Danach montiere ich einen modifizierten 2-Wege-Neiger auf dem Stativ. Die Panorama-Platte, die eigentlich oben auf dem Neiger sitzt, habe ich unter den Neiger geschraubt. Oben habe ich eine Arca Swiss Klemmer angeschraubt. Somit kann ich recht präzise den Höhenwinkel und die Richtung separat einstellen.
I then mounted a modified 2-way panhead on the tripod. I screwed the panorama plate, which actually sits on top of the panhead, under the panhead. I screwed on an Arca Swiss clamp at the top. This allows me to adjust the elevation angle and direction separately and quite precisely.
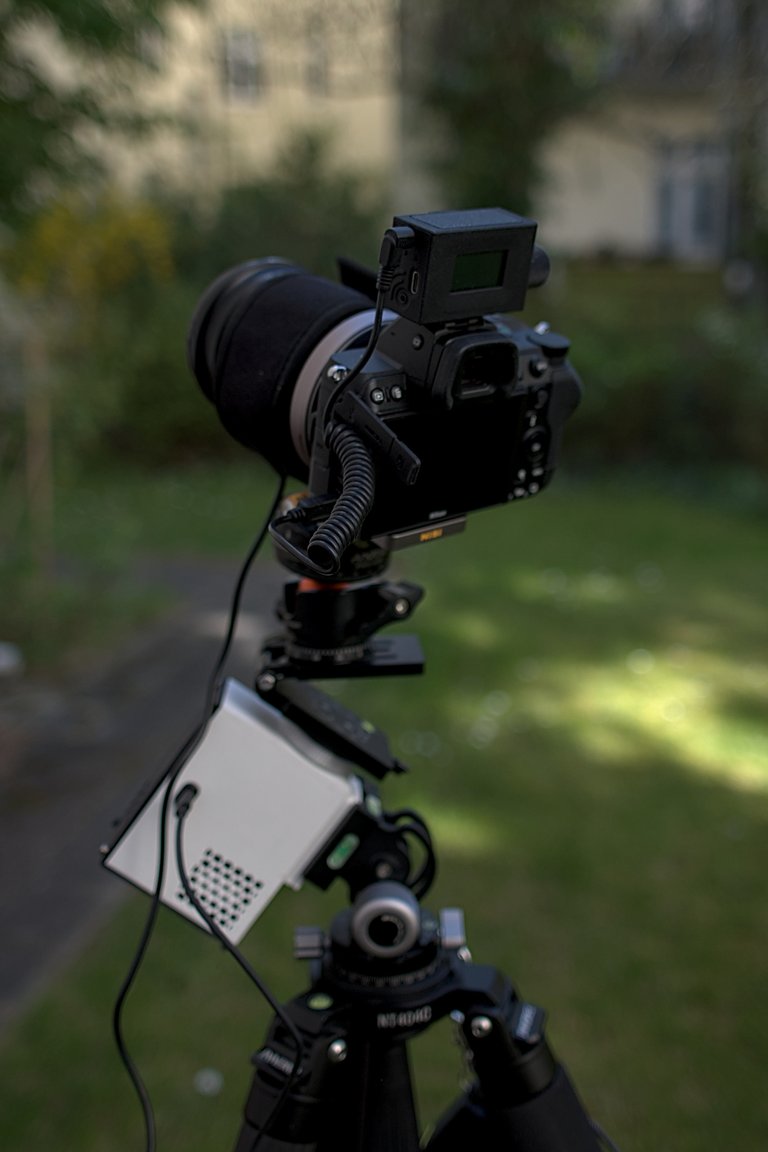
A holder for my mobile phone then goes into the Arca clamp. Unfortunately, it has disappeared into some black hole. That's why it's missing in the following picture. As you have already guessed, I also made the holder on the 3D printer. I then use the "PolarAligner Pro" app to align the inclinometer precisely to the earth's axis. You could also check this with a polar scope. I didn't do this in daylight.

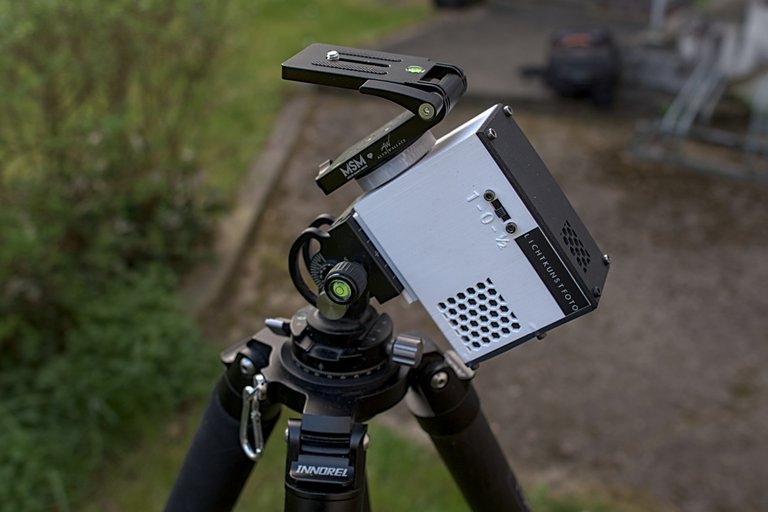
Wenn die Ausrichtung passt, kommt der Tracker auf den Neiger. Oben am Neiger befestige ich einen V Mount, damit die Unterseite des Stativkopfes halbwegs in Waage ist.
If the alignment is correct, the tracker is mounted on the panhead. I attach a V mount to the top of the panhead so that the underside of the tripod head is more or less level.
Dann kommen ein Low Profile Kugelkopf und die Kamera drauf.
Then a low-profile ball head and the camera are attached.
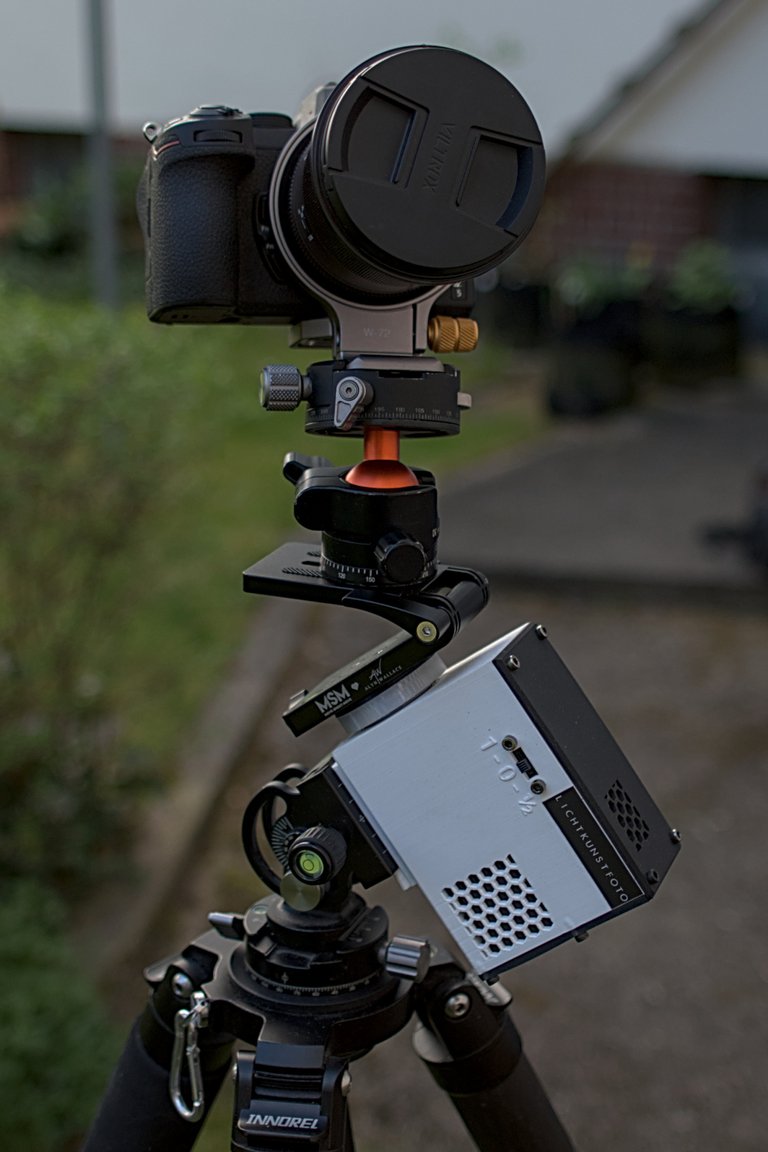
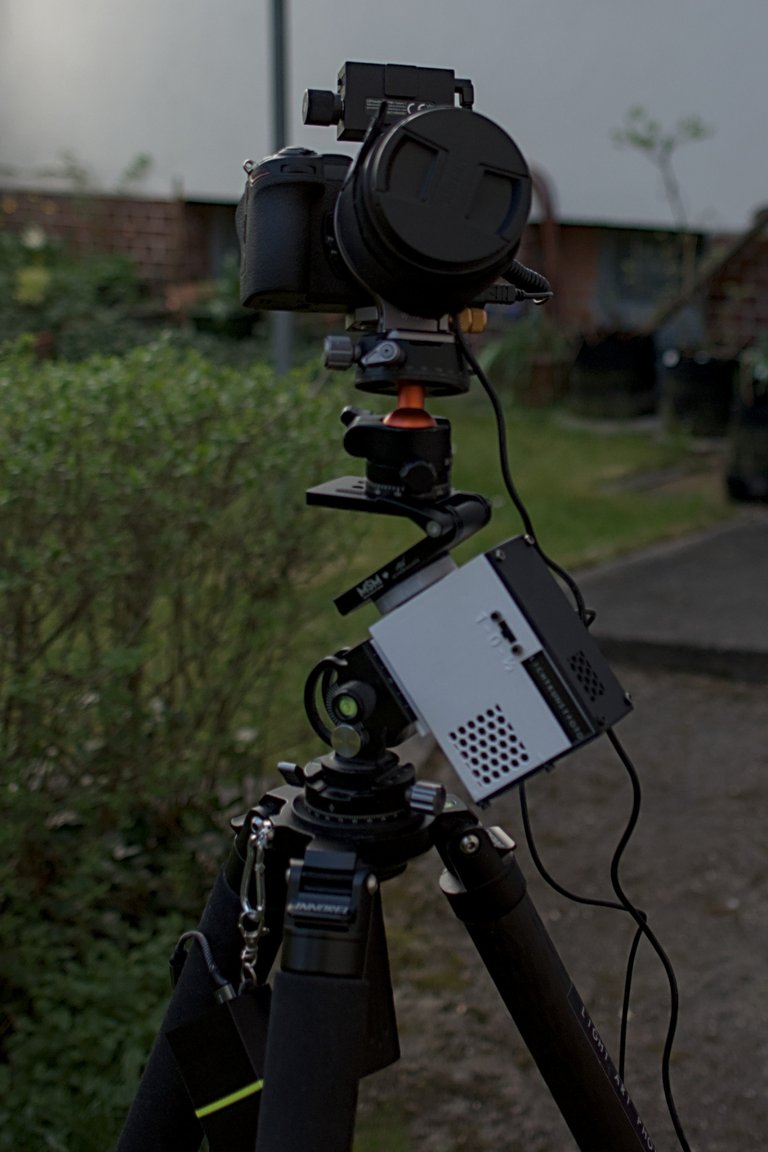
Wenn ich tatsächlich die Sterne fotografieren würde, würde ich jetzt die Kamera auf den gewünschten Bildausschnitt ausrichten und fokussieren. Wenn das erledigt ist kommt die Heizmanschette ans Objektiv damit die Frontlinse nicht beschlägt. Heizmanschette und Tracker werden dann an eine USB Powerbank angeschlossen.
If I were actually photographing the stars, I would now align the camera to the desired image section and focus. Once this is done, the heating cuff is attached to the lens to prevent the front lens from fogging up. The heating cuff and tracker are then connected to a USB power bank.
Zum Schluss kommt dann noch der LRTimelapse Timer auf den Blitzschuh um die Kamera zu steuern. Und schon ist das fertig. Klingt kompliziert? Ist es auch. Gerade die gute Ausrichtung ist schwierig und führt häufig zu unbrauchbaren Bildern. Aber irgendwie macht genau das einen großen Reiz aus.
Finally, the LRTimelapse Timer is attached to the hot shoe to control the camera. And that's it. Sounds complicated? It is. Good alignment in particular is difficult and often leads to unusable images. But somehow that's exactly what makes it so appealing.
Conclusion
Ich habe den Tracker nur gebaut, weil ich den Motor mit dem Getriebe bereits hatte. Diese Konstruktion ist nicht die Beste. Das Gewicht ist hoch, über 850 g. Die Aufnahme für die Kamera ist nicht besonders stabil. Letztendlich wird die Kamera von vier Schrauben M3 gehalten, welche in vier kleinen Einschmelzhülsen sitzen. Andererseits läuft das Teil sehr präzise. Nach 11 Stunden und 58 Minuten hatte sich der Tracker um genau 180° gedreht. Der Schwerpunkt liegt relativ flach über der Stativschulter. Selbst stärkere Windböen werden die Kamera nicht bewegen. Ich bin schon gespannt auf die ersten Bilder, die ich mit dem Tracker aufnehme und noch gespannter bin ich wie lange das Teil halten wird. Bis dahin allzeit gutes Licht.
I only built the tracker because I already had the motor with the gearbox. This design is not the best. The weight is high, over 850 g. The mount for the camera is not particularly stable. Ultimately, the camera is held in place by four M3 screws, which sit in four small melt-in sleeves. On the other hand, the tracker runs very precisely. After 11 hours and 58 minutes, the tracker had rotated by exactly 180°. The centre of gravity is relatively flat over the tripod shoulder. Even strong gusts of wind will not move the camera. I'm already looking forward to the first pictures I take with the tracker and I'm even more excited to see how long it will last. Until then, good light at all times.

WHAT IS LIGHT PAINTING?
LICHTKUNSTFOTO
If you like my art visit www.lichtkunstfoto.de for more Light Art Photography and informations about Light Painting. Join me on Flickr Twitter

For more great Light Art Photography, Light Painting and inspiration check these light painters: @marlasinger666 @fadetoblack @fastchrisuk @dawnoner @oddballgraphics @martbarras @stepko @rod.evans.visual @yo-hoho @maxpateau @gunnarheilmann @neilru75 @maximepateau @ryuslightworks @lightstabeu @candelart @lacelight

WE ARE LIGHT PAINTERS
To help and support the LightPainters community here on Hive I would appreciate your delegation of HivePower. Any amount is appreciated. It does not require much to get started, we are happy for any gesture. @lightpainters
How to delegate?
Delegate 50HivePower, [50HP]
Delegate 250HivePower, [250HP]
Delegate 500HivePower, [500HP]
Delegate 1000HivePower, [1000HP]
All the Hive Power will help to upvote the artist's contribution as part of the LightPainters community.
How interesting is this information and the effort you have to improve your tools is spectacular, you have many ideas to apply your photographic works.
!discovery 30
This post was shared and voted inside the discord by the curators team of discovery-it
Join our Community and follow our Curation Trail
Discovery-it is also a Witness, vote for us here
Delegate to us for passive income. Check our 80% fee-back Program
Congratulations @lichtkunstfoto! You have completed the following achievement on the Hive blockchain And have been rewarded with New badge(s)
Your next target is to reach 52000 upvotes.
You can view your badges on your board and compare yourself to others in the Ranking
If you no longer want to receive notifications, reply to this comment with the word
STOP