Saludos hijitos espero que se encuentren bien, yo aquí comenzando a preparar las decoraciones de la casa de navidad, porque nunca es suficiente tiempo, para prepararlas todas, y en mi casa luego del día halloween y del día de los muertos arrancamos a decorar todo con la navidad, que es la época más bonita del año.
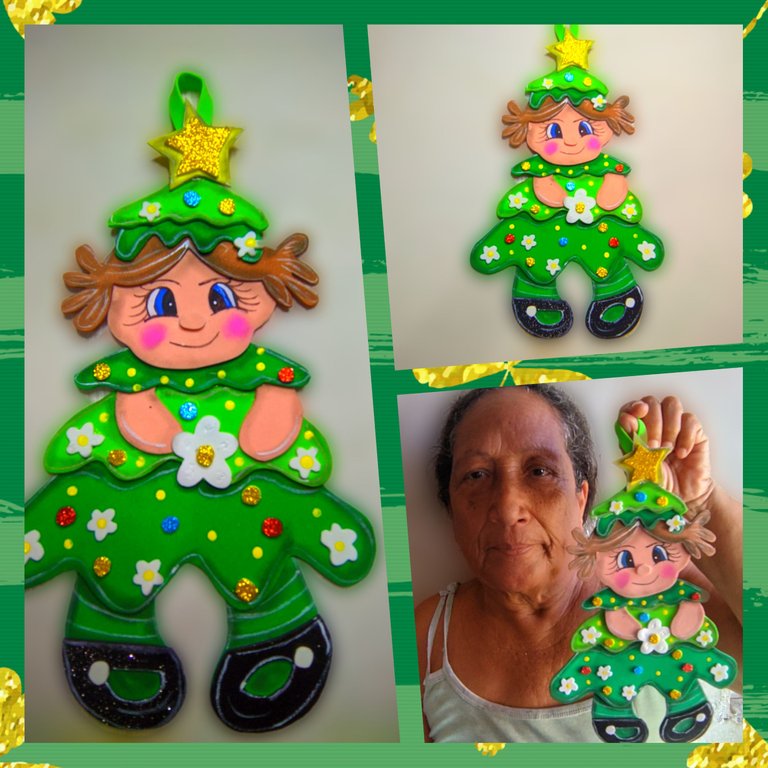
El día de hoy voy a preparar un lindo colgante de navidad, con forma de una niña arbolito, que me encantó, sobretodo porque es algo que se puede usar para decorar el árbol de navidad si hacemos varios, o bien podemos colocarlo en la pared a modo de decoración, incluso colgarlo en las chimeneas y le va a dar un toque hermoso.
Realmente cuando elaboro algún trabajo de manualidades me gusta hacerlo para que tenga utilidad, no hacerlo por hacerlo, hay que darle funcionalidad a los trabajos que hacemos, y sin lugar a dudas este trabajo de hoy tiene muchos lugares donde podemos usarlo, lo bueno es que este modelito tan lindo puede ser versátil y puede decorarse de acuerdo a los gustos de cada quien, incluso podemos elaborar algunos modelos de adornos y decorar a nuestra muñequita ya que ella es un árbol de navidad.
🌲 Materiales 🌲
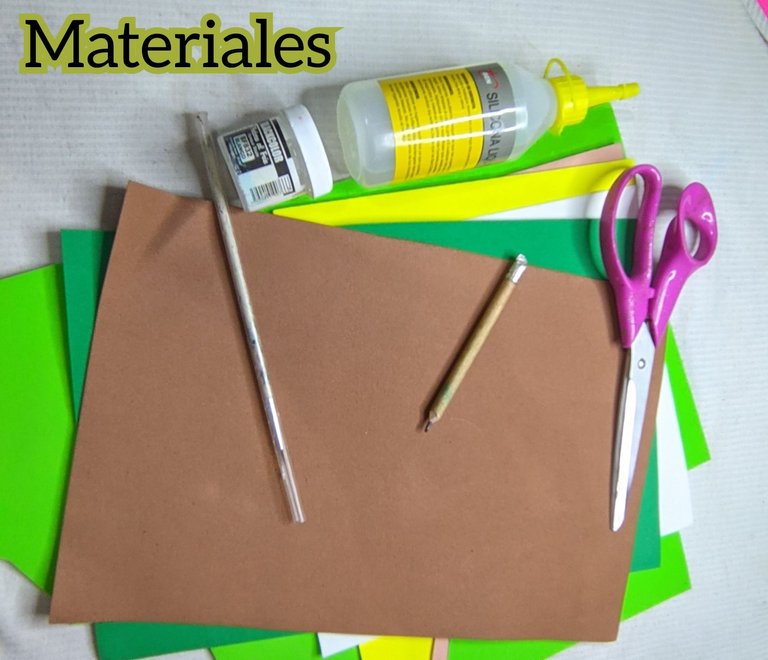
🌲 Foami verde manzana.
🌲 Foami verde oscuro.
🌲 Foami amarillo y amarillo escarchado.
🌲 Foami negro.
🌲 Foami blanco.
🌲 Foami piel.
🌲 Foami marrón.
🌲 Foami rojo escarchado.
🌲 Foami azul escarchado.
🌲 Silicón líquido.
🌲 Tijera.
🌲 Lápiz.
🌲 pintura blanca, amarilla y negra.
🌲 Rubor.
🌲 Paso a paso 🌲
🌲Paso 1:

Marque en el foami verde oscuro la primera capa del vestido de la muñeca, que es el cuerpo del árbol de navidad, luego la recorté.
🌲 Paso 2:
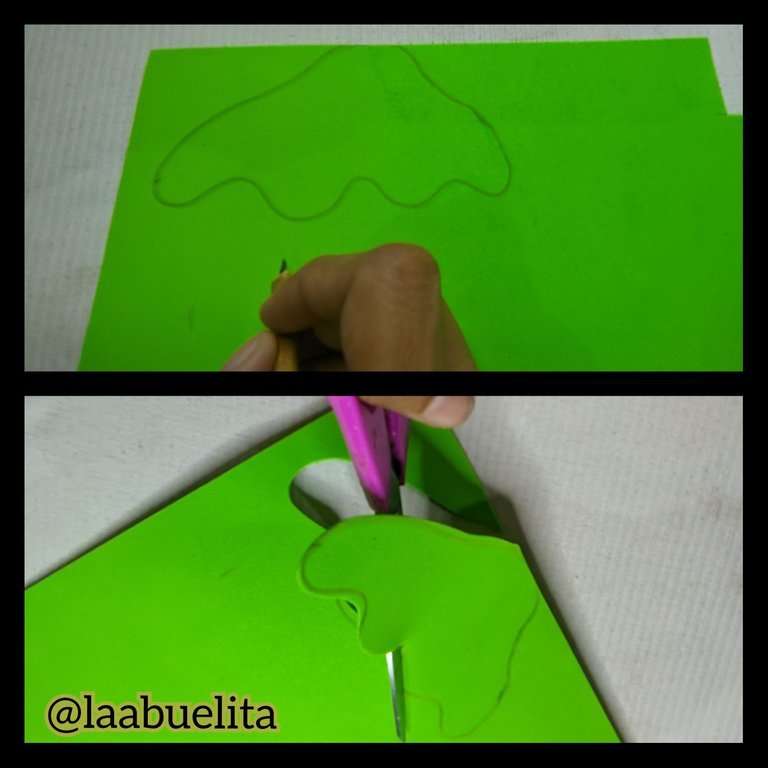
En el foami verde manzana marque la segunda capa, solo que está vez, la pieza será más pequeña que la anterior,, y recortamos.
🌲 Paso 3:
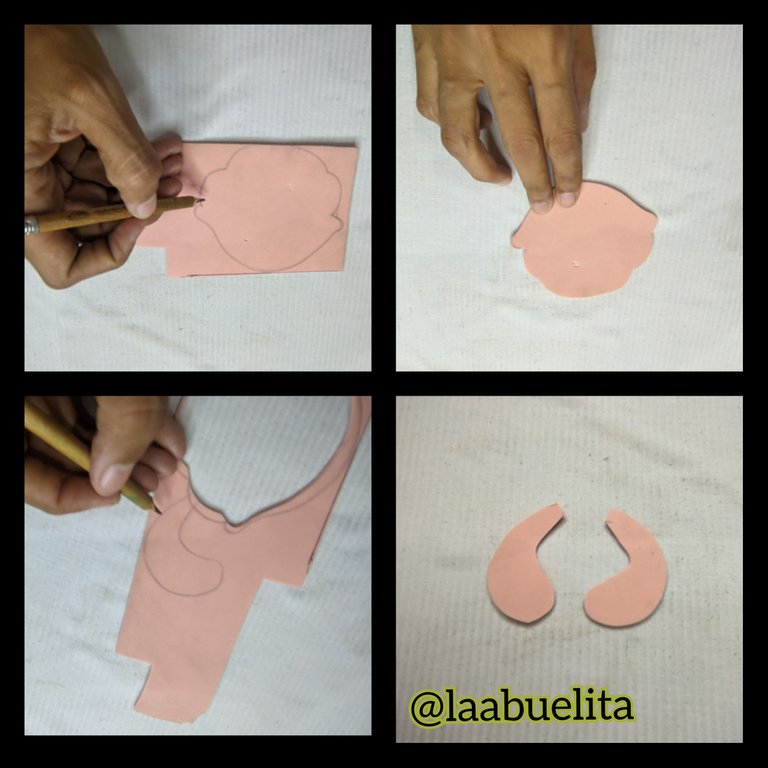
Agarre el foami de color piel y marque la cabeza de la muñeca y los dos bracitos,y luego los recorté.
🌲 Paso 4:
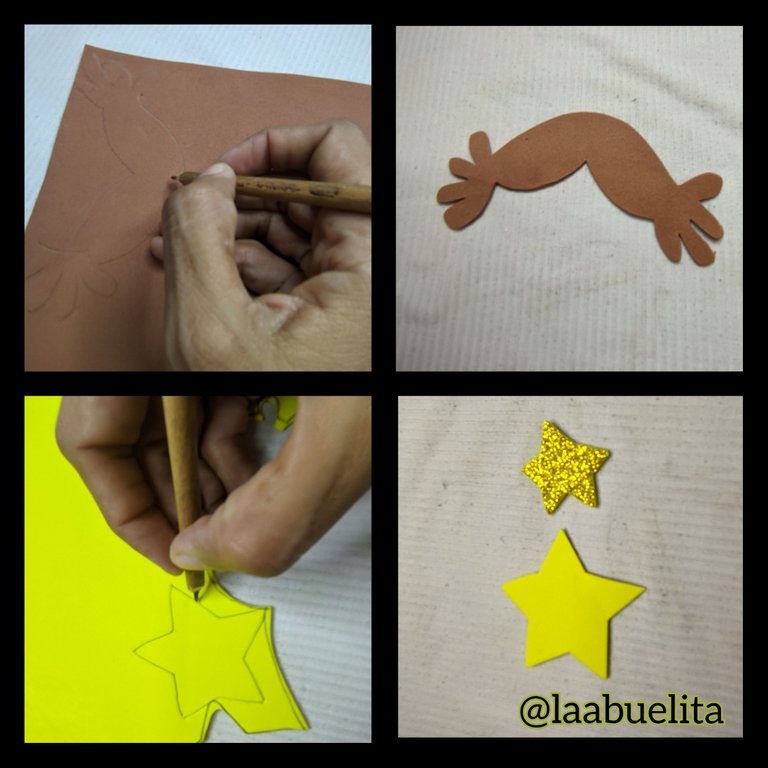
Ahora en el foami de color marrón dibuje y luego recorté el cabello de la muñeca, luego en el foami de color amarillo dibuje y recorte una estrella, y en el Foami amarillo escarchado recorte otra estrella más pequeña.
🌲 Paso 5:
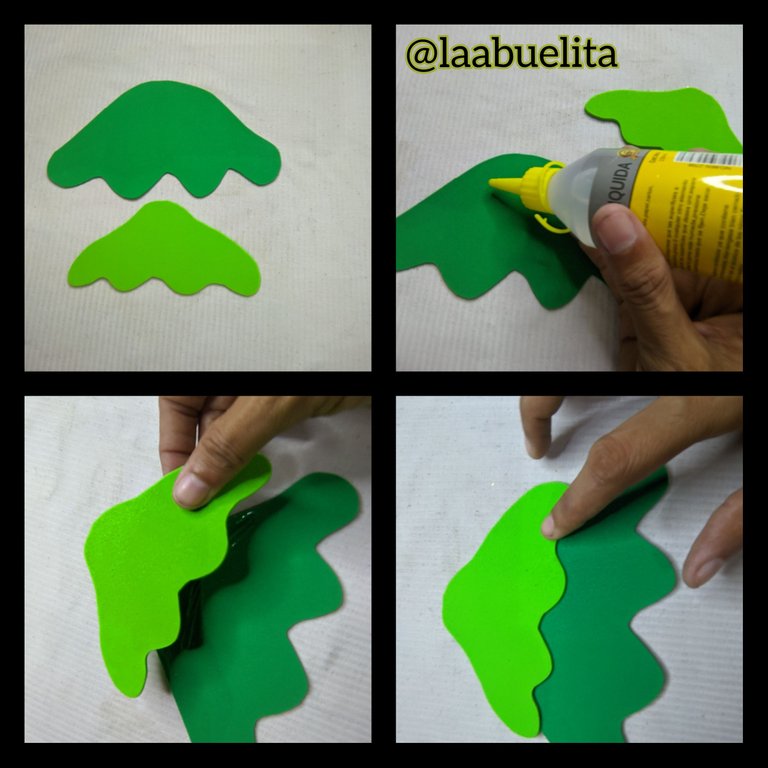
Cómo ya tenemos listo las piezas vamos a comenzar a armar, para eso tome las dos piezas verdes y pegamos la pequeña encima de la más grande.
🌲 Paso 6:
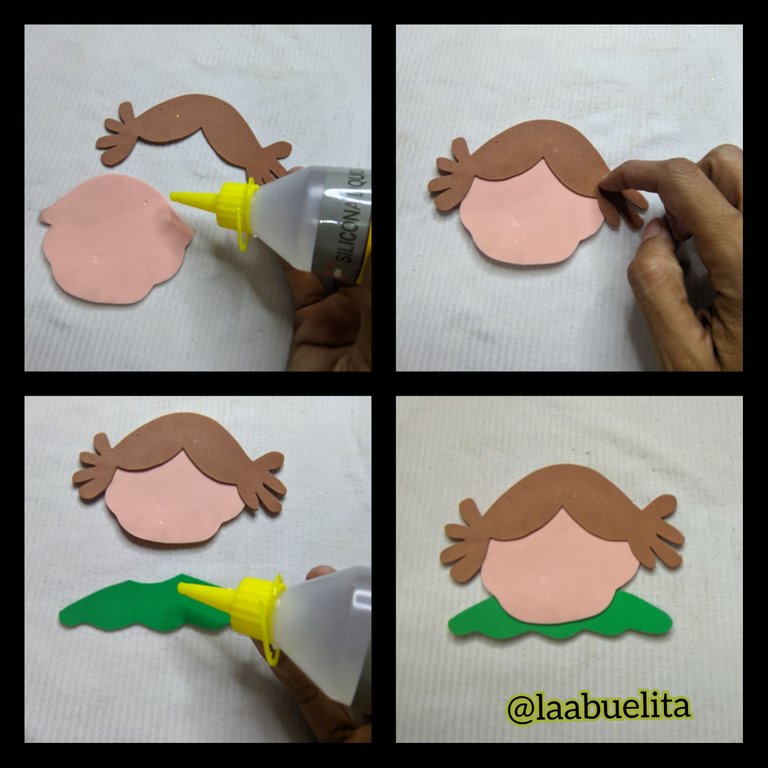
Tome la cabeza y con el silicón líquido pegamos el cabello, luego recorté otra pieza del Foami verde oscuro y con el silicón líquido pegamos a la cabeza y dejamos secar.
🌲 Paso 7:
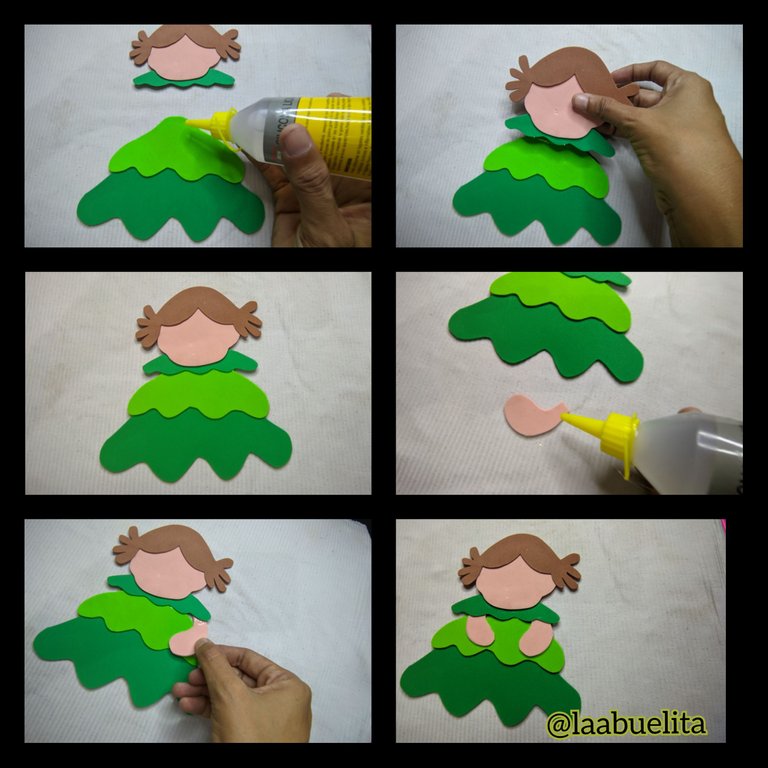
Ahora pegamos la cabeza encima de las piezas y luego pegamos los bracitos, estos van debajo de la pieza verde oscura que tiene la cabeza pegada.
🌲 Paso 8:
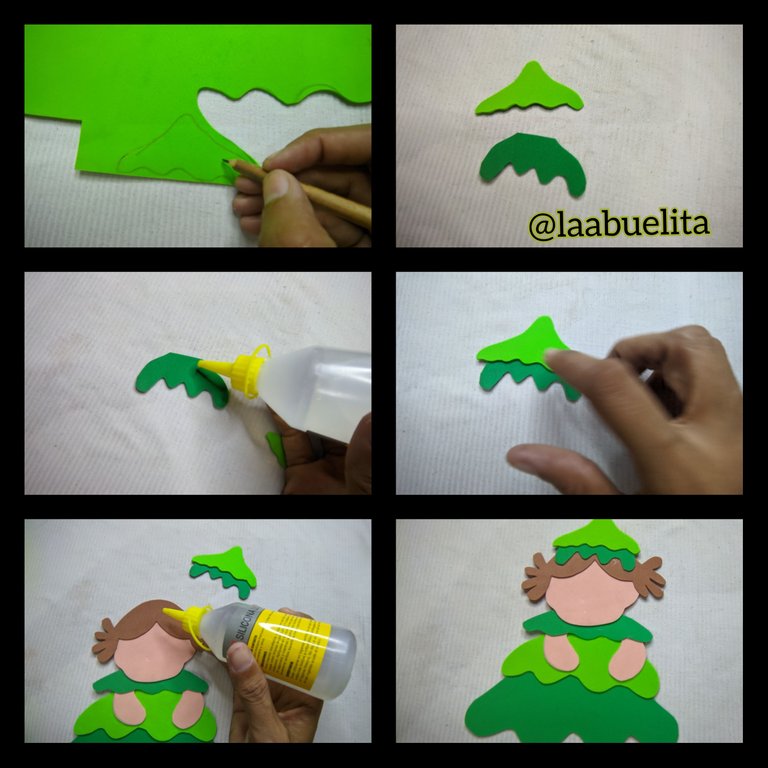
Ahora saque las piezas para el gorro de la cabeza, estás fueron dos piezas una verde manzana y la otra en verde oscuro las cuales pegamos una encima de la otra para luego pegarlo a la cabeza.
🌲 Paso 9:
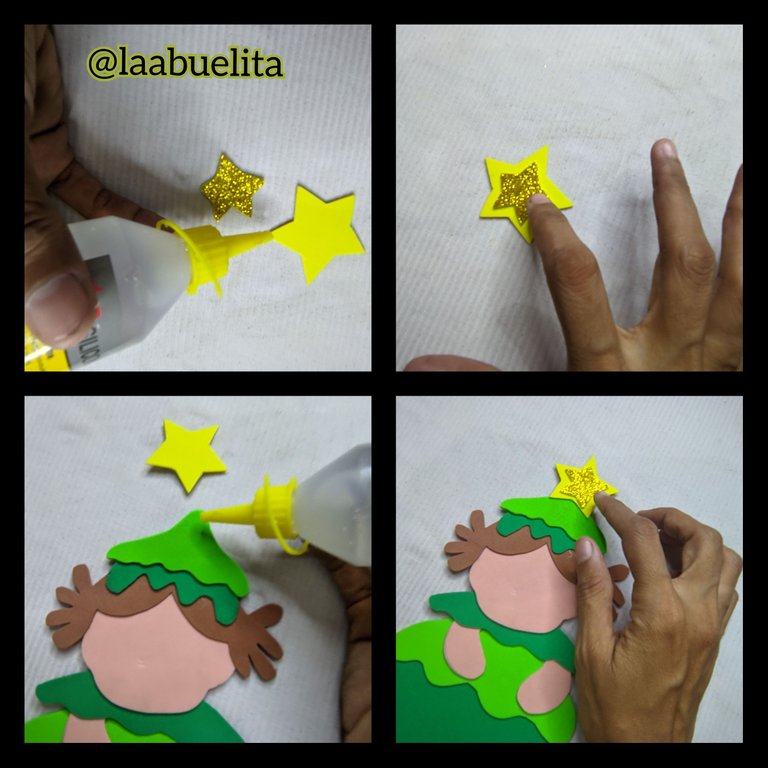
Agarre la estrella pequeña, la escarchada y le aplicó silicón líquido y pegamos encima de de la estrella amarilla y pegamos del gorro con un poco de silicón líquido.
🌲 Paso 10:
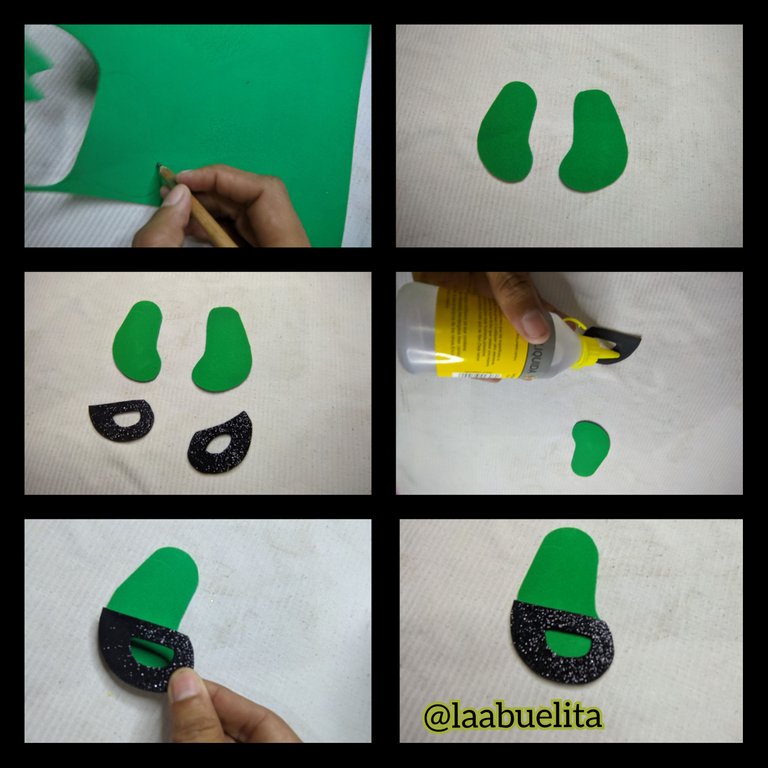
Ahora recorté del foami verde oscuro dos piernas y del foami negro, recorté dos piezas que van a ser los zapatitos, luego le aplique silicón líquido y pegamos en la pieza de las piernas.
🌲 Paso 11:
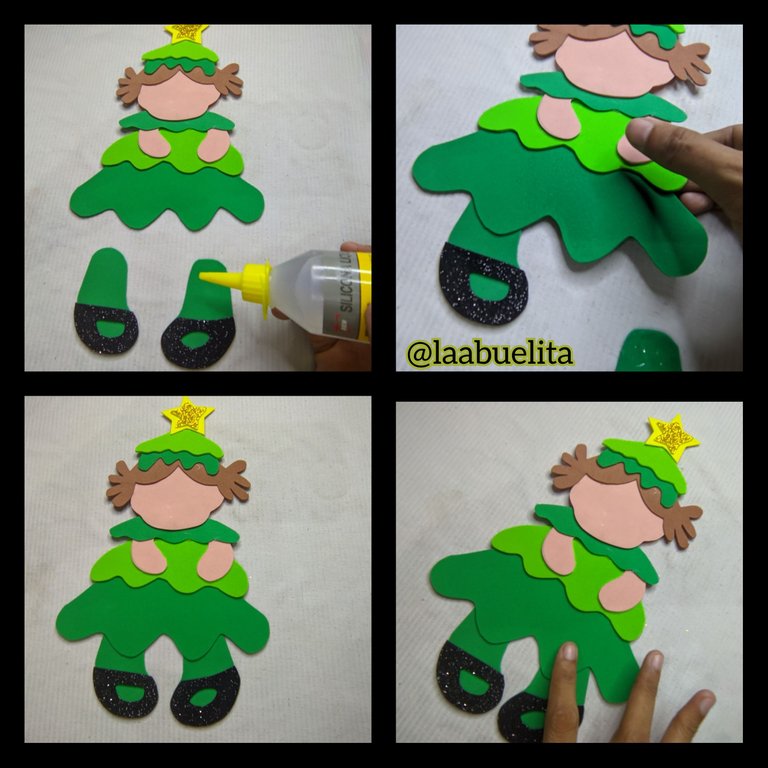
Aplicó silicón líquido en las piernas y pagamos la pieza completa.
🌲 Paso 12:

Ahora del foami blanco saqué algunas flores pequeñas y dos círculos, los cuales pegamos en los zapatitos y las florecitas las pegamos en diferentes partes del vestido.
🌲 Paso 13:
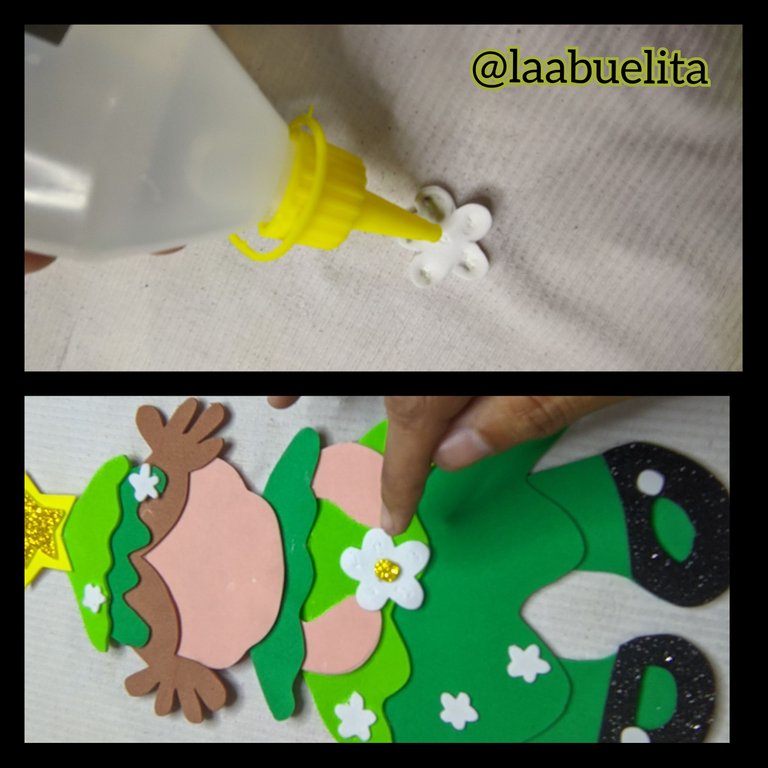
Marque y recorté una flor más grande, y la pegamos en el centro de las manos.
🌲 Paso 14:
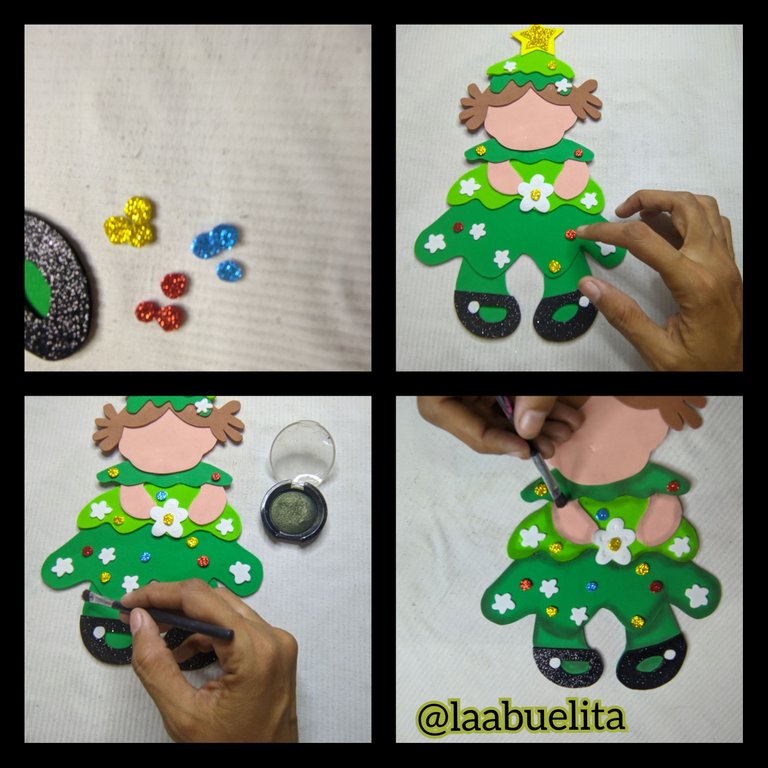
Ahora de los retazos recorte tres círculos pequeños del foami escarchado amarillo, azul y rojo y lo pegamos con silicón líquido en el vestido de la muñequita.
Luego sombreamos todo el trabajo completo.
🌲 Paso 15:
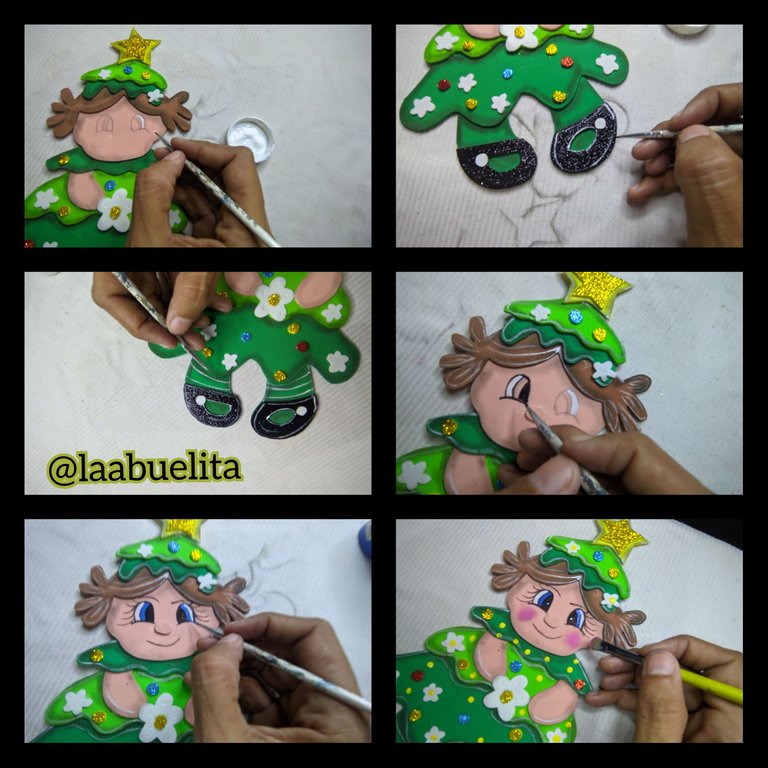
Ahora con el pincel fino y la pintura negra, blanca y azul dibujamos los ojos de la muñequita y finalmente aplicamos un poco de rubor en las mejillas y con la pintura blanca y el pincel fino delineamos algunas partes de la muñeca, también dibuje una líneas en la piernas que simulan las medias.
🌲 Paso 16:
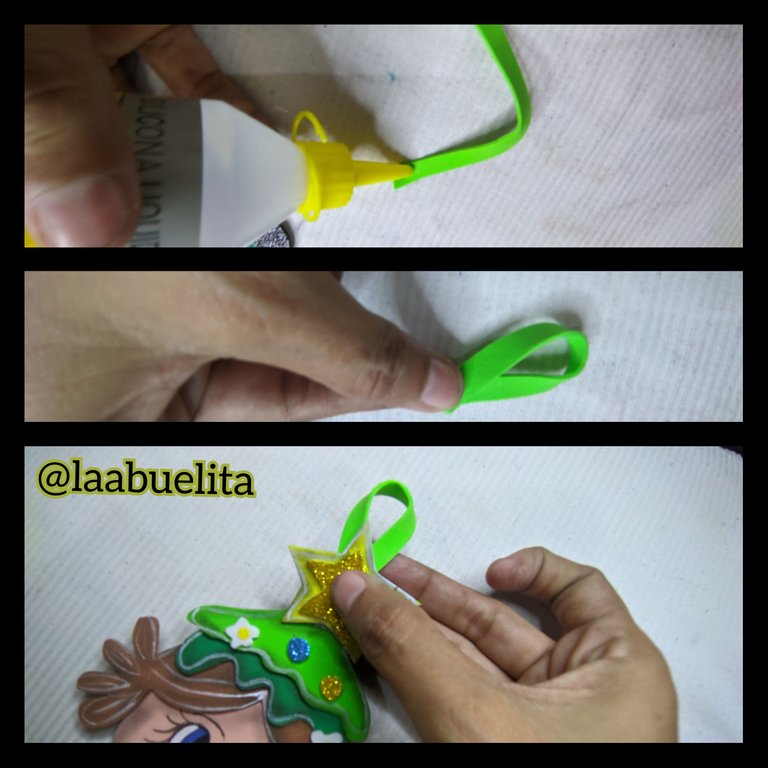
Recorte una pequeña tira que doblamos y pegamos de la cabeza de la muñeca y listo hemos terminado
🌲 Fotos finales 🌲

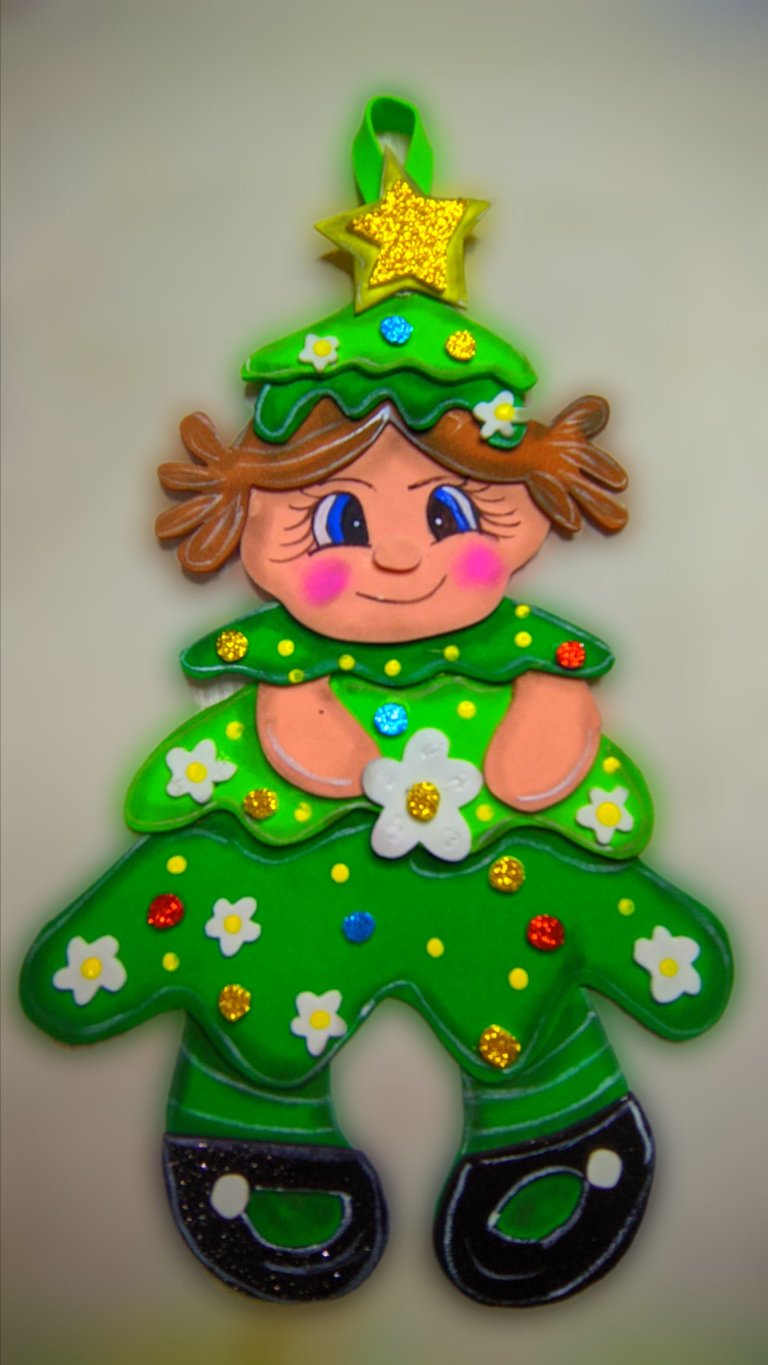

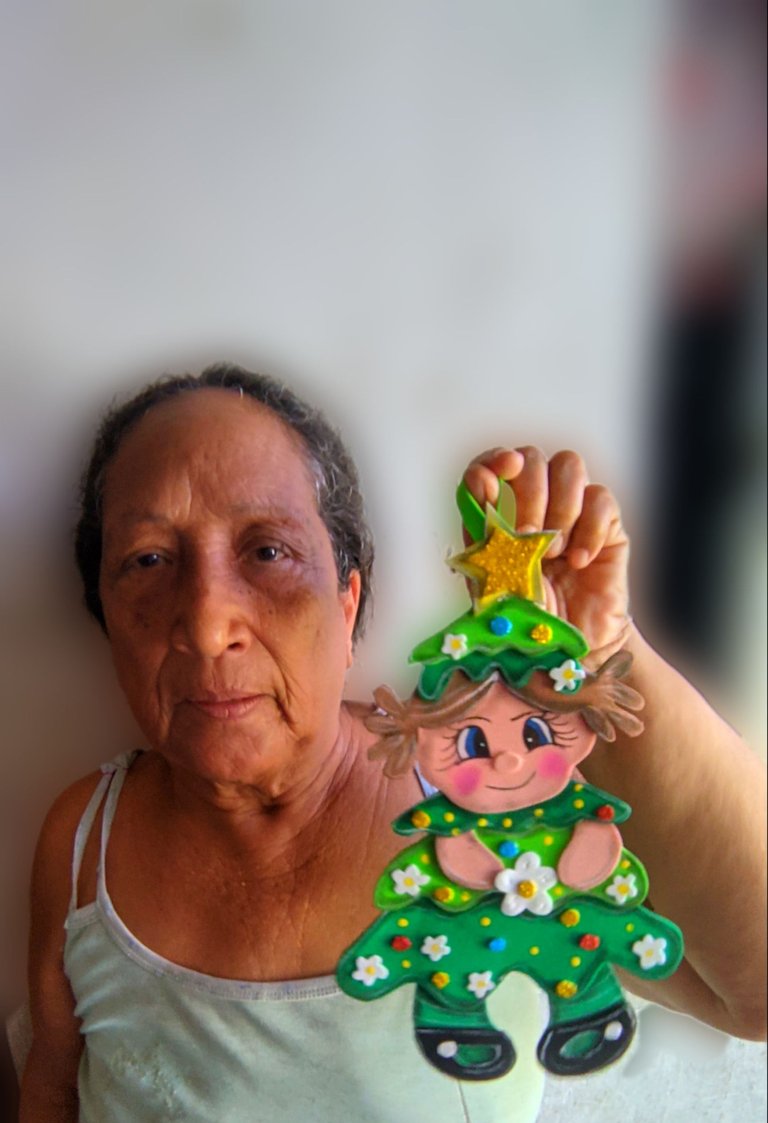
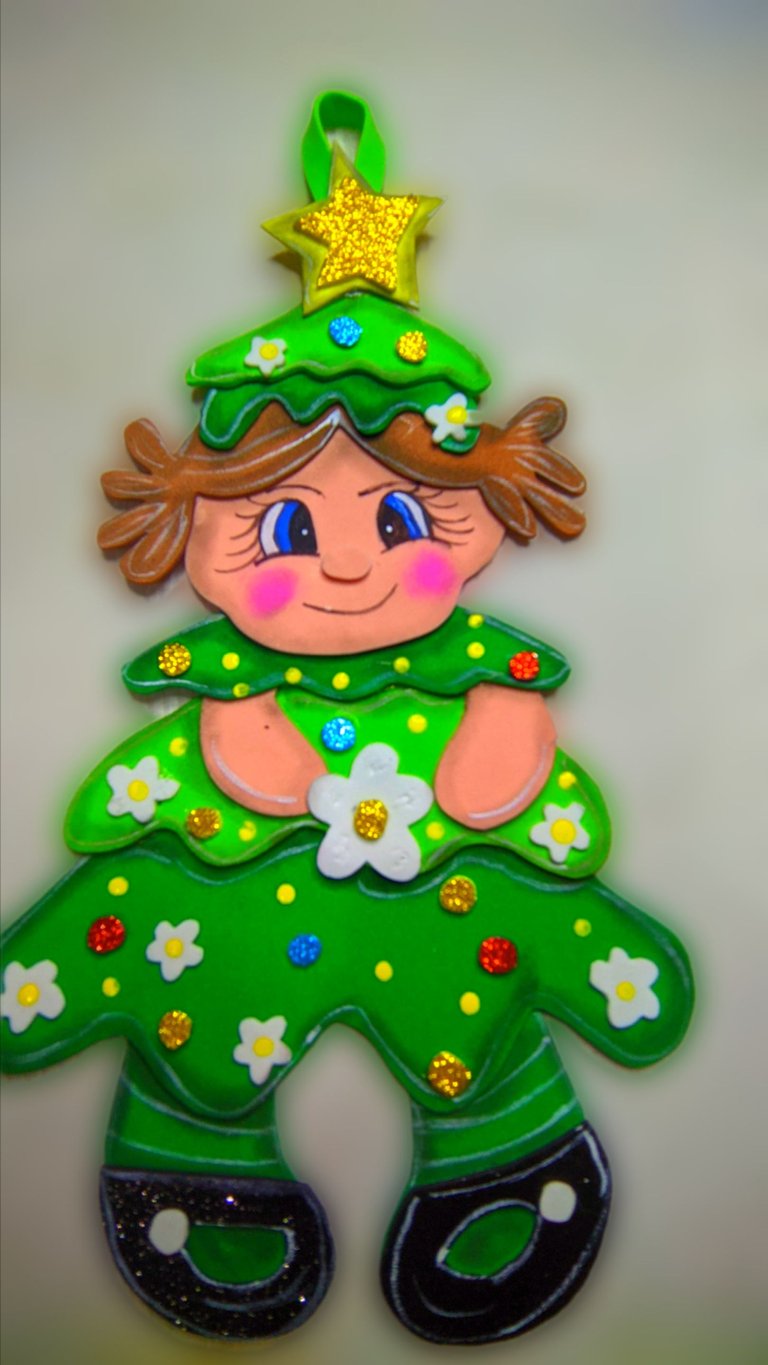
Cómo pueden ver este trabajo quedó bien hermoso, me encantó como quedó y espero que a ustedes también les guste, para hacer este post, utilice el programa polish y el traductor deepl versión gratis, las fotos fueron tomadas con mi teléfono Xiaomi redmi y son mías y me pertenecen.
 🌲🌲🌲🌲🌲🌲🌲🌲🌲🌲🌲
ENGLISH
🌲🌲🌲🌲🌲🌲🌲🌲🌲🌲🌲
ENGLISH
Hello hijitos I hope you are well, I'm here starting to prepare the Christmas decorations for the house, because there is never enough time to prepare them all, and in my house after Halloween and the Day of the Dead we start to decorate everything for Christmas, which is the most beautiful time of the year.
Today I'm going to make a cute Christmas hanging, in the shape of a little girl tree, which I loved, especially because it is something that can be used to decorate the Christmas tree if we make several, or we can put it on the wall as a decoration, even hang it on the chimneys and it will give it a beautiful touch.
Really when I make some crafts I like to do it so that it has utility, not do it for the sake of doing it, we must give functionality to the work we do, and undoubtedly this work today has many places where we can use it, the good thing is that this cute little model can be versatile and can be decorated according to the tastes of each person, we can even make some models of ornaments and decorate our doll as she is a Christmas tree.
🌲 Materials 🌲
🌲 Materials 🌲
🌲 Apple green foami.
🌲 Dark green foami.
🌲 Yellow and frosted yellow foami.
🌲 Black foami.
🌲 White foami.
🌲 Skin foami.
🌲 Brown foami.
🌲 Frosted red foami.
🌲 Blue frosted foami.
🌲 Liquid silicone.
🌲 Scissors.
🌲 Pencil.
🌲 white, yellow and black paint.
🌲 Blusher.
🌲 Step by step 🌲
🌲 Step by step 🌲
🌲Step 1:
I marked on the dark green foami the first layer of the doll's dress, which is the body of the Christmas tree, then cut it out.
🌲 Step 2:
On the apple green foami mark the second layer, only this time, the piece will be smaller than the previous one, and cut it out.
🌲 Step 3:
I took the skin-coloured foami and marked the doll's head and two little arms, then cut them out.
🌲 Step 4:
Now on the brown foami I drew and then cut out the doll's hair, then on the yellow foami I drew and cut out a star, and on the frosted yellow foami I cut out another smaller star.
🌲 Step 5:
As we already have the pieces ready we are going to start assembling, for that we take the two green pieces and glue the small one on top of the bigger one.
🌲 Step 6:
Take the head and with the liquid silicone we glued the hair, then I cut out another piece of the dark green Foami and with the liquid silicone we glued it to the head and let it dry.
🌲 Step 7:
Now we glue the head on top of the pieces and then we glue the little arms, these go under the dark green piece that has the head glued on.
🌲 Step 8:
Now I took out the pieces for the head cap, these were two pieces one in apple green and the other in dark green which we glued one on top of the other and then glued it to the head.
🌲 Step 9:
Grip the small star, the frosted one and apply liquid silicone and stick it on top of the yellow star and stick it on the hat with a little liquid silicone.
🌲 Step 10:
Now I cut out from the dark green foami two legs and from the black foami, I cut out two pieces that are going to be the little shoes, then I applied liquid silicone and glued on the legs piece.
🌲 Step 11:
Applied liquid silicone on the legs and we paid for the whole piece.
🌲 Step 12:
Now from the white foami I took some small flowers and two circles, which we glued on the little shoes and the little flowers we glued them on different parts of the dress.
🌲 Step 13:
I marked and cut out a larger flower, and we glued it in the centre of the hands.
🌲 Step 14:
Now from the scraps cut out three small circles from the yellow, blue and red frosted foami and glue them with liquid silicone on the doll's dress.
Then we shade the whole thing in.
🌲 Step 15:
Now with the fine brush and the black, white and blue paint we draw the doll's eyes and finally we apply a little blush on the cheeks and with the white paint and the fine brush we outline some parts of the doll, I also drew some lines on the legs that simulate the stockings.
🌲 Step 16:
Cut a small strip that we fold and glue from the doll's head and we are done
🌲 Final photos 🌲
How you can see this work was beautiful, I loved it and I hope you like it too, to make this post, I used the polish program and the free version of deepl translator, the photos were taken with my Xiaomi redmi phone and they are mine and belong to me.
Muchísimas gracias
¡Preciosa! Se ve muy linda esta muñeca de navidad. Muy llamativa. Yo la usaría como adorno en la puerta. Le quedó bella.
Viniendo de ti me llena de alegría hijita porque tus manos son benditas y tú haces trabajos maravillosos y hermosísimos
Gracias. ☺️ Igual usted.
Muchas gracias hijita Dios la bendiga
Que linda quedó está muñequita de arbolito. Saludos
Muchísimas gracias, a mi también me gustó el resultado final
Que hermoso proyecto, me gusta mucho que la forma del árbol sea como el vestido de la niña. Saludos 😊
Gracias hijita, que bueno que te gustó, quise hacer algo diferente, saludos y que Dios te bendiga
Felicidades abuelita,le quedó hermosa esa muñequita,propicia para estas fechas venideras.
Hermoso trabajo, se muy tierno, la ropa de la niña es el árbol de navidad, me encantó.
Que tenga u excelente fin de semana!
Que ternura! A mí hija le ha encantado!
@laabuelita
https://inleo.io/threads/view/hive-130560/re-leothreads-2dgoiunax
https://twitter.com/hivediy47901/status/1715806819522580597
Que lindos ojos usted dibuja muy bonito!!
Gracias