
Saludos a todos los miembros que conforman a este ecosistema maravilloso llamado
#hive, reciban de esta abuelita un gran abrazo y una lluvia de bendiciones para cada uno de ustedes que día a día hacen la hermosa labor de construir dentro de la web 3.0, yo estoy feliz de poder aportar mi granito de arena con mis trabajitos que manualidades que les traigo a todos.
Hoy mi trabajo está dedicado a la elaboración de un hermoso detalle decorativo para el día de halloween, algo muy bonito y delicado para colocarlo en cualquier espacio de la casa, inclusive en los cuartos de nuestros niños, aquí les dejo el paso a paso, la lista de materiales y las fotos finales.
🎃👻🕷️ MATERIALES 👻🎃🕷️
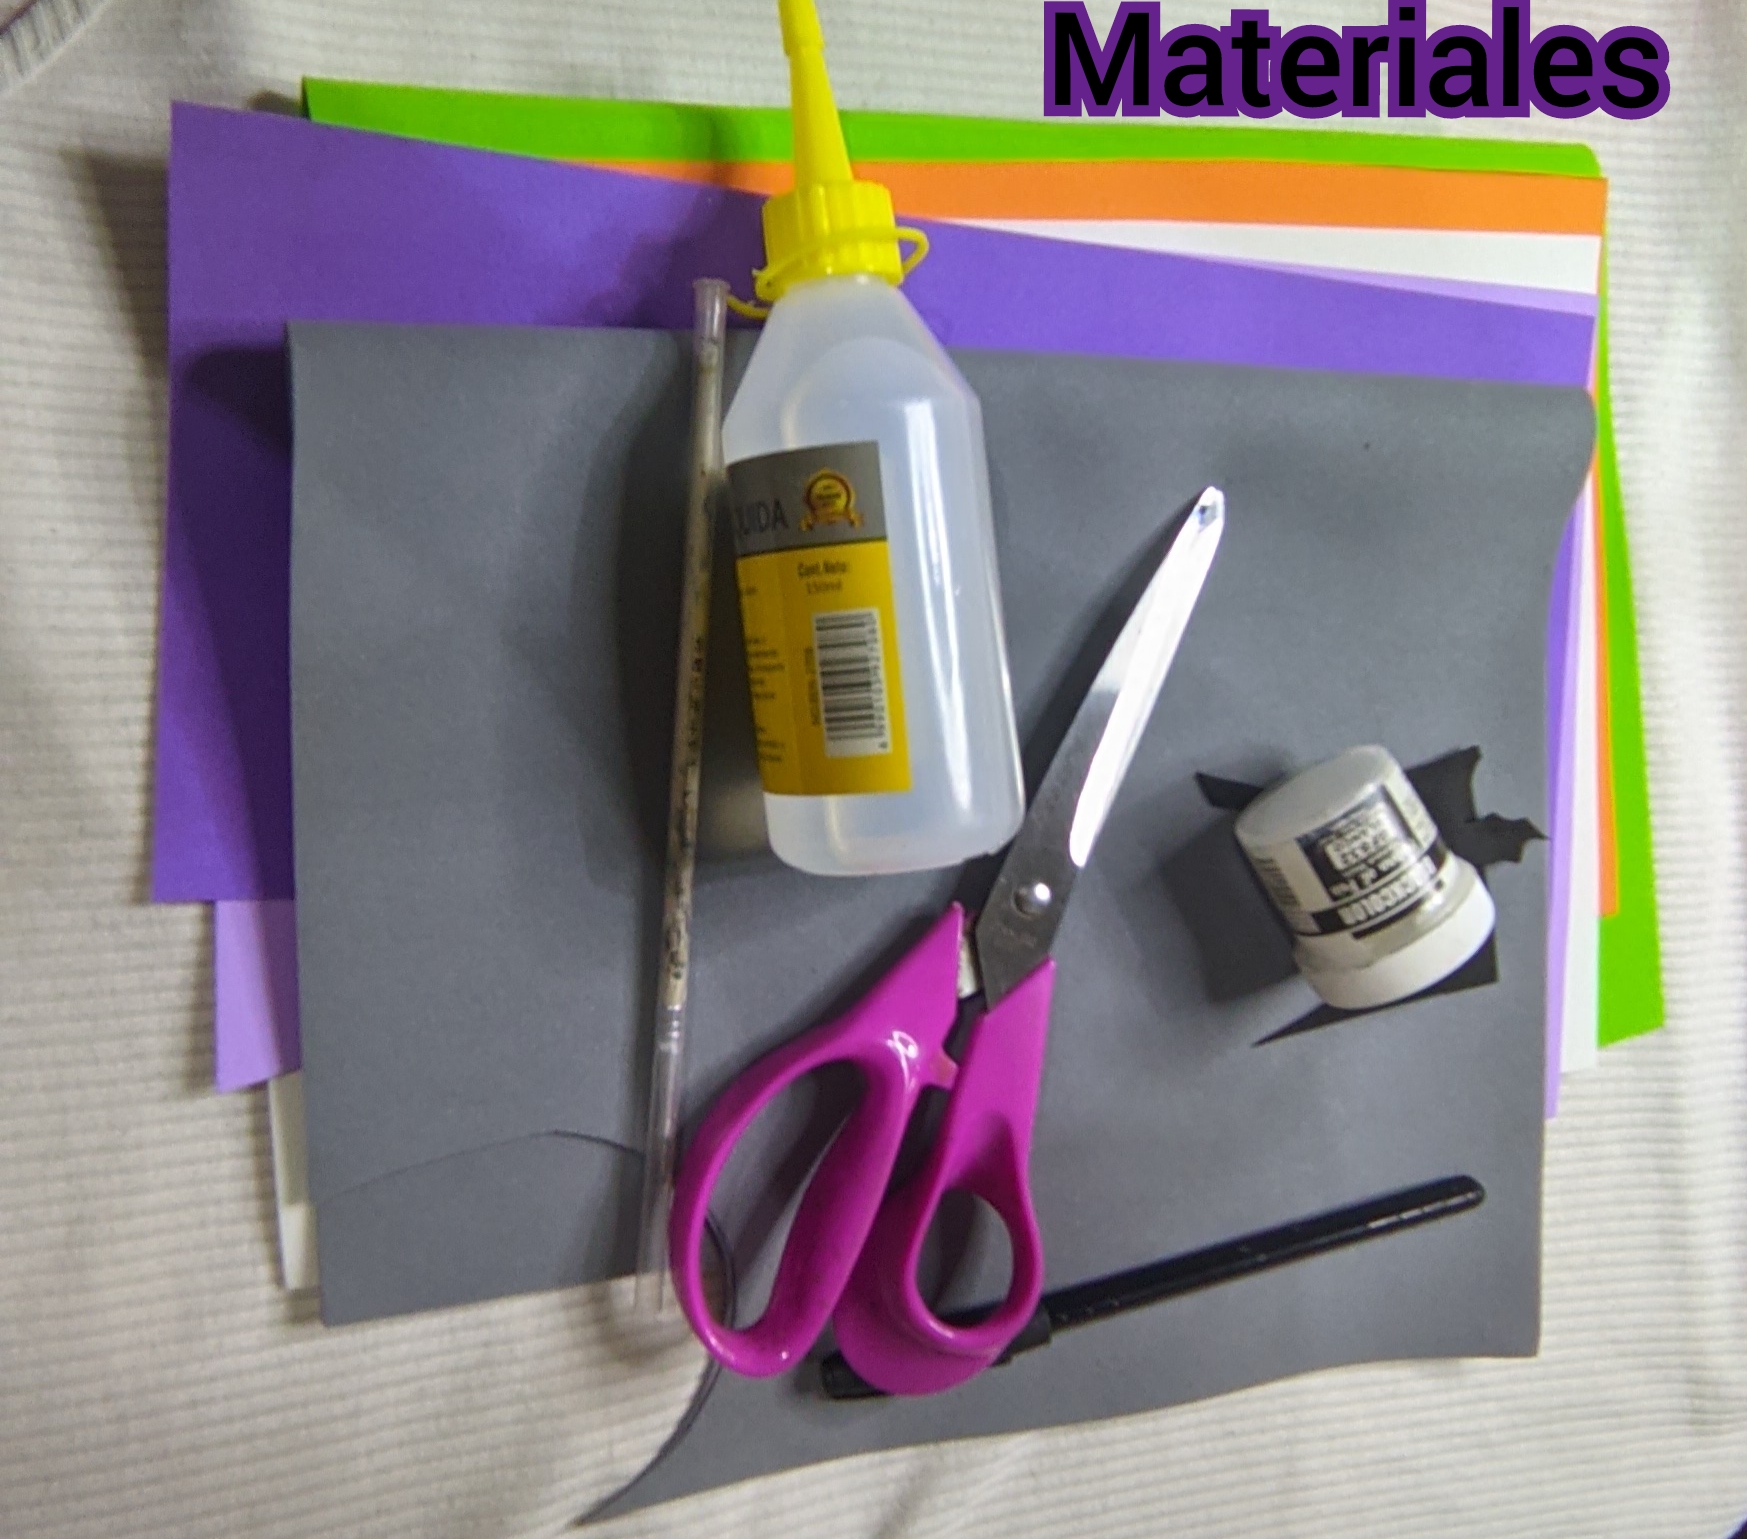
🕷️ Foami verde manzana, blanco, negro, rojo, amarillo, morado, lila, naranja, y gris.
🎃 Silicón líquido.
👻 Pintura blanca.
🕷️ Plumilla negra.
🎃 Sombra negra y azul.
👻 Regla.
🕷️ Tijera.
🎃 Pincel fino.
👻 Pincel para sombreado.
🕷️ Plumilla negra.
👻🎃🕷️ Paso a paso 🕷️🎃👻
👻Paso 1:

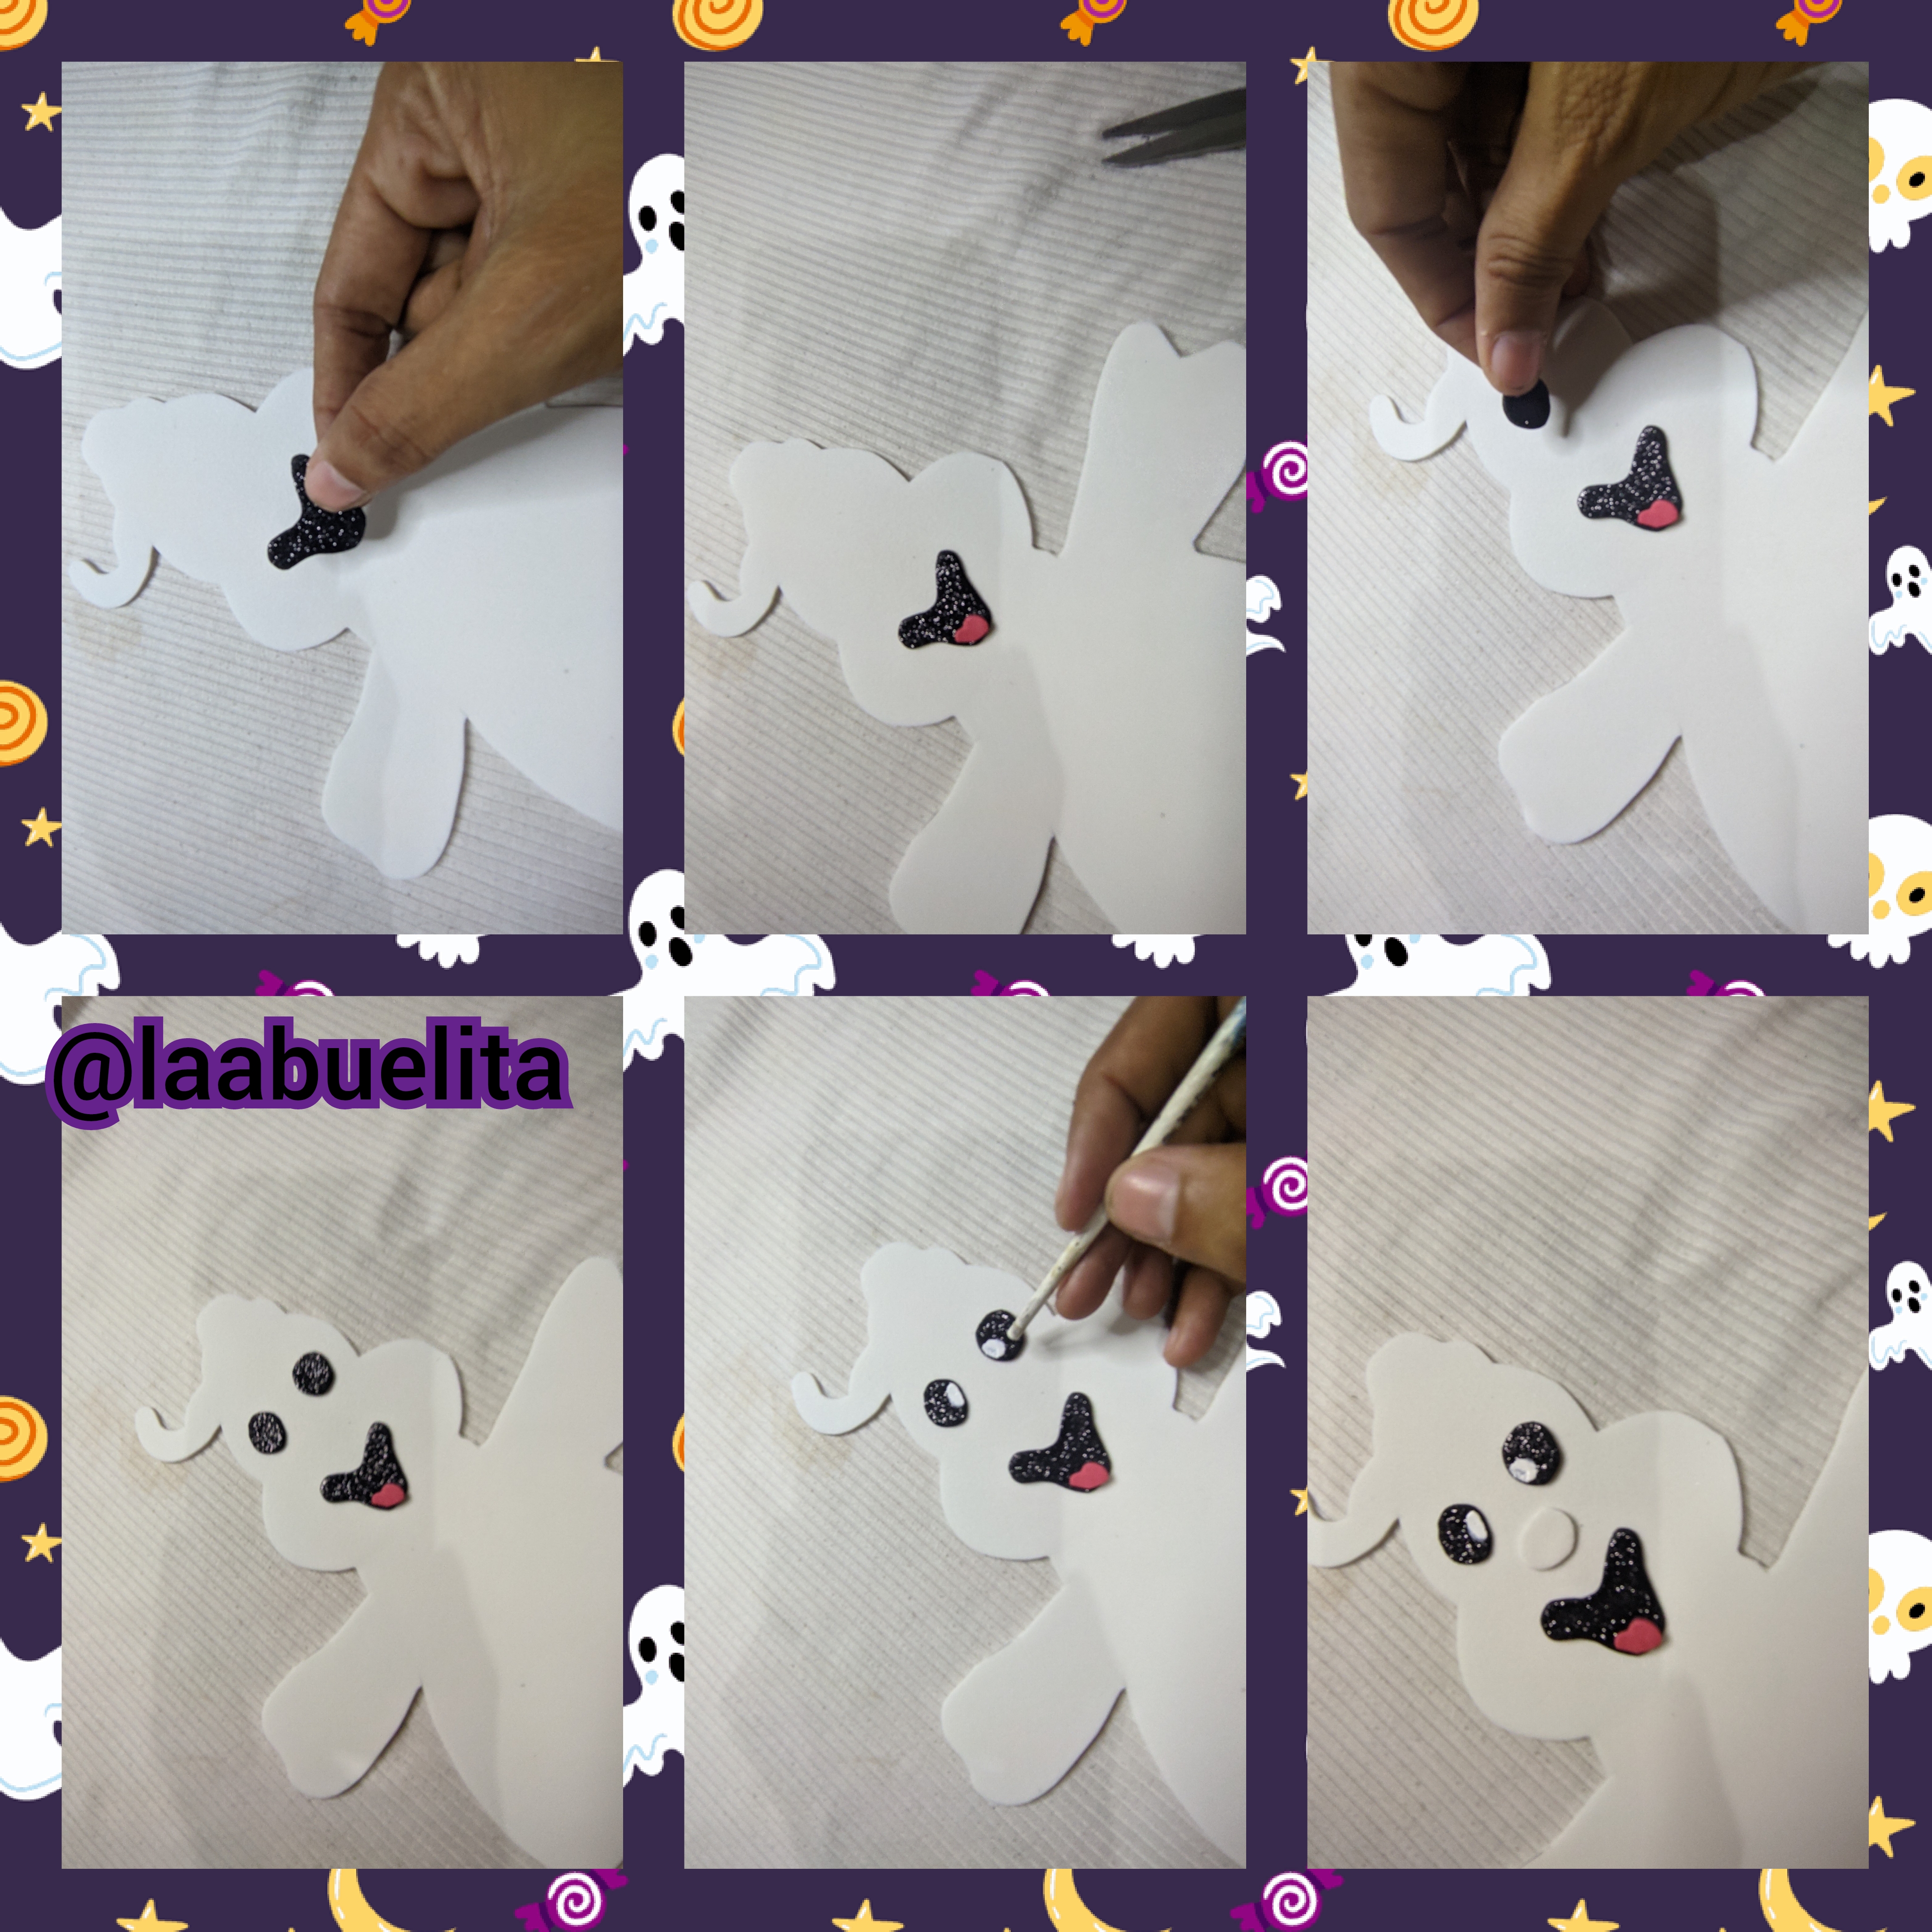
Primero que nada tome el Foami blanco y con el lápiz dibuje la figura del fantasma, y luego lo recorté. Después en el foami negro dibuje y recorte la boca del fantasmita, después recorté y con el silicón líquido pegue una pequeña lengua del foami rojo, luego recorté los ojitos del foami negro y pegamos con el silicón líquido, y con la pintura blanca dibujamos un círculo y listo los ojos, finalmente recorte un círculo de foami negro y pegue en el rostro que será nuestra naríz.
🕷️ Paso 2:
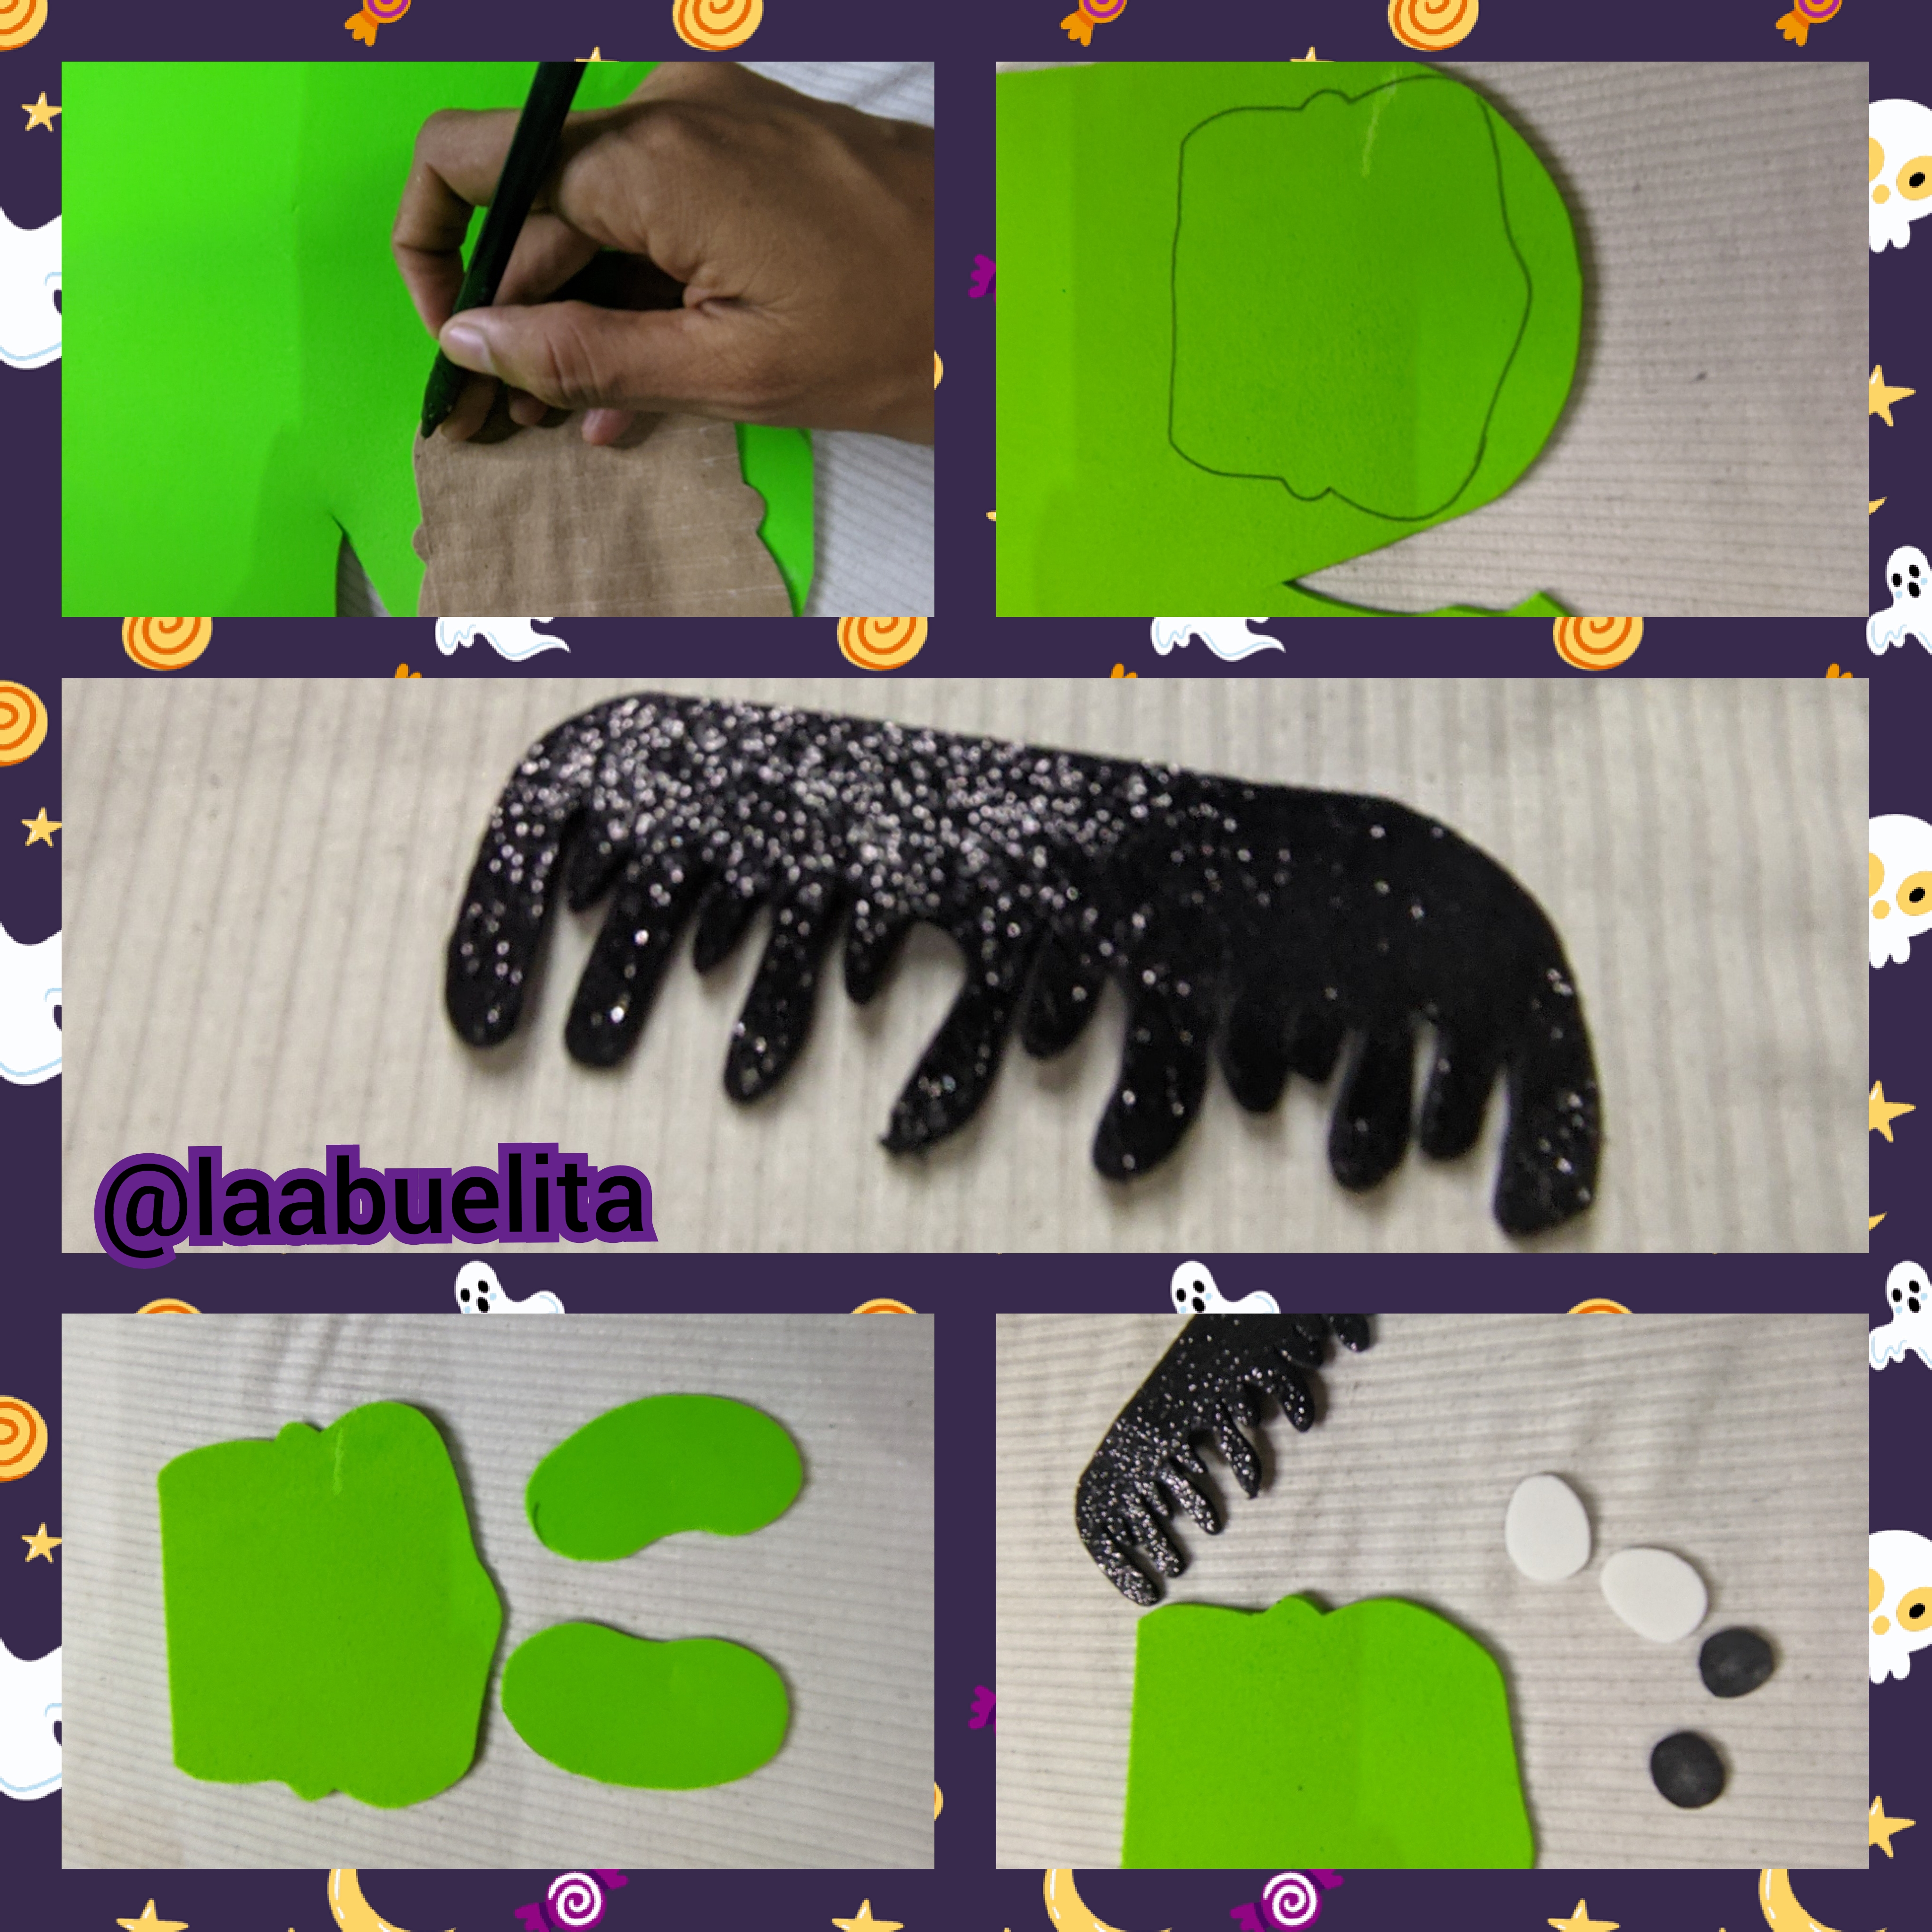
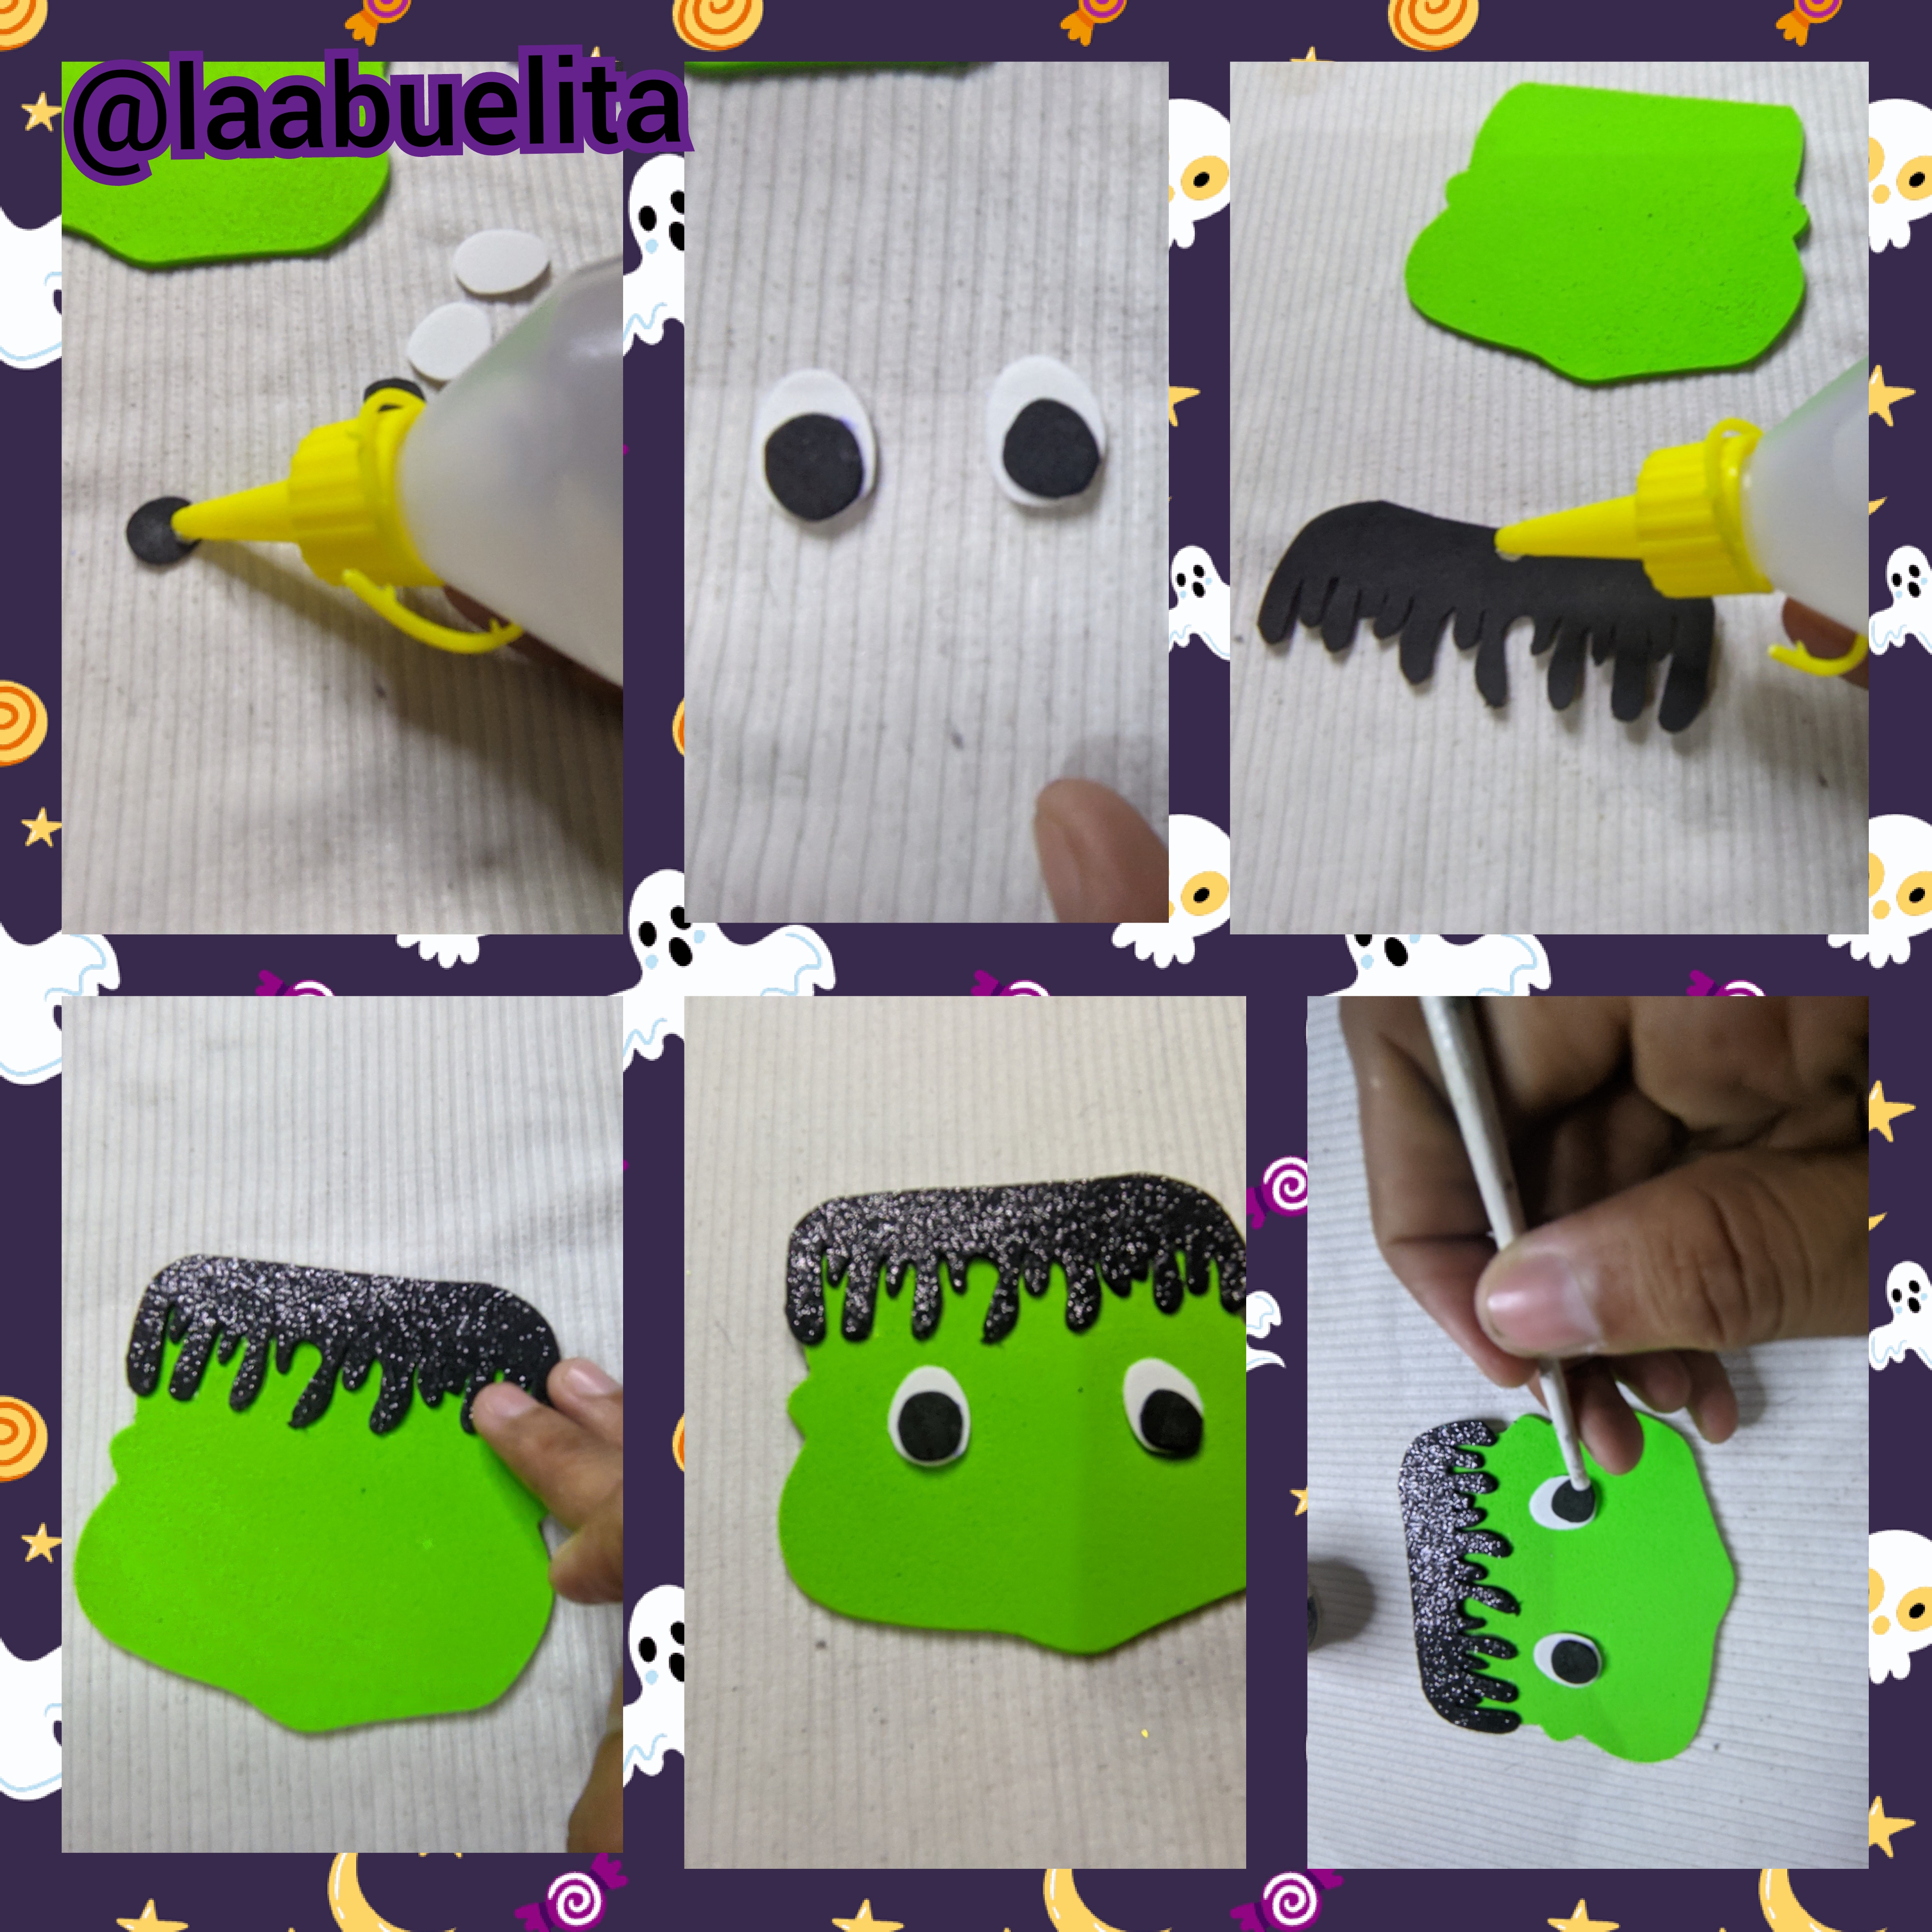
Agarre el Foami verde manzana y dibuje y recorte el rostro de Frankenstein, y los brazos y en el foami negro recorte el cabello,tambien recorté dos círculos de foami blanco y dos círculos de foami negro.
Luego con el silicón líquido pegamos las piezas, primero el cabello, luego los ojos.
🎃 Paso 3:


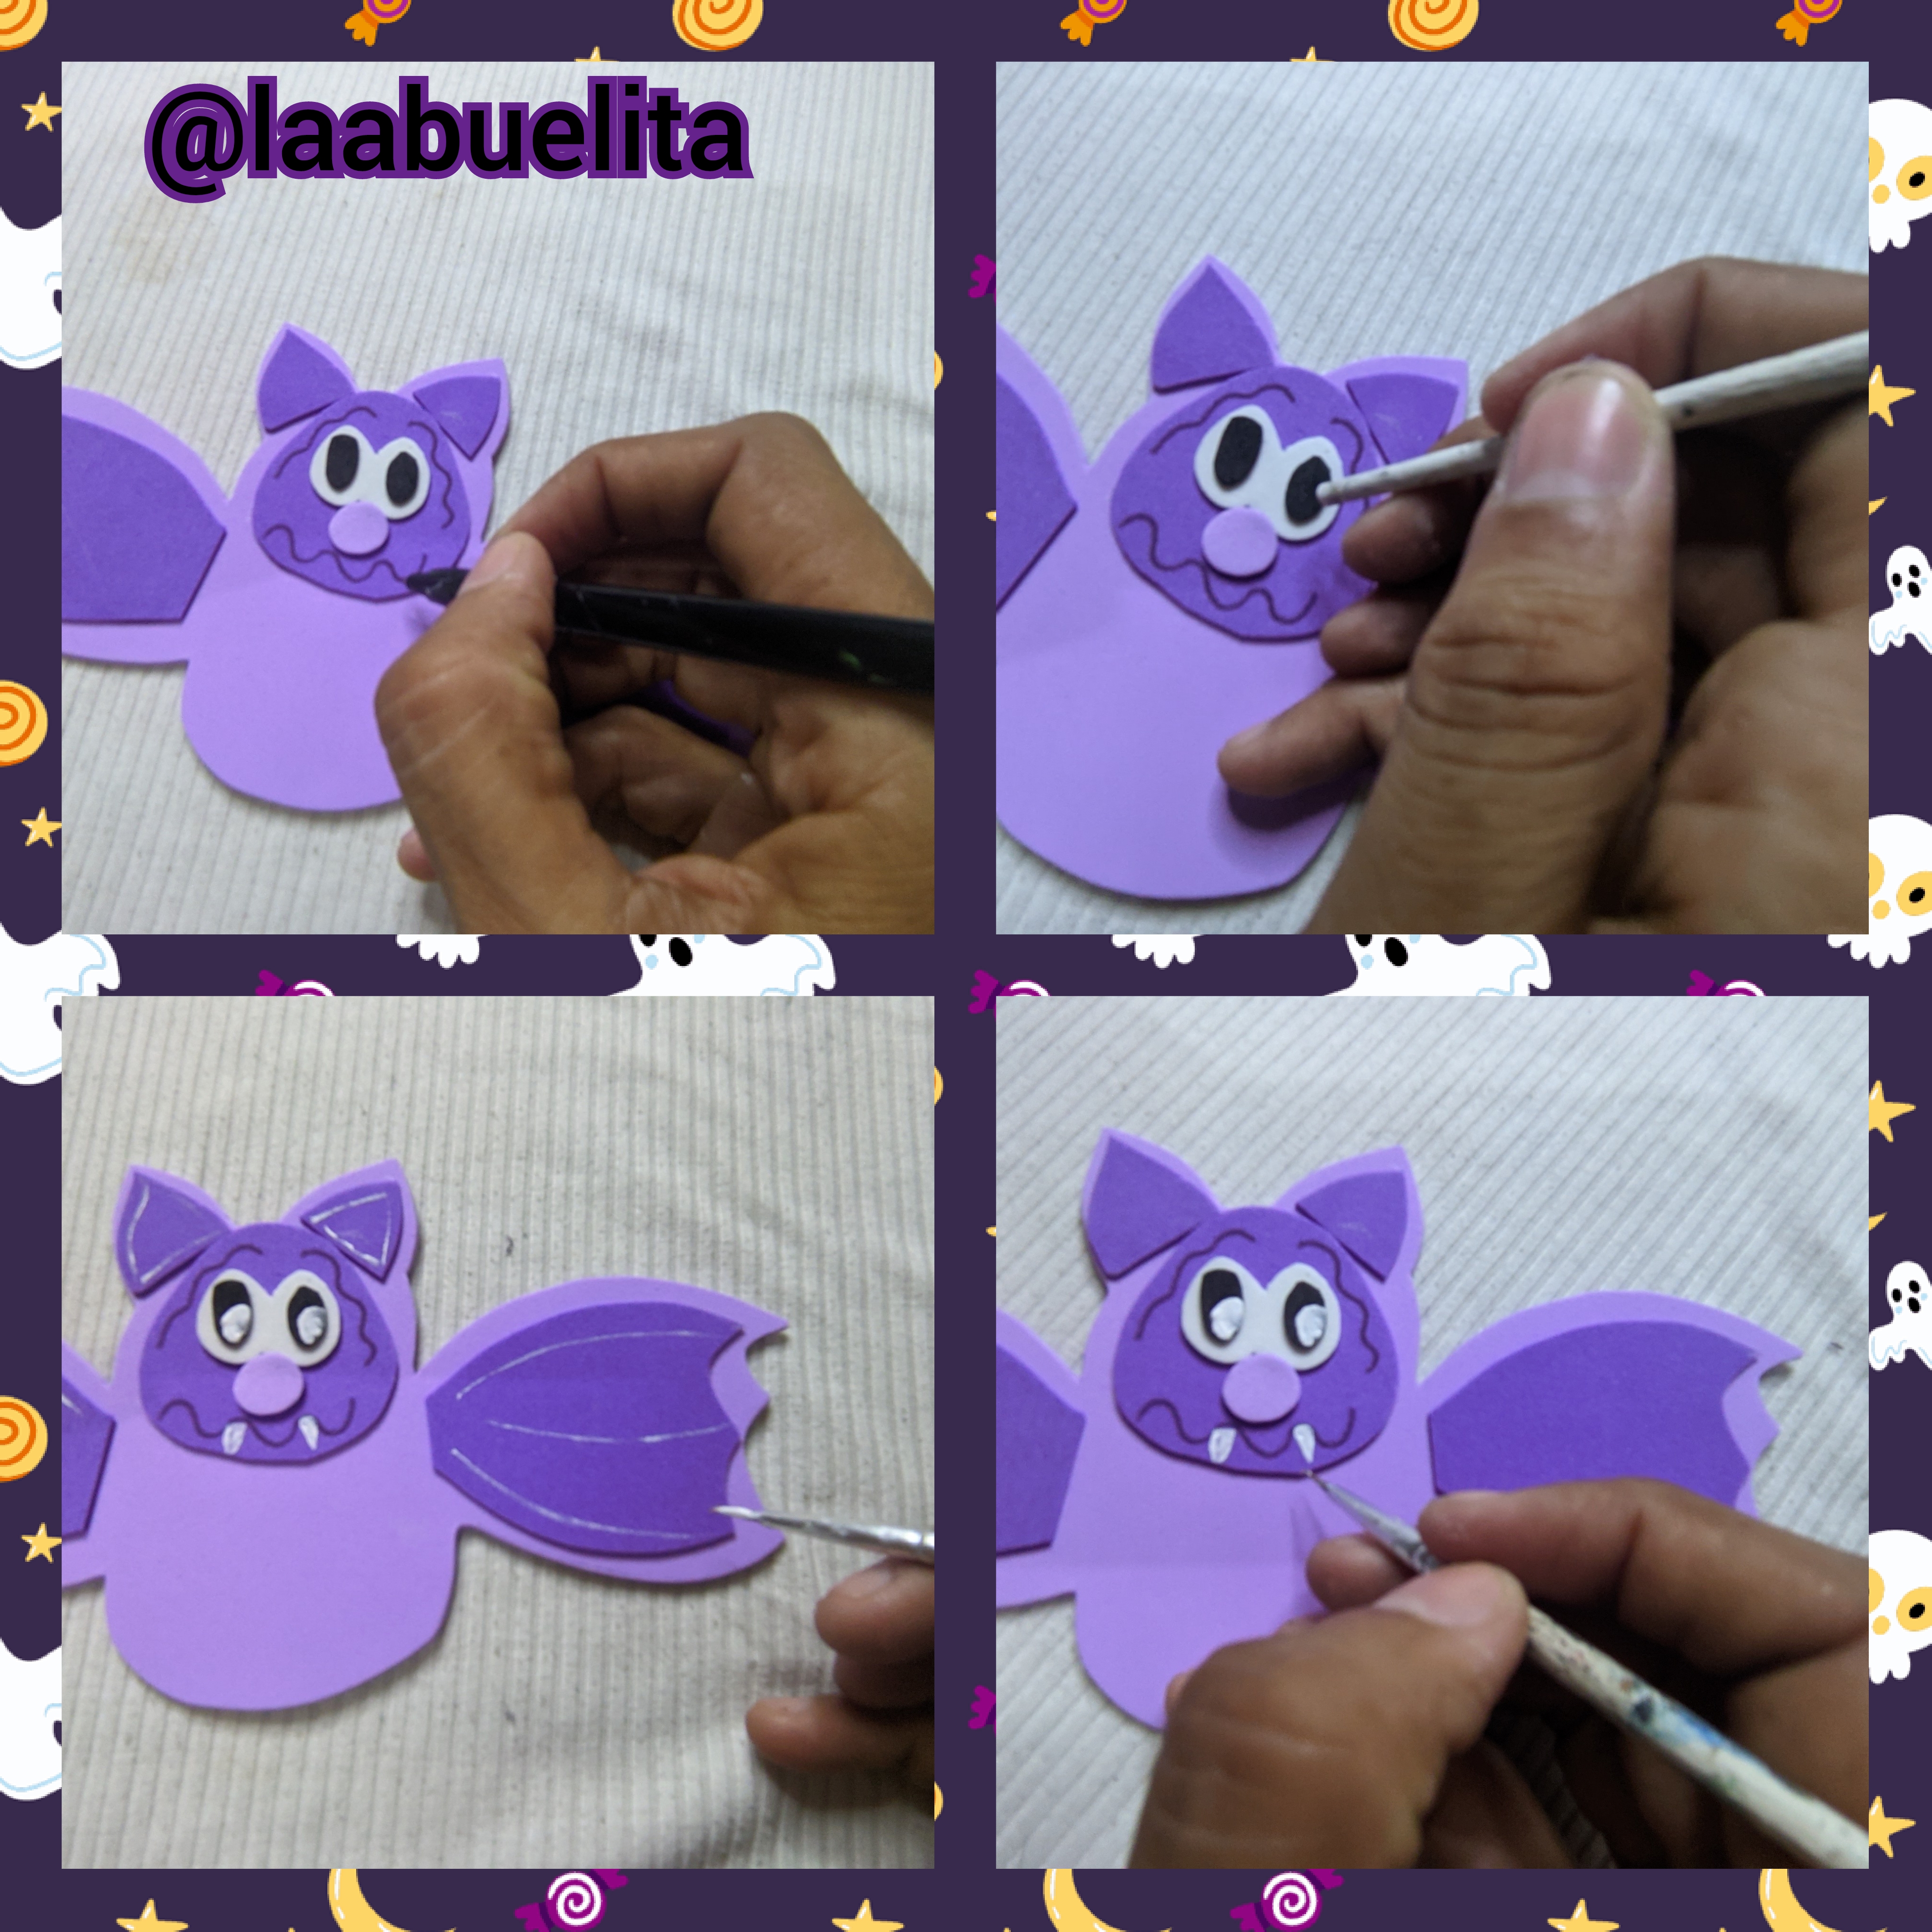
Ahora dibujé y recorté un vampiro en el Foami lila y en el Foami morado, recorte unas alas y las orejas, después con el silicón líquido pegamos las piezas de color morado encima de las de color lila (alas, orejas y panza), luego pegamos los ojitos.
Pegué los dos círculos negros dentro de los círculos blancos y con la pintura blanca y ayudándome con el pincel fino, dibuje los detalles del vampirito.
👻 Paso 4:

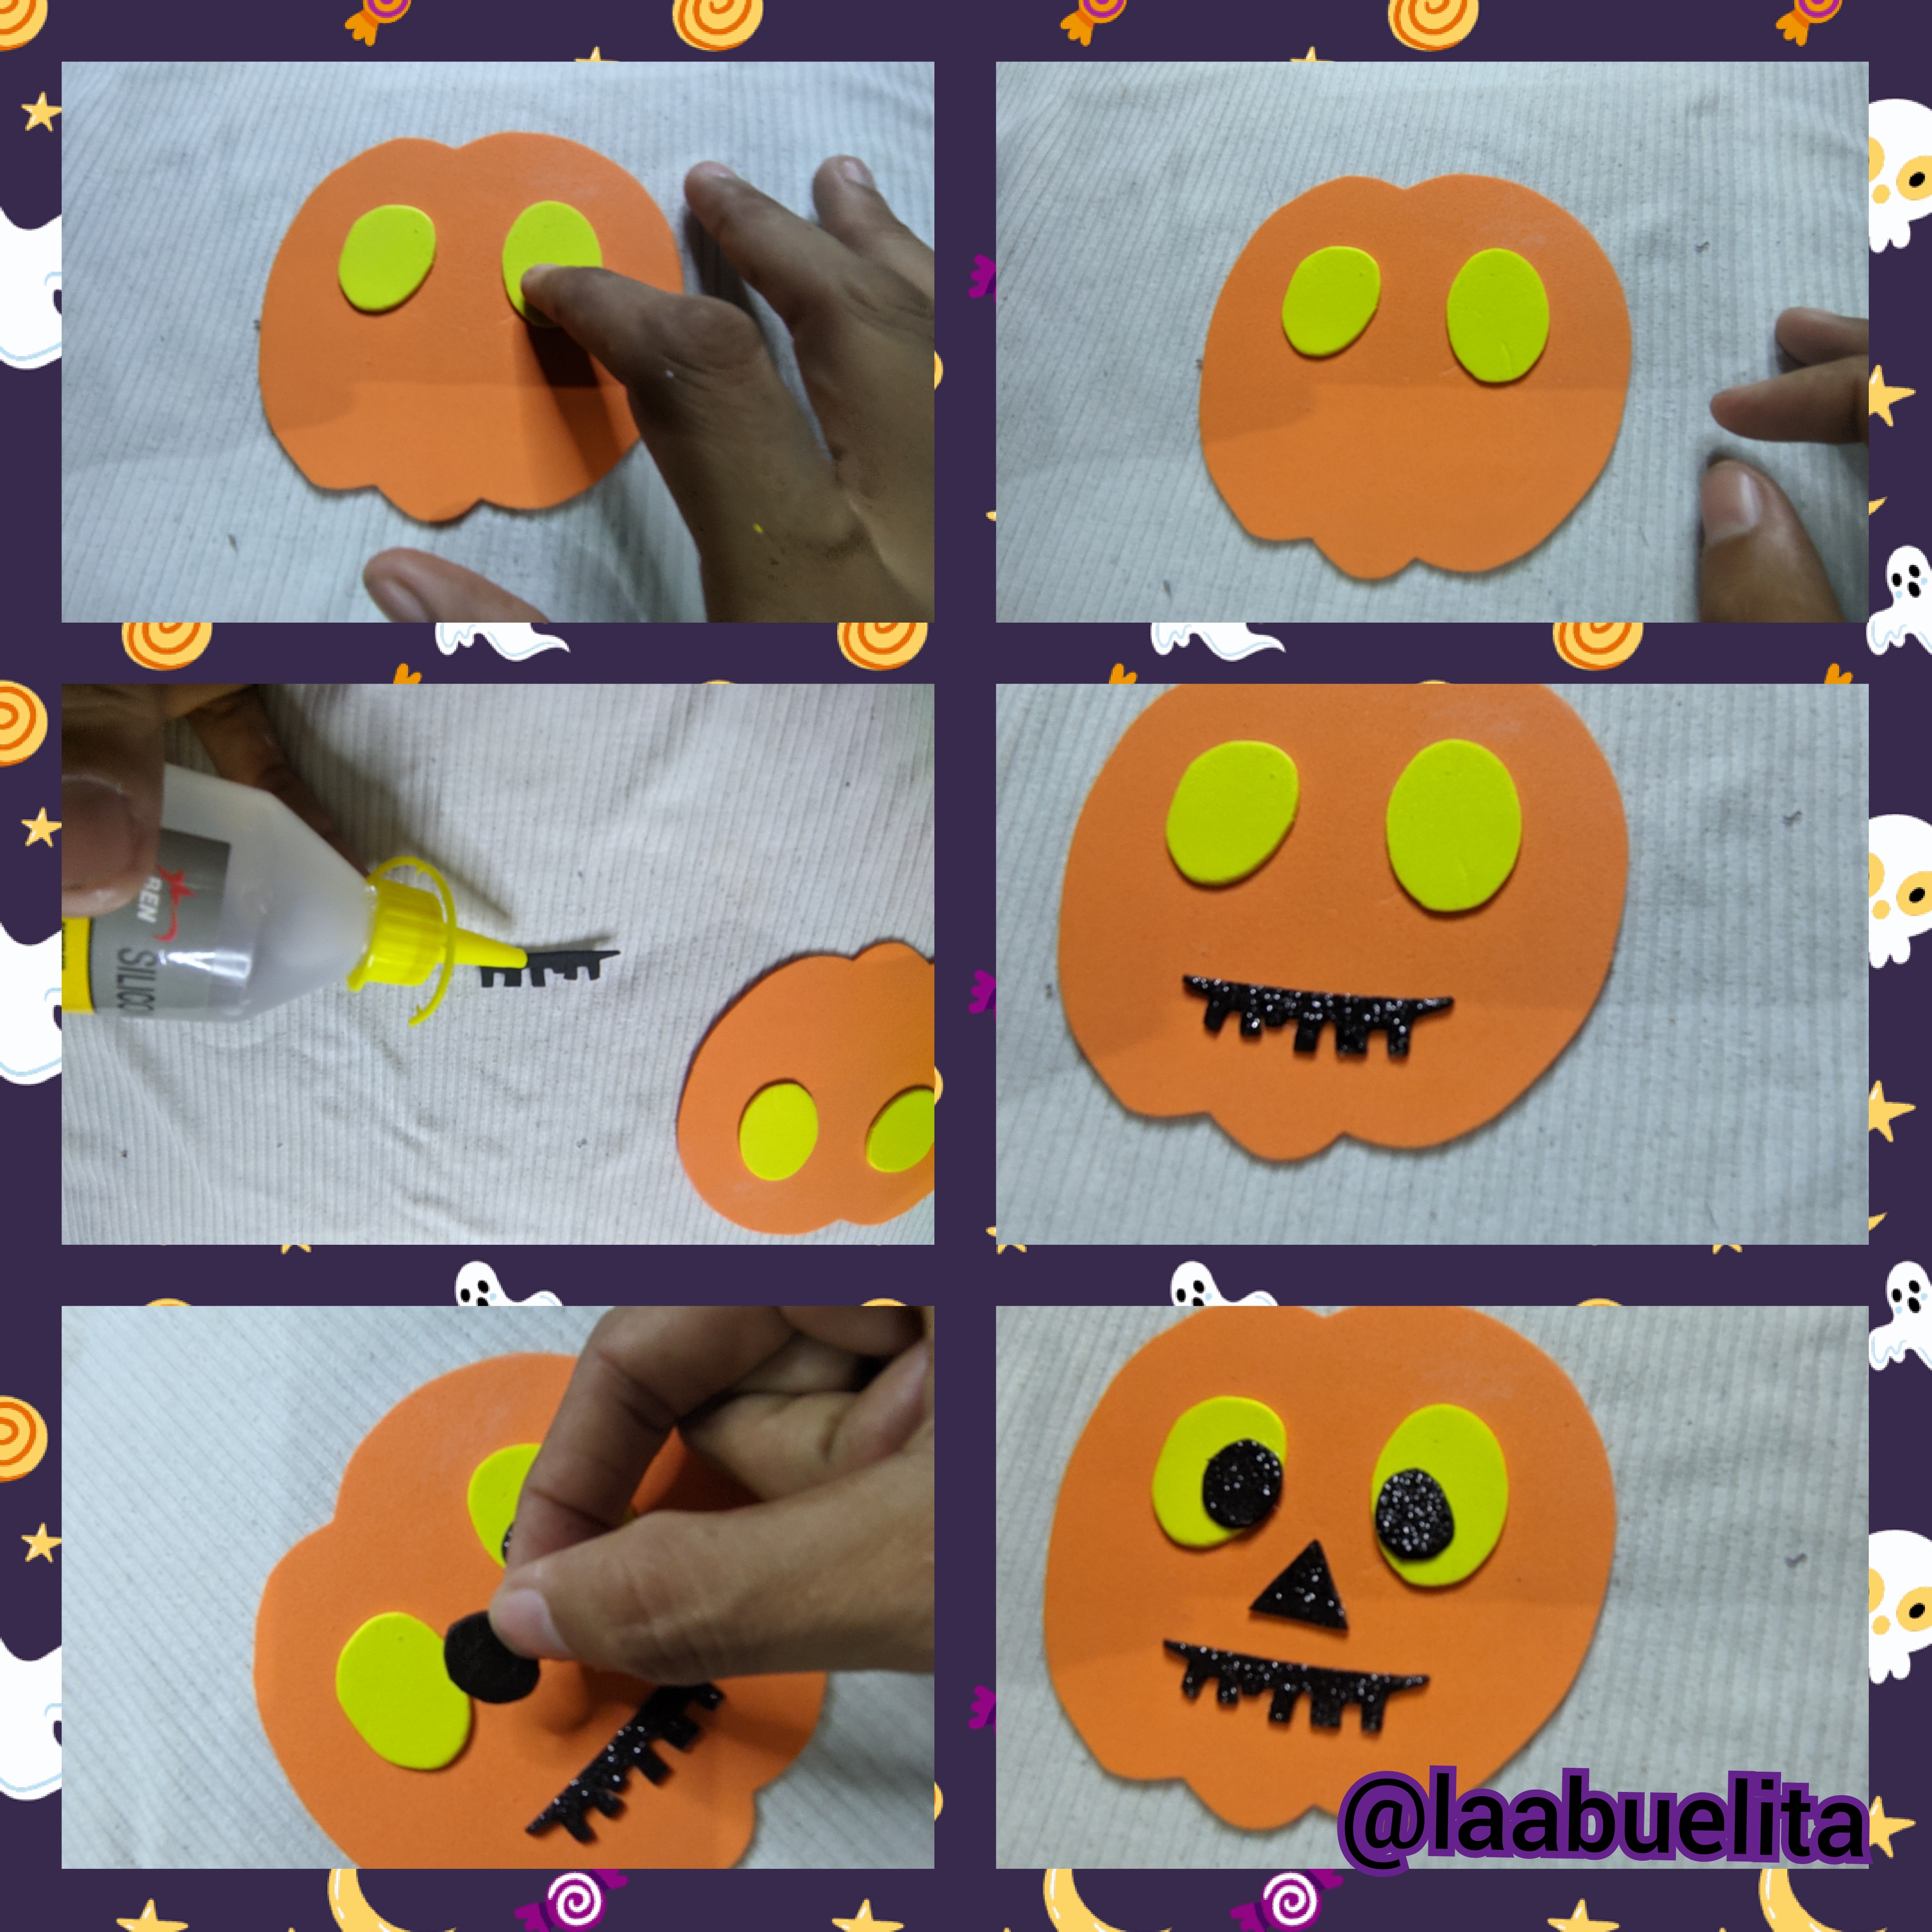
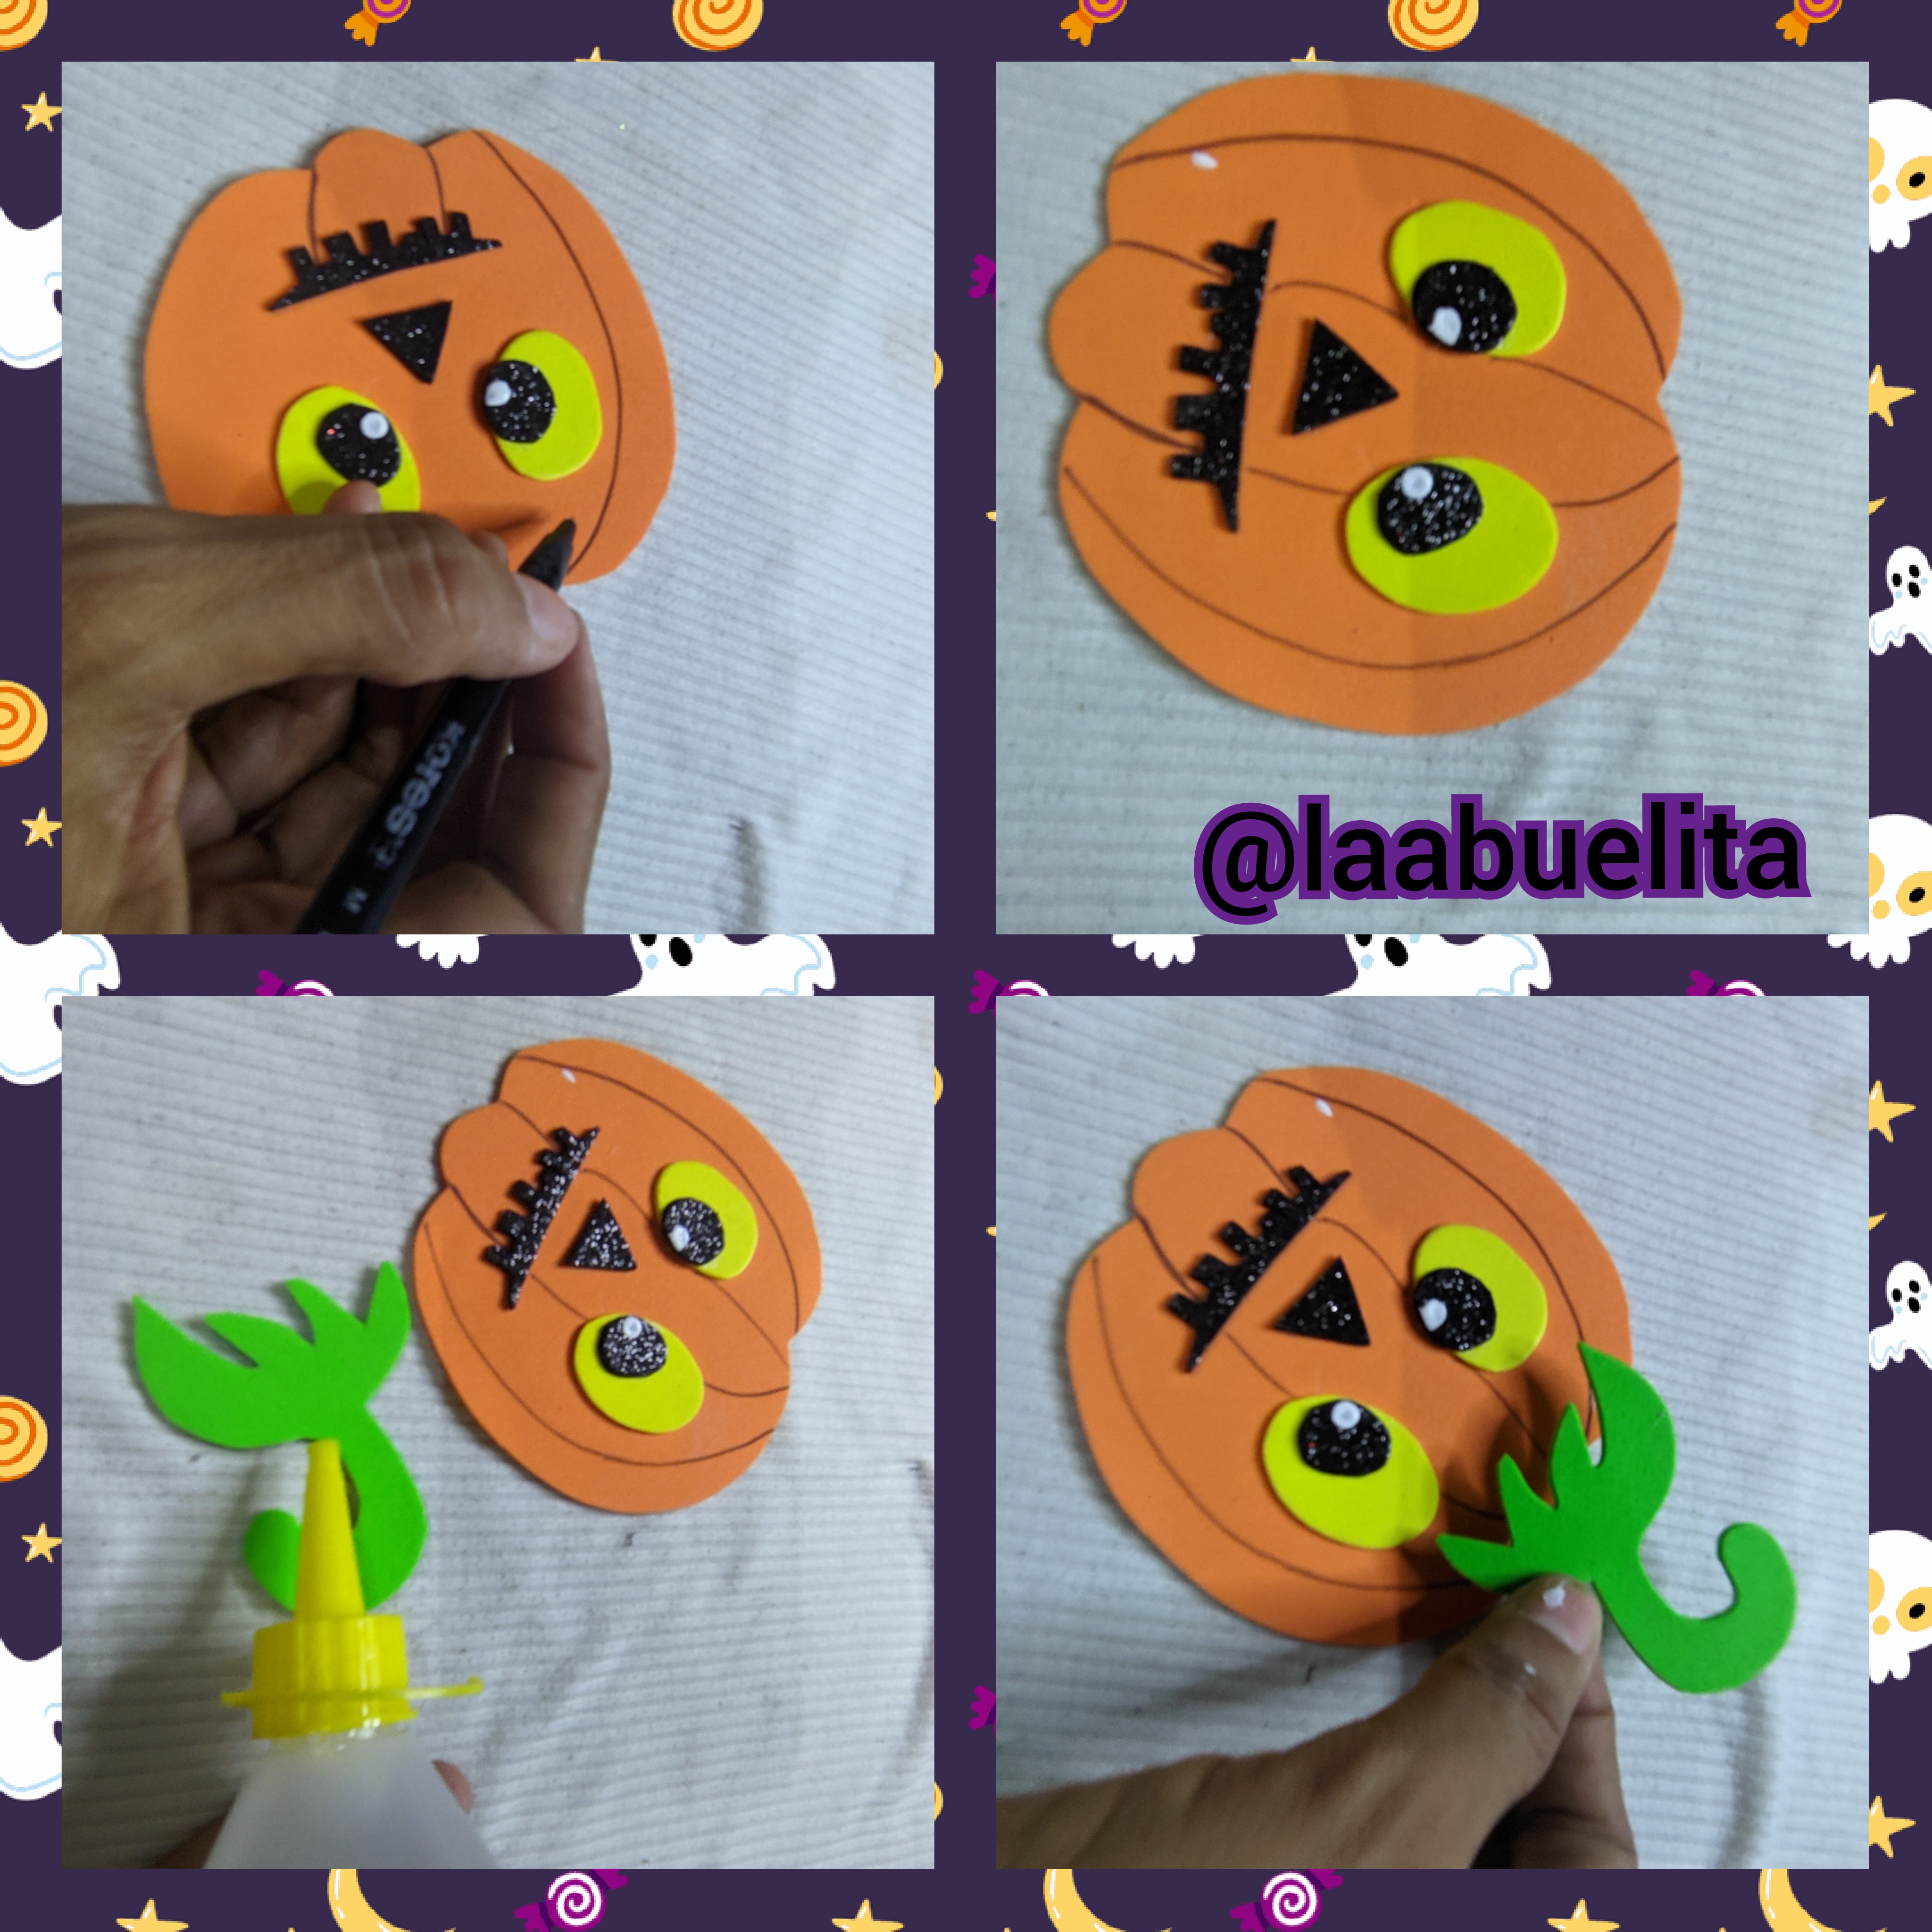
En el foami de color naranja dibuje y luego recorté la silueta de una calabaza, también recorté y pegue los ojitos de foami amarillo y el centro con foami negro, también recorte la nariz y la boca, luego del foami verde recorte la parte de arriba de la calabaza y la pegue con el silicón líquido.
Con la plumilla le dibujé las líneas que caracterizan a las calabazas.
🕷️ Paso 5:

Agarramos las sombras y sombreamos todas las piezas, para darle un mejor acabado.
🎃 Paso 6:

Ahora que ya están listas todas las figuras, vamos a ensamblar nuestro adorno y para eso colocamos de base al fantasma porque le deje la parte de abajo las larga para montar el trabajo allí. Luego le aplicó silicón líquido a la cabeza de Frankenstein y pegó en la base del fantasma.
👻 Paso 7:
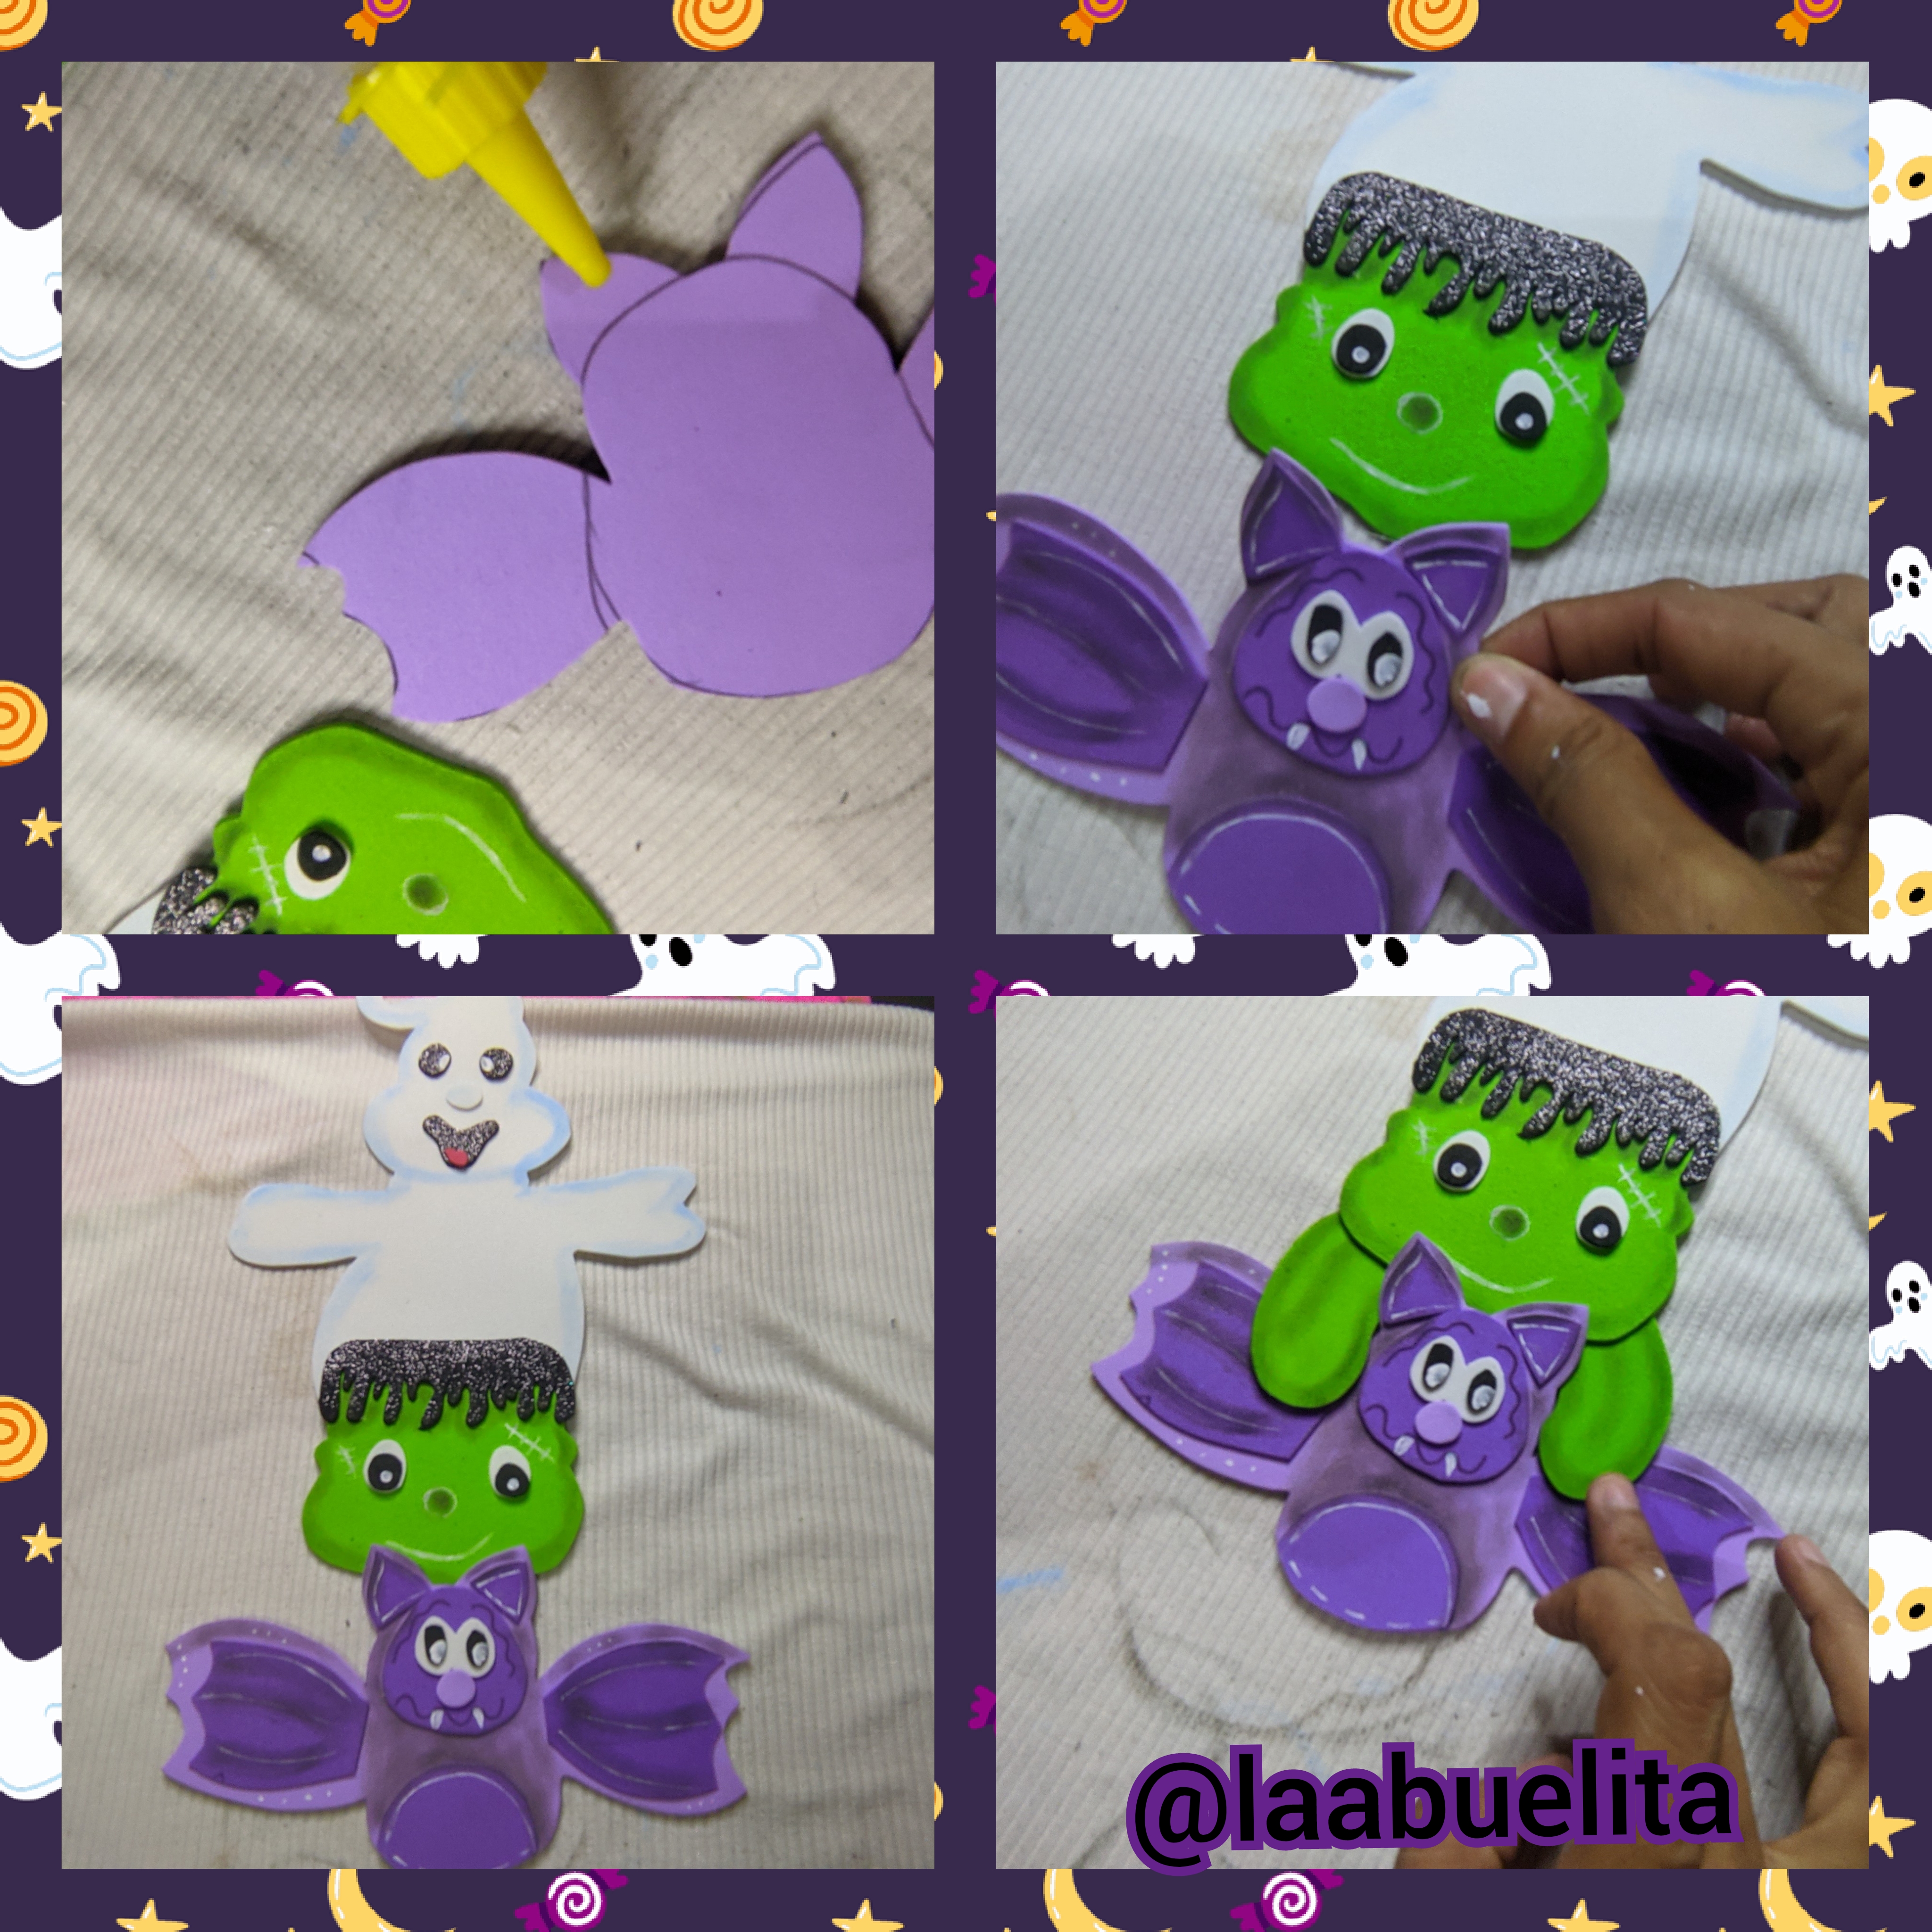
Luego pegamos al vampiro y encima le pegó los brazos de Frankenstein.
🕷️ Paso 8:

Pegué la calabaza en el brazo del fantasma con el silicón líquido.
🎃 Paso 9:

Tome el Foami gris y dibujé y recorté una especie de nube, también recorte la palabra dulces en el Foami morado, y la pegó encima de la nube gris, luego con el pincel fino y la pintura blanca le hago algunos dibujos.
👻 Paso 10:
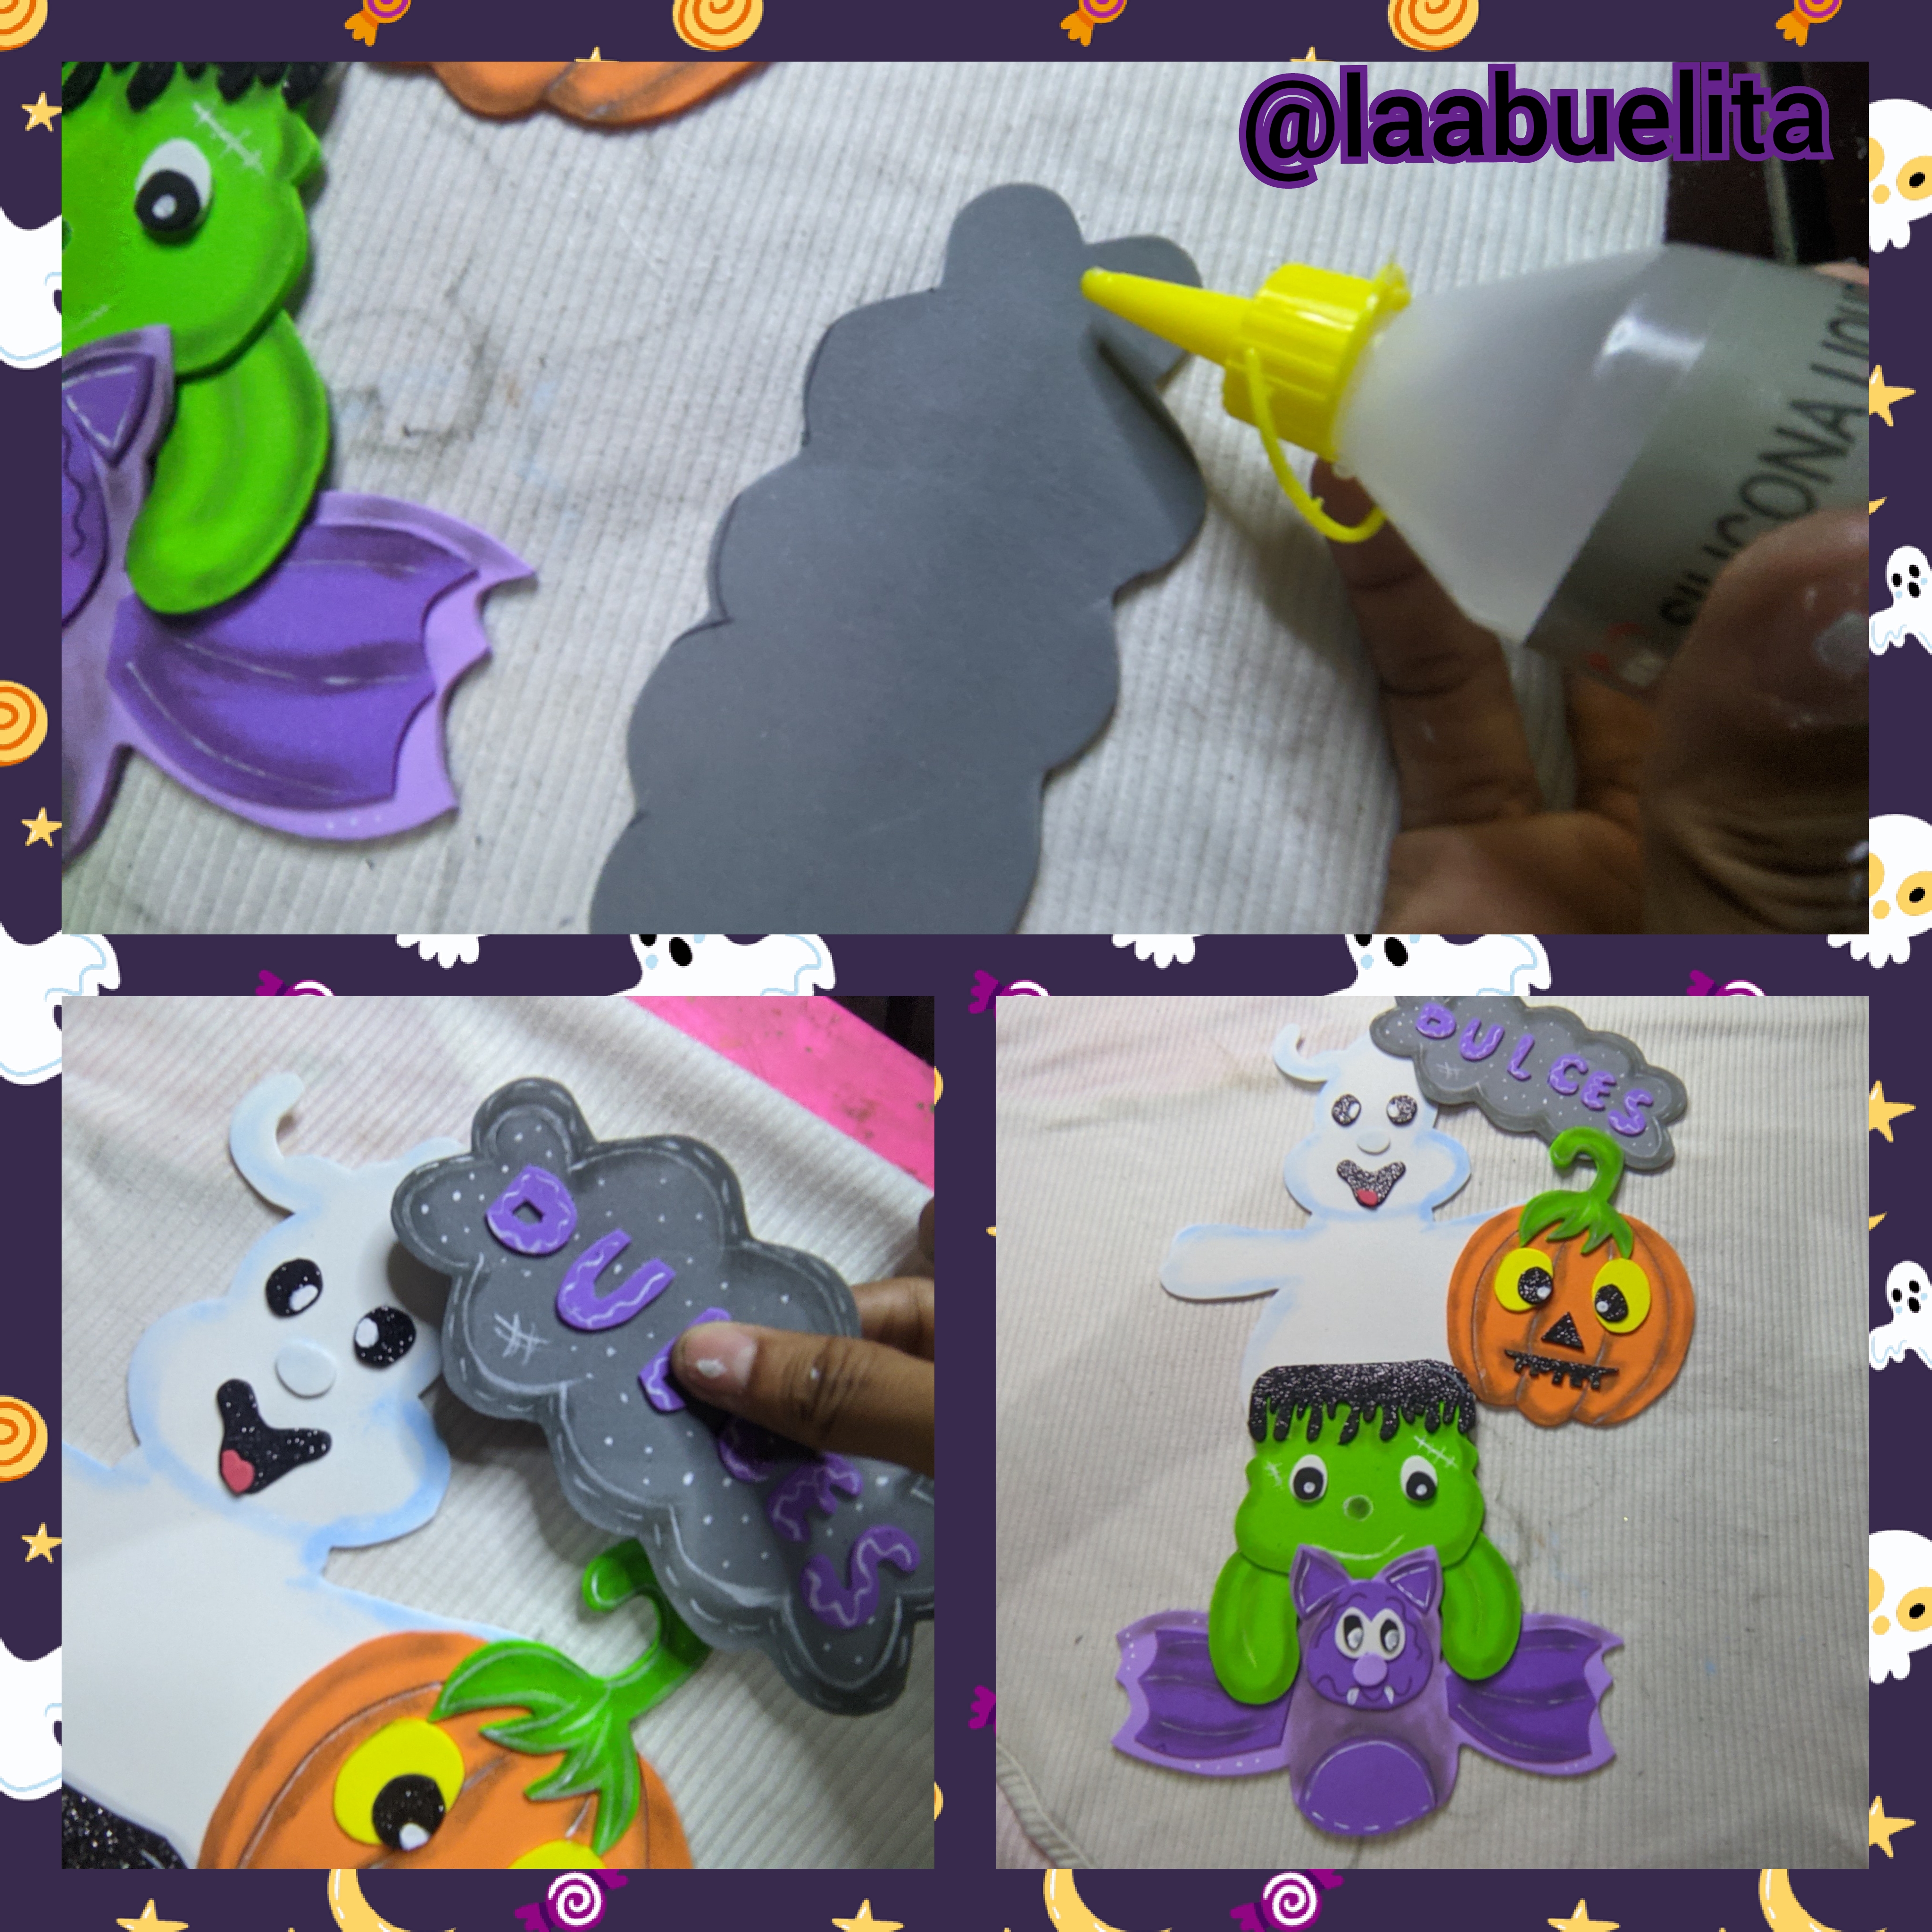
La nube la pegamos entre la cabeza del fantasma y la calabaza.
🕷️ Paso 11:

Ahora recorté una tira pequeña y doblamos y pegamos de nuestra pieza ya armada y dejamos secar un rato.
🎃 Paso 12:
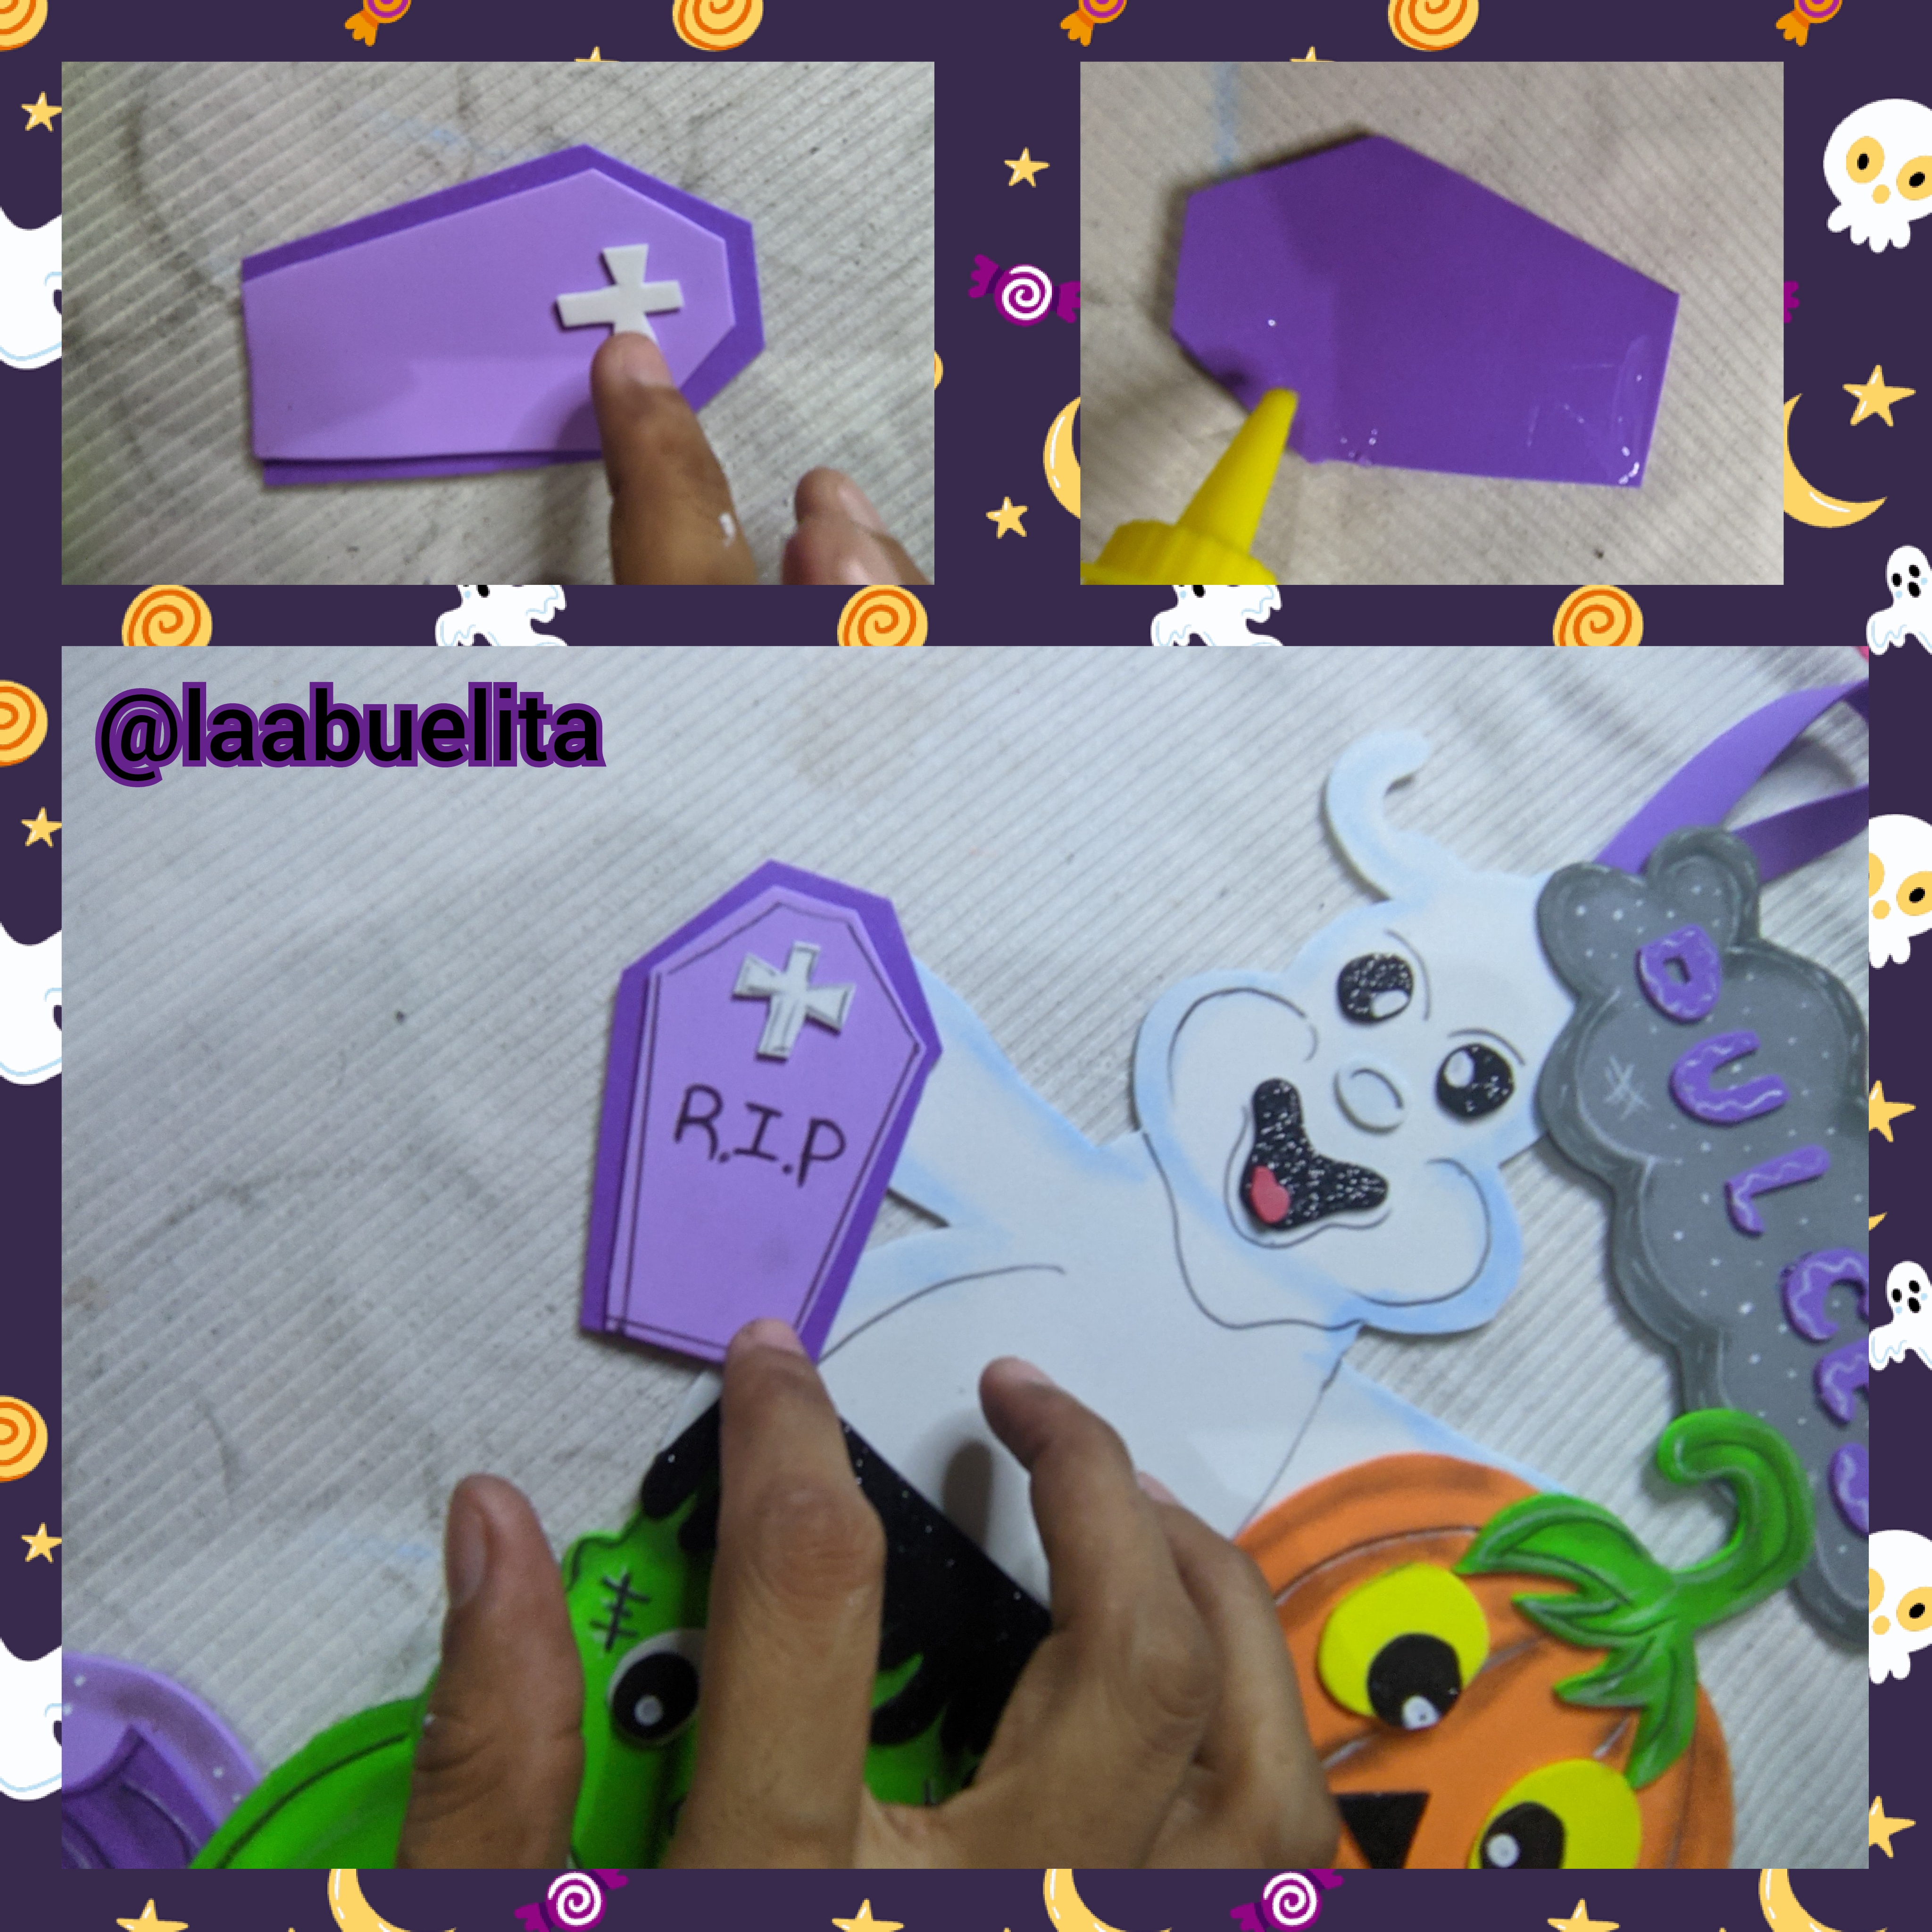
Quise darle un toque de equilibrio y realice un pequeño ataúd que luego pegué del otro brazo del fantasma, y listo hemos terminado el trabajo.
🎃🕷️👻 Fotos finales 👻🕷️🎃
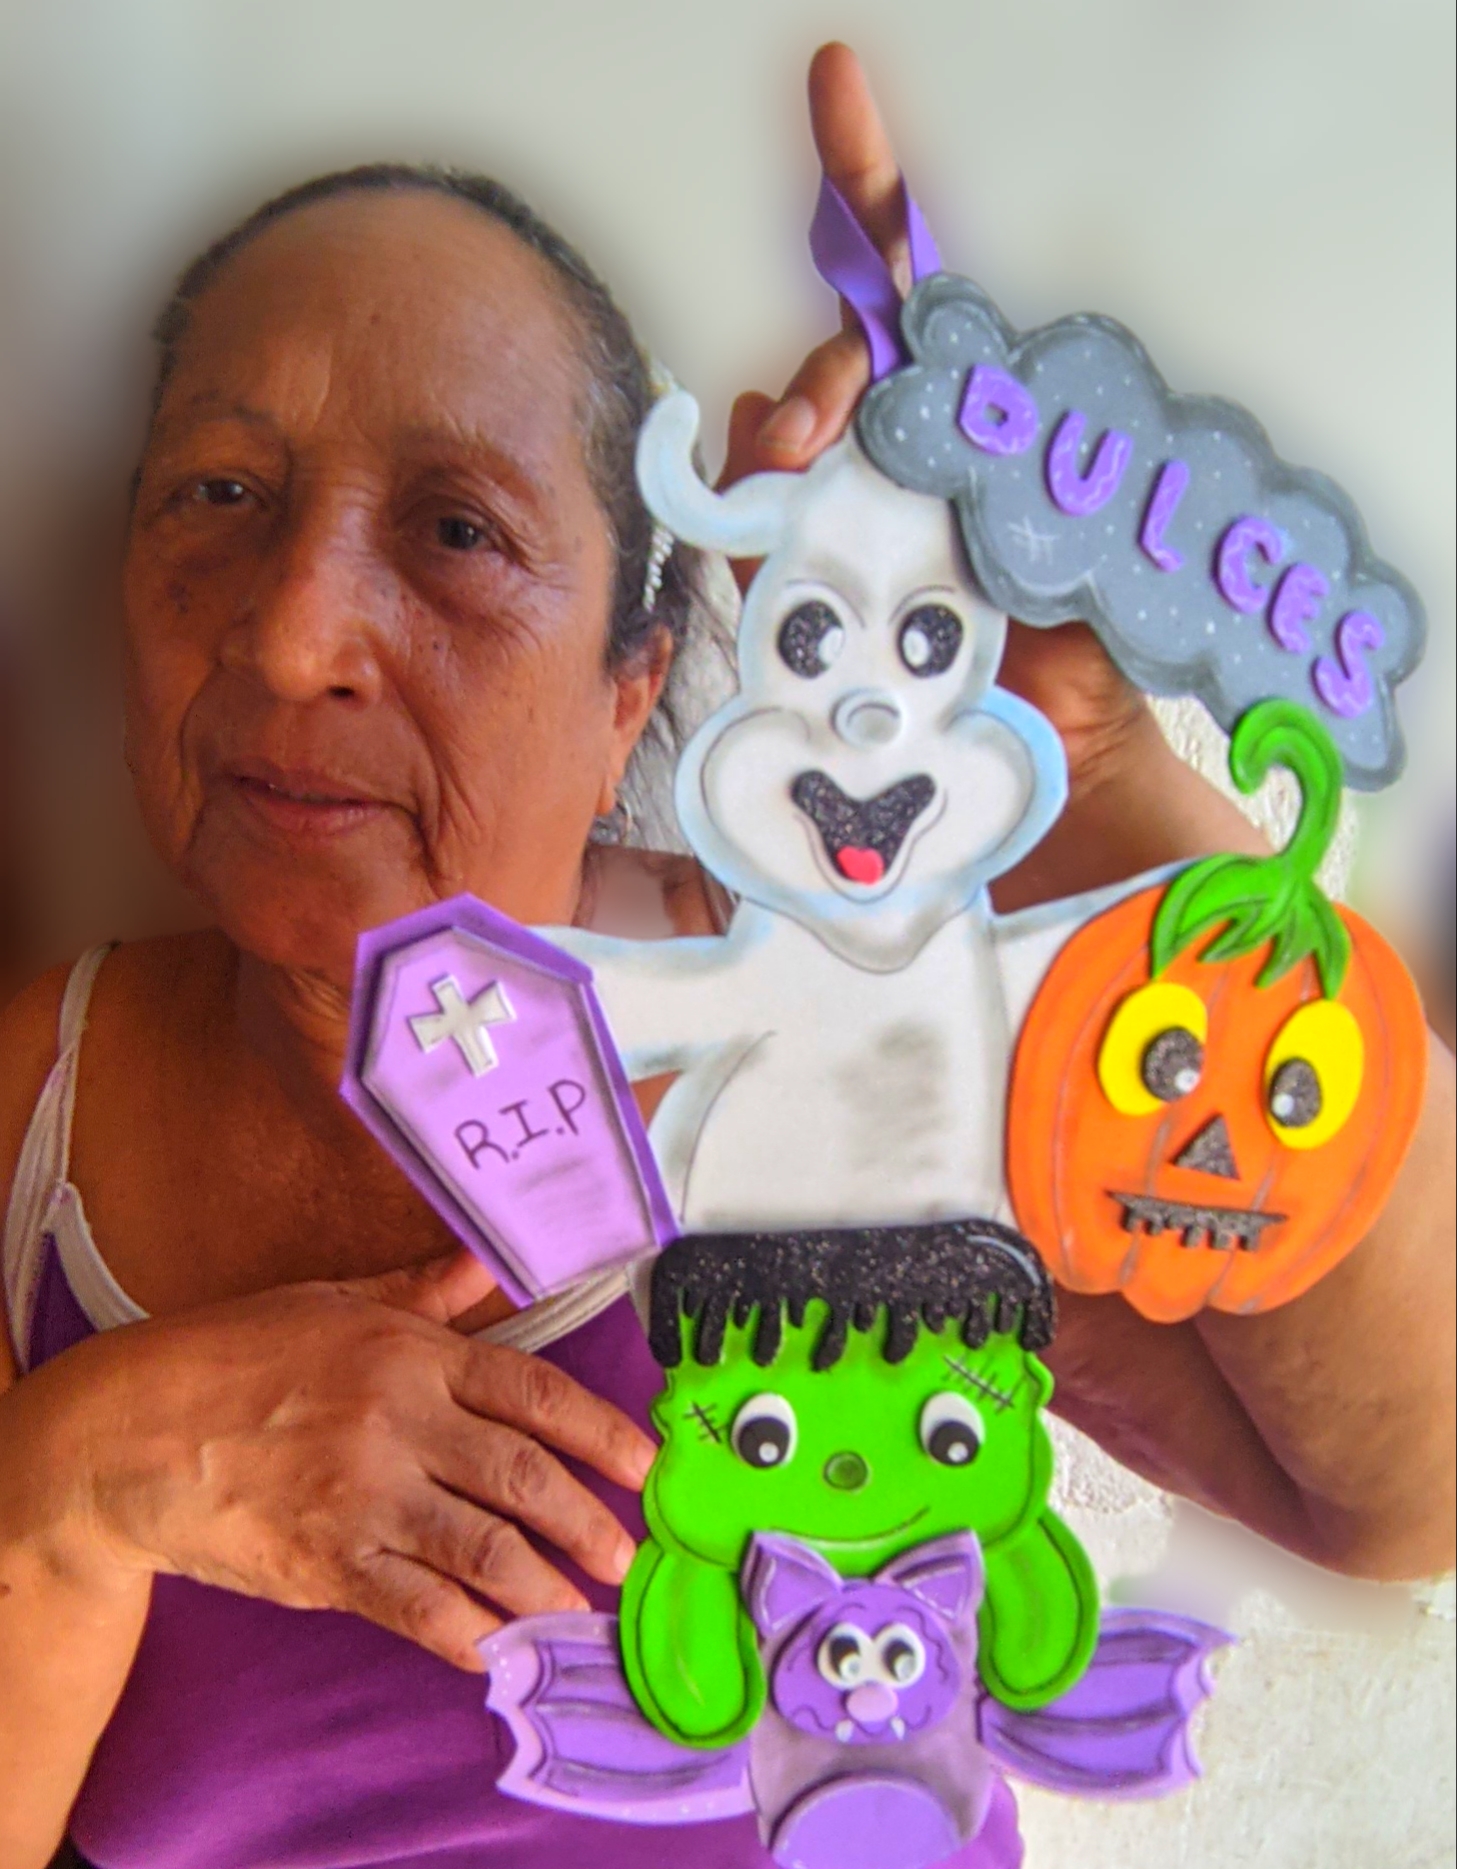

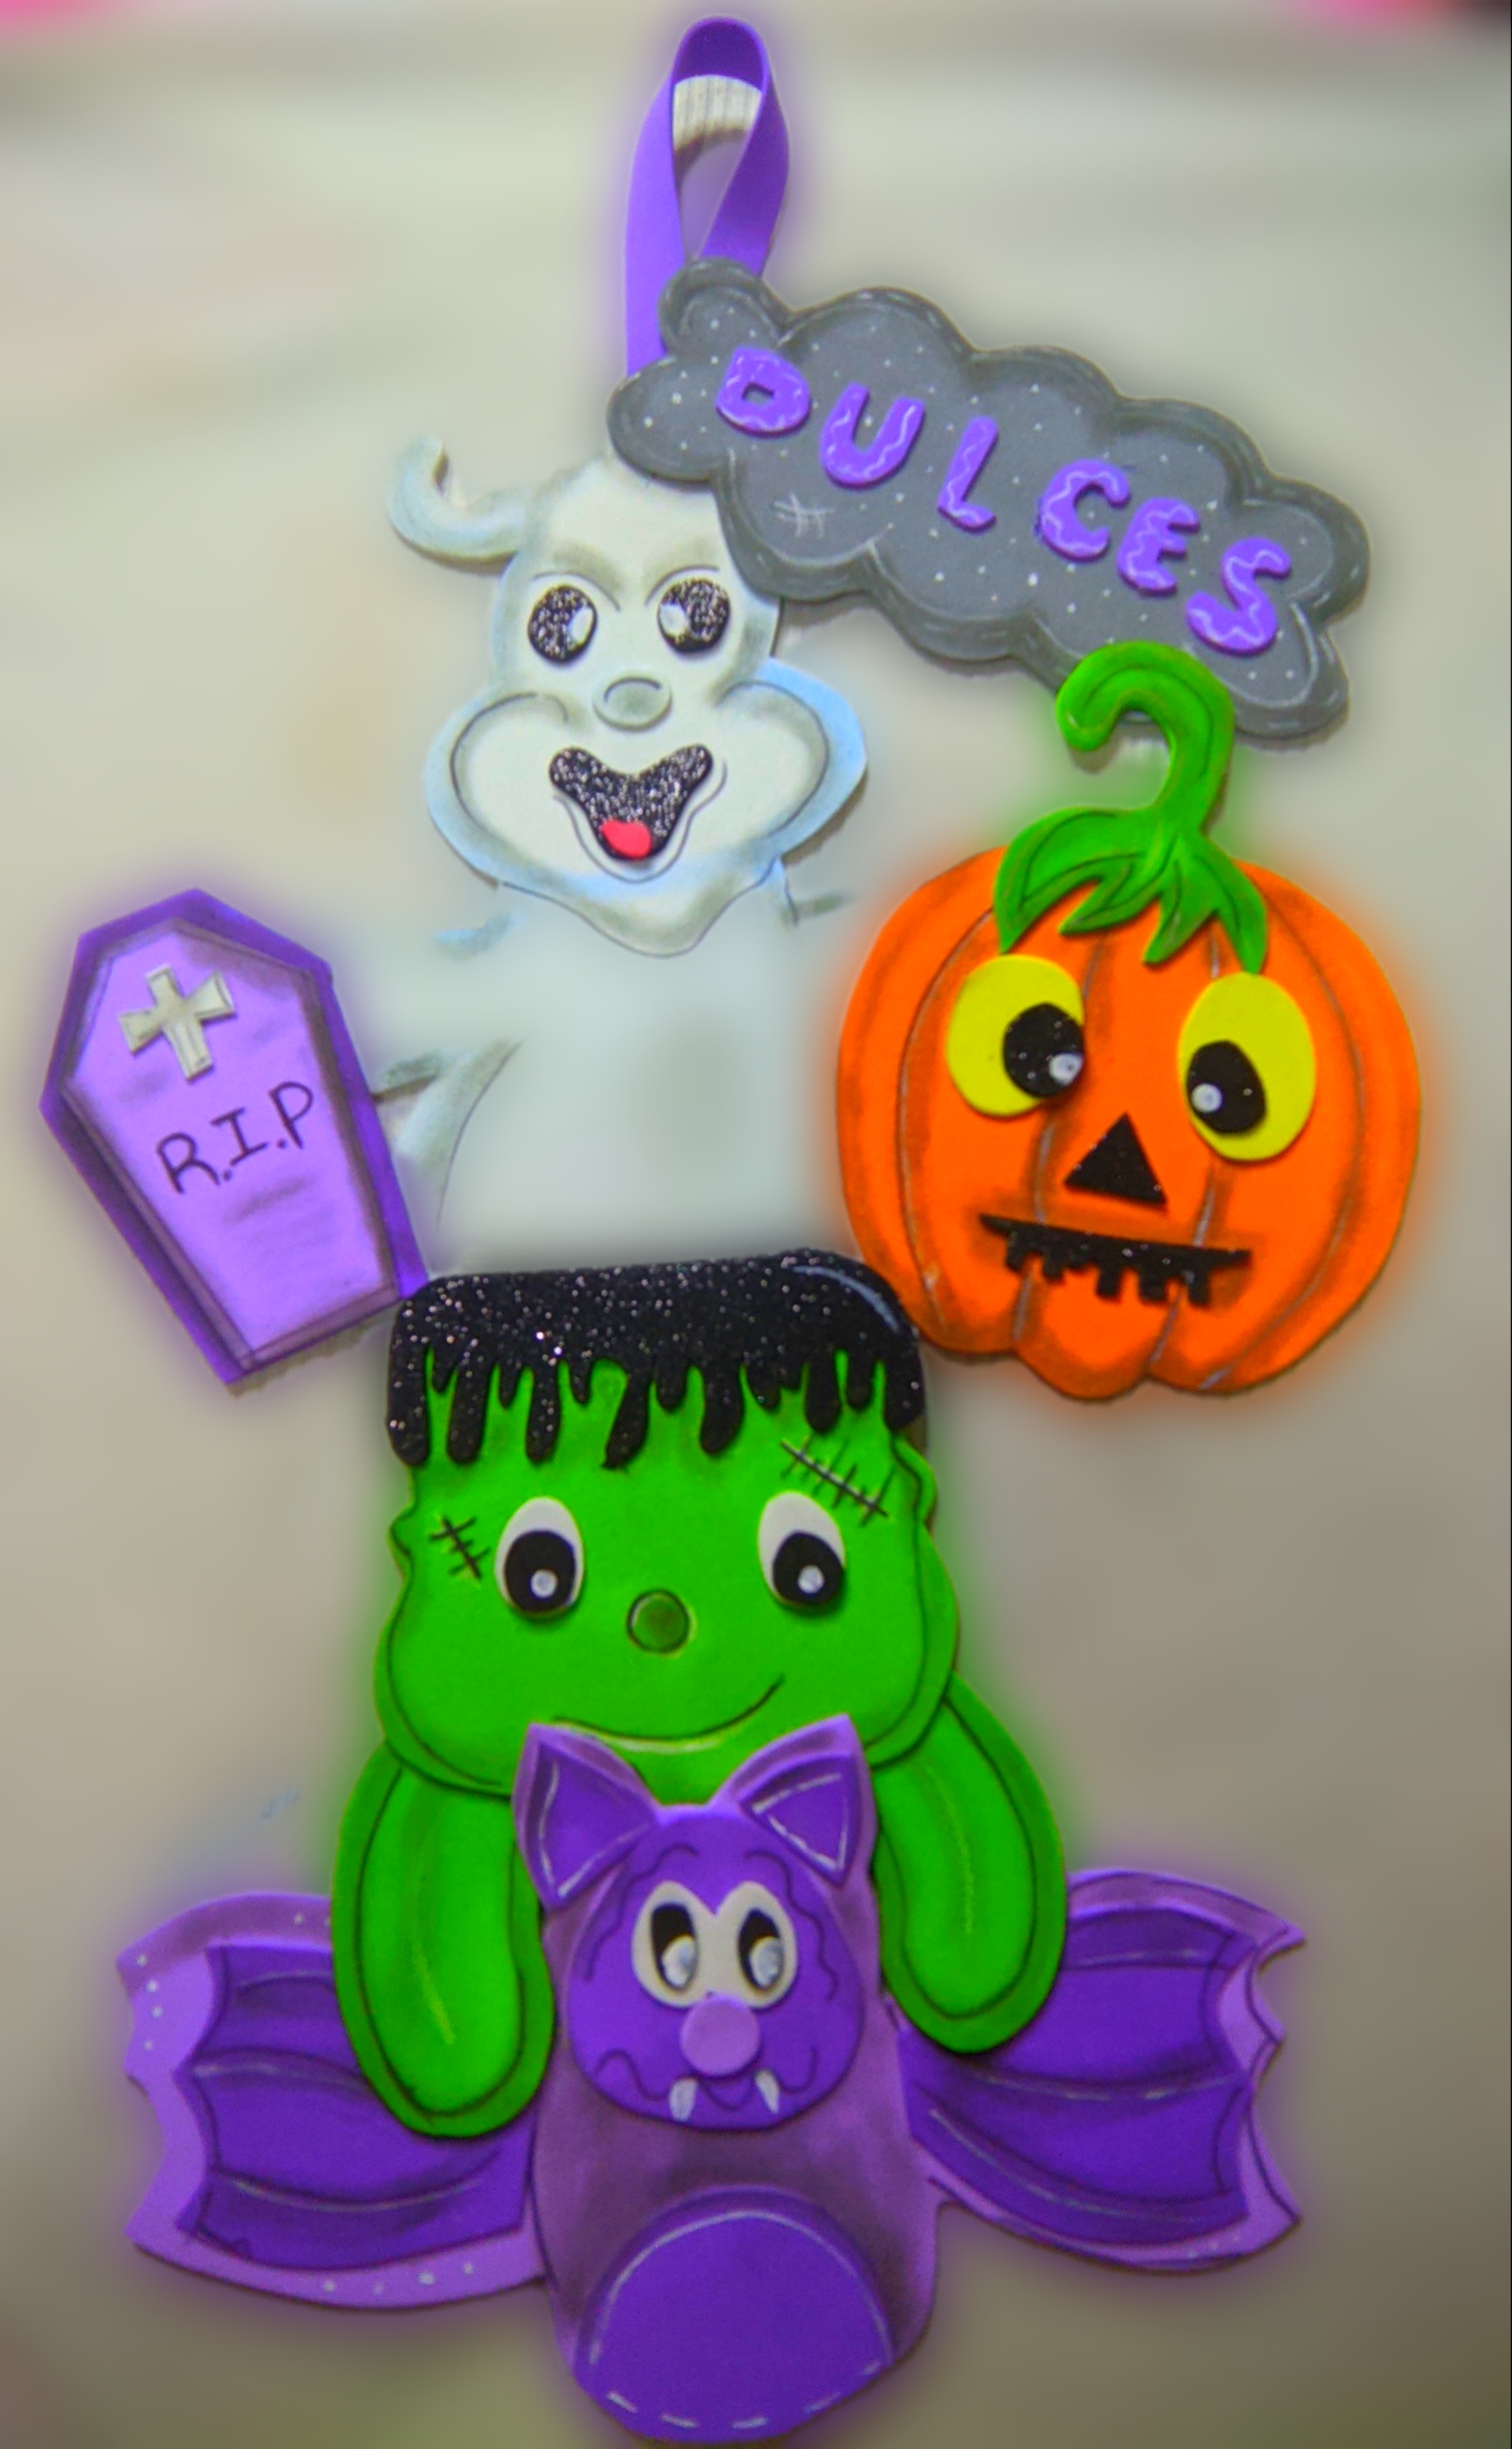
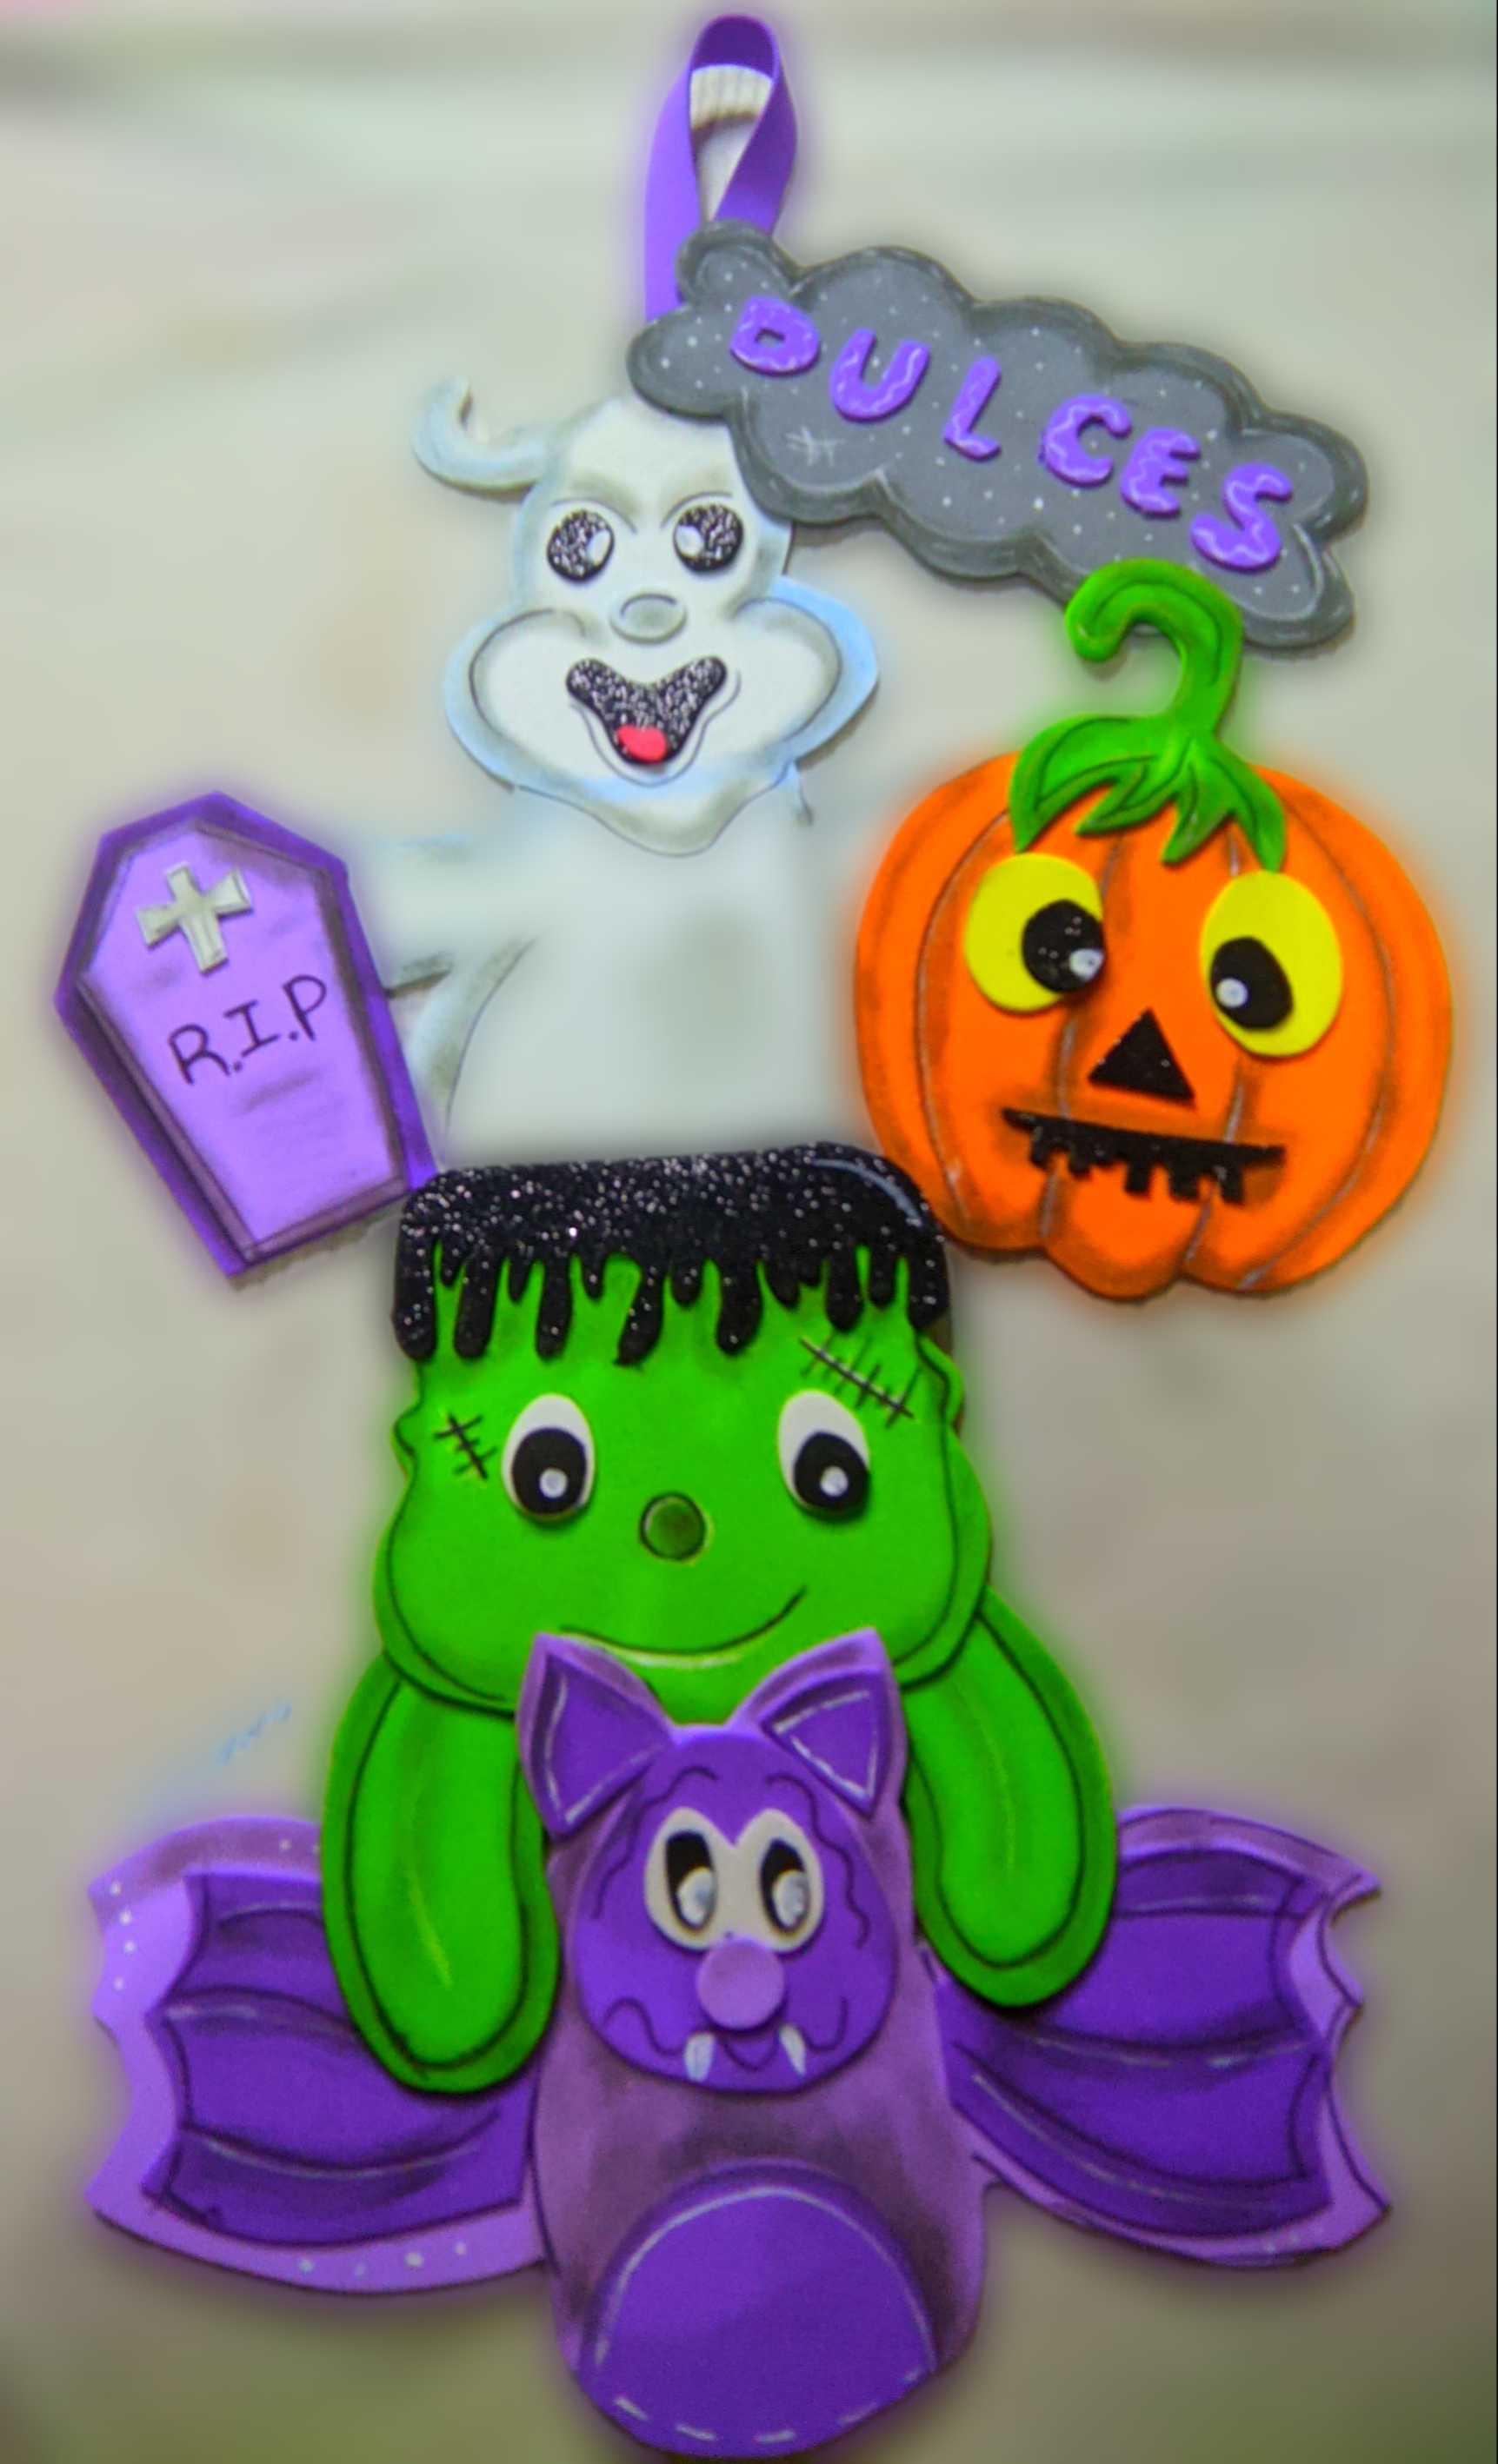
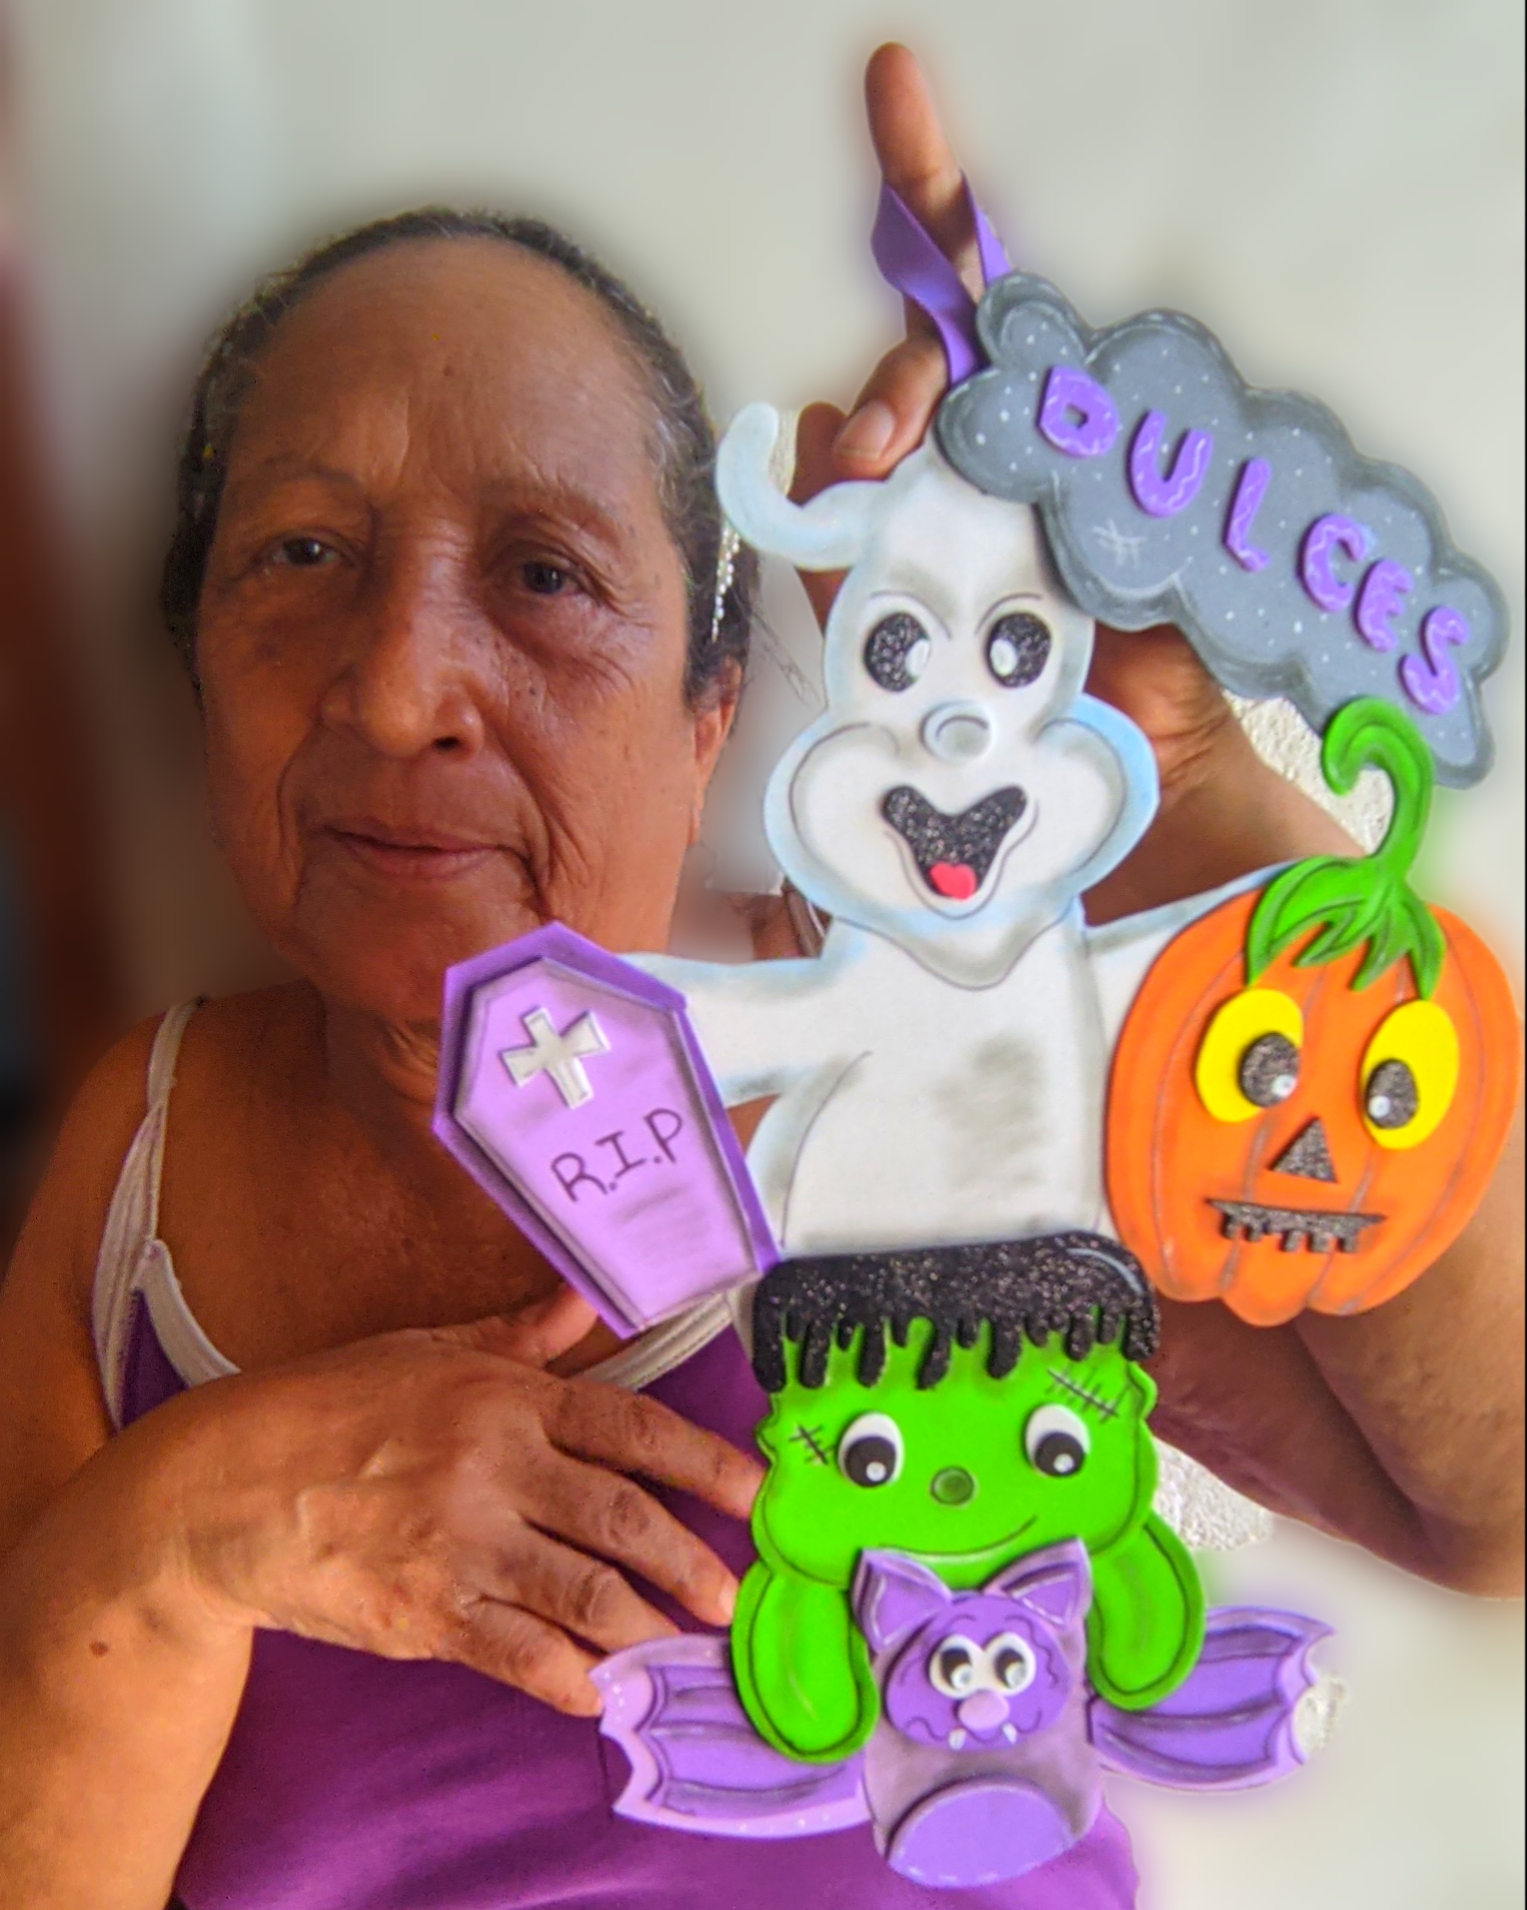
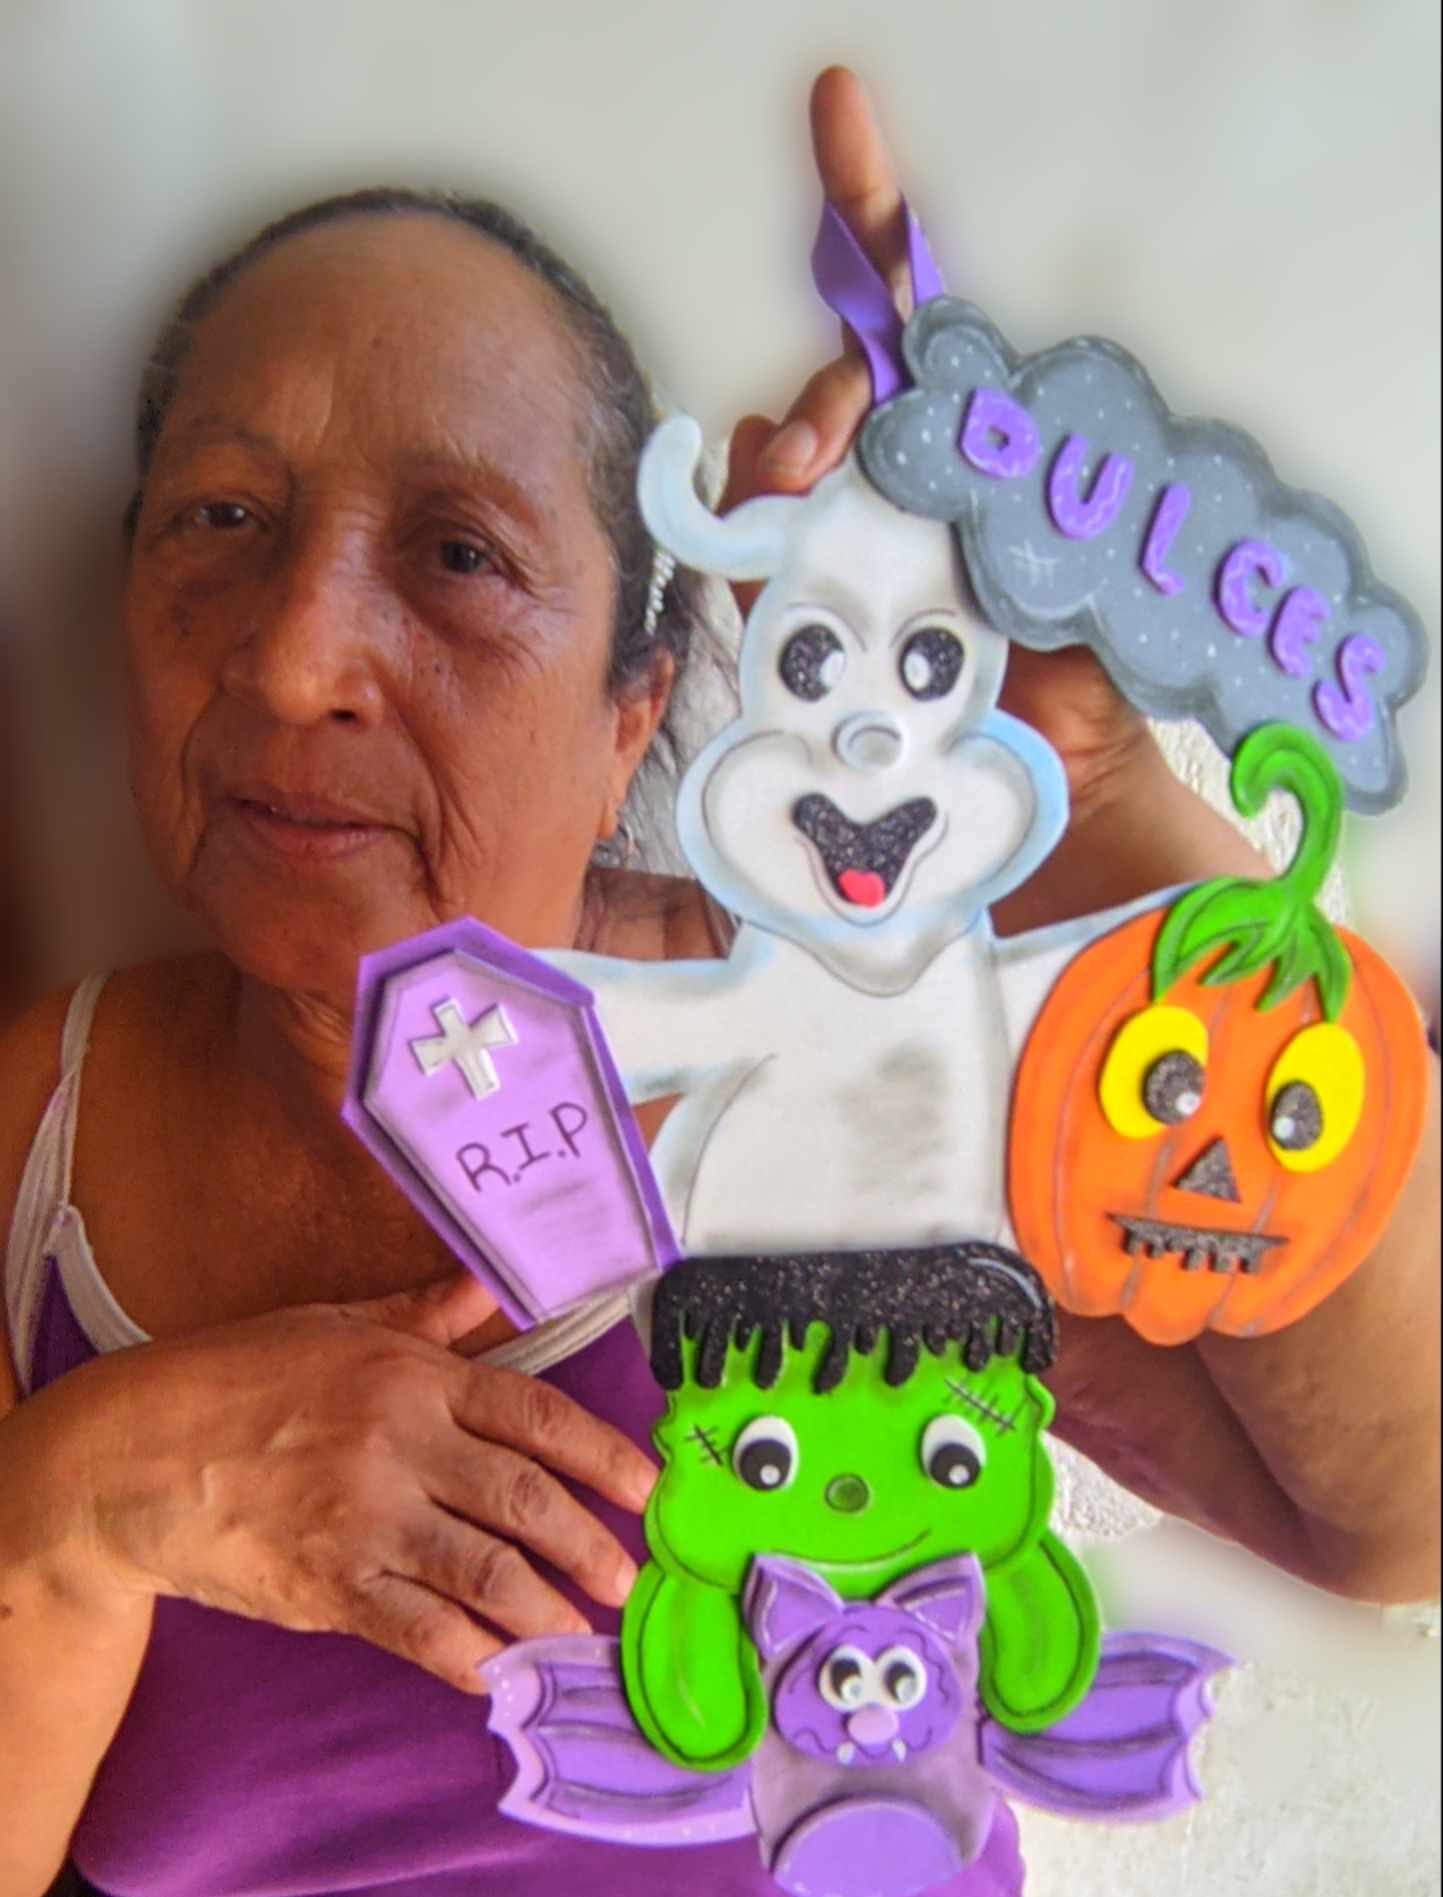
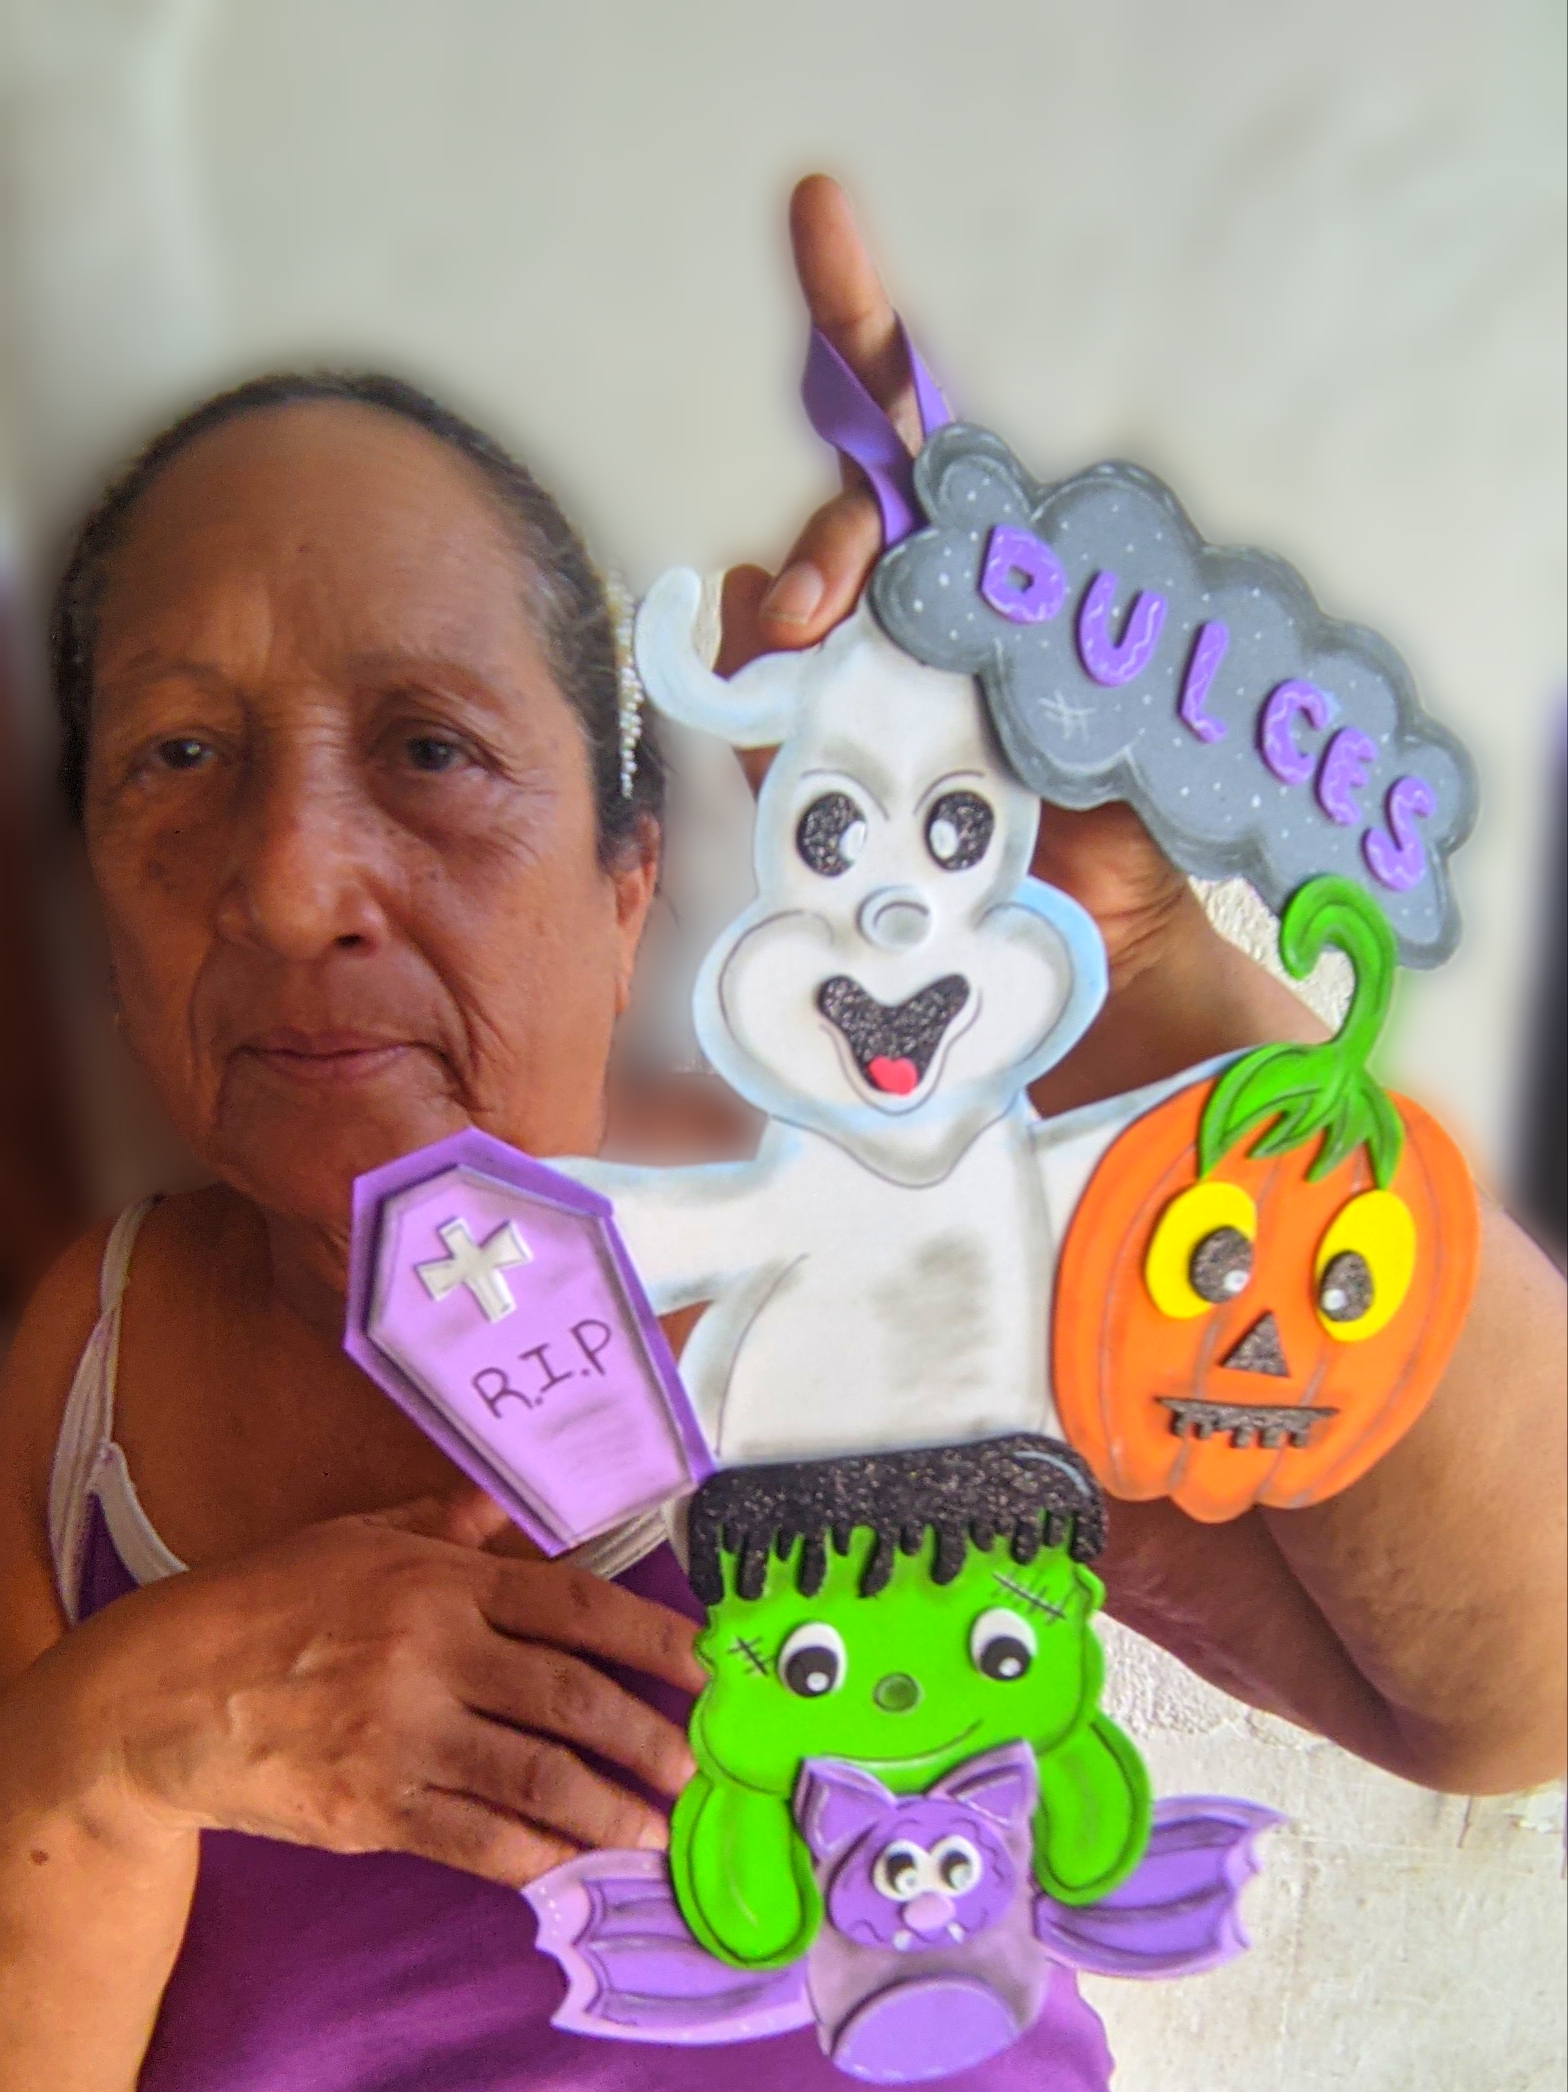
Díganme qué esto no quedó hermoso, a mí me encantó, sobretodo por la gama de colores, y claro que los muñecos me quedaron bien tiernos, me estoy disfrutando estos trabajos previos al halloween, espero que les estén gustando, si es así házmelo saber, si quieres algún motivo en especial también dímelo.
Quiero agradecerte por apoyar mis post, es importante para mí saber que el trabajo realizado con tanto amor, llega a ustedes, para este post utilice el programa polish y el traductor deepl versión gratuita.
🎃🕷️👻Gracias por visitar mi blog y apoyarme, Dios te bendiga. 🎃🕷️👻
 👻🕷️🎃👻🕷️🎃👻🕷️🎃👻🕷️🎃
ENGLISH
👻🕷️🎃👻🕷️🎃👻🕷️🎃👻🕷️🎃
ENGLISH
Greetings to all the members that make up this wonderful ecosystem called
#hive, receive from this granny a big hug and a shower of blessings for each of you who every day do the beautiful work of building within the web 3.0, I am happy to be able to contribute my bit with my little works that crafts that I bring to all.
Today my work is dedicated to the elaboration of a beautiful decorative detail for halloween, something very nice and delicate to place it in any space of the house, even in the rooms of our children, here I leave the step by step, the list of materials and the final photos.
🎃👻🕷️ MATERIALS 👻🎃🎃🕷️
🕷️ Apple green, white, black, red, yellow, purple, purple, purple, orange, and grey foami.
🎃 Liquid silicone.
👻 White paint.
🕷️ Black marker pen.
🎃 Black and blue shadow.
👻 Ruler.
🕷️ Scissors.
🎃 Fine brush.
👻 Shading brush.
🕷️ Black pen.
👻🎃🎃🕷️ Step-by-step 🕷️🎃👻
👻Step 1:
First of all I took the white foami and with the pencil I drew the figure of the ghost, and then I cut it out. Then on the black foami I drew and cut out the mouth of the little ghost, then I cut out and with the liquid silicone I glued a little tongue from the red foami, then I cut out the eyes from the black foami and we glued with the liquid silicone, and with the white paint we drew a circle and ready the eyes, finally I cut out a circle of black foami and glued on the face that will be our nose.
🕷️ Step 2:
I grabbed the apple green foami and drew and cut out Frankenstein's face and arms, and on the black foami I cut out the hair, I also cut out two circles of white foami and two circles of black foami.
Then with the liquid silicone we glued the pieces together, first the hair, then the eyes.
🎃 Step 3:
Now I drew and cut out a vampire on the purple Foami and on the purple Foami, I cut out some wings and the ears, then with the liquid silicone I glued the purple pieces on top of the purple ones (wings, ears and belly), then I glued the eyes.
I glued the two black circles inside the white circles and with the white paint, using the fine brush, I drew the details of the little vampire.
👻 Step 4:
On the orange foami I drew and then cut out the silhouette of a pumpkin, I also cut out and glued the eyes with yellow foami and the centre with black foami, I also cut out the nose and the mouth, then from the green foami I cut out the top of the pumpkin and glued it with liquid silicone.
I drew the lines that characterize the pumpkins with the pen.
🕷️ Step 5:
We will add the shadows and shade all the pieces, to give it a better finish.
🎃 Step 6:
Now that all the figures are ready, we are going to assemble our ornament and for that we put the ghost as a base because I left the bottom part long enough to assemble the work there. Then he applied liquid silicone to Frankenstein's head and glued it to the base of the ghost.
👻 Step 7:
Then we glued the vampire and on top of that we glued Frankenstein's arms to it.
🕷️ Step 8:
I glued the pumpkin onto the ghost's arm with the liquid silicone.
🎃 Step 9:
I took the grey Foami and drew and cut out a kind of cloud, I also cut out the word sweets on the purple Foami, and glued it on top of the grey cloud, then with the fine brush and the white paint I make some drawings.
👻 Step 10:
The cloud is glued between the ghost's head and the pumpkin
🕷️ Step 11:
Now I cut out a small strip and we folded and glued it from our assembled piece and let it dry for a while.
🎃 Step 12:
I wanted to give it a touch of balance so I made a small coffin which I then glued to the other arm of the ghost, and that's it, we've finished the job.
🎃🕷️👻 Final photos 👻🕷️🎃
Tell me what this was not beautiful, I loved it, especially for the range of colours, and of course the dolls were very cute, I am enjoying these works before Halloween, I hope you are liking them, if so let me know, if you want a special reason also tell me.
I want to thank you for supporting my posts, it is important for me to know that the work done with so much love, reaches you, for this post I used the polish program and the free version of deepl translator.
🎃🕷️👻Thank you for visiting my blog and supporting me, God bless you. 🎃🕷️👻
Has sido curado por @visualblock / You've been curated by @visualblock
Bienvenidas delegaciones / Delegations welcome
Trail de Curación / Curation Trail
Vota por nuestro Testigo aliado - @hispapro / Vote for our allied Witness - @hispapro
Más información sobre el testigo aquí / More information about the witness here
Agradezco mucho su apoyo hijito
Es un gusto apoyar trabajos de calidad como tu simpática manualidad. 🤗
!discovery 40
Gracias
This post was shared and voted inside the discord by the curators team of discovery-it
Join our Community and follow our Curation Trail
Discovery-it is also a Witness, vote for us here
Delegate to us for passive income. Check our 80% fee-back Program
Muchas gracias por apoyar
Your detailed guide provides a fantastic resource for others interested in crafting their Halloween decorations. Well done.
Muchísimas gracias por el apoyo agradecida de verdad
Congratulations @laabuelita! You have completed the following achievement on the Hive blockchain And have been rewarded with New badge(s)
Your next target is to reach 1500 upvotes.
You can view your badges on your board and compare yourself to others in the Ranking
If you no longer want to receive notifications, reply to this comment with the word
STOPTo support your work, I also upvoted your post!
Check out our last posts:
Gracias
¡Eso es genial @laabuelita! ¡Estamos emocionados de ver tu progreso en Hive! ¡Estamos ansiosos por verte lograr el próximo!
¡Felicidades! Esta publicación obtuvo upvote y fue compartido por @la-colmena, un proyecto de Curación Manual para la comunidad hispana de Hive que cuenta con el respaldo de @curie.
Si te gusta el trabajo que hacemos, te invitamos a darle tu voto a este comentario y a votar como testigo por La Colmena.
Si quieres saber más sobre nuestro proyecto, te invitamos a acompañarnos en nuestro servidor de Discord.
Oh qué honor sentir su apoyo muchas gracias
Abuelita! Le quedaron estupendos!!! La felicito por tan hermosos trabajos y presentaciones
Hay hijita muchas gracias, usted también hace trabajos hermosos, que bueno que le gustó, muchas gracias y que Dios te bendiga
Como siempre muy destacada abuelita te felicito éxitos feliz noche un abrazo.
Muchas gracias amiga que bueno que le gustó, saludos
Fue un placer visitarte abuelita gracias por compartir un abrazo.
@laabuelita
https://inleo.io/threads/view/hive-130560/re-leothreads-fsnfsky3
Congratulations, your post has been upvoted by @dsc-r2cornell, which is the curating account for @R2cornell's Discord Community.
Enhorabuena, su "post" ha sido "up-voted" por @dsc-r2cornell, que es la "cuenta curating" de la Comunidad de la Discordia de @R2cornell.
Gracias por apoyarme
Contáctenos para saber más del proyecto a nuestro servidor de Discord.
Si deseas delegar HP al proyecto: Delegue 5 HP - Delegue 10 HP - Delegue 20 HP - Delegue 30 HP - Delegue 50 HP - Delegue 100 HP.
Gracias por su apoyo