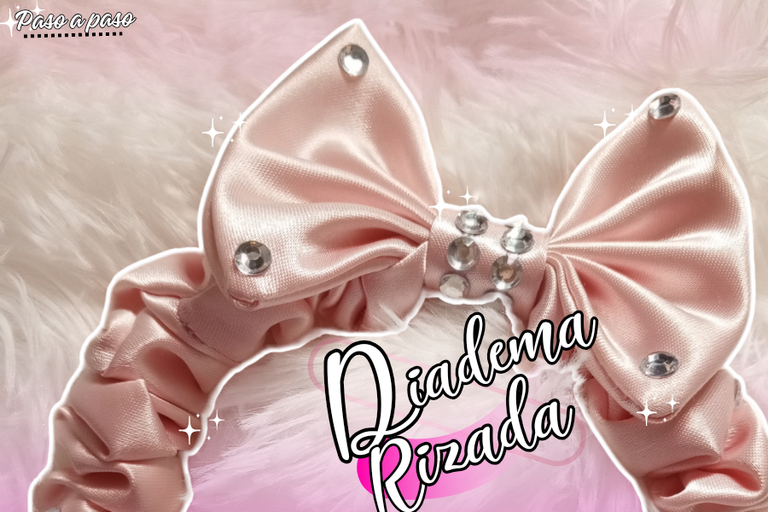
👑 Diadema Rizada paso a paso - (Spa-Eng)
✨ ¡Hola gente bella! ✨ y creativa de la colmena un gusto poder saludarles y compartir con ustedes una nueva creación.
Ya tengo algunos meses en el que estoy de llena realizando accesorios para el cabello, inicie haciendo lazos bellísimos para las niñas y las no tan niñas... Hay para todos los gustos, pero esta vez quise presentar algo diferente a mi círculo de clientes y son estas bellas Diademas. . .
Son demasiado bellas y lo mejor de todo esto es que son bien prácticas a la hora de utilizarlas y versátiles porque se adaptan a cualquier estilo que utilices, ¡demasiado hermosas!
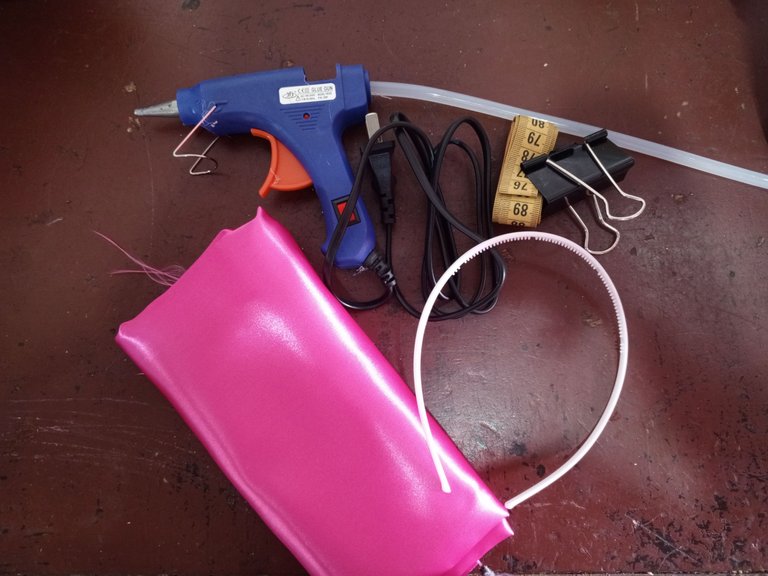
Hoy les voy a compartir el paso a paso y los materiales que utilice.
Necesitaremos:
| ✂️Tijera | |
|---|---|
| 🪡Máquina de coser | |
| 〰️Cinta métrica | |
| Silicón en barra | |
| 👑 Diadema o cintillo | |
| Tela a su elección |
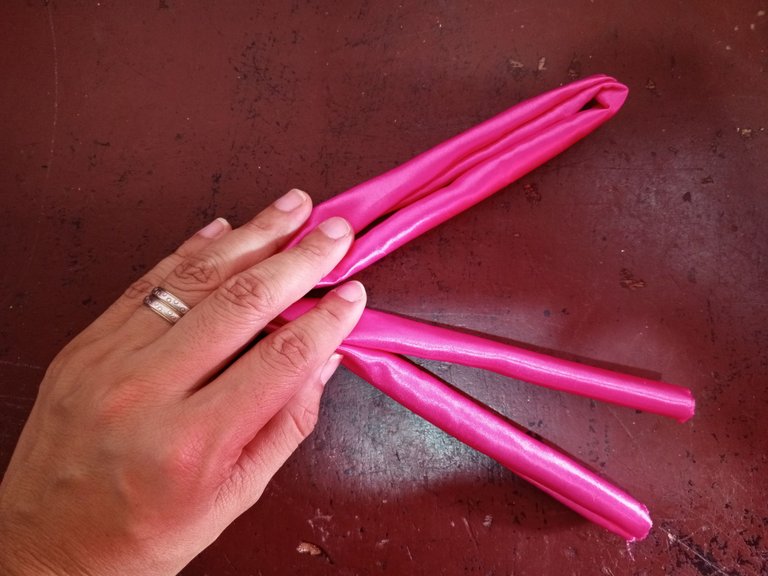
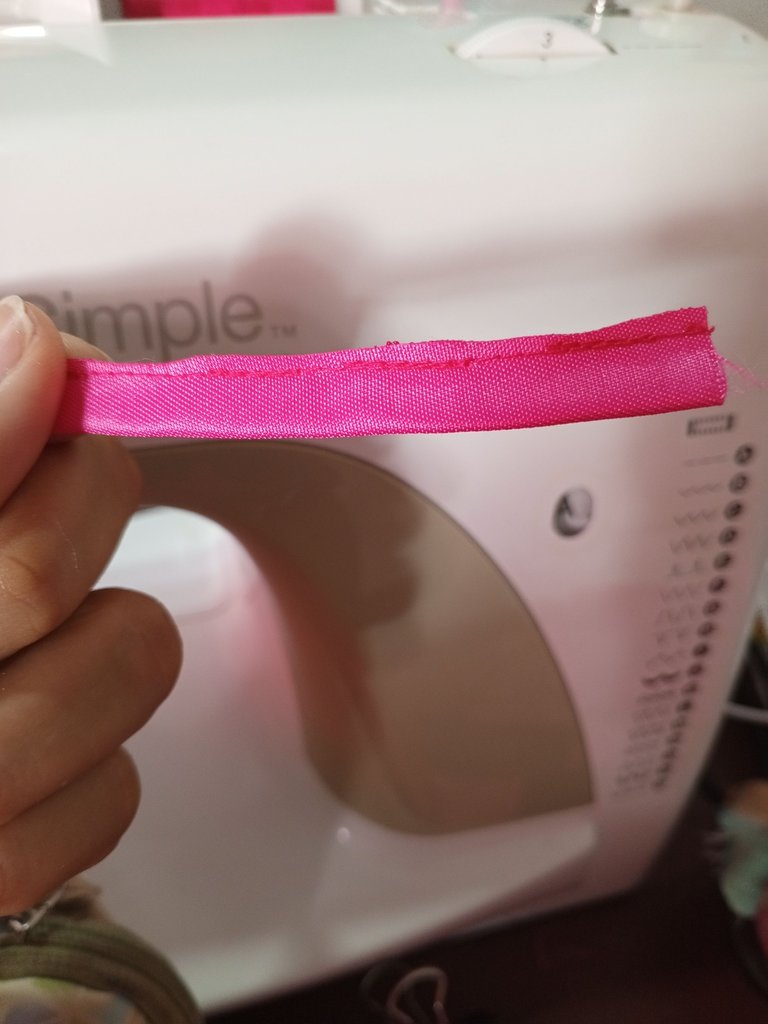
yo utilice satín color fucsia aproximadamente 6 cm de ancho y 40 cm de largo.
! [ENGLISH]
✨ Hello beautiful people! ✨ It's a pleasure to greet you and share with you a new creation.I've been making hair accessories for a few months now, I started making beautiful bows for little girls and not so little girls.... There is something for everyone, but this time I wanted to present something different to my circle of clients and these are these beautiful headbands....
They are too beautiful and the best of all is that they are very practical when it comes to use them and versatile because they adapt to any style you use, too beautiful!
Today I am going to share with you the step by step and the materials I used.
We will need:
✂️ Scissors
🪡Sewing machine
〰️Cinta
Silicone stick
Headband or headband
Fabric of your choiceI used fuchsia colored satin approximately 6 cm wide and 40 cm long
 |  |  |
|---|
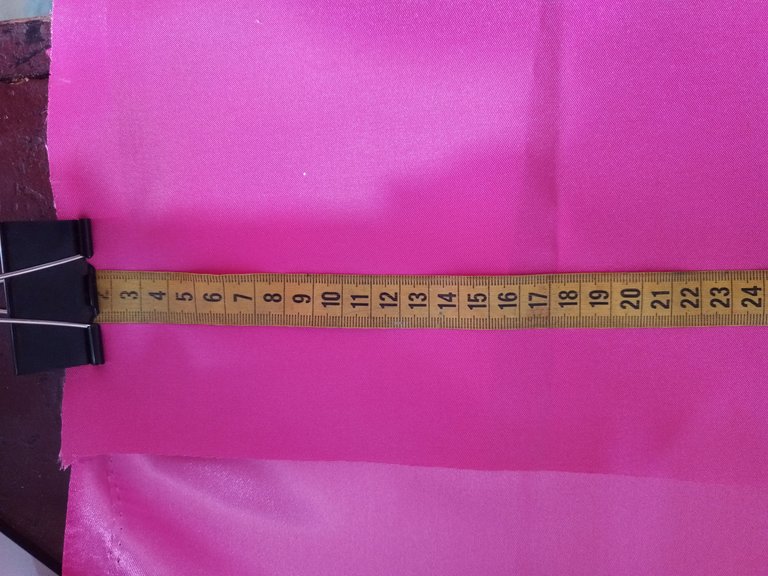
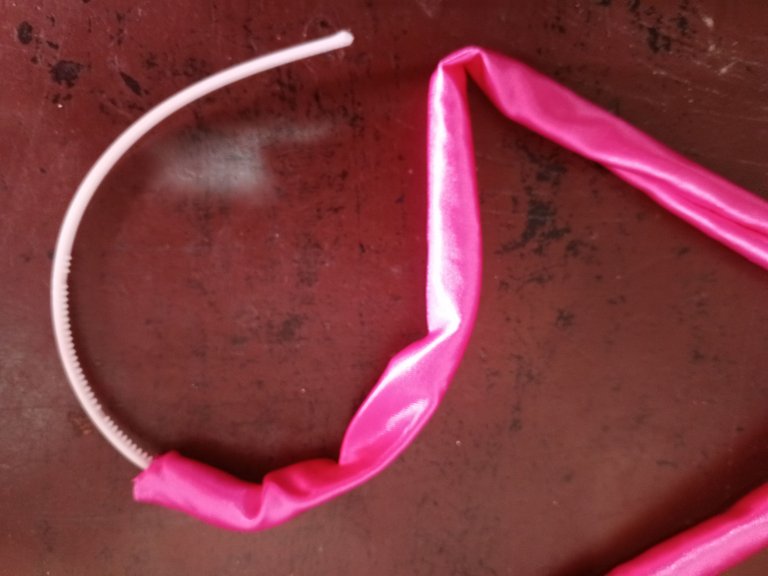
Una vez que ya tengamos definido el ancho y largo de la tela que vamos a utilizar y la cortamos. Acá es importante saber que el ancho y largo va a depender del tamaño de la diadema y de saber cuan rizado queremos que quede la diadema en mi caso como son para unas gemelas la cliente las quería con el rizado bien definido así que hice las tiras más largas, para que al momento de hacer los pliegues quedaran bonitos.
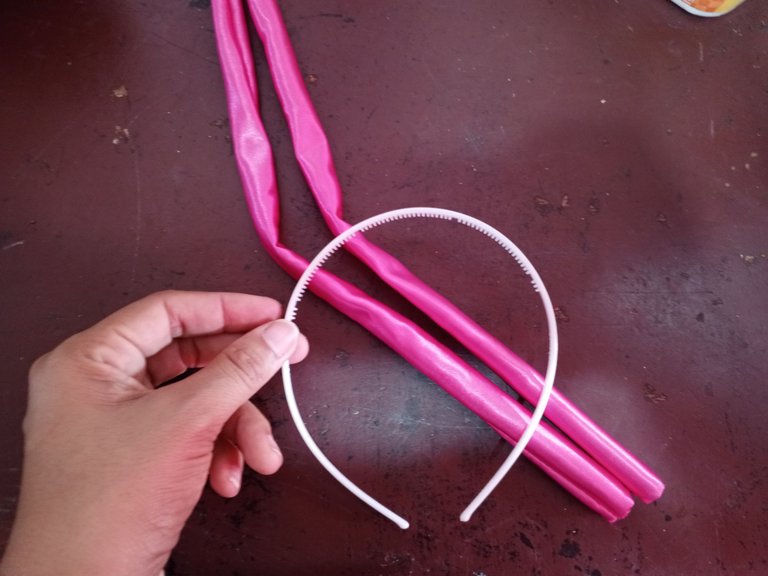
Ok, ya tengo mi tira de tela cortada, paso un costura recta para unir los dos bordes y empiezo a dar vuelta a la tela, para que el lado brillante quede hacia afuera y la parte mate hacia adentro.
Una vez listo yo planche la tela para que me quedará más bonita y prolija y para que los lados donde están las costuras quedarán bien sellados.
 |  |  |
|---|
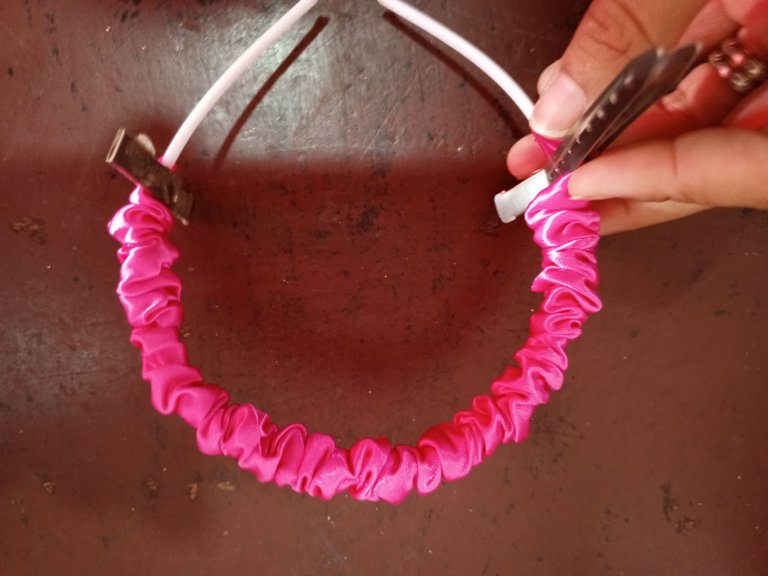
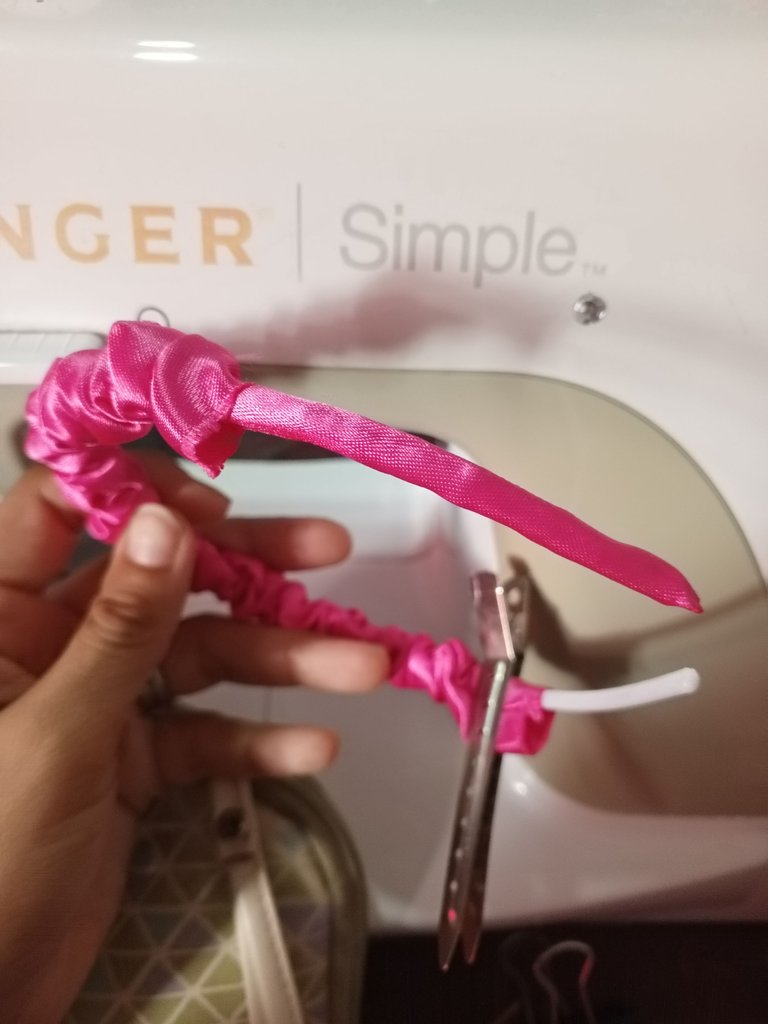
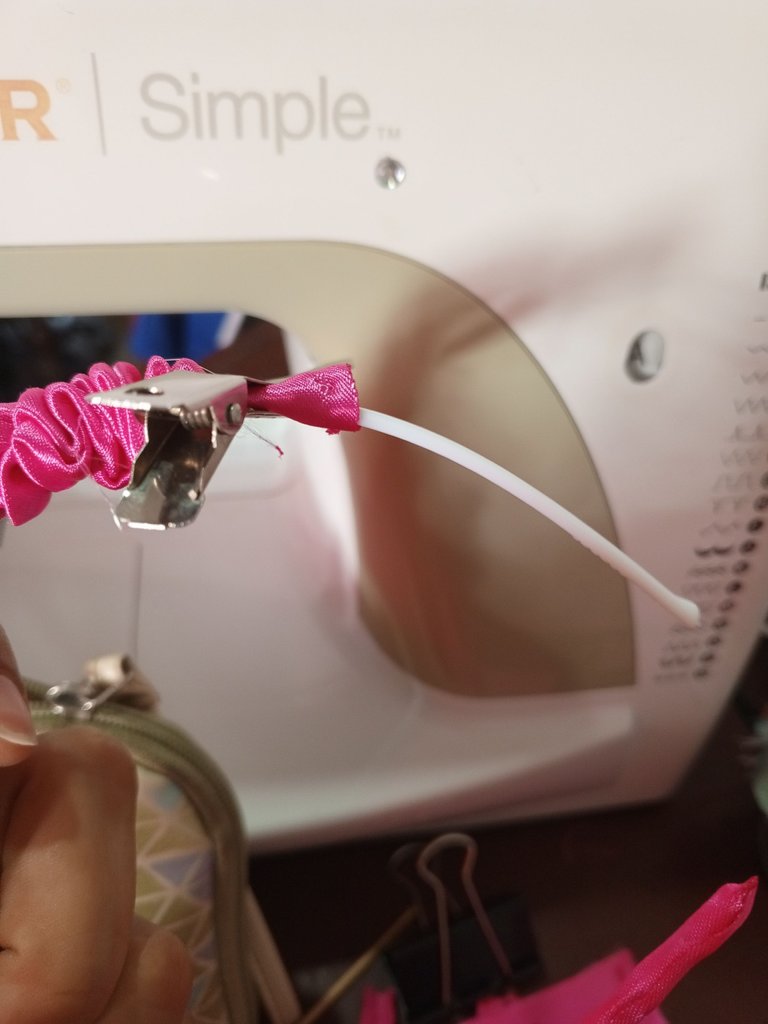
Ahora lo que vamos a realizar es empezar a forrar la diadema, hasta cubrirla por completo con la tira de tela que ya hemos cosido previamente, allí vamos definiendo que tan rizada queremos la diadema, acá es a nuestra elección, cuando vemos que ya tiene una forma bonita y definida nos ayudamos de dos pinzas que colocaremos en cada extremo para que no se pierda esta bonita forma.
! [ENGLISH]
Once we have defined the width and length of the fabric we are going to use, we cut it. Here it is important to know that the width and length will depend on the size of the headband and to know how curly we want the headband to be, in my case as they are for twins the client wanted them with a well defined curl so I made the strips longer, so that when making the folds they would look nice.Ok!, now I have my strip of fabric cut, I sew a straight seam to join the two edges and start turning the fabric, so that the shiny side faces out and the matte side faces in.
Once ready I iron the fabric so that it will look nicer and neater and so that the sides where the seams are will be well sealed.
Now what we are going to do is to start lining the headband, until it is completely covered with the strip of fabric that we have previously sewn, there we define how curly we want the headband, here is our choice, when we see that it already has a nice and defined shape we help ourselves with two clips that we will place at each end so that this nice shape is not lost.
shape.
 |  |  |
|---|
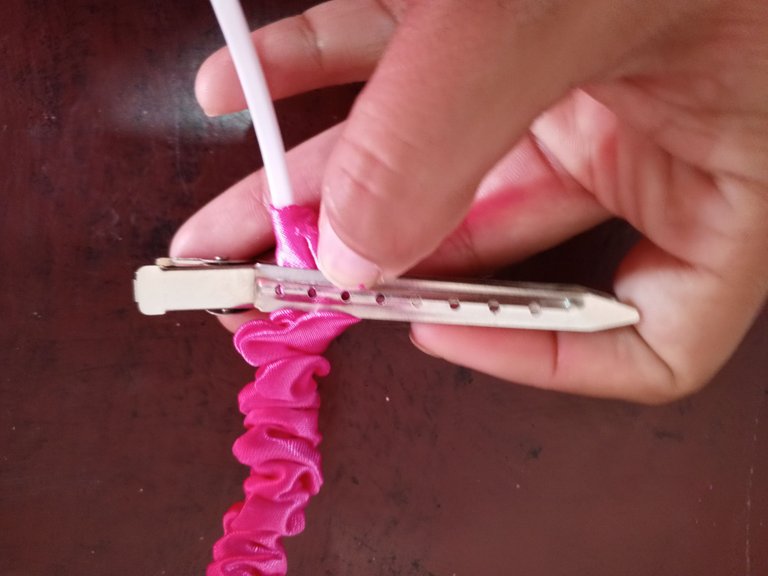
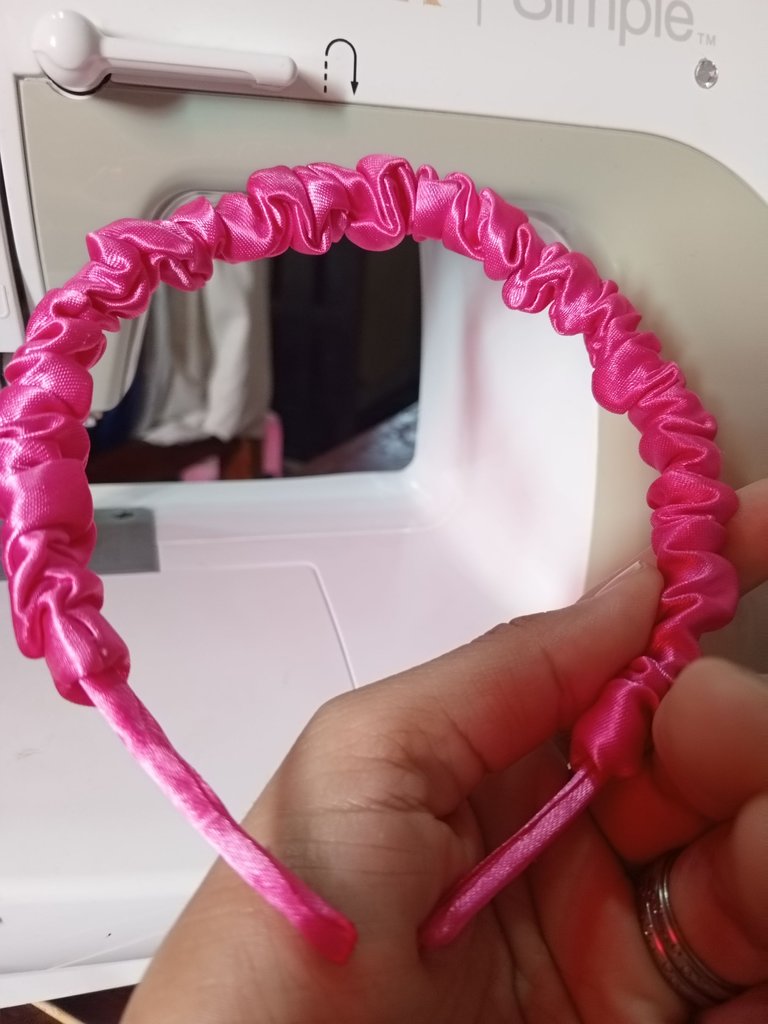
Una vez que tengamos bien sujeto nuestras puntas vamos a cortar dos tiras que nos servirán para forrar estos extremos, lo que yo hago es sacar una especie de forritos que encajan perfectamente, volteo estos forros y los introduzco en las puntas de la diadema, de esta manera queda forrado los extremos.
Y así de rápido y fácil tenemos lista está Diadema rizada, yo le añadí estos bonitos lazos con brillos
y me encanta el resultado.
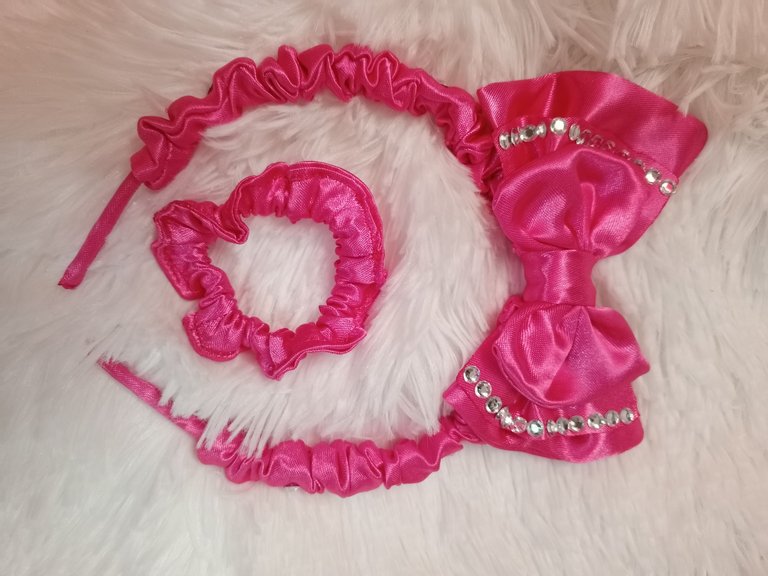
A este set le añadí como obsequio dos mini Scrunchies para complementar un poquito lo que fue este pedido para unas gemelas.
 |  |
|---|
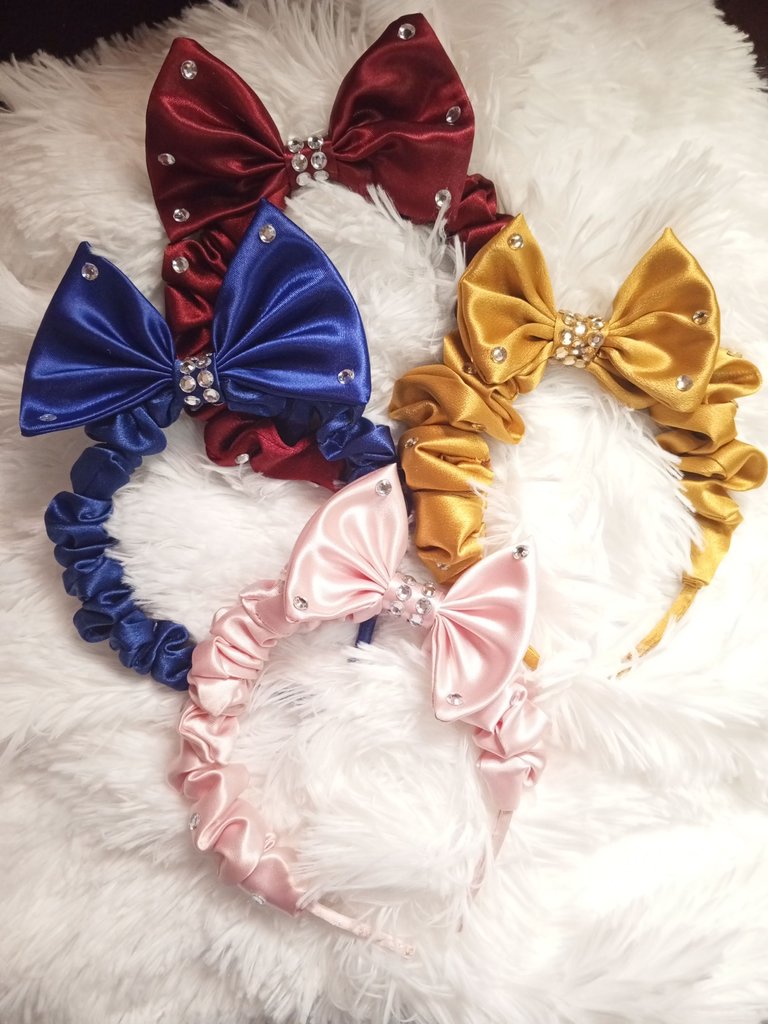
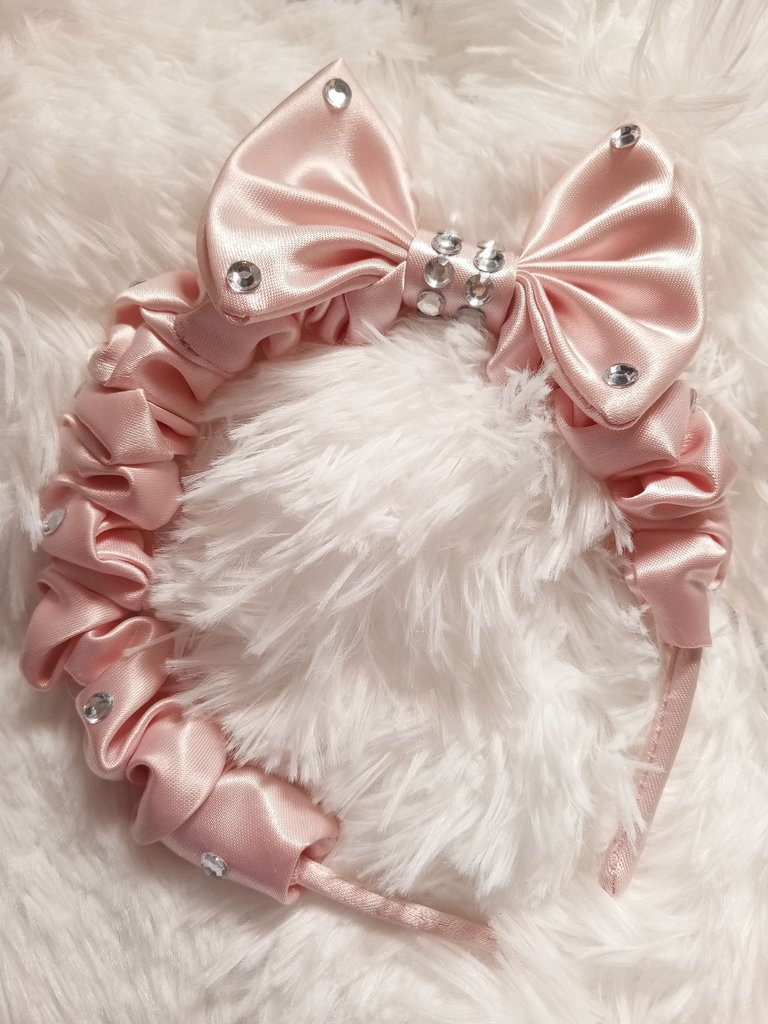
Esta diadema la he realizado en varios colores y todas quedan bellas, esta medida que utilice es perfecta para niñas, además la diadema es de niña, podemos utilizar una para adultos y sé que el resultado será así de bello.

Espero que les guste y que se animen a realizarlos, los leo en los comentarios ante cualquier duda.
! [ENGLISH]
Once we have our ends well fastened we are going to cut two strips that will serve us to cover these ends, what I do is to take out a kind of linings that fit perfectly, I turn these linings and introduce them into the ends of the headband, in this way the ends are covered.And that's how quick and easy this curly headband is ready, I added these beautiful bows with glitter and I love the result.
To this set I added as a gift two mini Scrunchies to complement a little what was this order for twins.
I have made this headband in several colors and they all look beautiful, this size I used is perfect for girls, besides the headband is for girls, we can use one for adults and I know that the result will be just as beautiful.
I hope you like it and that you are encouraged to make them, I will read them in the comments if you have any doubts.

✨Imagen principal editada utilizando Canva
⚠️Todas las fotografías son propias capturadas con mi teléfono Tecno Spark 10 pro
✨Main image edited using Canva.
⚠️All photos are my own captured with my Tecno Spark 10 pro phone.
Haces ver la realización de esta diadema como muy fácil de elaborar, pero porque presiento que no es así 🤣 de igual forma te quedaron muy hermosas 😊
Es fácil en serio... 🤣 Lo más tedioso es la parte de forrar las puntitas de la diadema, ya me estoy ingeniando otra forma...
🤣 pues te creeré 😅. Gracias por compartir el proceso para elaborarla
Inténtalo, te vas a sorprender. 👍🏻
WOW! It is so beautiful and charming. It can draw anyone's attention. Nice work! Thanks!
Thank you very much, very nice and delicate work ✂️🪡
https://twitter.com/hivediy47901/status/1775410399124267258
¡Felicidades! Esta publicación obtuvo upvote y fue compartido por @la-colmena, un proyecto de Curación Manual para la comunidad hispana de Hive que cuenta con el respaldo de @curie.
Si te gusta el trabajo que hacemos, te invitamos a darle tu voto a este comentario y a votar como testigo por La Colmena.
Si quieres saber más sobre nuestro proyecto, te invitamos a acompañarnos en nuestro servidor de Discord.
From Venezuela, our witness drives decentralization and the adoption of Web3 technology, creating opportunities for the local community and contributing to the global ecosystem. // Desde Venezuela, nuestro testigo impulsa la descentralización y la adopción de la tecnología Web3, generando oportunidades para la comunidad local y contribuyendo al ecosistema global.
Sigue, contacta y se parte del testigo en: // Follow, contact and be part of the witness in:
Que hermosa!!
Muchas gracias ☺️
¡¡¡Buen trabajo!!! Gracias por publicar tu excelente contenido en Hive Diy, asombroso trabajo, sí que supiste como decorar esta hermosa diadema, a mi hija le encantaría unos así.
Tu comunidad artesana ahora es testigo

El resultado es hermoso, espero que te animes a intentarlo, 😊
Hermosa, es la palabra que define este bello accesorio. Sin duda espero pronto incursionar en este tipo de diademas. Estan muy lindas. Bendiciones.
Hola amiga, espero que está publicación le sea de ayuda y le guíe en este bello mundo ✨😊