Everyday bag, customizing fabric leftovers. (En/Es)
Un feliz inicio de semana, sean todos bienvenidos a mi blog, estoy muy feliz de estar nuevamente compartiendo con ustedes, no nada más grata que rodearse de personas especiales con el mismo entusiasmo y amor por la creatividad manual a través del hilo, aguja y telas.
A happy start of the week, welcome to my blog, I am very happy to be sharing with you again, there is nothing more pleasant than to be surrounded by special people with the same enthusiasm and love for manual creativity through thread, needle and fabrics.
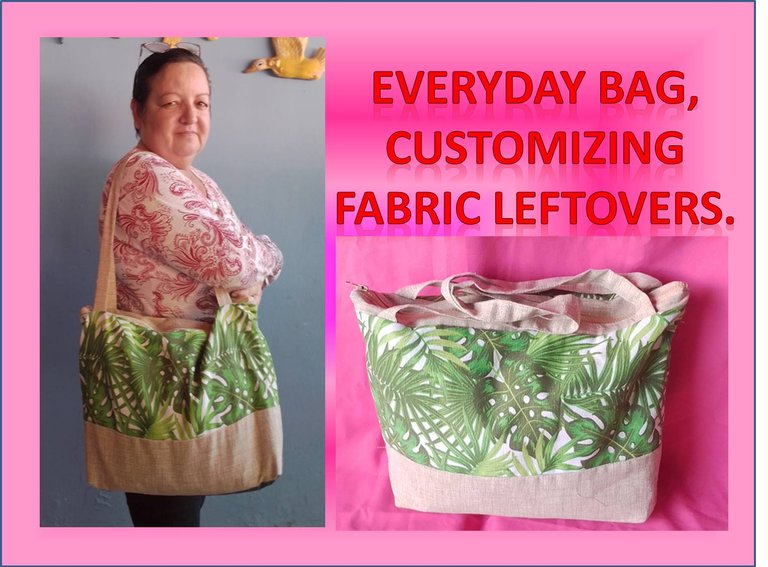
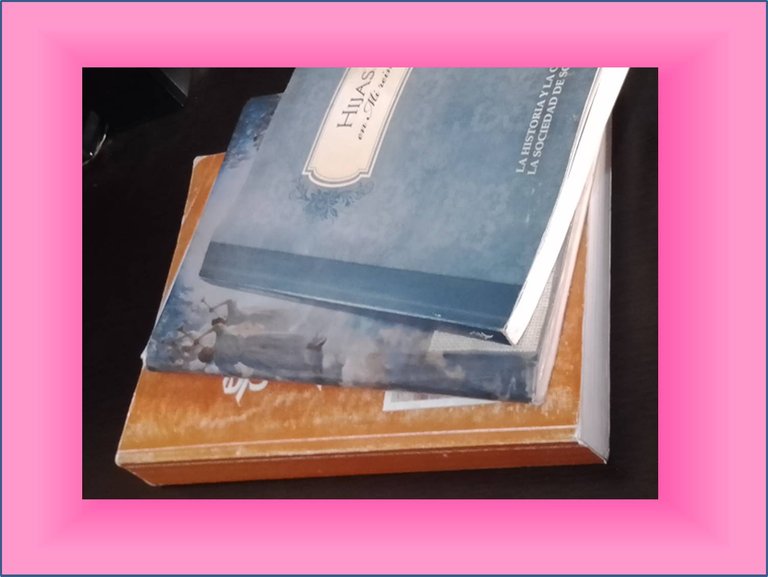
Esta semana les comparto un nuevo proyecto pensado en mi rutina diaria, como maestra de religión debo llevar a mis clases además de mis escrituras algunos libros adicionales y mi cuaderno de notas, los que comúnmente llevo en la bolsa de compras o en los brazos, por esta razón la semana pasada después de terminar por fin mi primer bolso del taller realizado en mi Iglesia, me puse a revisar en los retazos de tela que me habían sobrado y en cómo sacarles provecho, por lo que me dije a misma – Gladys tienes un desafío que cumplir aprender a armar el bolso sin tanto enredos, por lo que me puse la meta de hacerme un bolso de diario para llevar todos los libros y mis cosas personales en un solo bolso.
This week I share with you a new project thought in my daily routine, as a religion teacher I have to take to my classes besides my scriptures some additional books and my notebook, which I commonly carry in my shopping bag or in my arms, for this reason last week after finally finishing my first bag from the workshop held in my church, I started to review the scraps of fabric that I had left over and how to make the most of them, I started to review the scraps of fabric that I had left over and how to make the most of them, so I said to myself - Gladys you have a challenge to meet to learn how to assemble the bag without so much tangle, so I set myself the goal of making a journal bag to carry all my books and my personal things in one bag.
La meta que me puse esta vez fue un poco más difícil, pues trabajaría sin patrón, les comparto que como alguien que ama la arquitectura trabajar con patrones es lo más convencional, pero esta vez quise jugar con mi imaginación, pues los sobrantes del bolso anterior no daban justo con la medida que necesita para mi próximo bolso, por lo que tendría que acudir a mi baúl de retazos en busca de un comodín, je je, para poder completar mi proyecto, para lo cual conseguí un retazo de tafeta, por lo que me dispuse a cortar las telas para el bolso.
The goal I set this time was a little more difficult, because I would work without a pattern, I share with you that as someone who loves architecture working with patterns is the most conventional, but this time I wanted to play with my imagination, because the leftovers of the previous bag did not give just the measure needed for my next bag, so I would have to go to my trunk of scraps in search of a wildcard, heh heh, to complete my project, for which I got a piece of taffeta, so I set out to cut the fabrics for the bag.
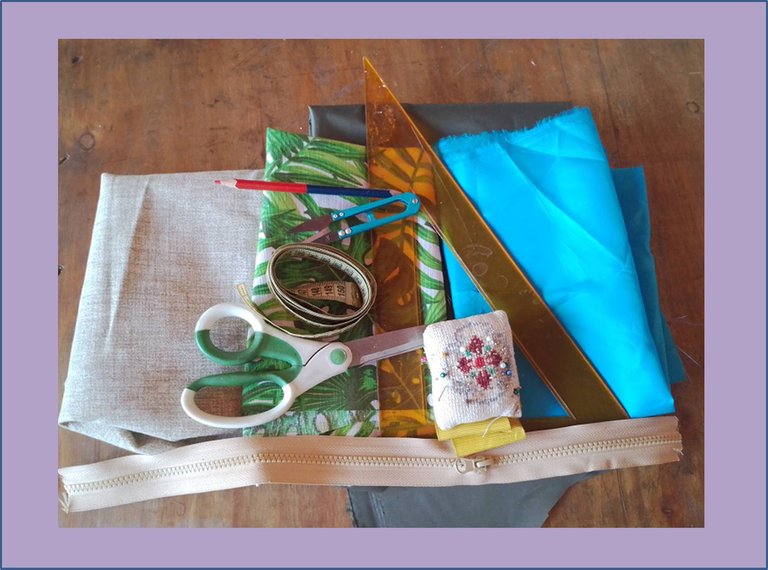
Para este proyecto utilice los siguientes materiales:
-Retazos de telas (tafeta, loneta unicolor y estampada y Oxford impermeable)
-Cierre y cremallera
-Tijera y descosedor
-Cinta métrica y escuadra
-Alfileres y lápiz de colores.
For this project, please use the following materials:
- Fabric scraps (taffeta, one-color and printed canvas and waterproof oxford)
- Zipper and zipper
- Scissors and stitch remover
- Tape measure and square
- Pins and crayon.
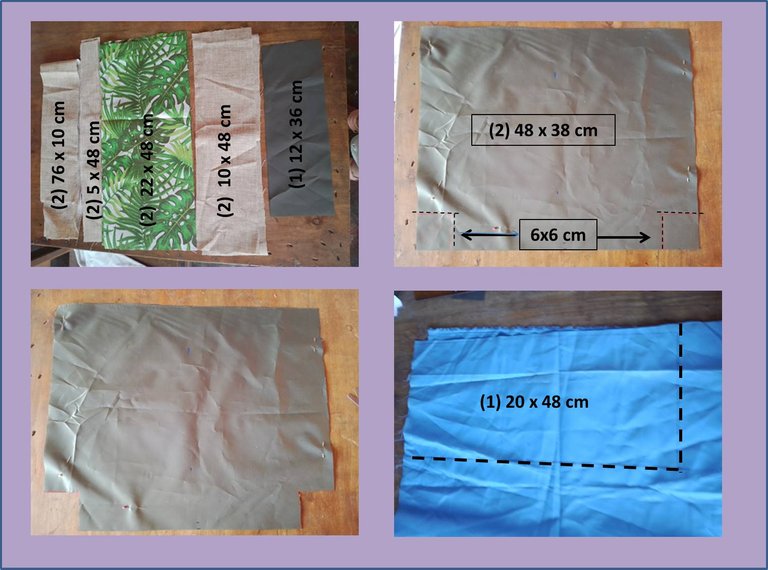
Procedimiento
Lo primero que hice fue contar las diferentes partes para mi bolso para ello corté según lo que los sobrantes de tela me permitieron:
-2 piezas de 76 cm X 10 cm para las asas.
-2 piezas de 5 cm X 48 cm para el fuelle.
-2 piezas de 22 cm X 48 cm en tela estampada
-2 piezas de 10 cm X 48 cm en tela unicolor.
-1 pieza de 12 cm x 36 cm para el fondo del bolso.
-2 piezas de 38 cm X 48 cm para el forro, con un corte de 6 cm en cada esquina.
-1 pieza de 20 cm X 48 cm para el bolsillo interno del bolso, en tafeta.
Procedure.
The first thing I did was to count the different parts for my bag. For this I cut as much as the fabric leftovers allowed me:
- 2 pieces of 76 cm X 10 cm for the handles.
- 2 pieces of 5 cm X 48 cm for the gusset.
- 2 pieces of 22 cm X 48 cm in printed fabric.
- 2 pieces of 10 cm X 48 cm in one-color fabric.
- 1 piece of 12 cm X 36 cm for the bottom of the bag.
- 2 pieces of 38 cm X 48 cm for the lining, with a cut of 6 cm in each corner.
- 1 piece of 20 cm X 48 cm for the inner pocket of the bag, in taffeta.
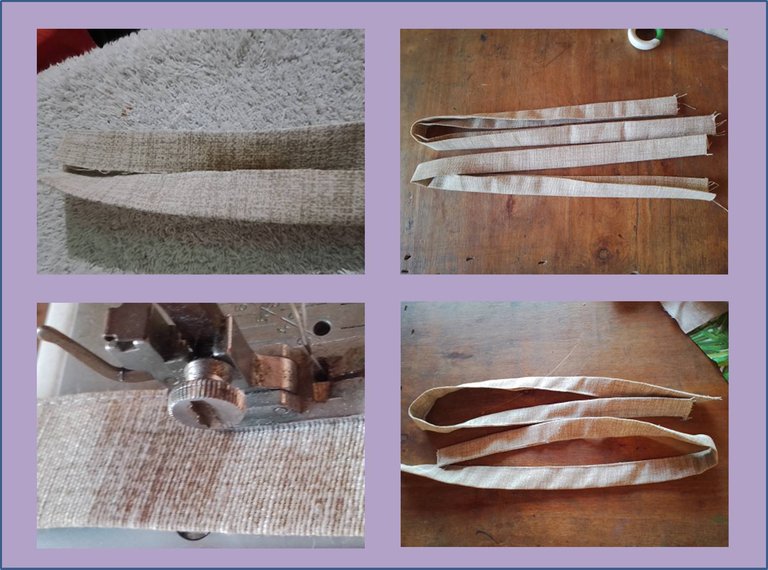
Para comenzar a armar el bolso, procedí a preparar la asas del mismo, primero las planches doblándolas a la mitad y luego doblando cada extremo hacia adentro; de esta forma haría solo una costura y no tendría que estar volteando tela; luego de planchadas y tomando en cuenta que ambas asas quedaran dela misma medida procedí a coserlas.
To start assembling the bag, I proceeded to prepare the handles of the bag, first I ironed them folding them in half and then folding each end inwards; this way I would make only one seam and I would not have to be turning fabric; after ironing them and taking into account that both handles would be of the same size I proceeded to sew them.
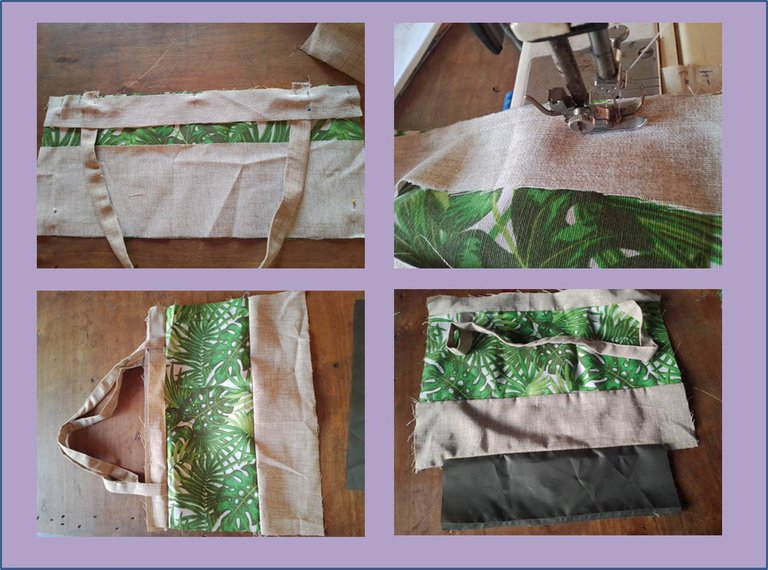
Luego procedí a montar con alfileres las partes delanteras y traseras de mi bolso, para ello coloqué frente con frente de las telas, en el medio del bolso coloqué la tela estampada, luego en el extremo superior el fuello junto con las asas a 7 cm de los extremos laterales de cada parte del bolso, en la parte inferior de la tela estampada coloque la otra tela unicolor y solo en el extremo de la parte delantera cosí el fondo del bolso, esto dejando los mismo 6 cm en los extremos que dejé en la tala del forro.
Then I proceeded to assemble with pins the front and back parts of my bag, for this I placed front to front of the fabrics, in the middle of the bag I placed the printed fabric, then at the top end the gusset along with the handles at 7 cm from the side ends of each part of the bag, at the bottom of the printed fabric I placed the other unicolor fabric and only at the end of the front I sewed the bottom of the bag, this leaving the same 6 cm at the ends that I left in the cutting of the lining.
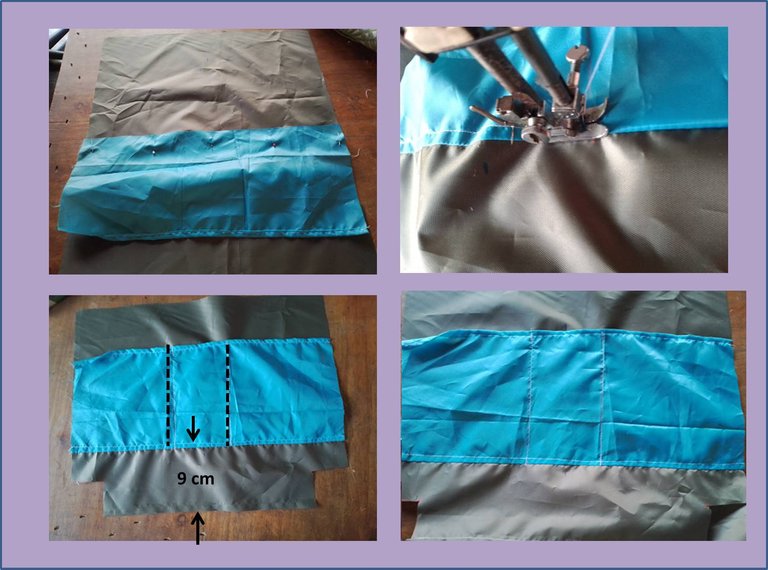
Ya teniendo las partes externas listas procedí a armar el forro, para ello medí 9 cm del extremo inferior de una de mis partes del forro, hacia arriba para colocar el bolsillo, luego procedí a coser con costura oculta y luego marque del centro hacia los lados 5 cm e hice dos costuras rectas, para hacer tres bolsillos, en el centro quedaría el bolsillo para el celular.
Once I had the external parts ready I proceeded to assemble the lining, for this I measured 9 cm from the lower end of one of my parts of the lining, upwards to place the pocket, then I proceeded to sew with a hidden seam and then I marked from the center to the sides 5 cm and made two straight seams, to make three pockets, in the center would be the pocket for the cell phone.

Ya estando las 4 piezas listas, medí el cierre y me quedaba casi justo a los extremos del bolso por lo que al igual que el bolso anterior le cosí unos refuerzos a cada extremo, seguido procedí a unir las piezas y el cierre; 😔😔 les comento me toco desarmar porque al colocar el cierre la primera vez me quedó con la cremallera hacia adentro del bolso,🥤🥤 así que aproveche para ir por un vasito de jugo y desmontar la costura.
Así que comencé de nuevo a montar mis piezas, esta vez verificando que la cremallera quedara bien colocada 😉😉, para ello enfrente la parte delantera del bolso con la parte delantera de la cremallera y seguido colóquela tela del forro y procedí a coser, luego hice lo mismo con la parte de atrás y listo el cierre quedó montado como debía de ser, respiré profundo y me felicité a mí misma.
Once the 4 pieces were ready, I measured the zipper and it was almost right at the ends of the bag, so like the previous bag I sewed some reinforcements at each end, then I proceeded to join the pieces and the zipper; 😔😔 I had to disassemble it because when I placed the zipper the first time it was left with the zipper inside the bag, 🥤🥤 so I took the opportunity to go for a glass of juice and disassemble the seam.
So I started again to assemble my pieces, this time verifying that the zipper was well placed 😉😉, for this I faced the front of the bag with the front of the zipper and then placed the lining fabric and proceeded to sew, then I did the same with the back and ready the zipper was mounted as it should be, I took a deep breath and congratulated myself.

Acto seguido procedí a juntar forro con forro y las partes delantera y trasera del bolso para luego coser por los laterales, para ello primero unir el fondo del bolso a la parte trasera del mismo, seguido deje una abertura de aproximadamente 20 cm en la parte inferior del forro para poder voltearlo al final; posteriormente procedí a juntar con un alfiler cada punta en los extremos del fondo.
Then I proceeded to join lining with lining and the front and back of the bag and then sew the sides, to do this first join the bottom of the bag to the back of it, then I left an opening of about 20 cm at the bottom of the lining to turn it over at the end; then I proceeded to join with a pin each point at the ends of the bottom.

Procedí a coser cada punta cuidando que todas quedaran a de la misma medida, luego volteé el bolso por l abertura dejada anteriormente y cosí la misma luego de ajustar bien cada extremo del bolso y listo mi bolso de diario ya estaba listo.
I proceeded to sew each point taking care that they were all of the same size, then I turned the bag by the opening left previously and sewed the same after adjusting well each end of the bag and ready my diary bag was ready.
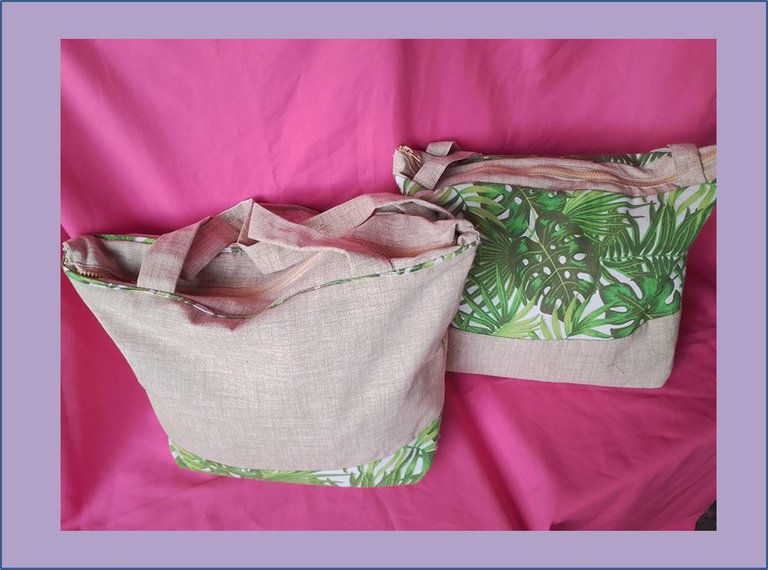
Al finalizar mi segundo bolso me sentí satisfecha, sé que aunque no fue fácil todo esfuerzo vale la pena y toda aprendizaje trae su recompensa, ahora me falta aprender a realizar los bolsillos internos con cremallera en los bolsos, ese será un siguiente reto y como la vida se trata de aprender y avanzar pronto me pondré en ello. Me siento agradecida por la oportunidad de poder aprender cada día algo nuevo y por superar un nuevo desafío, les deseo una feliz semana llena de éxitos.
When I finished my second bag I felt satisfied, I know that although it was not easy every effort is worth it and all learning brings its reward, now I have to learn how to make the internal zippered pockets in the bags, that will be a next challenge and as life is about learning and moving forward soon I will get to it. I am grateful for the opportunity to learn something new every day and to overcome a new challenge, I wish you a happy week full of success.

Sin más que decirle me despido de ustedes
deseándoles una feliz semana,
Agradeciéndoles por tomarse un tiempo
para leer y comentar mi post,
Sus comentarios y sugerencias
siempre serán bienvenidos.
wishing you a happy week,
Thanking you for taking the time
to read and comment on my post,
Your comments and suggestions
will always be welcome.

Contenido original.
Las fotos fueron tomadas con mi celular Moto E6I y editadas en PowerPoint.
Los banner fueron creados por mí en PowerPoint.
La traducción fue a través de www.DeepL.com,Translator (versión gratuita).
Original content.
The photos were taken with my Moto E6I cell phone and edited in PowerPoint.
The banners were created by me in PowerPoint.
The translation was done through www.DeepL.com,Translator (free version).
Hola @gladymar1973, que bueno que pudiste concluir este reto. Como dice el refrán, la práctica hace al maestro. Los próximos bolsos serán cada vez más hermosos.
Recuerda compartir las fotos de tu proceso creativo para poder conectar mejor con tu contenido. Gracias por compartir, saludos!
Saludos querida @kattycrochet gracias por el consejo, feliz día
This bag looks fantastic and I'm amazed to know that you made it with leftover fabrics. Great work.
It is nice that you use the leftover fabric to make this beautiful bag, indeed nothing is waste
Thank you very much dear friend, exactly from those little leftovers we can put our imagination to work.
Greetings and thanks for sharing