I show you how to make a pair of shorts with recycled fabric from old pants || Te enseño a elaborar un pantalón corto o Shorts con tela reciclada de un pantalón viejo
Bienvenidos Queridos Amantes de la Artes Manuales
Welcome Dear Manual Arts Lovers
Que tal queridos lectores, espero que estén pasando un excelente fin de semana, recargándose de energía para iniciar una nueva semana, que confío en Dios, estará repleta de maravillosas sorpresas. Yo por mi parte, les traigo un nuevo proyecto de costura que les aseguro les encantará, no solo porque es simple sino porque, además, les podría permitir reciclar. Resulta, que confeccione un sencillo short o pantalón corto y lo realice a partir de las piernas de un pantalón de Cotton Licra viejo.
Hello dear readers, I hope you are having a great weekend, recharging your energy to start a new week, which I trust in God, will be full of wonderful surprises. I, for my part, bring you a new sewing project that I assure you will love, not only because it is simple but also because it could allow you to recycle. As it turns out, I made a simple pair of shorts from the legs of an old Cotton Lycra pant.


Utilicé un pantalón largo, de eso que se usan para hacer ejercicios, pero el modelo que trae la bota ancha o recta, no era estilo legin. Por supuesto, se había desgastado mucho después de tantas lavadas y uso, por lo que decidí dejarlo para uso diario. Como ya no lo quería largo, le corté las piernas al pantalón, lo hice, más o menos a la altura de las rodillas. Cuando vi la tela correspondiente a las botas del pantalón, me di cuenta, de que, a diferencia de la del resto de la prenda, estas no estaban desgastada, por el contrario, se veían en perfecto estado.
I used a pair of long pants, one of those that are used for exercise, but the model that has a wide or straight boot, it was not legin style. Of course, it had worn out a lot after so many washes and use, so I decided to leave it for daily use. Since I no longer wanted it long, I cut the legs of the pants, I did, more or less at the knees. When I saw the fabric corresponding to the boots of the pants, I realized that, unlike the rest of the garment, these were not worn, on the contrary, they looked in perfect condition.
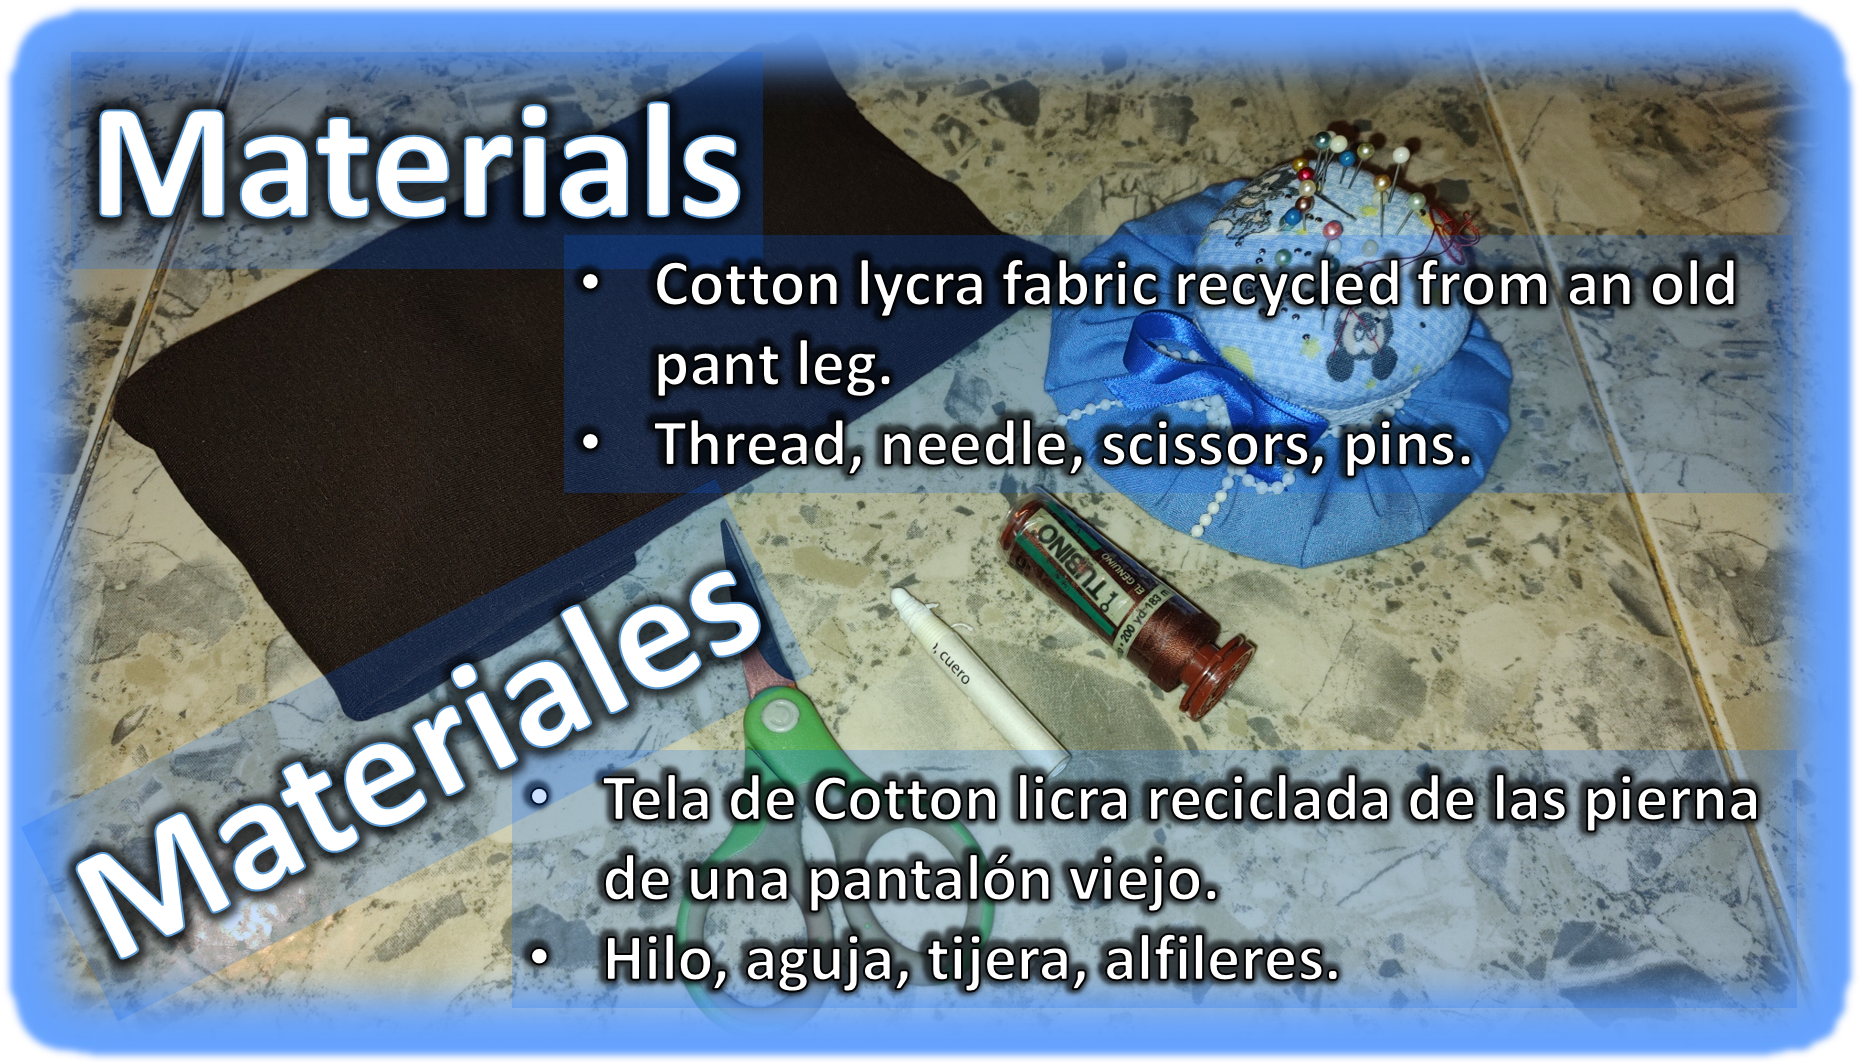
Se me ocurrió entonces reutilizar la tela para realizar un short o pantalón corto, para que mi hija mayor lo usara debajo de la falda del colegio. Con respecto a los materiales, a parte de la tela, los demás, son los básicos, que normalmente se usan, hilo, aguja, alfileres tejeras, etc., de todas formas, se los coloqué arriba en la imagen. Lo primero que hice, fue descoser las costura que tenían las dos piernas de pantalón. Luego la tarea fue buscar un patrón, como no tenía uno a mano, busqué uno de los shorts que ya tiene mi hija, y a partir de allí, elaboré un patrón. Seguidamente, verifiqué que la tela con la que contaba alcanzaba, en caso contrario, buscaría como hacerlo en una talla más chica, para mi hija menor. Por suerte, quedo justo el tamaño, así que, continué con mi proyecto sin cambios.
I then thought of reusing the fabric to make a pair of shorts for my oldest daughter to wear under her school skirt. As for the materials, apart from the fabric, the rest are the basics, which are normally used, thread, needle, knitting pins, etc., anyway, I placed them above in the image. The first thing I did was to unpick the seams of the two pant legs. Then the task was to look for a pattern, as I didn't have one at hand, I looked for one of the shorts my daughter already has, and from there, I made a pattern. Then, I verified that the fabric I had was enough, otherwise, I would look for a way to make it in a smaller size for my younger daughter. Luckily, it was just the right size, so I continued with my project without changes.
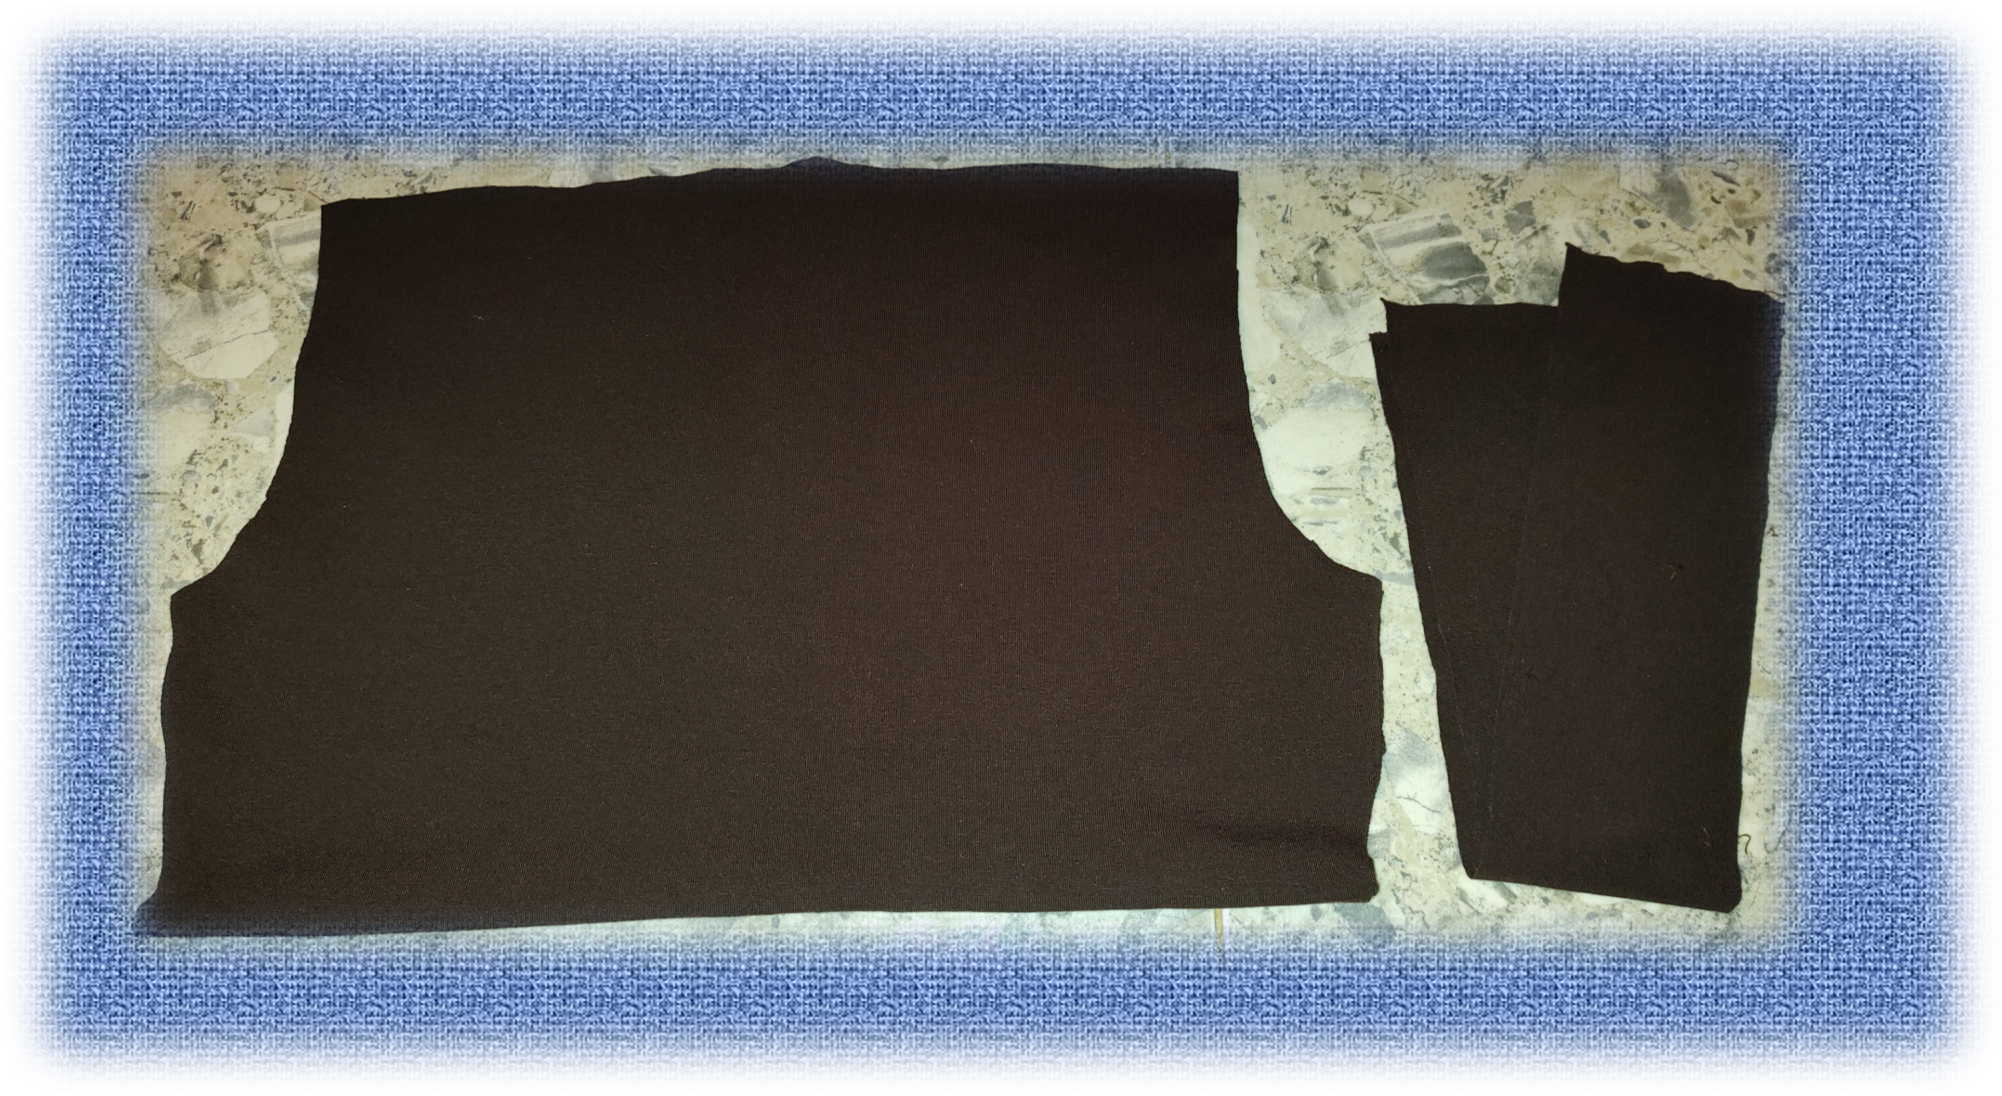
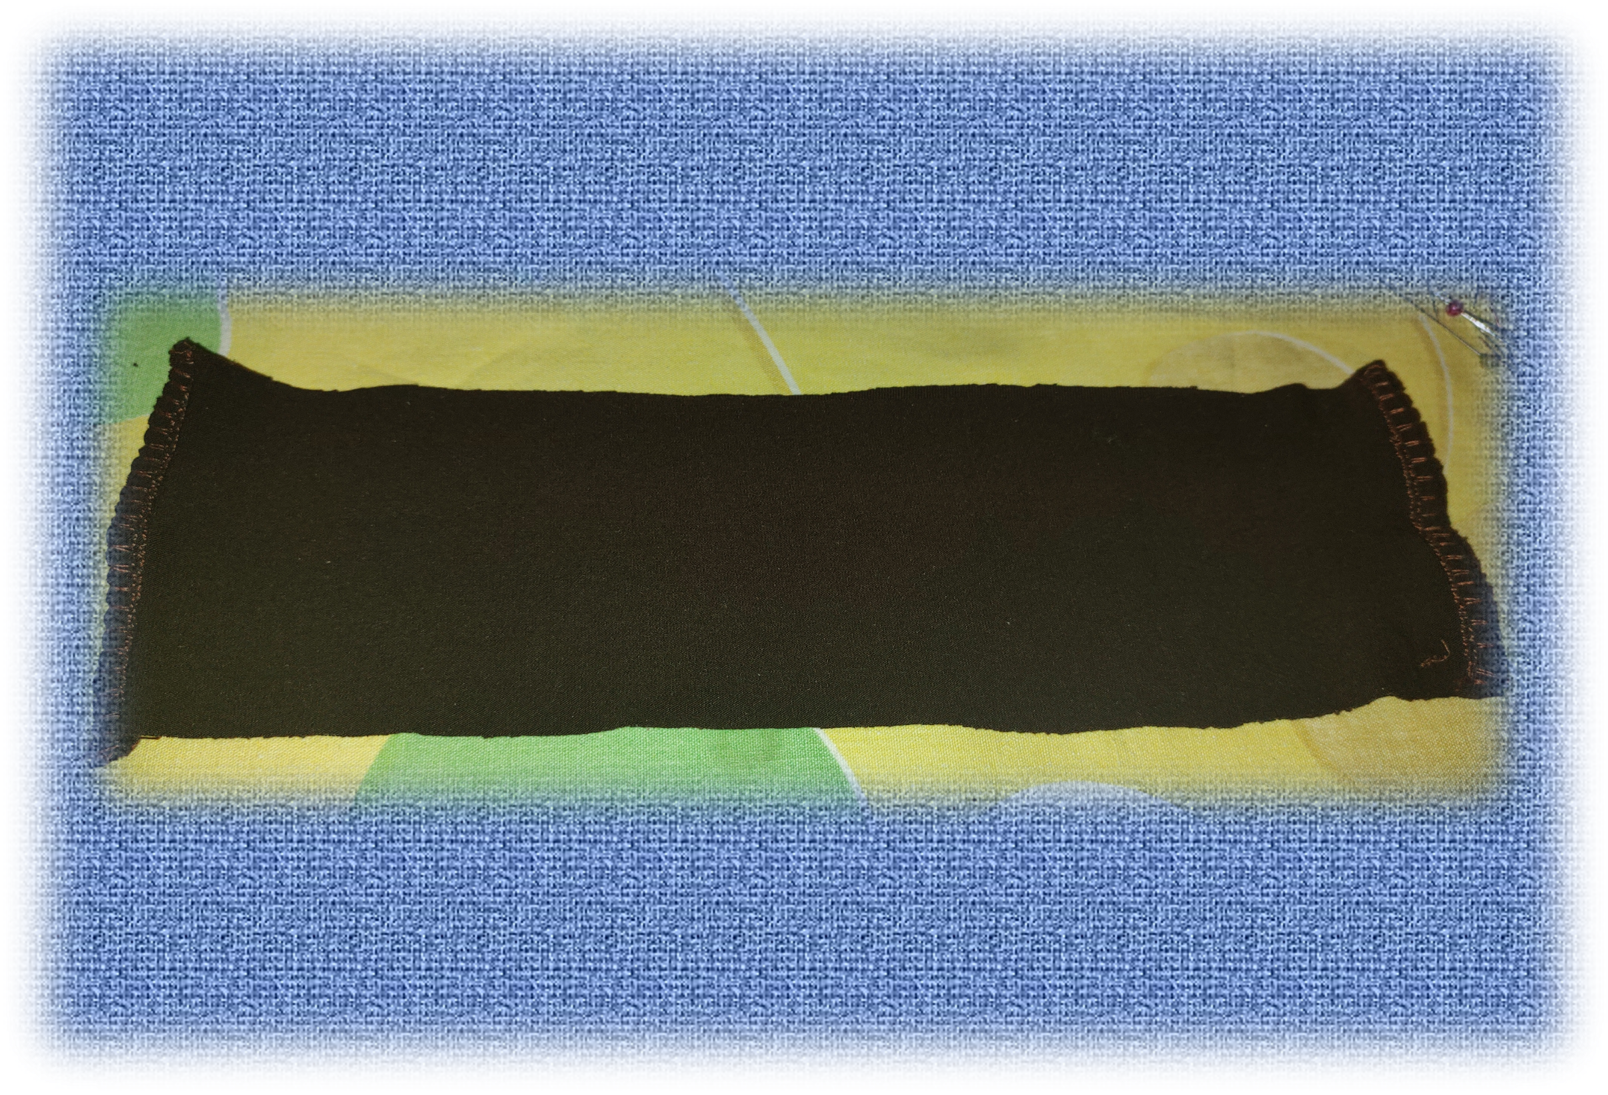
Este tipo de pantalones no tiene costura a los lados, así que coloque las piezas de tela una encima de la otra, haciendo coincidir los derechos de la tela. Por un lado, de la tela, usando el patrón corté la parte delantera del pantalón y del otro lado de la tela, hice lo mismo, pero, esta vez cortando la parte trasera. Al cortar las piezas del largo que necesitaba, me quedaron dos tiras de tela que reservé para luego usarlas para elaborar la pretina del pantalón.
This type of pants has no seams on the sides, so I placed the pieces of fabric one on top of the other, matching the right sides of the fabric. On one side of the fabric, using the pattern, I cut the front part of the pants and on the other side of the fabric, I did the same, but this time cutting the back part. By cutting the pieces to the length I needed, I was left with two strips of fabric that I reserved to use later to make the waistband of the pants.
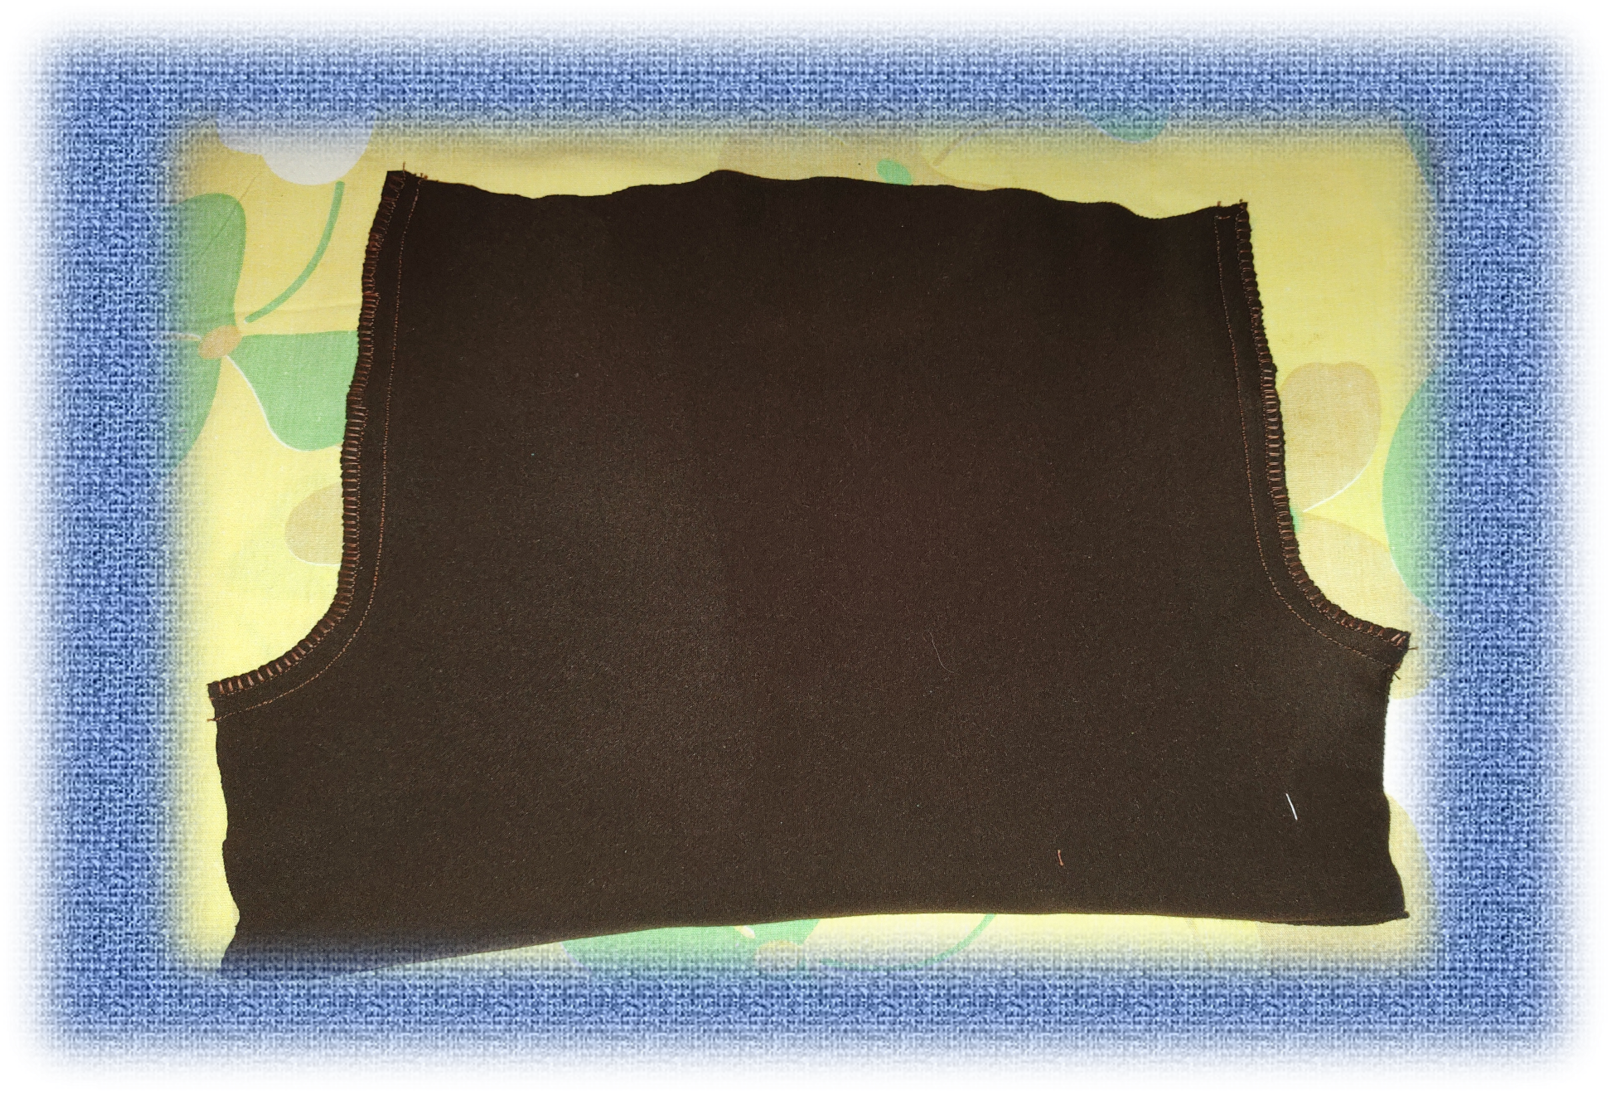
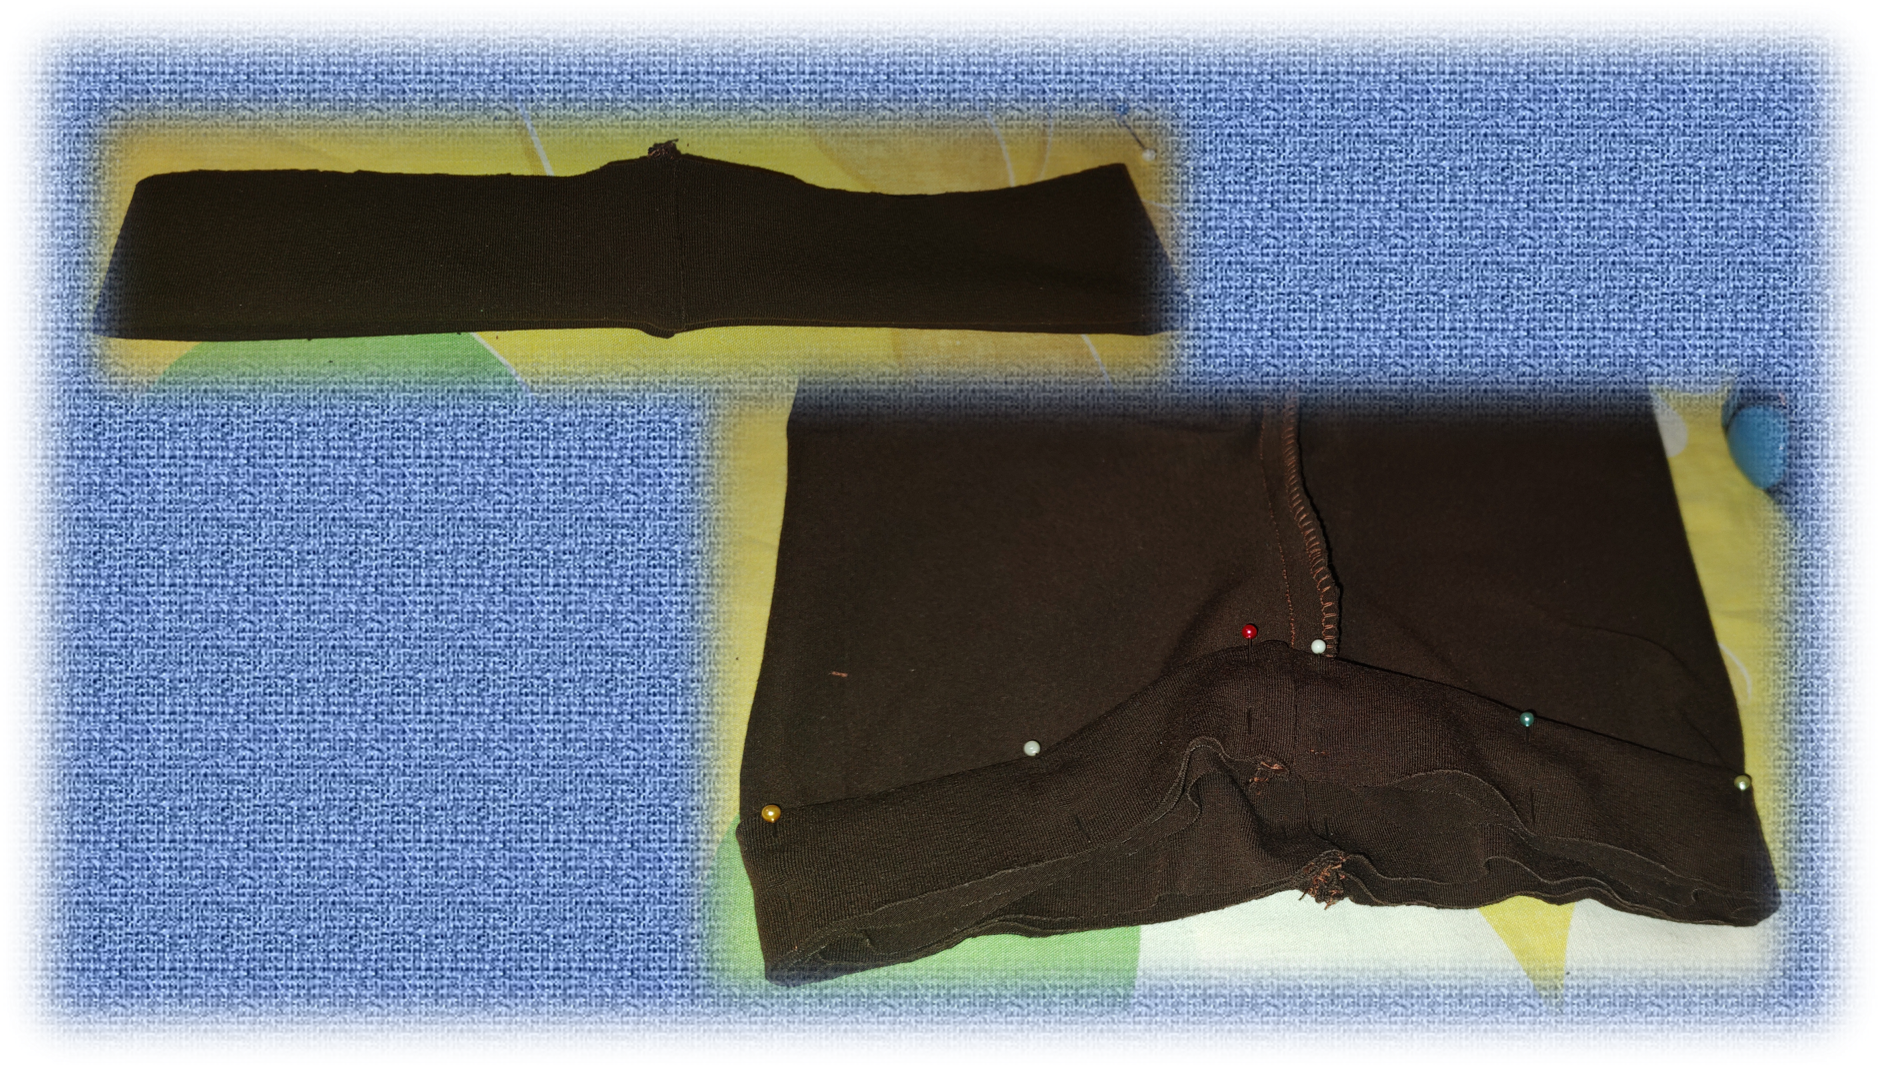
Ya con las piezas cortadas, me ayude con alfileres para fijas las 2 piezas juntas y lo siguiente fue coser. Utilice con un tipo puntada recta, especial para telas elásticas, esta permite que, al espirarse, no se rompa la costura; primero uní las dos piezas de la parte delantera y luego hice lo mismo con la trasera. Para rematar las costuras use una puntada, de falso overlock, que también es un tipo de puntada especial para ser usada en telas que estiran. Y en la imagen que coloco arriba, pueden ver como quedo después que realice las costuras.
Once the pieces were cut, I used pins to fix the two pieces together and the next step was to sew. I used a type of straight stitch, special for elastic fabrics, this allows the seam to not break when it is exhaled; first I joined the two pieces of the front part and then I did the same with the back part. To finish the seams, I used a false overlock stitch, which is also a special type of stitch to be used in fabrics that stretch. And in the image above, you can see how it looks like after I made the seams.
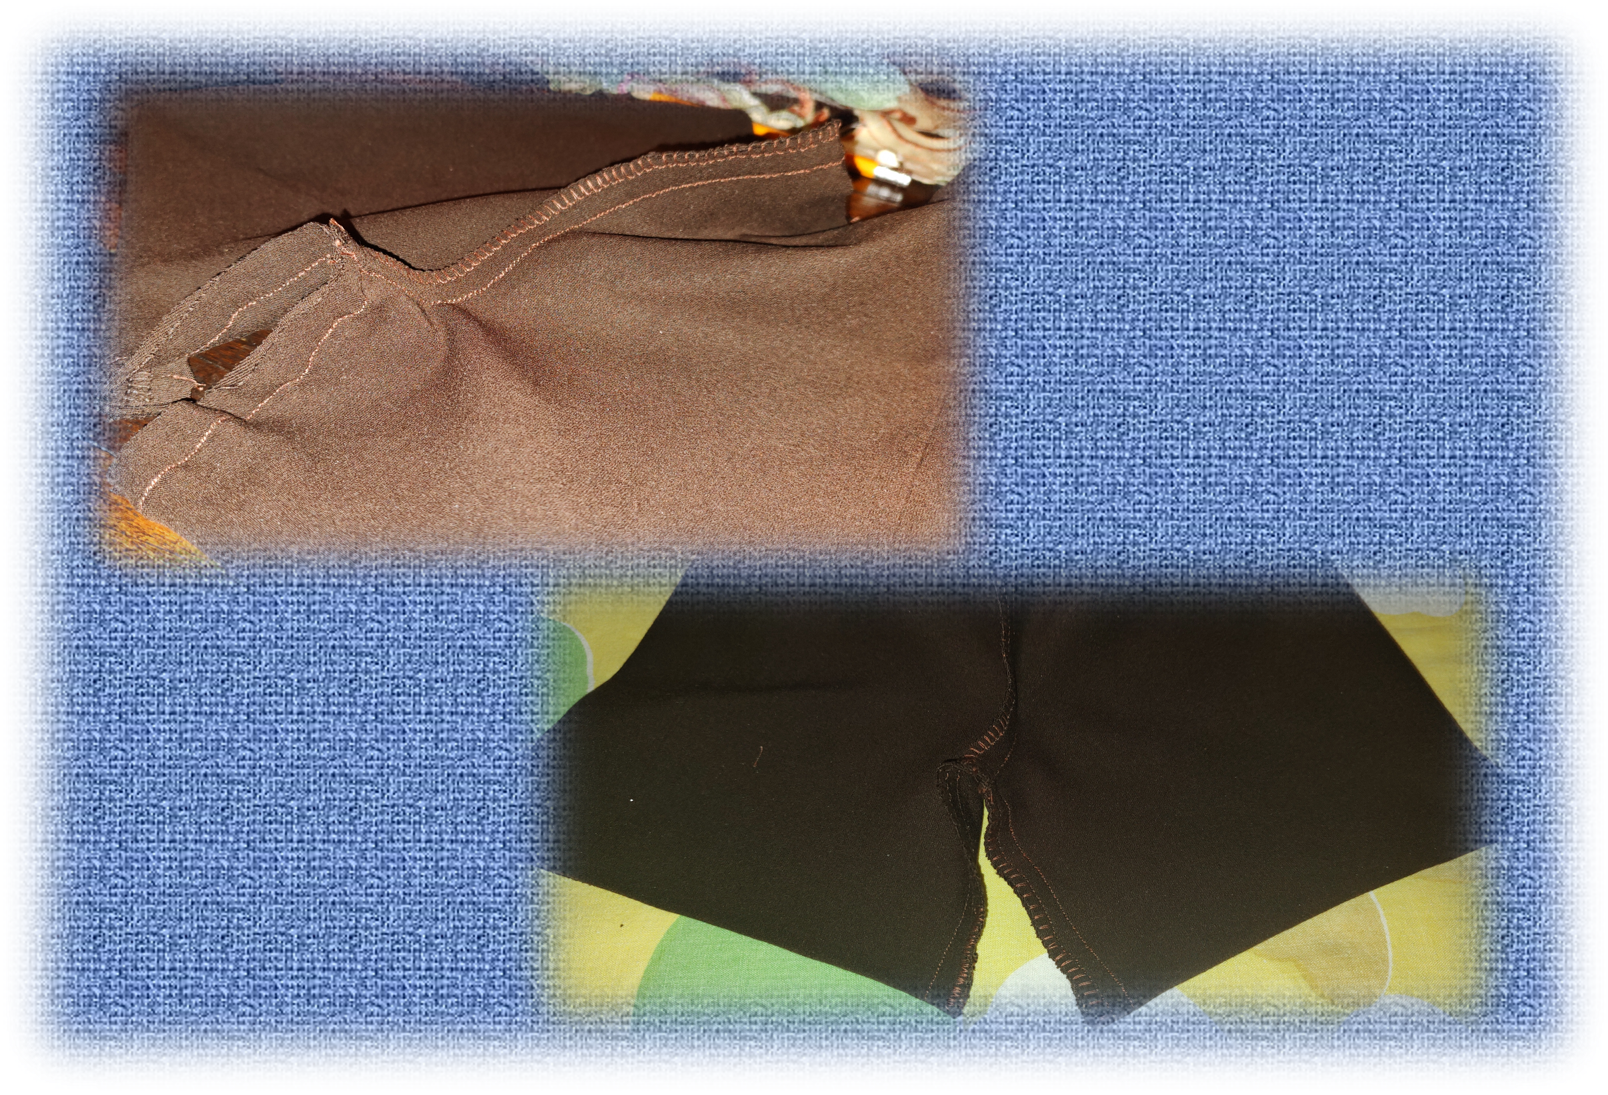
Ahora, toca el turno de unir la entrepiernas, con la ayuda nuevamente de los alfileres, primero hice coincidir la costura de la parte delantera con la trasera. A partir de ese punto, coloque alfileres de un lado y del otro, ya con las dos piezas fijas, pase la costura recta, especial para telas elásticas. Finalmente, como en el caso anterior remate las costuras con una puntada estilo overlock, como lo pueden apreciar en la imagen.
Now, it's time to join the crotch, with the help of the pins again, first I matched the seam of the front with the back. From that point, place pins on one side and on the other, and with the two pieces fixed, pass the straight seam, special for elastic fabrics. Finally, as in the previous case, stitch the seams with an overlock stitch, as you can see in the picture.
Recuerdan que había reservado unas tiras de tela que les comenté, usaría para elaborar la pretina del pantalón. Bueno, para ello lo primero que hice fue medir el contorno de la cintura de mi hija, a esa medida le resté 2 centímetros, ese sería el largo total de la pretina. Para obtener ese largo, uní las dos piezas de tela que tenia con una costura elástica y luego rematé la orilla. Eliminé la tela sobrante y uní también los 2 extremos que quedaban sueltos, con esto, me quedo una especie de anillo.
Remember that I had reserved some strips of fabric that I told you I would use to make the waistband of the pants. Well, the first thing I did was to measure the circumference of my daughter's waist, I subtracted 2 centimeters from that measurement, that would be the total length of the waistband. To get that length, I joined the two pieces of fabric I had with an elastic seam and then I finished off the edge. I removed the excess fabric and also joined the 2 ends that were loose, with this, I was left with a kind of ring.
Ahora, ese anillo lo doblaremos a la mitad como muestra la imagen, dejando las costuras por la parte interna. Llego el momento de fijar la pretina al pantalón, obviamente la pretina es mas angosta que la zona de la cintura del pantalón. Pero, no se preocupen, ajustará perfectamente, para ello, usen alfileres para hacer coincidir las 2 costuras, de la pretina, una con la costura delantera y la otra con la trasera. Luego, de forma equidistante, fijen con alfileres en los extremos de los costados. Seguido estiren un poco la tela de la pretina para que se ajuste al tamaño de la zona de la cintura del pantalón y pueden ir colocando más alfileres si lo necesitan.
Now, we will fold that ring in half as shown in the picture, leaving the seams on the inside. Now it's time to attach the waistband to the pants, obviously the waistband is narrower than the waist area of the pants. But, don't worry, it will fit perfectly, so use pins to match the 2 seams of the waistband, one with the front seam and the other with the back seam. Then, in an equidistant way, fix with pins at the ends of the sides. Then stretch the waistband fabric a little to fit the size of the waistband area of the pants and you can pin more if you need to.

Una vez que fijé la pretina del short en lugares equidistantes, procedí a pasar la misma costura de puntada recta que he usado hasta ahora. Por supuesto, como ya les comenté en la medida que iba cosiendo estiraba un poco la tela de la pretina para ajustarla al tamaño de la tela con la que estaba uniendo. Lo siguiente fue rematar muy bien el borde, con una pintada de zic-zac muy juntita, ya que, como pueden ver en este caso le deje la costura visible, por lo que me quedo un mínimo vuelito, como una especie de decoración.
Once I fixed the waistband of the shorts in equidistant places, I proceeded to sew the same straight stitch seam that I have used so far. Of course, as I mentioned before, as I was sewing, I stretched the waistband fabric a bit to adjust it to the size of the fabric I was joining. The next step was to finish off the edge very well, with a very close zic-zac stitch, since, as you can see in this case, I left the seam visible, so that I had a minimal frill, as a kind of decoration.
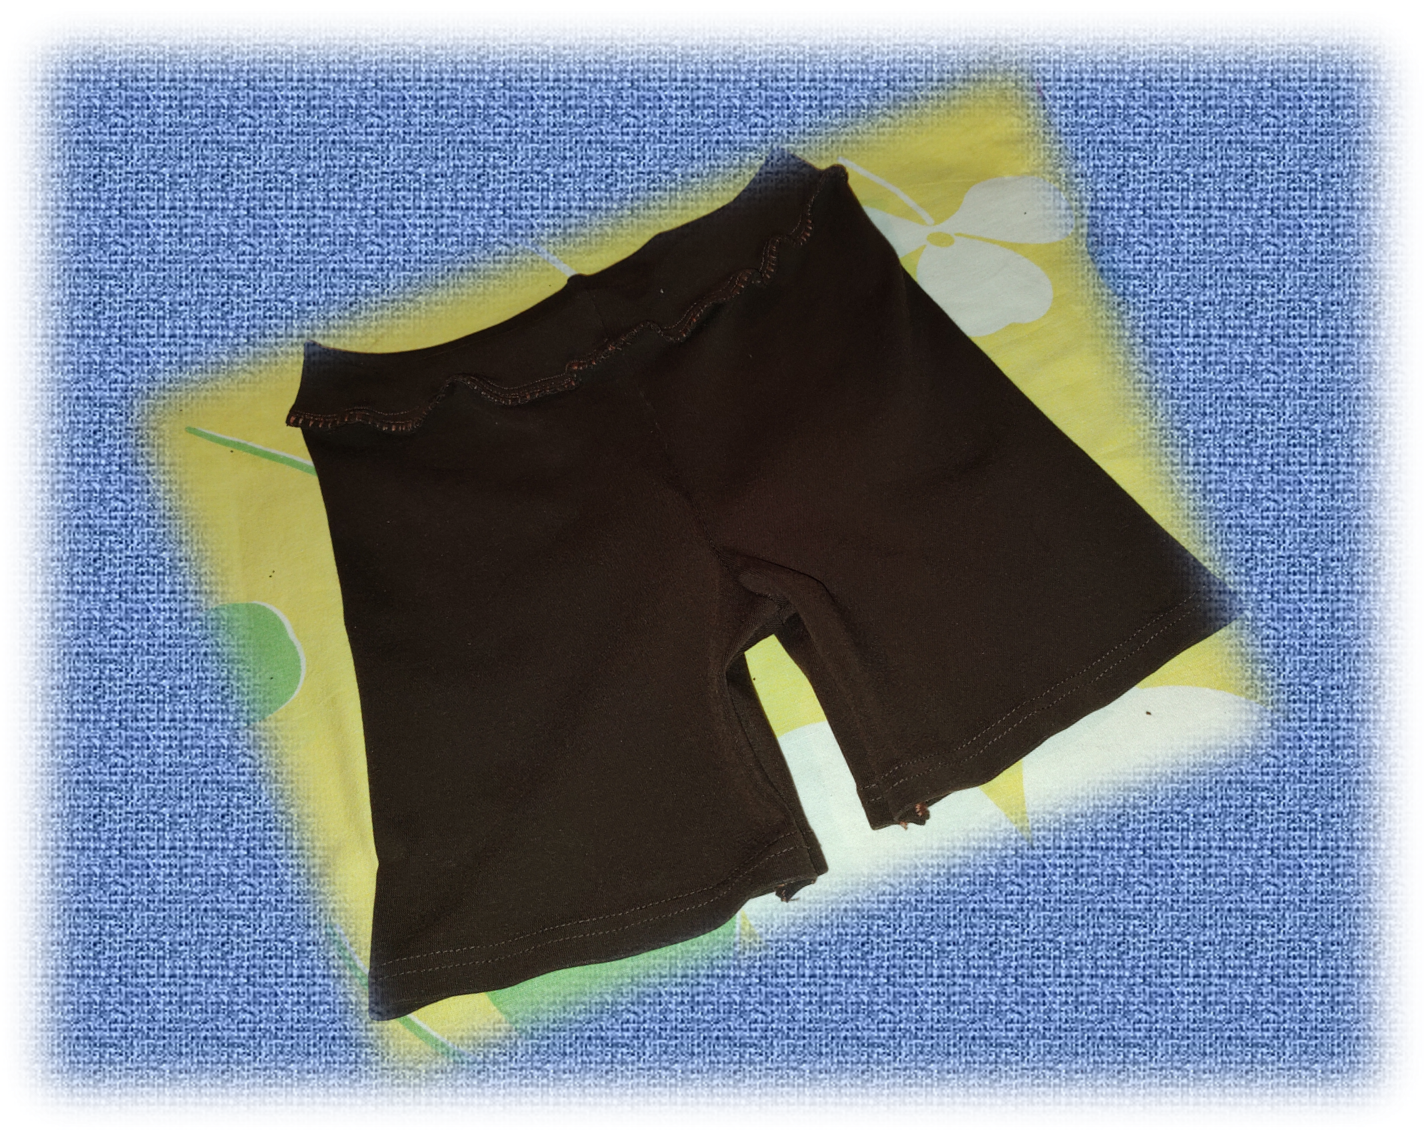
Lo último que hice fue rematar la parte del ruedo, que en este caso conservé del pantalón original, así que me ahorré ese trabajo, jajaja. Bueno, hasta aquí llegamos con este sencillo proyecto, que como pudieron ver, además les permite reciclar, al encontrarle utilidad a esas piernas de pantalones viejos, que a veces nos quedan. Por ahora me despido esperando, que sigan recargando las pilas, para iniciar la nueva semana con muchas energías, un abrazo virtual y bendiciones para todos.
The last thing I did was to finish off the hem, which in this case I kept from the original pants, so I saved myself that work, hahaha. Well, so much for this simple project, which as you can see, also allows you to recycle, by finding a use for those old pant legs that sometimes we have left over. For now, I say goodbye hoping that you continue recharging your batteries, to start the new week with lots of energy, a virtual hug and blessings to all.
Contenido y fotografías de mi propiedad intelectual
Información Técnica
| Cámara | Pentax * istDL |
|---|---|
| Lente | * Pentax 18-55 |
| Iluminación | Luz Natural |
| Locación | Barcelona, Estado Anzoátegui, Venezuela |
Content and photographs of my intellectual property
Technical information
| Camera | Pentax * istDL |
|---|---|
| Lens | * Pentax 18-55 |
| Lighting | Natural Light |
| Location | Barcelona, Anzoátegui State, Venezuela |


0
0
0.000
https://twitter.com/268913702/status/1619681665156268033
The rewards earned on this comment will go directly to the people( @francyrios75 ) sharing the post on Twitter as long as they are registered with @poshtoken. Sign up at https://hiveposh.com.
Siempre agradecida @ewkaw de recibir tu visita y apoyo. Salud y bendiciones para ti y todo el equipo de @qurator.
Your content has been voted as a part of Encouragement program. Keep up the good work!
Use Ecency daily to boost your growth on platform!
Support Ecency
Vote for new Proposal
Delegate HP and earn more
Gracias por su visita y apoyo. Bendiciones para todo el equipo de trabajo.
Bien lindo amiga felicidades
Este patrón sin costuras a los lados no puede fallar nunca, es demasiado fácil y lo podemos hacer a la medida clonando una pieza.
Felicitaciones @francyrios75 te quedó genial
Si, es realmente genial y muy práctico. Gracias por tu visita, salud y bendiciones para ti y los tuyos.
https://twitter.com/1484196455719915527/status/1619853161371668482
The rewards earned on this comment will go directly to the people sharing the post on Twitter as long as they are registered with @poshtoken. Sign up at https://hiveposh.com.
The pattern is beautiful. Like play like play, your daughter now have a new inner wear. You must be a caring mother. It's like I will practice it. I have all it takes.
Hello, thanks for your visit, I'm glad you liked the shorts. And if you have all the materials, I hope you will be encouraged to do it soon and share with us how it turned out. I send many blessings to you and yours.
Congratulations @francyrios75! You have completed the following achievement on the Hive blockchain And have been rewarded with New badge(s)
Your next payout target is 7000 HP.
The unit is Hive Power equivalent because post and comment rewards can be split into HP and HBD
You can view your badges on your board and compare yourself to others in the Ranking
If you no longer want to receive notifications, reply to this comment with the word
STOPCheck out our last posts:
Support the HiveBuzz project. Vote for our proposal!
Con el apoyo de la familia.
También nos puedes apoyar en nuestro Trail de TopFiveFamily
Si desea delegar HP al proyecto de la Familia del Top Family puedes hacerlo desde aquí: Delegue 5 HP - Delegue 10 HP - Delegue 20 HP - Delegue 30 HP - Delegue 50 HP - Delegue 100 HP.