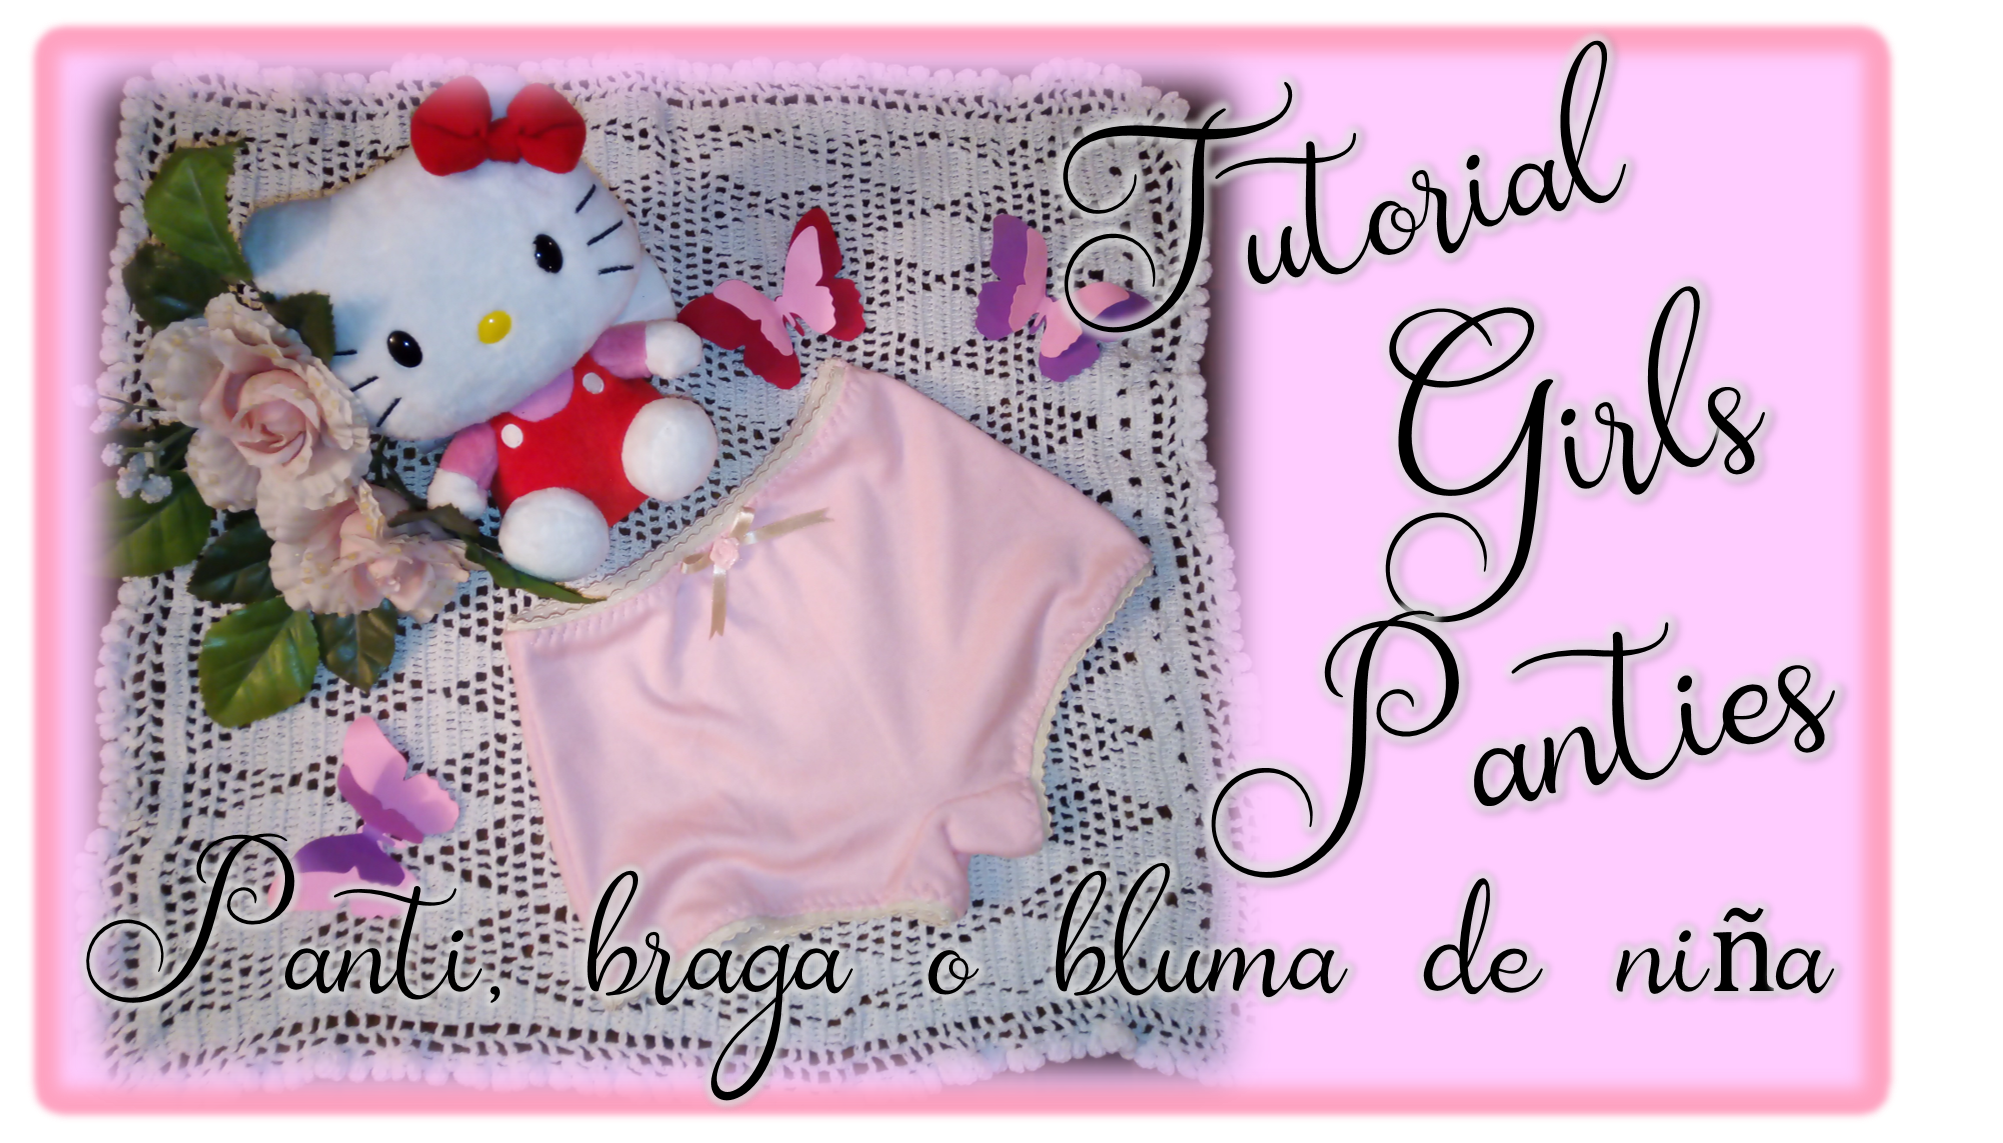
Come and I will show you how to make a girl's pantyhose, model "boyshorts". |TUTORIAL| Ven y te enseño a elaborar un panty de niña, modelo “boyshorts”
Bienvenidos Queridos Amantes de la Artes Manuales
Welcome Dear Manual Arts Lovers
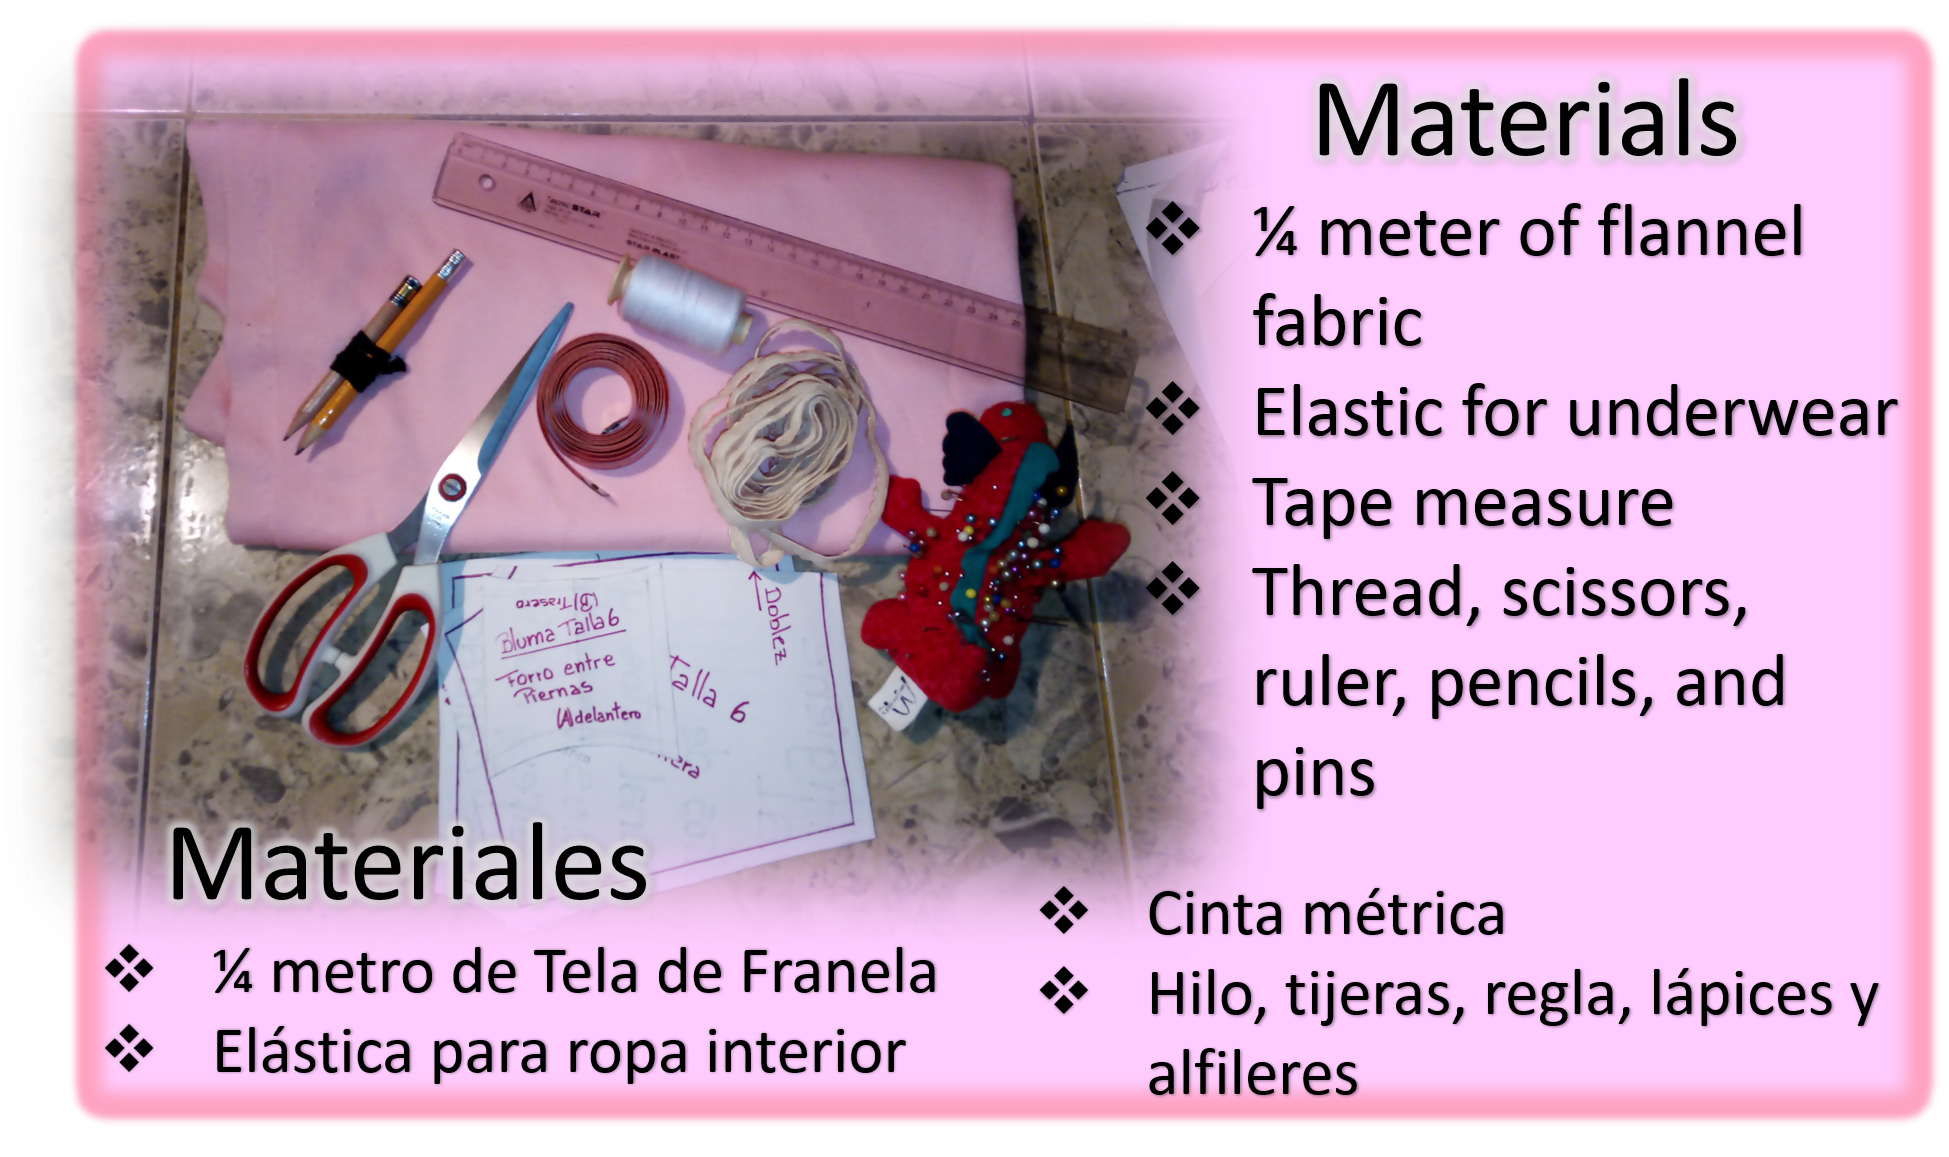
Que rico es estar de vuelta con ustedes y más aun para traerles un proyecto que me encanta, porque se trata de costura, ya en otras oportunidades le he compartido este tipo de proyectos y les he comentado, que la costura es una de mis aficiones favoritas. Tenia tiempo que no hacia nada, porque mi máquina de coser tenia una pieza rota y no había podido comprársela, pero, recientemente se la compre y ya estoy lista para empezar a realizar los estrenos navideños para mis princesas.
How nice to be back with you and even more to bring you a project that I love, because it is about sewing, I have already shared with you in other opportunities this kind of projects and I have told you that sewing is one of my favorite hobbies. I haven't done anything for a while, because my sewing machine had a broken part and I hadn't been able to buy it, but, recently I bought it and I'm ready to start making the Christmas premieres for my princesses.

Pero antes de empezar a trabajar con la ropa para navidad y año nuevo, quise realizar algo que tenía pendiente, como ya les he comentado, aunque practico la costura desde muy joven, realmente nunca he recibido clases formales. Mi trabajo, se puede decir, que es empírico, y en esta ocasión no fue la excepción, realice una bluma, braga o pantys de niña talla 6, a partir de una de las que tiene mi princesa menor. El modelo es lo que se conoce como “boyshorts”, porque son como una especie de pantaloncillos, pero, son muy cómodos y prácticos para las niñas, a mis hijas les encantan.
But before starting to work with the clothes for Christmas and New Year, I wanted to do something I had pending, as I have already mentioned, although I practice sewing since I was very young, I have never really received formal classes. My work, you could say, is empirical, and this time was no exception, I made blouse, panties or tights for girl size 6, from one of those that my youngest princess has. The model is what is known as "boyshorts", because they are like a kind of shorts, but they are very comfortable and practical for girls, my daughters love them.
Como suele suceder, no tenia el patrón para realizarla, pero, eso no importa, porque lo realice a partir de uno de los pantys de mi niña. El ¿cómo lo hice? fue muy sencillo, coloque la prenda sobre cartulina y copie la pieza delantera, luego la trasera y finalmente la de la entrepiernas. Por supuesto, hay que se debe tomar en cuenta dejar el margen de costuras, eso lo resolví usando una técnica muy sencilla que vi en internet, solo necesitan dos lápices y los unen como ven en la imagen anterior, donde además pueden ver los materiales que necesitaran. Como pueden ver, yo los uní con una goma elástica, entonces, coloque una de las puntas de los lápices en la línea del molde y repase todo el molde y al lado el otro lápiz fue trazando una línea paralela a más o menos ½ cm y ese es el margen de costura.
As it usually happens, I didn't have the pattern to make it, but that doesn't matter, because I made it from one of my little girl's tights. How I did it was very simple, I placed the garment on cardboard and copied the front piece, then the back piece and finally the crotch piece. Of course, you have to take into account to leave the seam allowance, I solved that using a very simple technique that I saw on the internet, you only need two pencils and join them as you can see in the image above, where you can also see the materials you will need. As you can see, I joined them with a rubber band, then, I placed one of the pencil tips on the mold line and went over the whole mold and next to it the other pencil was tracing a parallel line at about ½ cm and that is the seam allowance.
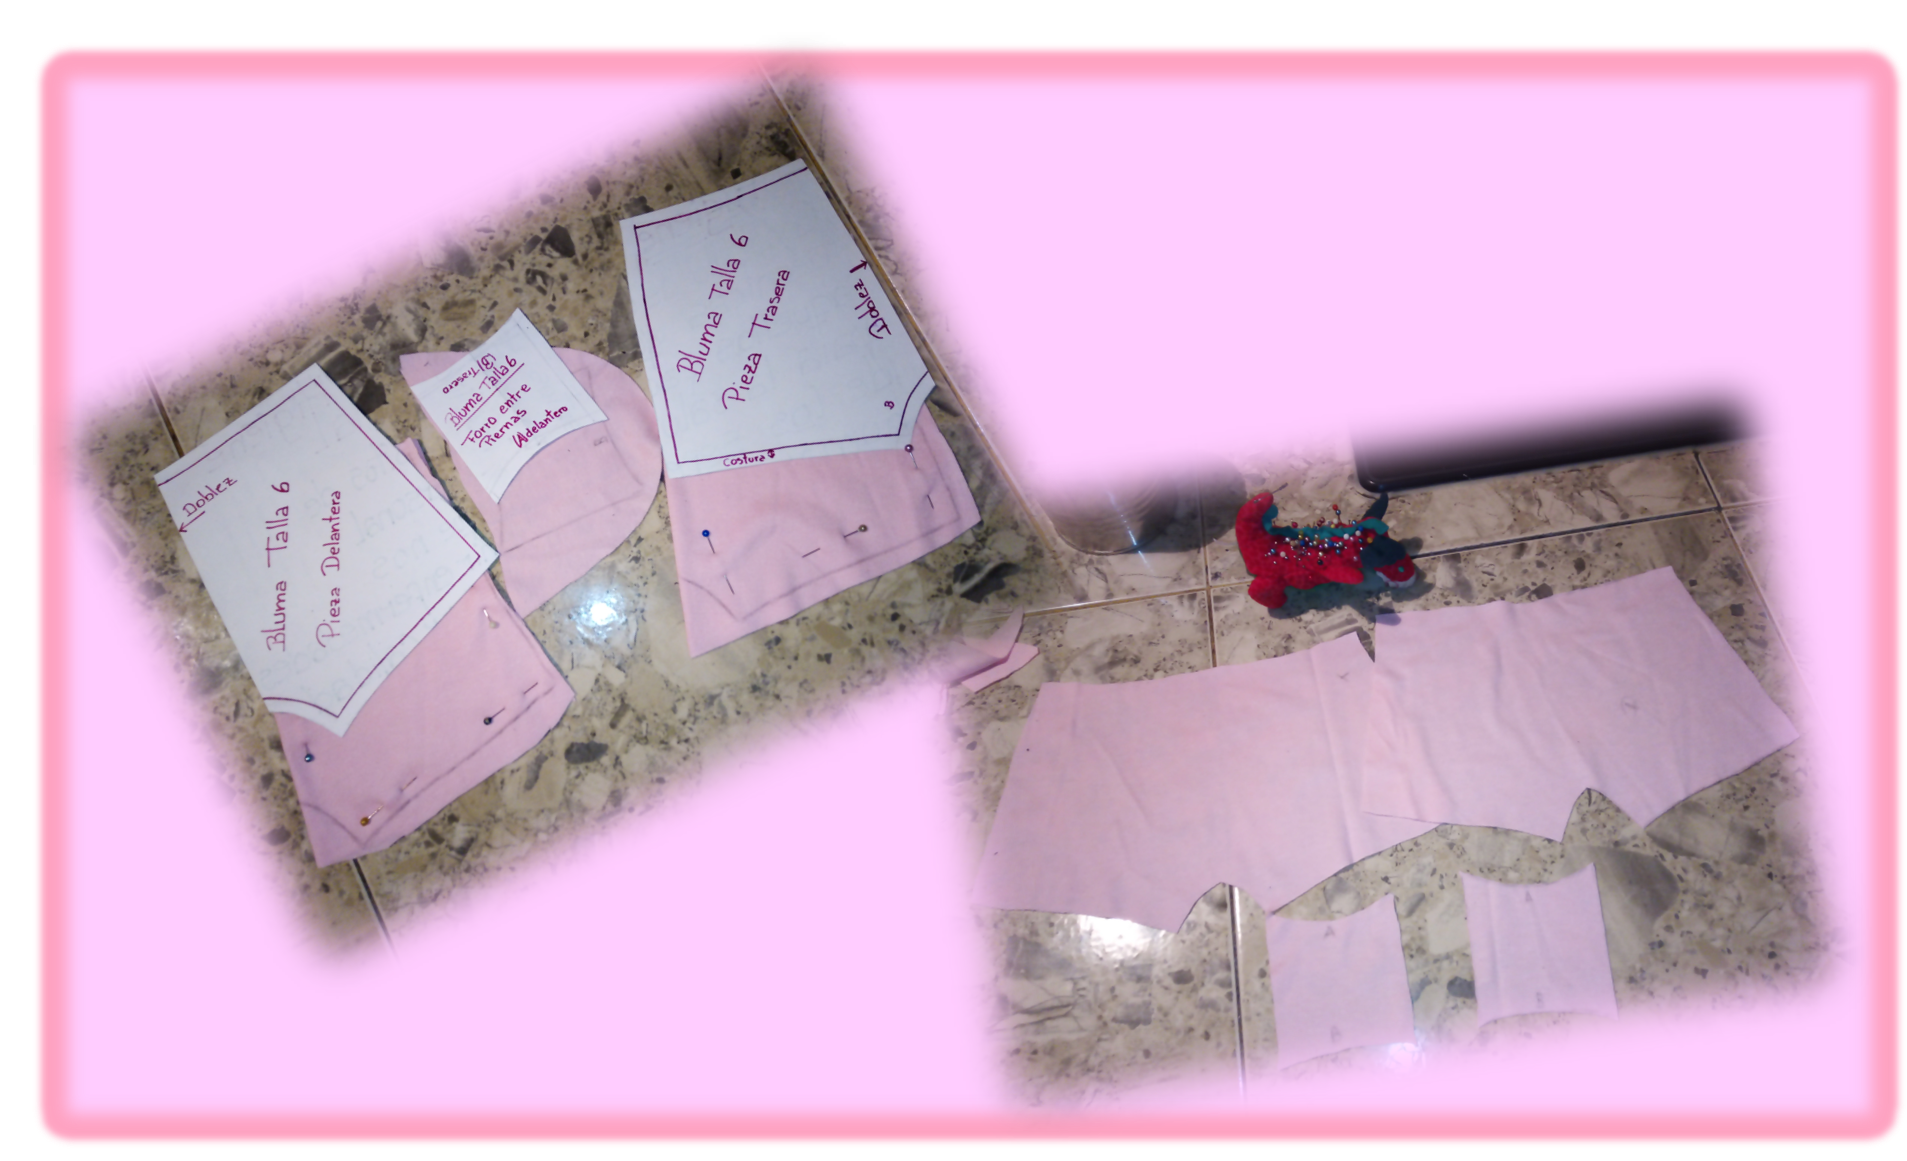
Muy sencilla la forma de copiar el molde del panty, ¿no les parece?, a continuación, lo que realice fue también muy sencillo, traspase los moldes a la tela de franela y luego simplemente los corté. No olviden tener la precaución de identificar la pieza delantera, la trasera, y las de la entrepiernas. Otro detalle que no deben olvidar, es que en el caso de la entrepiernas se cortan dos piezas iguales, ya que, una corresponde al forro interior del pantys.
It was very easy to copy the panty mold, don't you think? next, what I did was also very simple, I transferred the molds to the flannel fabric and then I simply cut them out. Don't forget to identify the front piece, the back piece and the crotch pieces. Another detail that you should not forget is that in the case of the crotch, two equal pieces are cut, since one corresponds to the inner lining of the tights.
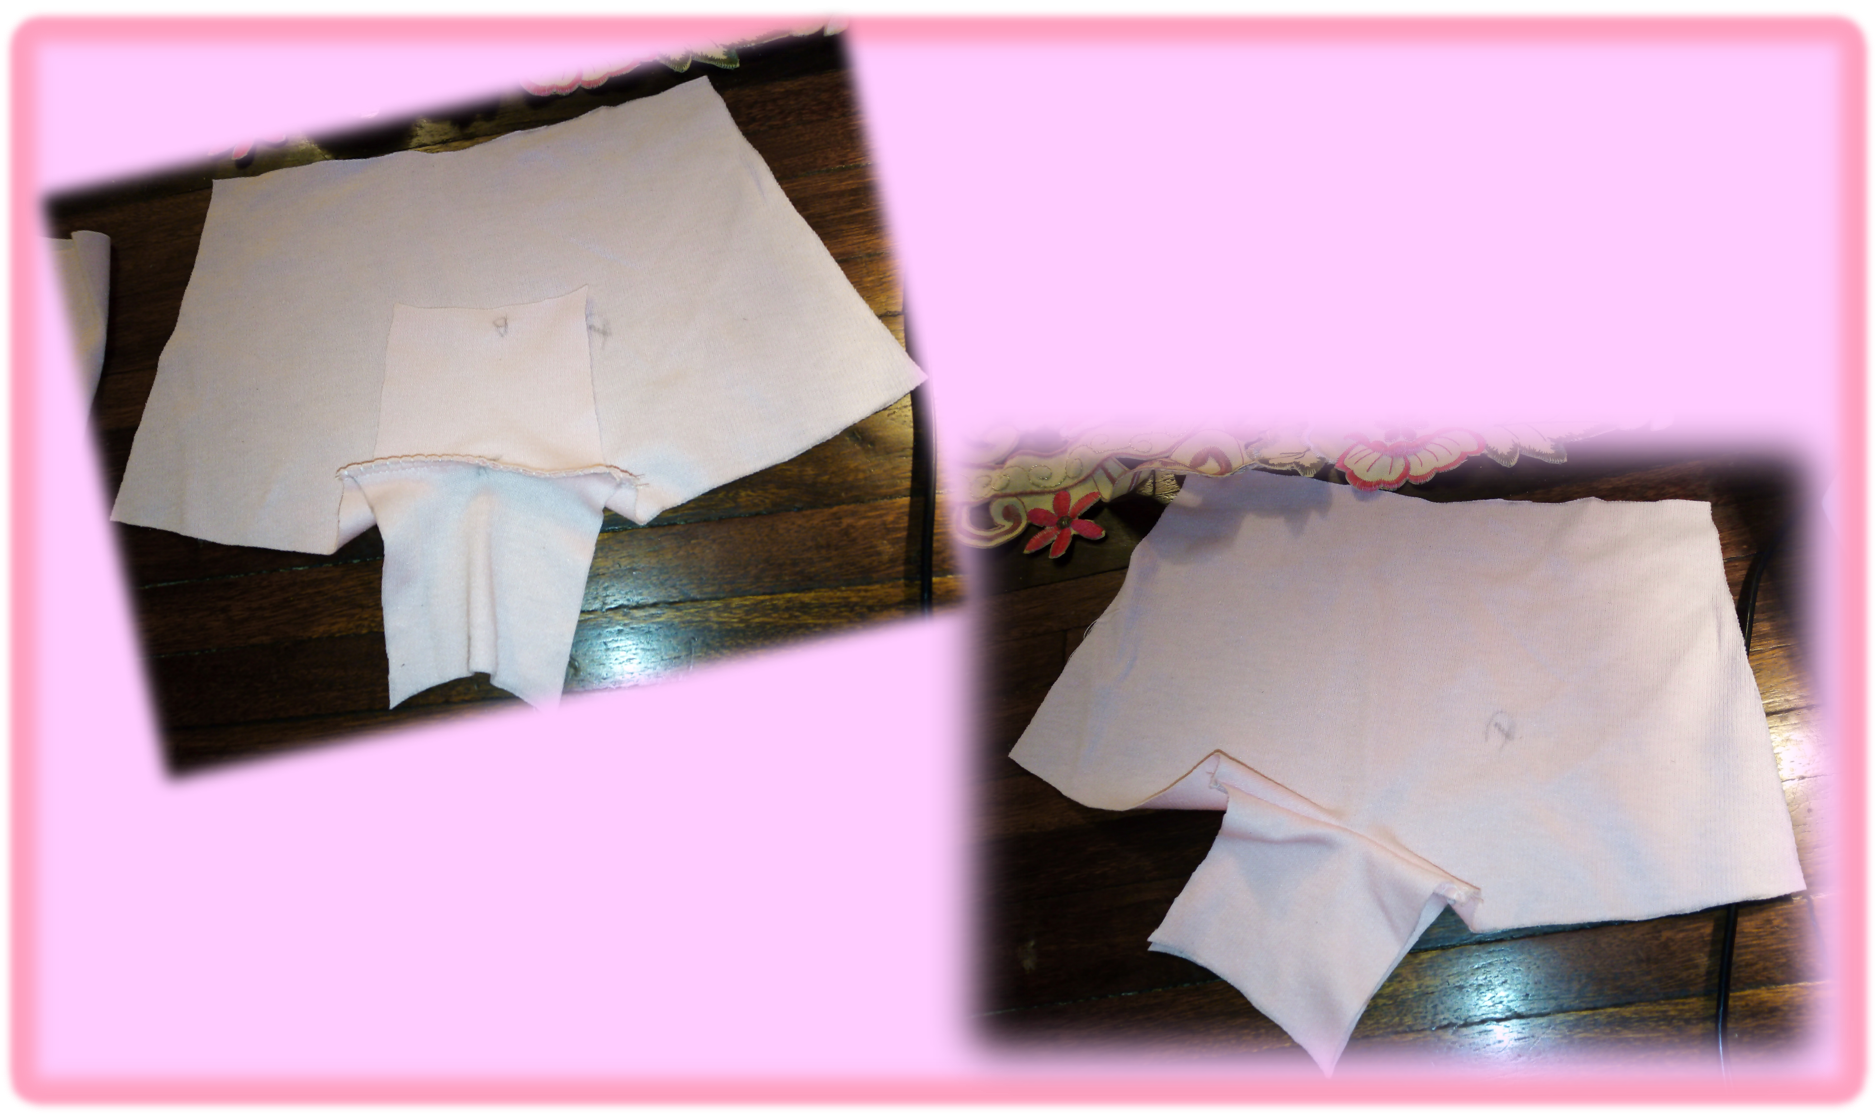
En este siguiente paso, como pueden ver en la imagen, hice coincidir las dos piezas de la entrepiernas con la zona del entrepiernas de la pieza delantera y procedí a pasarle una costura tipo overlock. Este tipo de costura es especial para realizar ropa íntima, pero, también es el que se usa para rematar prácticamente todo tipo de ropa, seguramente lo podrán ver en cualquier tipo de vestimenta que tengan en sus hogares. Se realiza con tipo especial de máquina de coser, pero, la mayoría de las máquinas de coser caseras, que no son únicamente de costura recta, tienen una puntada similar y esa fue la que usé en esta ocasión. Ahora, si se fijan en la segunda imagen al enderezar las piezas, la costura queda interna, esto es para que no moleste, al usarla.
In this next step, as you can see in the image, I matched the two pieces of the crotch with the crotch area of the front piece and proceeded to pass an overlock seam. This type of seam is special for making intimate apparel, but, it is also the one used to finish off practically all types of clothing, surely you can see it in any type of clothing that you have in your homes. It is made with a special type of sewing machine, but, most of the home sewing machines, which are not only straight sewing machines, have a similar stitch and that was the one I used in this occasion. Now, if you look at the second image when straightening the pieces, the seam remains inside, this is so that it does not bother, when using it.
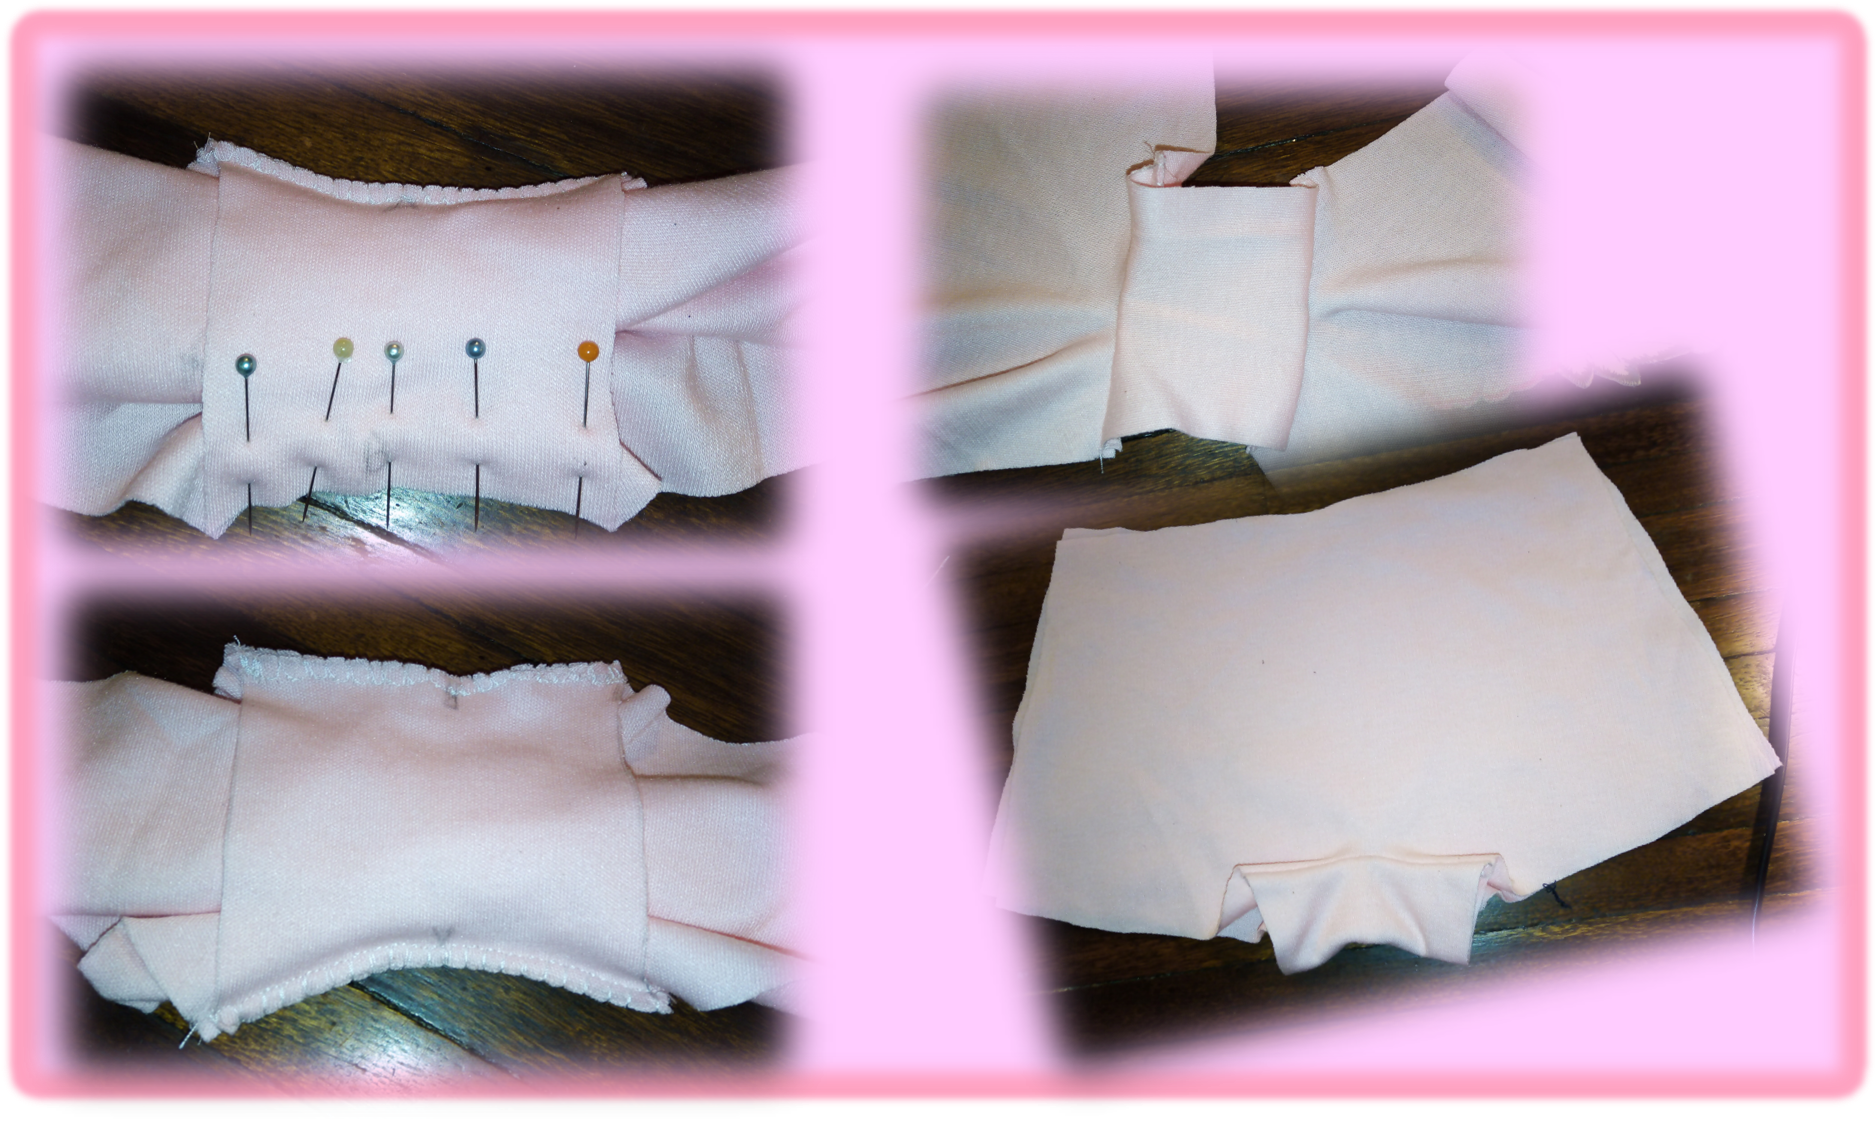
Este siguiente paso reconozco que es un poquito complicado y trataré de explicarme, espero me entiendan. La idea es que al igual que en el paso anterior la costura quede de la parte de adentro, para que no moleste. Para ello, la parte delantera y la trasera la enrollamos y quedará entre las dos piezas de la entrepiernas. Ahora, hacemos coincidir los dos extremos de las piececitas del entrepiernas y en medio de ellas haremos que también coincida con la zona que debemos unir de la pieza trasera. Fijamos los tres extremos con alfileres para que no se nos mueva y luego procedemos a pasar la costura. Finalmente le damos la vuelta, y les debería quedar como muestra la imagen, con las costuras invisibles.
I recognize that this next step is a little complicated and I will try to explain myself, I hope you understand me. The idea is that, as in the previous step, the seam should be on the inside, so that it doesn't get in the way. To do this, we roll up the front and the back and it will be between the two pieces of the crotch. Now, we match the two ends of the crotch pieces and in the middle of them we will also match the area of the back piece that we have to join. We fix the three ends with pins so that it does not move and then proceed to pass the seam. Finally we turn it over, and it should be as shown in the picture, with invisible seams.
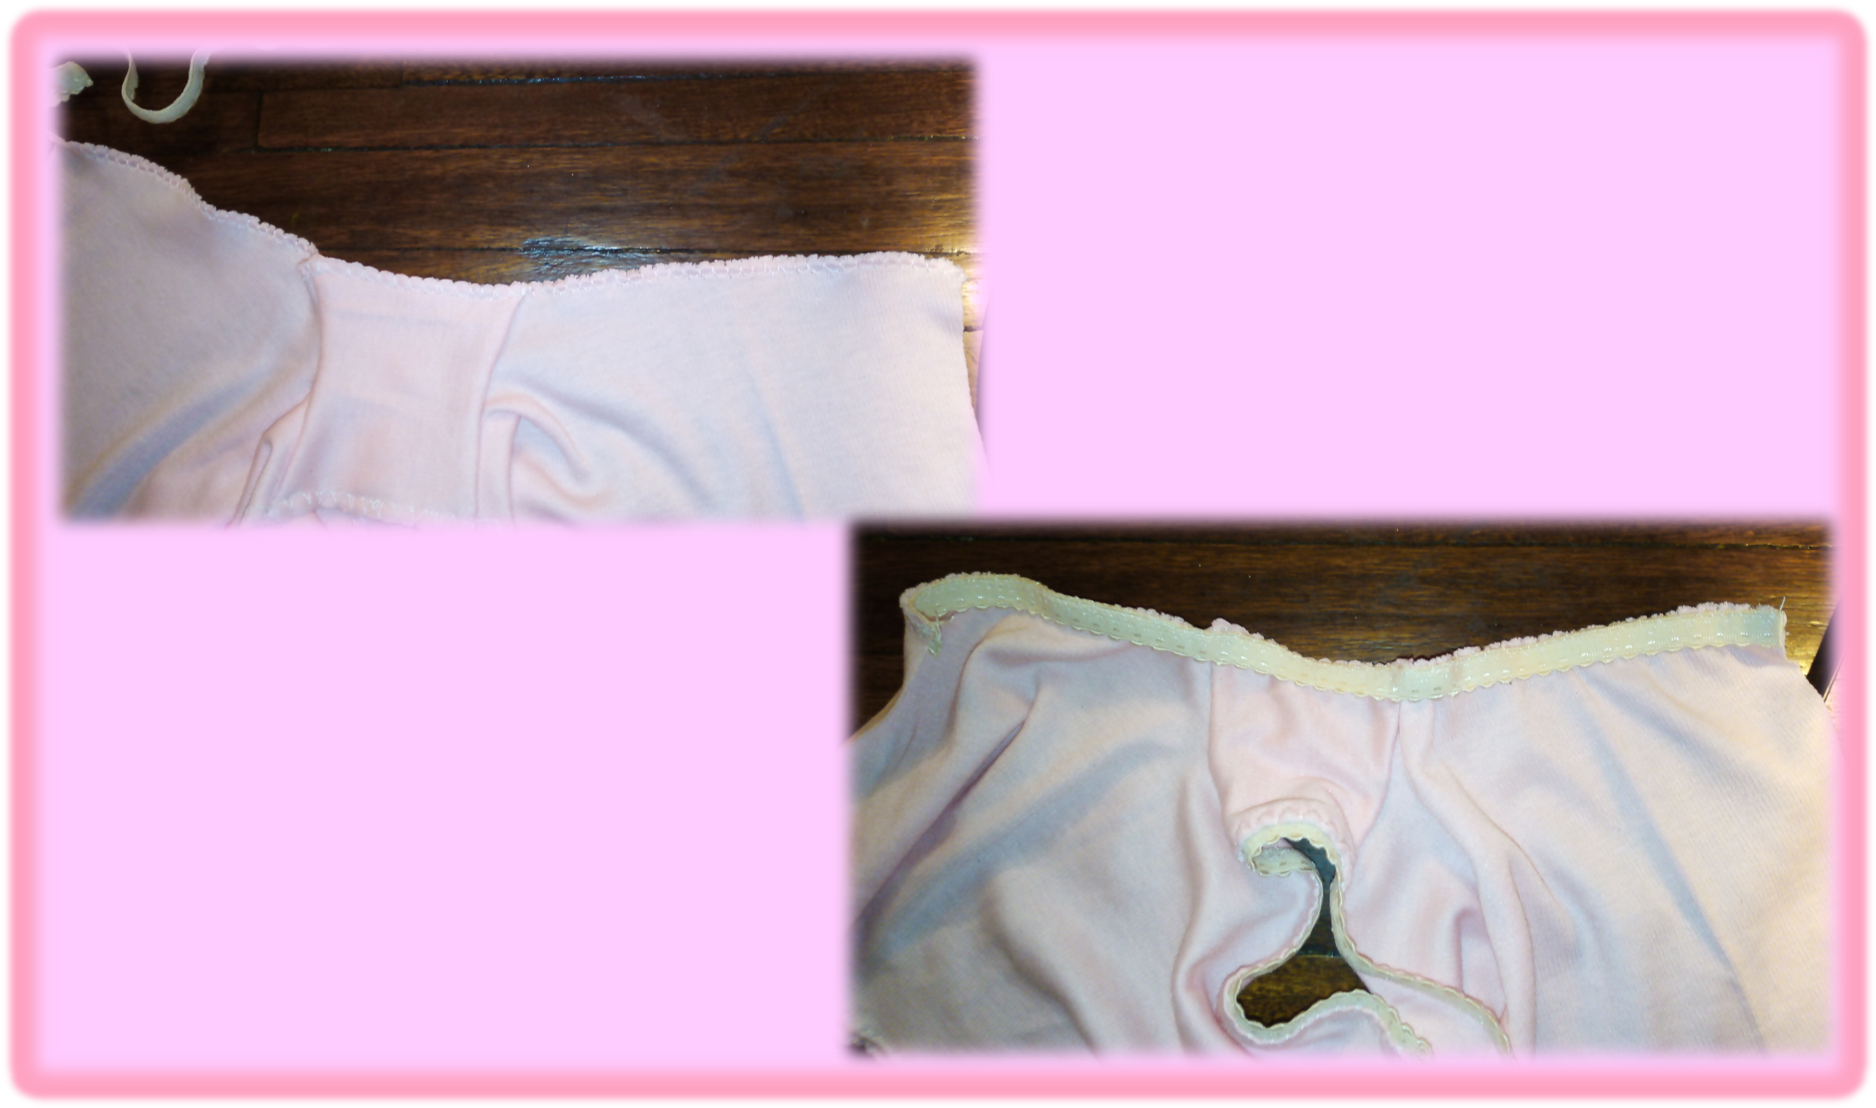
Ahora, toca rematar con punto overlock la zona que corresponde a las piernas, para que nos quede prolijo el trabajo, luego, procedemos a pegar la elástica. Yo utilice un tipo de elástica, especial para realizar ropa íntima, que, además, es decorativa, en mi caso, la idea es que se vea un poco, y de hecho tiene un color distinto, es beis y no rosada. Pero, también pueden usar la elástica normal delgadita, solo que es preferible que al pegarla quede envuelta, para que se vea mejor el trabajo. Para pegar la elástica, recuerden usar una puntada en zic zac para costura elástica, de lo contrario al estirar la prenda las costuras se romperán.
Now, it is time to finish off with overlock stitch the area that corresponds to the legs, so that the work is neat, then, we proceed to glue the elastic. I used a special type of elastic for making intimate apparel, which is also decorative, in my case, the idea is that it shows a little, and in fact it has a different color, it is beige and not pink. But you can also use the normal thin elastic, but it is preferable that when gluing it, it is wrapped, so that the work is better seen. To glue the elastic, remember to use a zic zac stitch for elastic stitching, otherwise when stretching the garment, the seams will break.
Ya falta poco para terminar, ahora, unimos la pieza delantera con la trasera, por uno de los costados, lo hacemos por solo un lado para que se nos facilite el pegar la elástica en la cintura. Antes de pegar la elástica rematamos, la orilla de la cintura con la puntada overlock, para seguidamente fijar la elástica por todo el borde.
Now, we join the front piece with the back piece, on one of the sides, we do it on one side only to make it easier to glue the elastic on the waistband. Before attaching the elastic, we finish off the edge of the waistband with the overlock stitch, and then fix the elastic all around the edge.
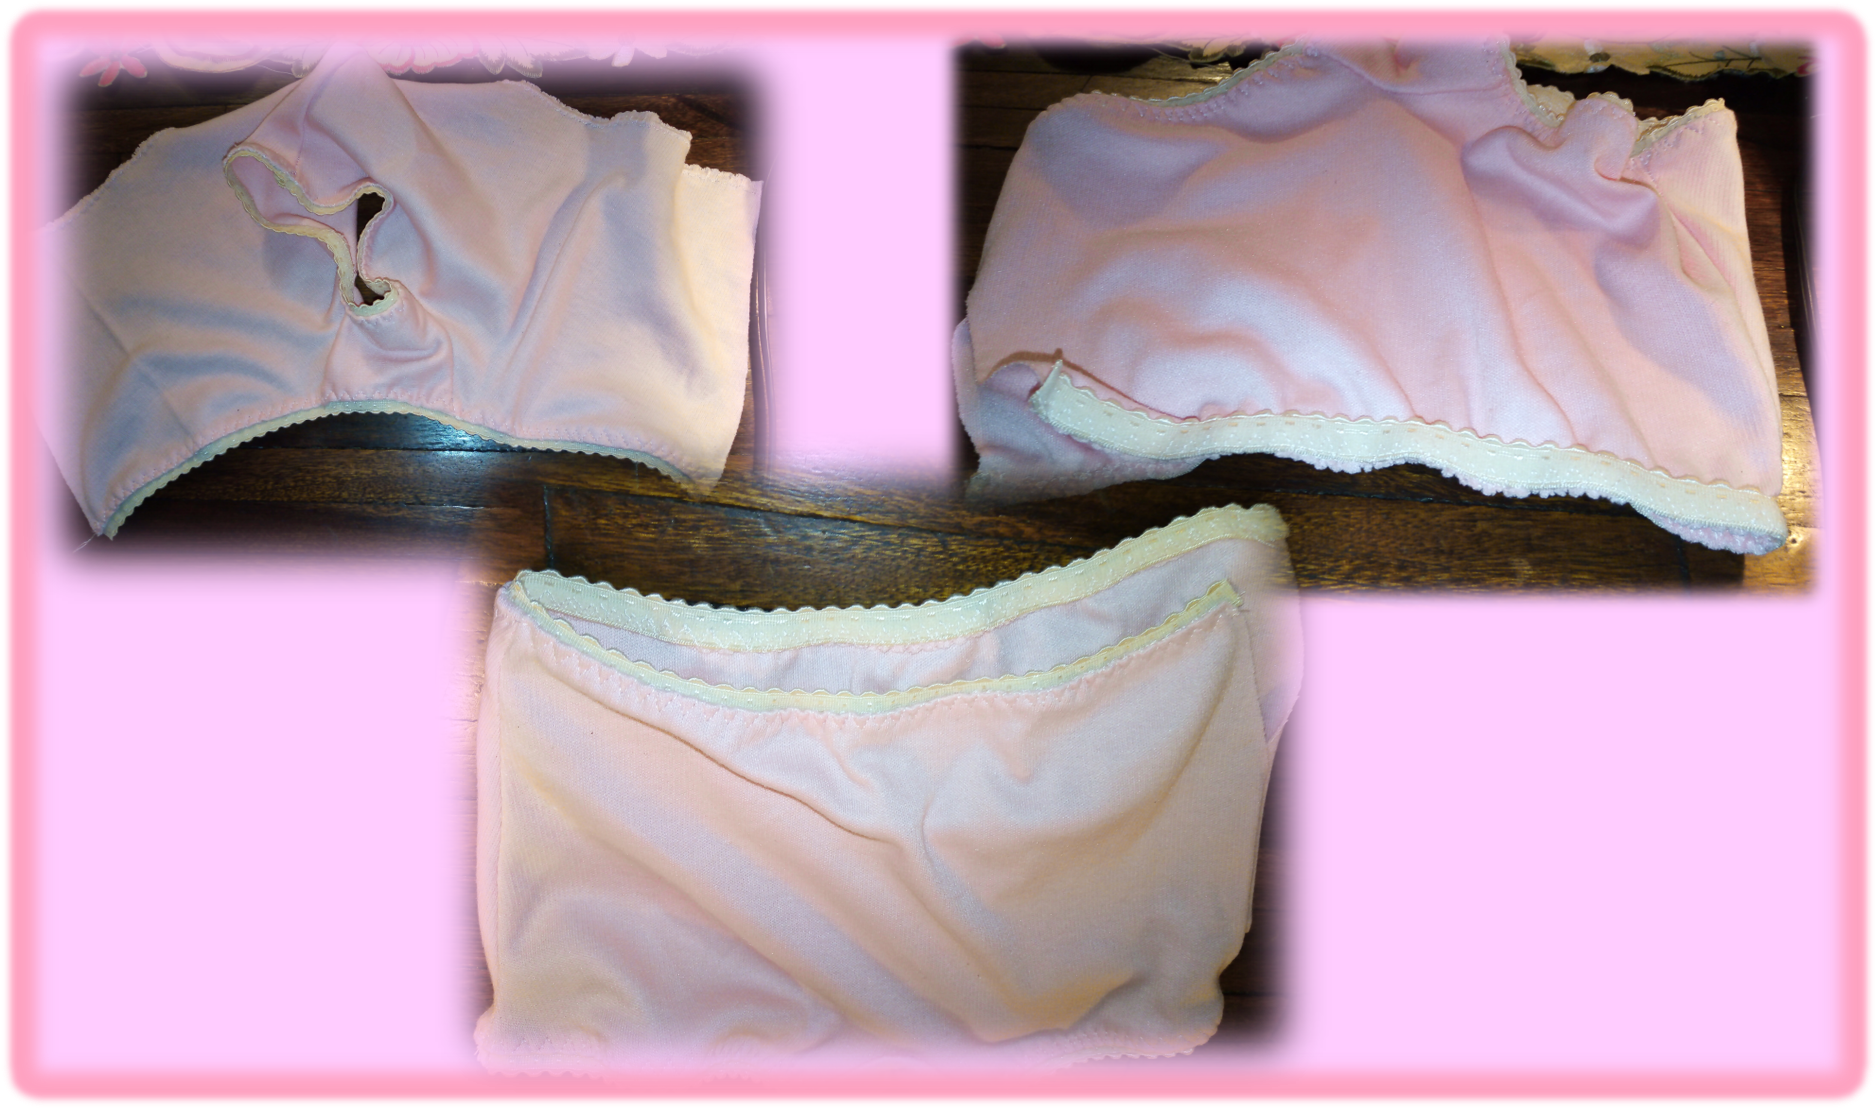
Una vez fijada la elástica en la cintura, solo resta unir la parte delantera con la trasera por el borde que nos faltaba, con esto el panty está listo.
Once the elastic is attached to the waistband, the only thing left to do is to join the front part to the back part along the missing edge, with this the panty is ready.
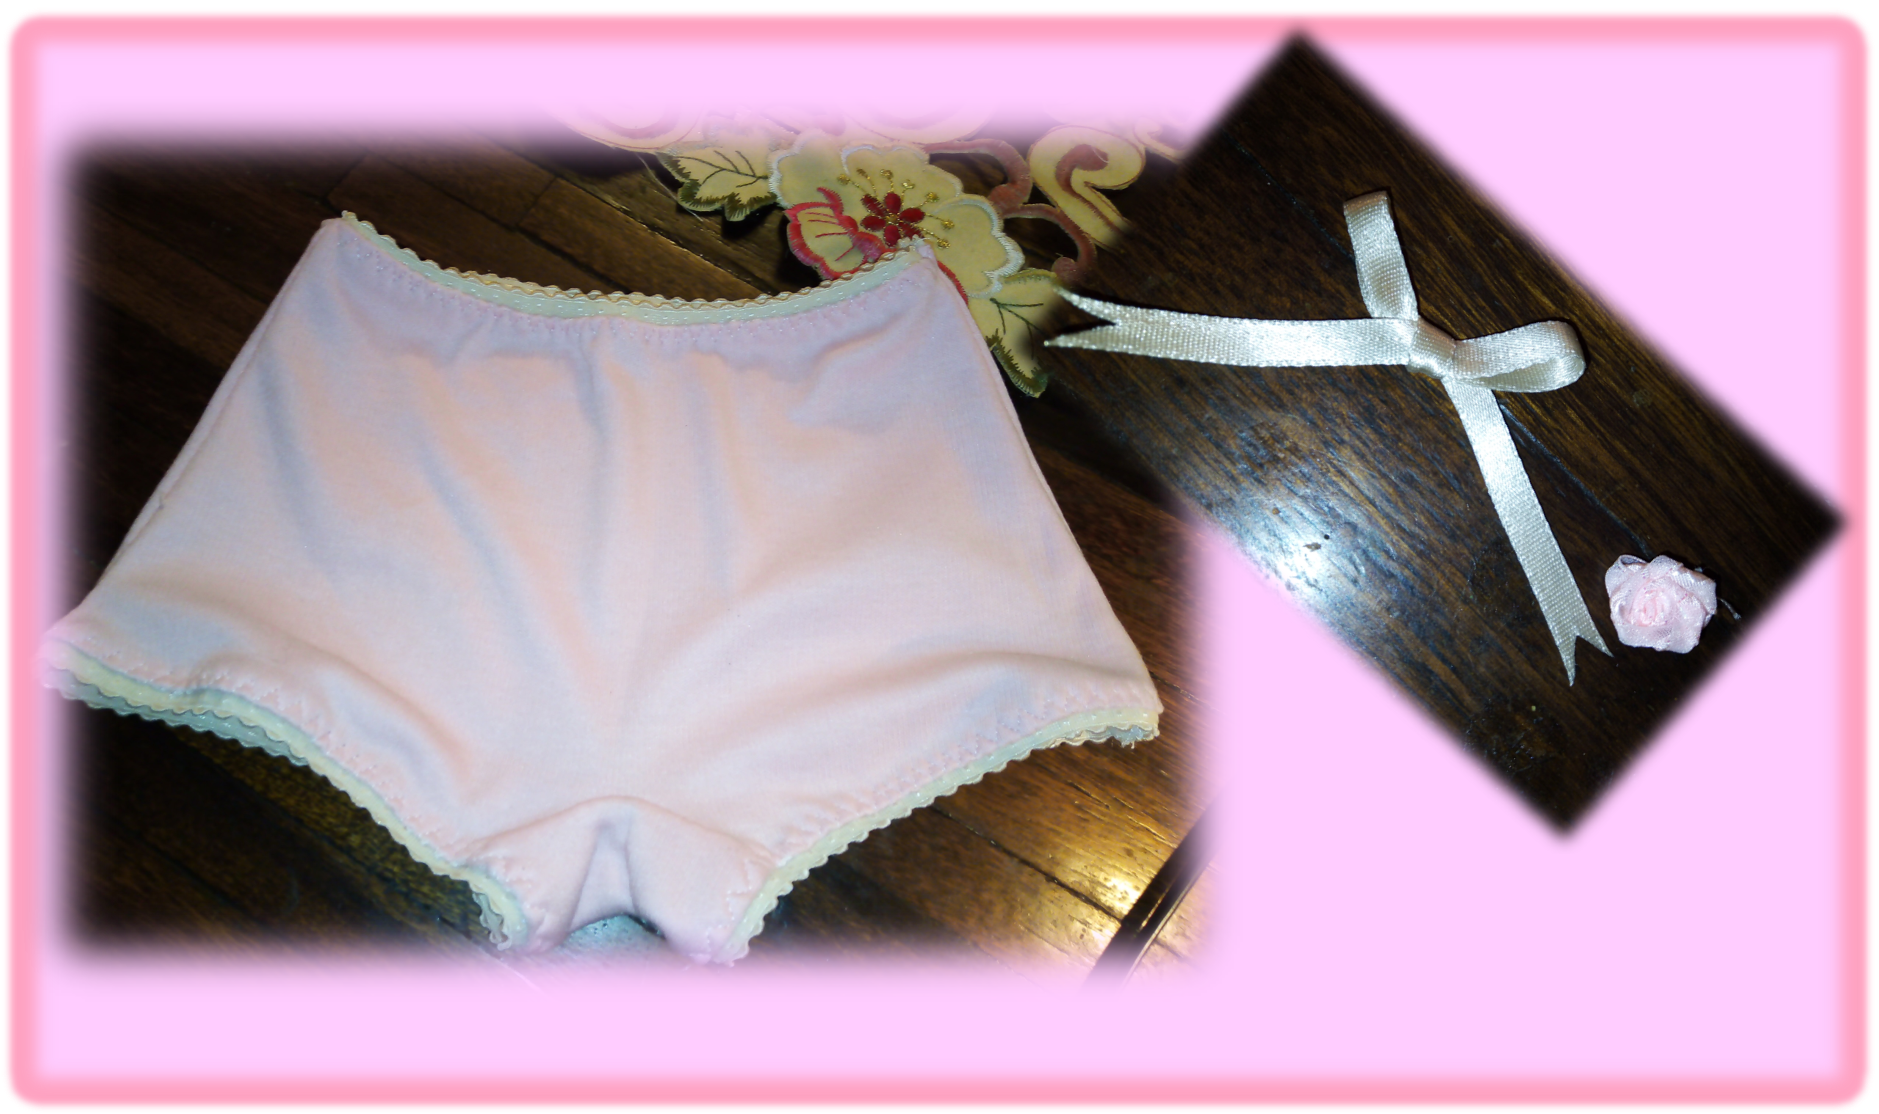
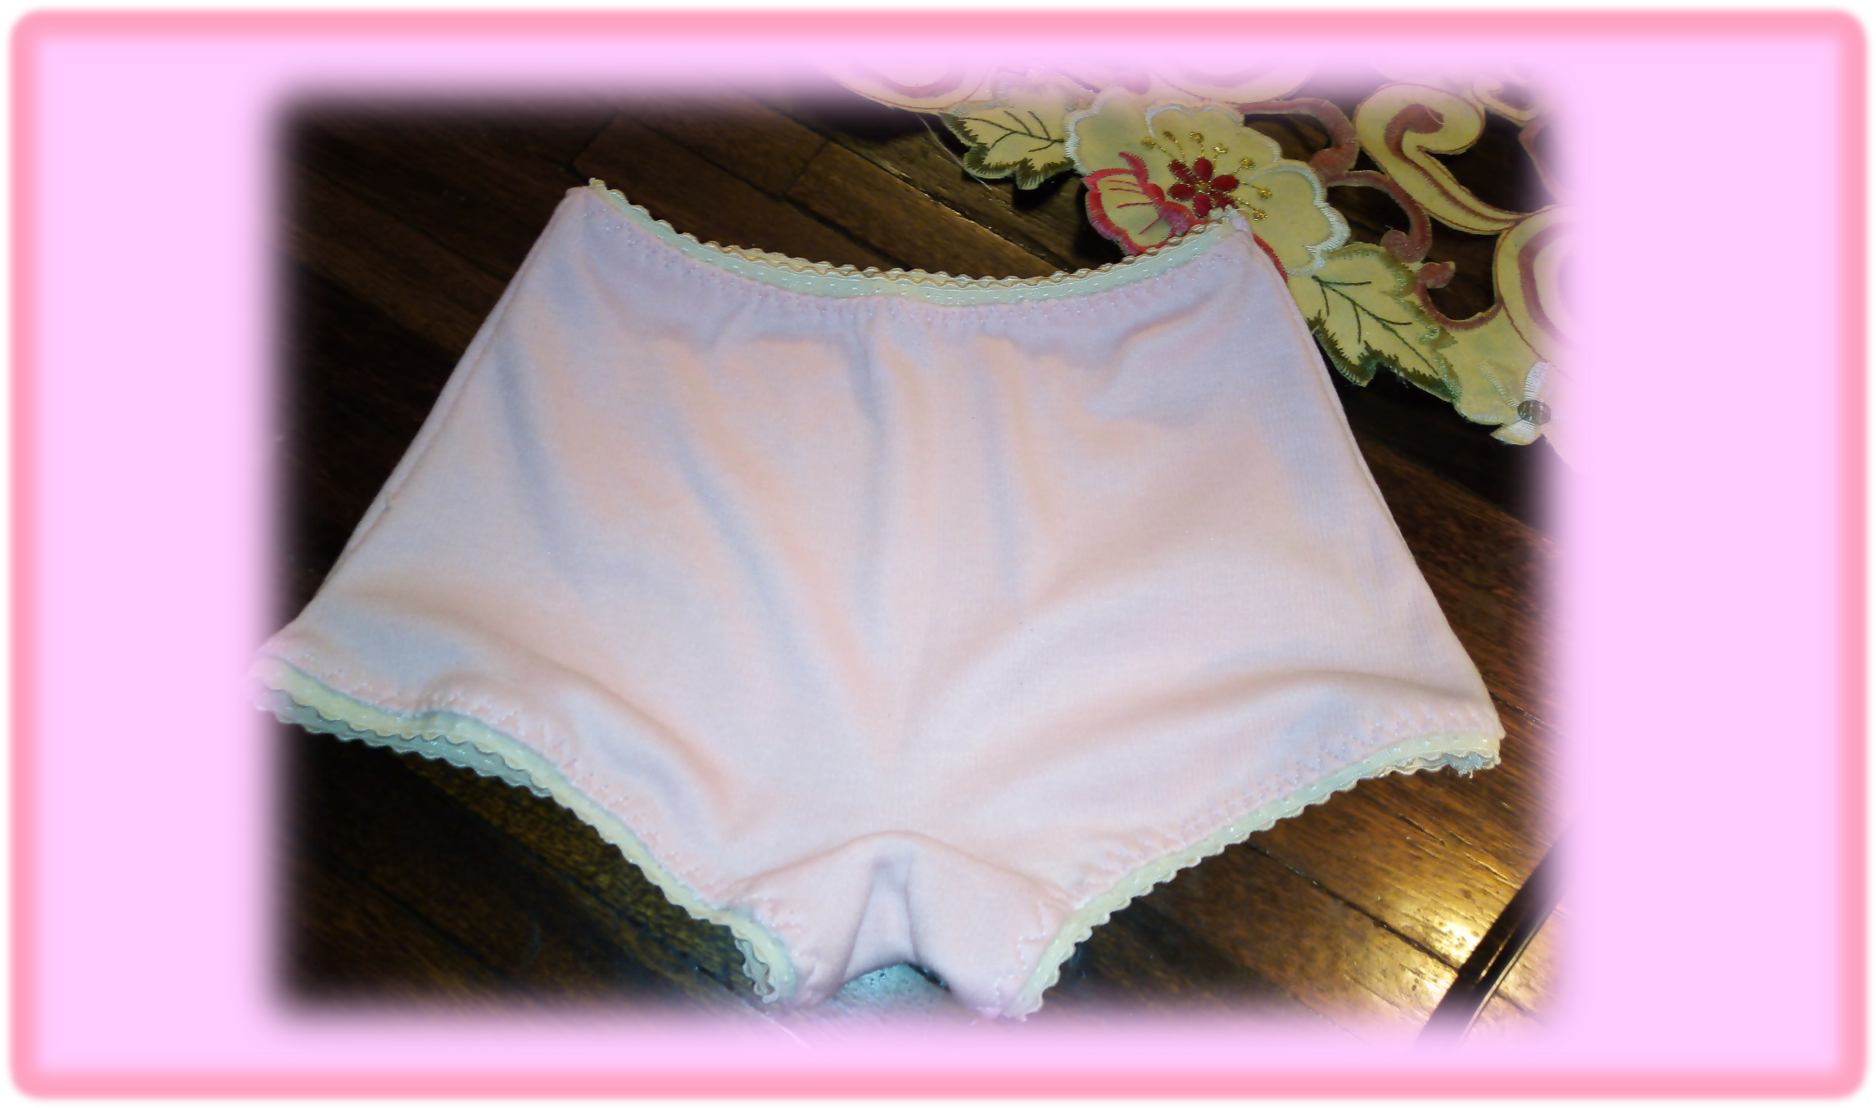
Como detalle final, tome un trocito de cinta de raso de la más delgada y realice un sencillo y pequeño lazo y le coloque encima una diminuta florecilla de tela.
As a final detail, take a small piece of the thinnest satin ribbon and make a simple little bow and place a tiny fabric flower on top.
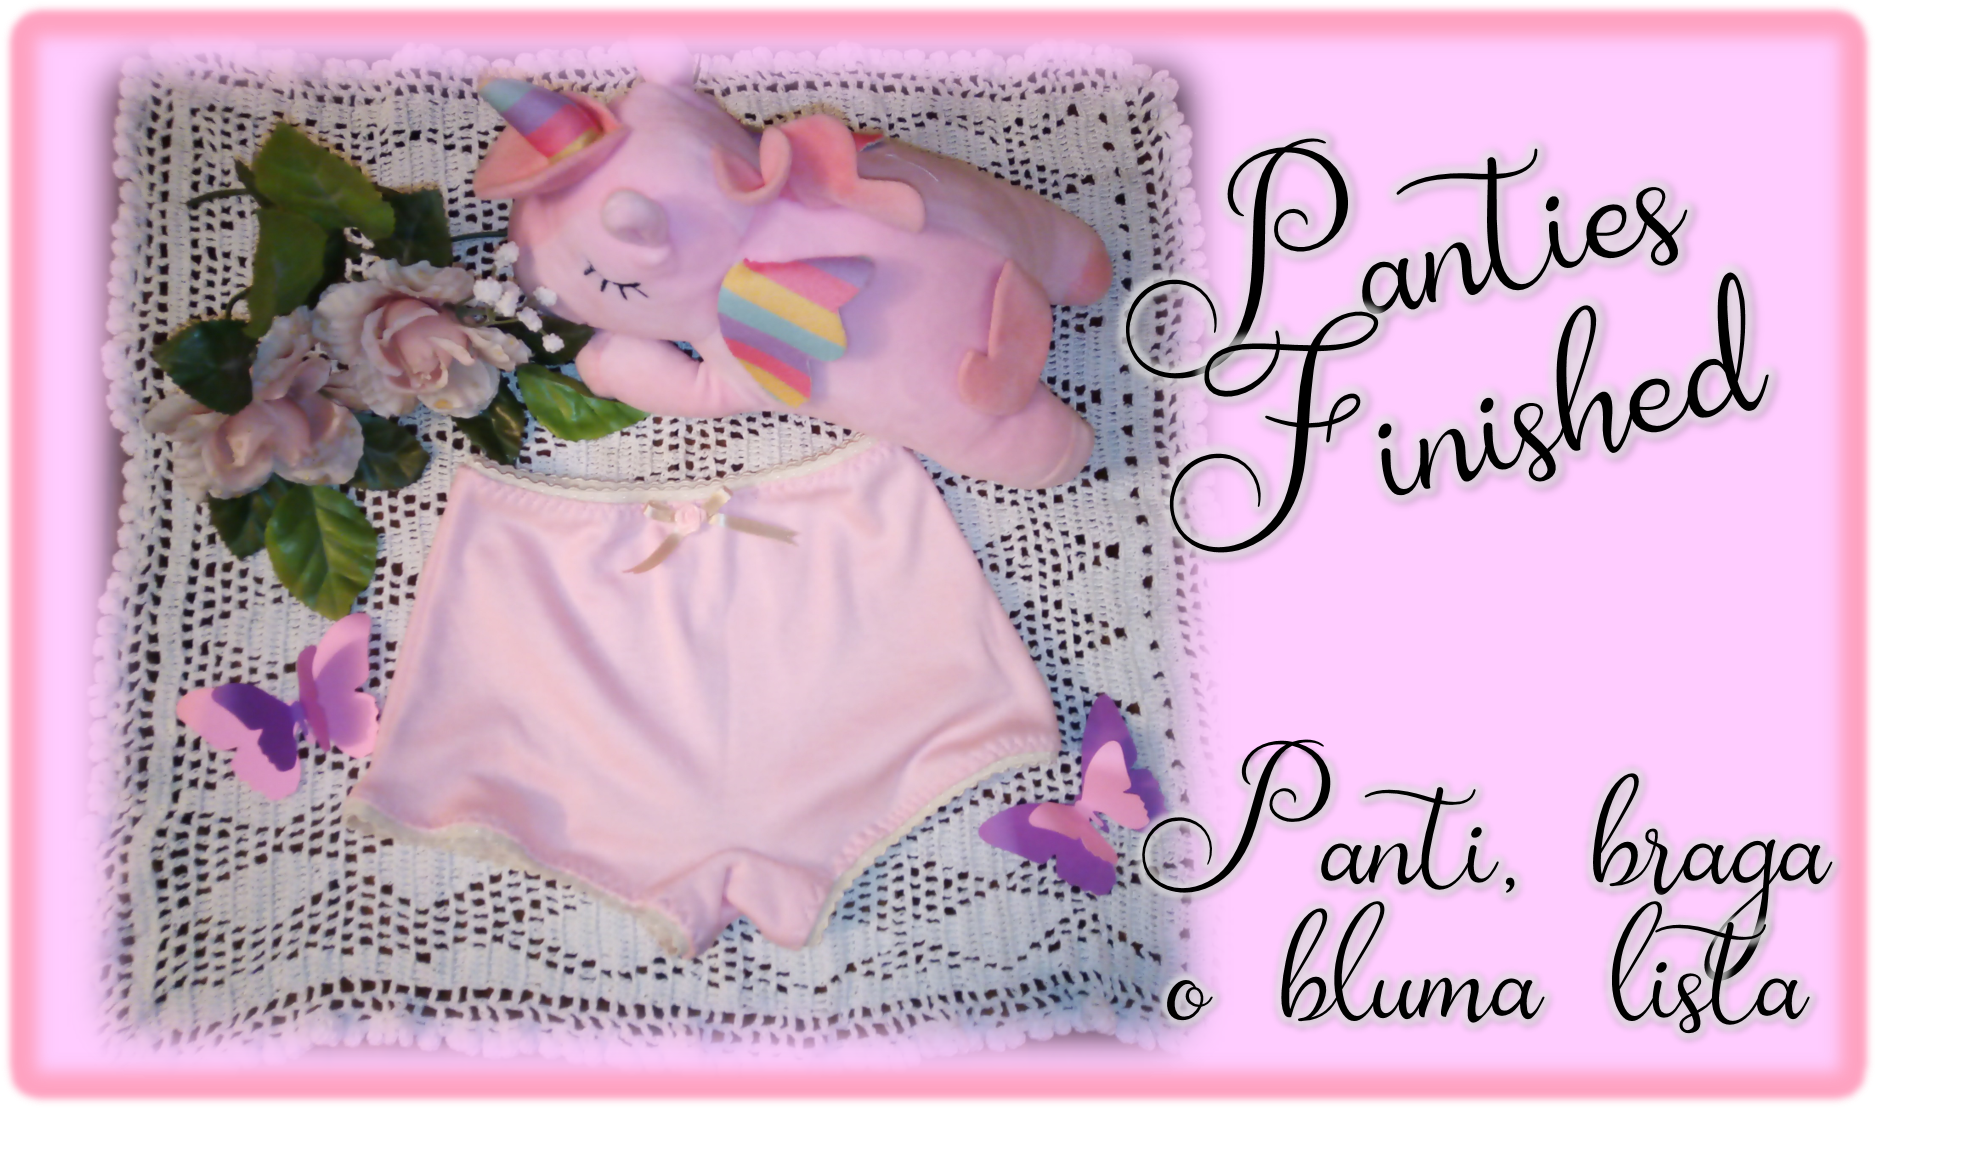
Ahora sí, la panty, bluma o braga, no sé, en realidad cómo ustedes la conozcan, pero, el caso es, que ya esta prenda de ropa interior para mi princesa pequeña está totalmente termina. No me queda más que despedirme, esperando que les gustara mi proyecto y se animen a realizarla para sus princesas. Dios los bendiga y les regale una excelente salud. ¡Hasta la próxima!
Now, the panty, blouse or panties, I don't really know how you know it, but the thing is, this underwear for my little princess is totally finished. I just have to say goodbye, hoping that you liked my project and that you will be encouraged to make it for your princesses. God bless you and give you an excellent health, see you next time!
Contenido y fotografías de mi propiedad intelectual
Información Técnica
| Cámara | Pentax * istDL |
|---|---|
| Lente | * Pentax 18-55 |
| Iluminación | Luz Natural |
| Locación | Barcelona, Estado Anzoátegui, Venezuela |
Content and photographs of my intellectual property
Technical information
| Camera | Pentax * istDL |
|---|---|
| Lens | * Pentax 18-55 |
| Lighting | Natural Light |
| Location | Barcelona, Anzoátegui State, Venezuela |


https://twitter.com/268913702/status/1604075435456745473
https://twitter.com/1466004279127388163/status/1604685915011842048
The rewards earned on this comment will go directly to the people( @francyrios75, @elisaday7 ) sharing the post on Twitter as long as they are registered with @poshtoken. Sign up at https://hiveposh.com.
Congratulations, your post has been upvoted by @dsc-r2cornell, which is the curating account for @R2cornell's Discord Community.
Thank you @jasonmunapasee for your support. Health and blessings to you Mr. @r2cornell and all the work team of @dsc-r2cornell.
Thank you for sharing this post on HIVE!
Your content got selected by our fellow curator semarekha & you just received a little thank you upvote from us for your great work! Your post will be featured in one of our recurring compilations which are aiming to offer you a stage to widen your audience within the DIY scene of Hive. Stay creative & HIVE ON!
Please vote for our hive witness <3
Thank you so much 😊 @semarekha for your support. Health and blessings to you and the entire @diyhub team.
El tutorial está muy completo y bien explicado, pero debo decir que quedé encantada con el maquetado, esta super hermoso y delicado.
Hola bienvenida, me alegra mucho que te gustara. Salud y bendiciones para ti y los tuyos 🤗
Con el apoyo de la familia.
También nos puedes apoyar en nuestro Trail de TopFiveFamily
Si desea delegar HP al proyecto de la Familia del Top Family puedes hacerlo desde aquí: Delegue 5 HP - Delegue 10 HP - Delegue 20 HP - Delegue 30 HP - Delegue 50 HP - Delegue 100 HP.
Te quedó muy bonita la publicación. Se ve que la hiciste con cariño.
Hola es muy grato saber que fue de su agrado. Salud y bendiciones para usted y su familia.