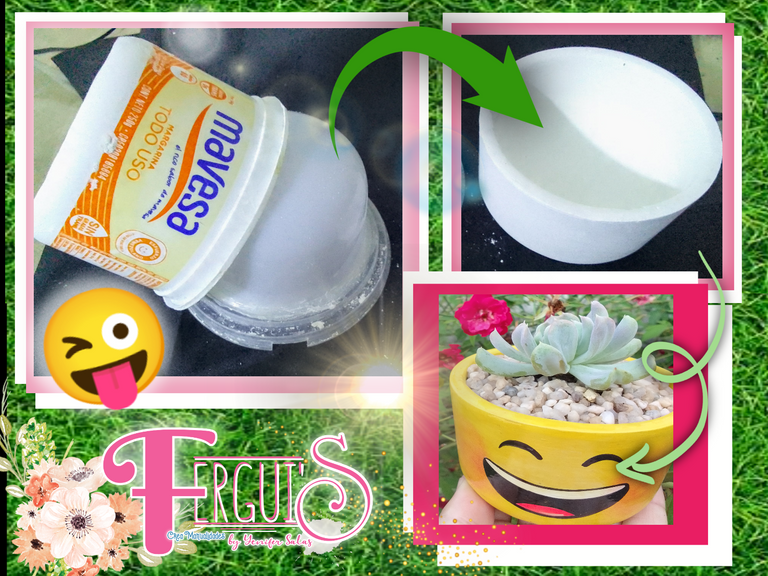
💡♻️[ESP/ENG] Cómo hacer un molde para macetas con material de reciclaje.♻️💡
Hola Hola amigos creativos HIVE DIY que la bendición de Dios los acompañe siempre, en publicaciones anteriores les hablé sobre el inicio de mi emprendimiento referente a la creación o elaboración de materos a partir de moldes de silicón ver aqui este emprendimiento ya está rumbo a cumplir 4 meses, en el transcurso de ese tiempo experimenté una notable evolución, basadas mayormente en las exigencias y peticiones de mis clientes, hasta ahora solo hemos ofrecido materos con un fin únicamente decorativo, muy pequeños para el cuidado y crecimiento de sus plantas, en base a esto me han pedido constantemente el aumento del tamaño de los materos. He buscado moldes de silicón en todas partes, pero son muy difíciles de conseguir aquí en Venezuela por lo que opté por pedirle a mi hermana que se encuentran en España (la que me envió mis primeros moldes de silicón) que realice la compra por allá y los envíe a Venezuela. Este proceso es muy lento y puede tardar hasta dos o tres meses en llegar el producto a mis manos, por lo que puse mi ingenio a volar e hice un molde para macetas con material de provecho y así poder cumplir las exigencias de mis clientes en un menor tiempo siempre esperando obtener el mejor resultado posible. Aquí les mostraré como los hice...
Hello Hello creative friends HIVE DIY may God's blessing be with you always, in previous publications I told you about the beginning of my venture regarding the creation or elaboration of pot from silicone molds see here this venture is already about to be 4 months old, during this time I have experienced a remarkable evolution, based mostly on the demands and requests of my customers, so far we have only offered only decorative pots, very small for the care and growth of their plants, based on this I have been constantly asked to increase the size of the pots. I have looked for silicone molds everywhere, but they are very difficult to get here in Venezuela, so I decided to ask my sister who is in Spain (the one who sent me my first silicone molds) to make the purchase there and send them to Venezuela. This process is very slow and can take up to two or three months to get the product to my hands, so I put my ingenuity to fly and made a mold for pots with useful material and thus be able to meet the demands of my customers in a shorter time always hoping to get the best possible result. Here I'll show you how I made them...
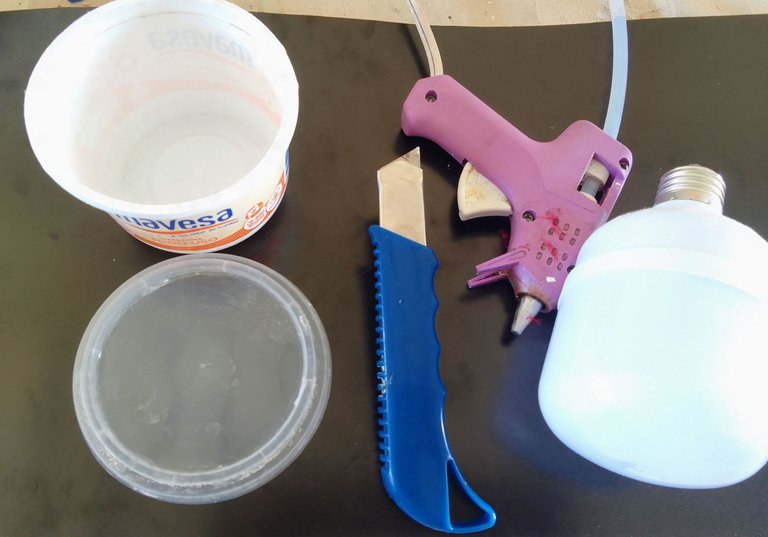
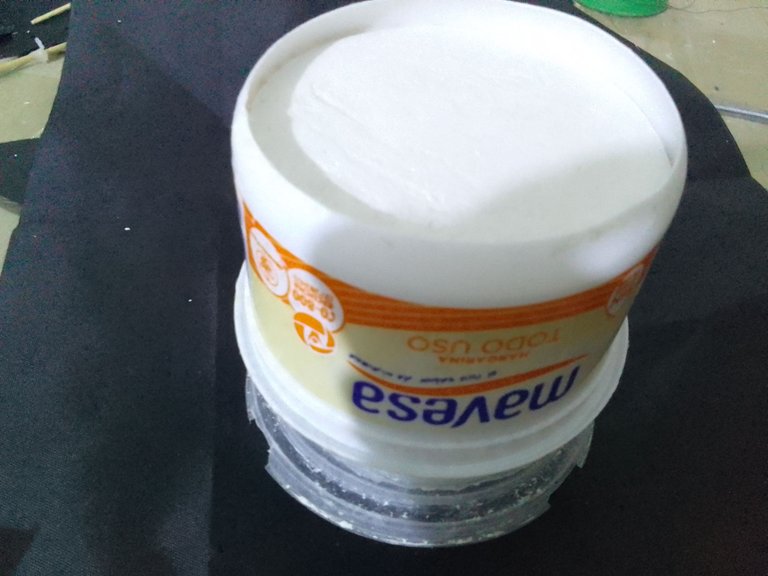
• 1 Envase de margarina de 250gr con tapa.
• 1 Bombillo led dañado.
• Silicón en barra.
• Pistola de silicón.
• Cortador exacto.
• Palito de brocheta.
• Clips binder.
• Tijera.
• 1 250gr margarine container with lid.
• 1 Damaged LED bulb.
• Silicone stick.
• Silicone gun.
• Exact cutter.
• Skewer stick.
• Binder clips.
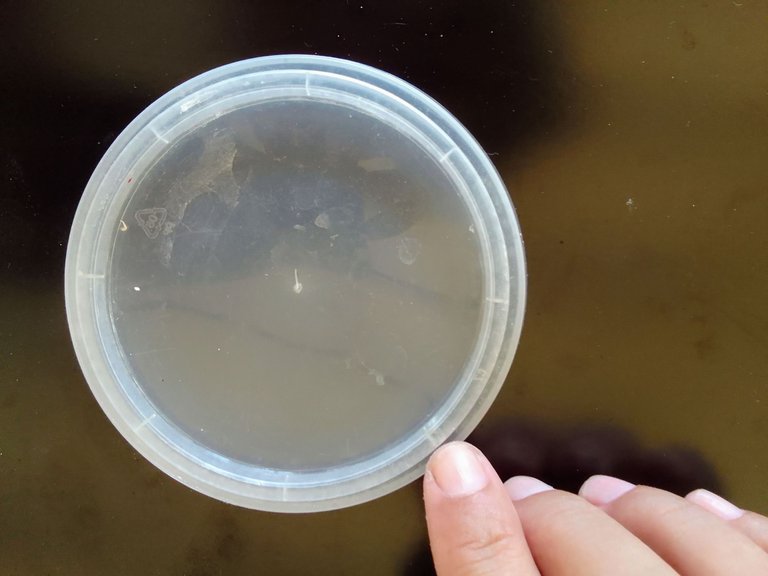
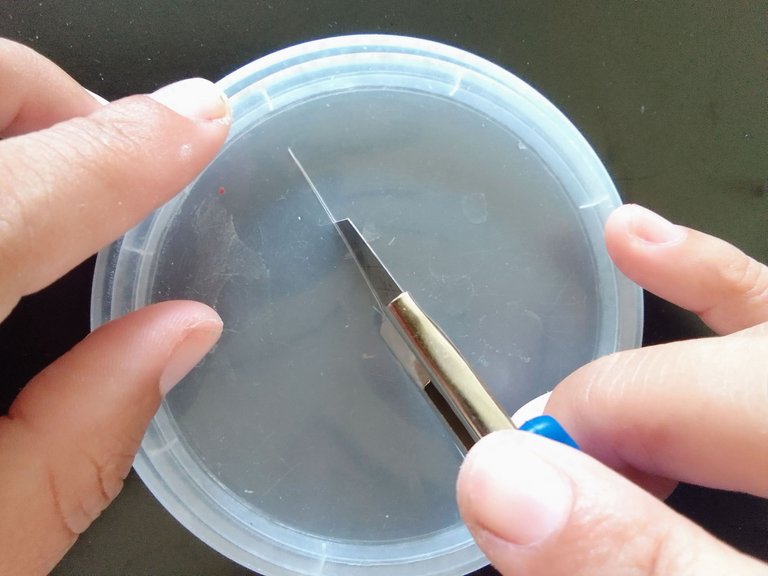
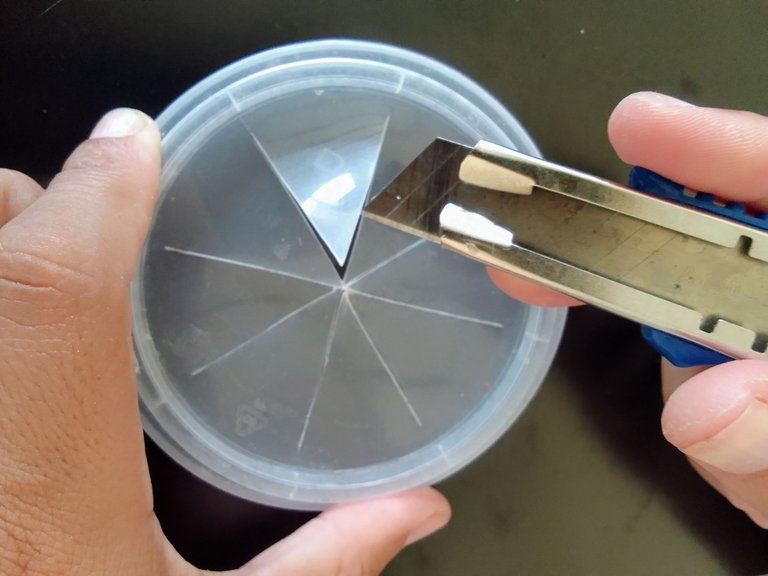
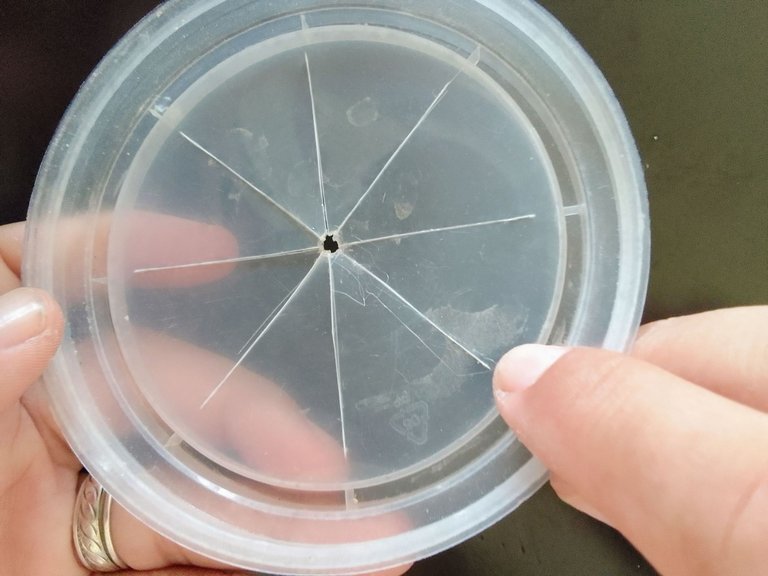
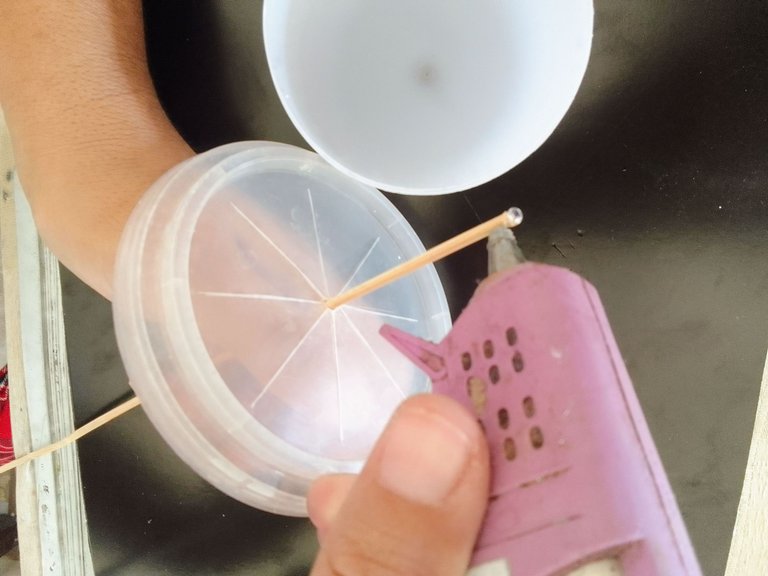
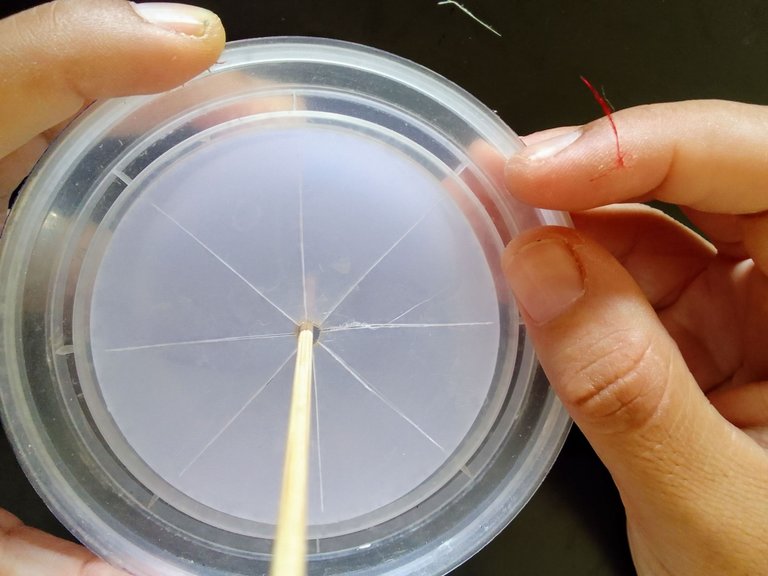
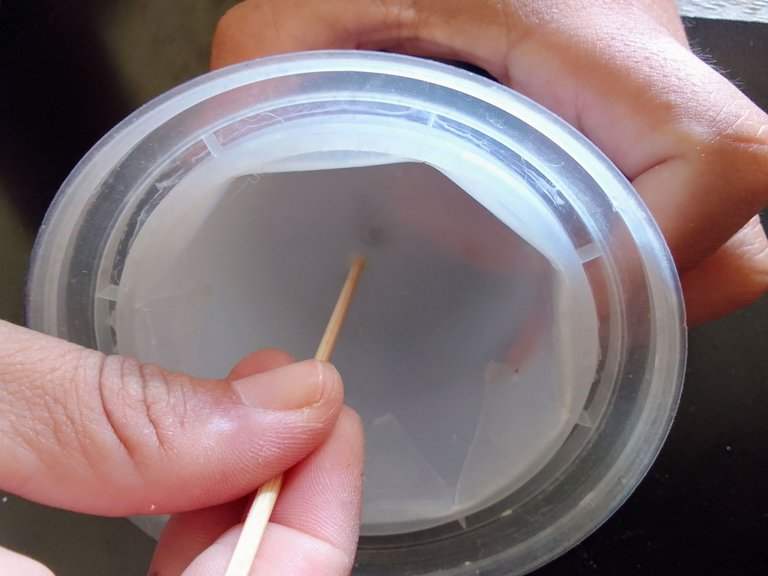
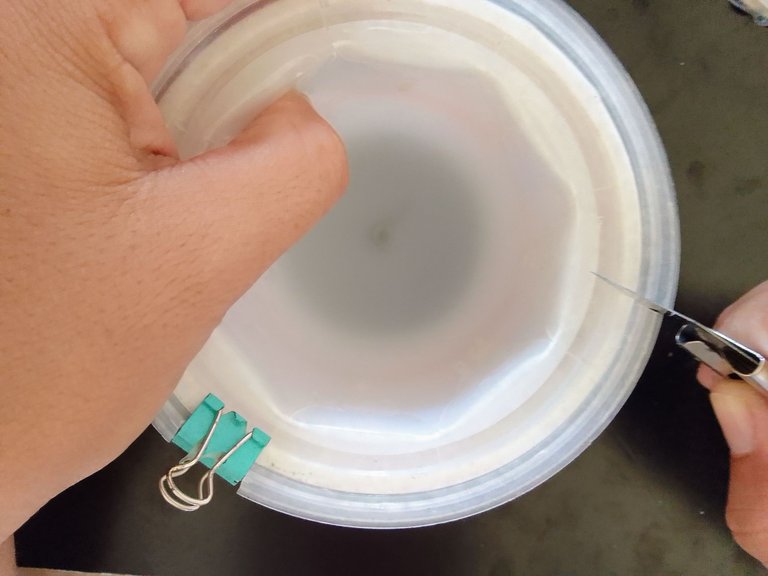
Este paso es muy importante para que el matero quedé simétrico y sus bordes sean parejos. Por esto me guíe de la tapa de la margarina, corte con el exacto líneas rectas para unir los extremos, luego con la punta caliente de la pistola de silicón realice un pequeño orificio en el punto de convergencia de todas las lineas.
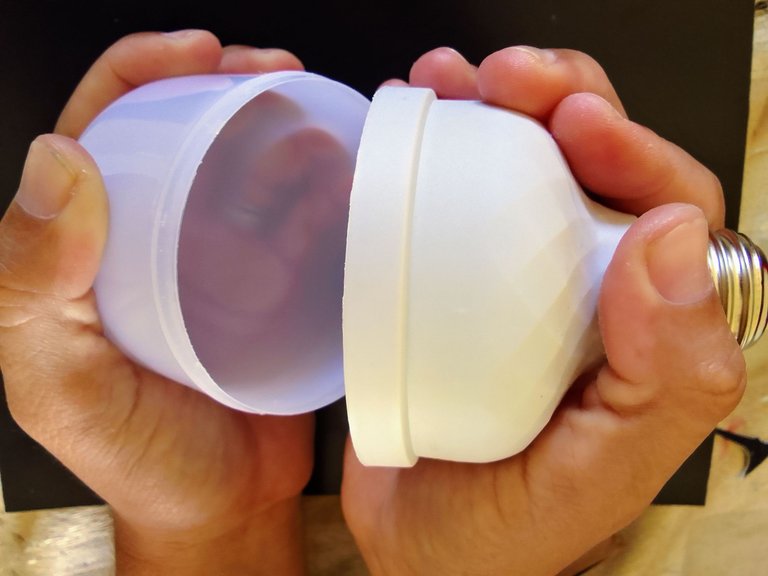
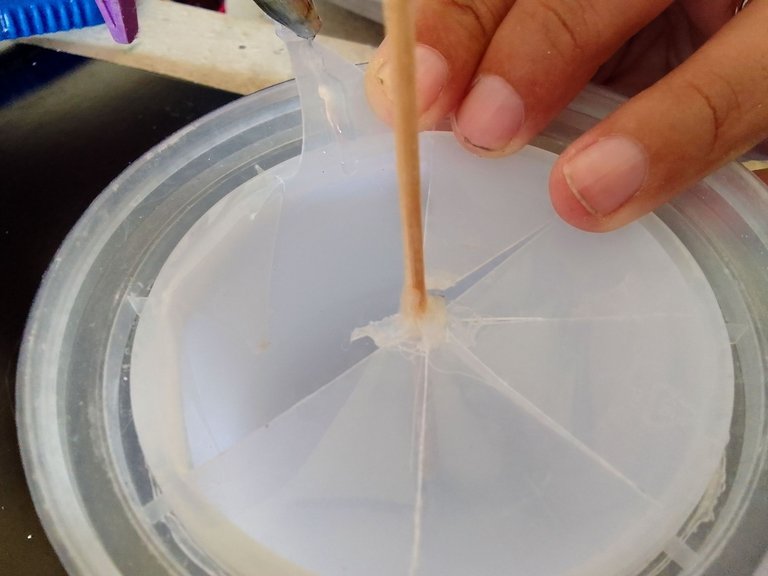
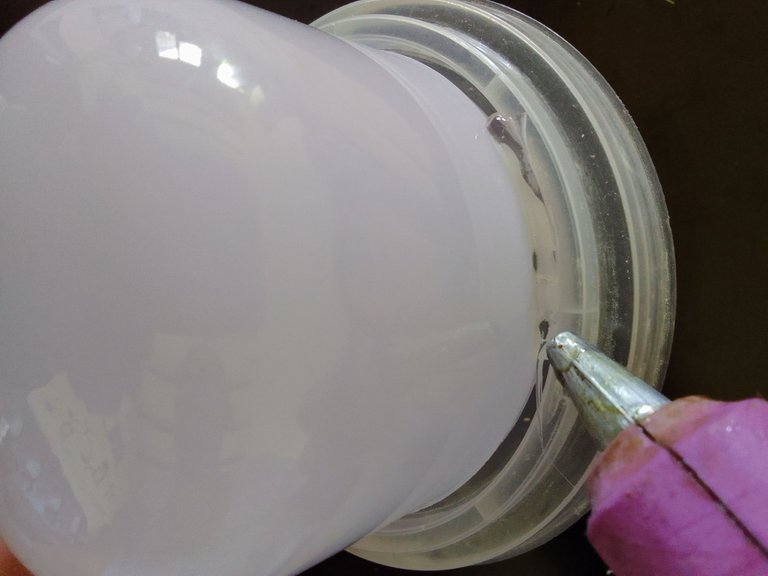
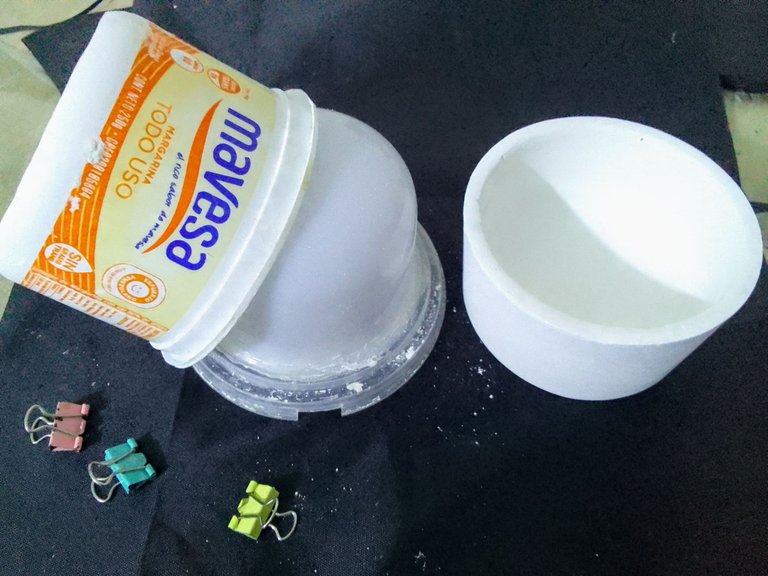
Posteriormente retire el difusor (material plástico que protege los elementos de un bombillo led) del bombillo, ubique y marqué el centro del mismo, seguidamente hice pasar un palito de brocheta a través del orificio en la tapa de la margarina y aplique en la punta silicón caliente, inmediatamente después lo fijé al centro del difusor previamente marcado e hice presión hasta que secó el silicón.
This step is very important so that the mat is symmetrical and its edges are even. For this reason I used the margarine lid as a guide, cut with the exact straight lines to join the ends, then with the hot tip of the silicone gun I made a small hole at the point of convergence of all the lines.
Then remove the diffuser (plastic material that protects the elements of an LED bulb) from the bulb, locate and mark the center of it, then I passed a skewer stick through the hole in the margarine lid and applied hot silicone on its tip, immediately after I fixed it to the center of the previously marked diffuser and pressed until the silicone dried.
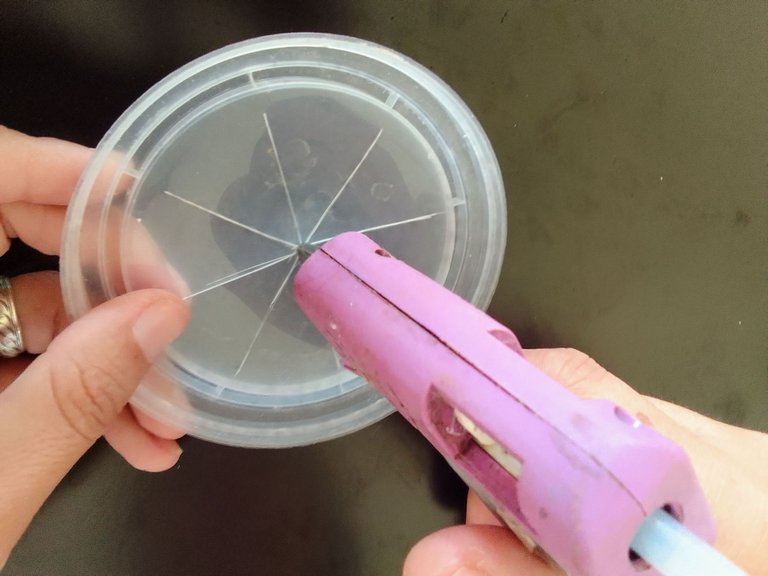
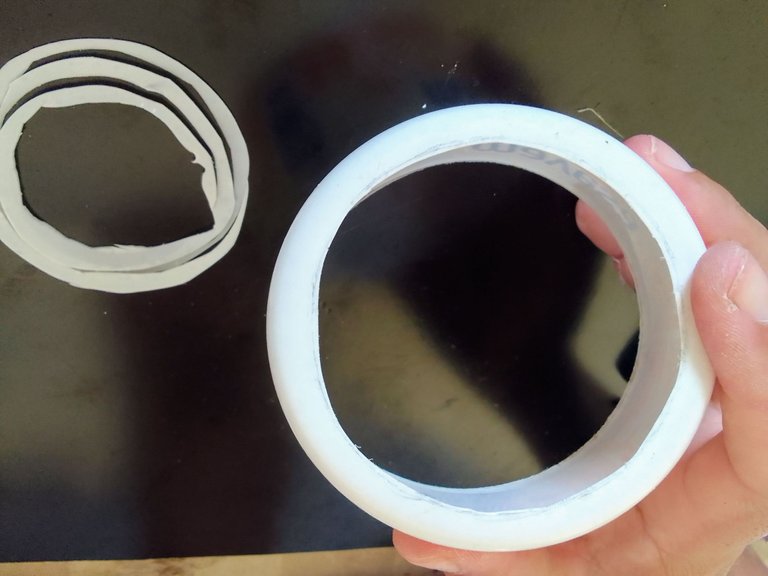
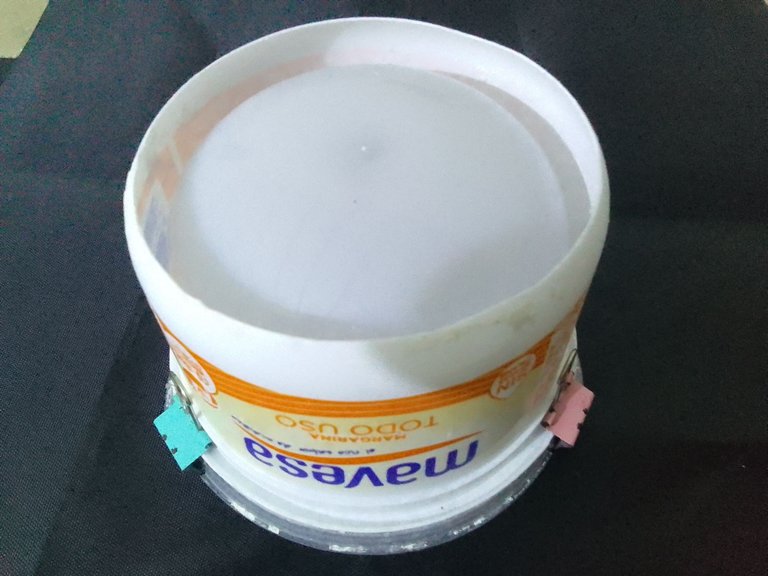
Procedí a fijar una a una las pestañas previamente cortadas de la tapa de margarina a la superficie interna del difusor, después retiré el palito de brocheta, di vuelta a la tapa y apliqué silicón caliente en el espacio entre la tapa y el difusor creando así una mayor superficie de adherencia, disminuyendo la posibilidad de despegarse en el proceso de desmolde.
I proceeded to attach one by one the previously cut tabs of the margarine lid to the inner surface of the diffuser, then I removed the skewer stick, turned the lid over and applied hot silicone in the space between the lid and the diffuser, thus creating a larger adhesion surface, decreasing the possibility of detachment in the demolding process.
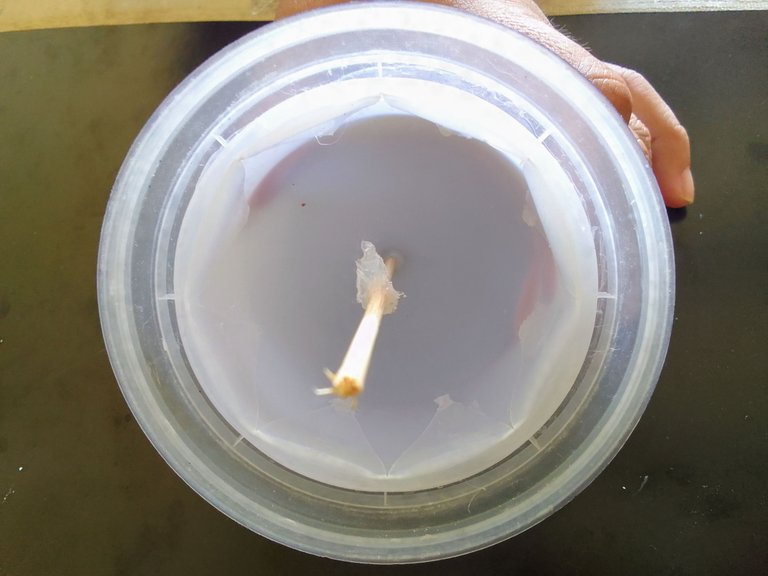

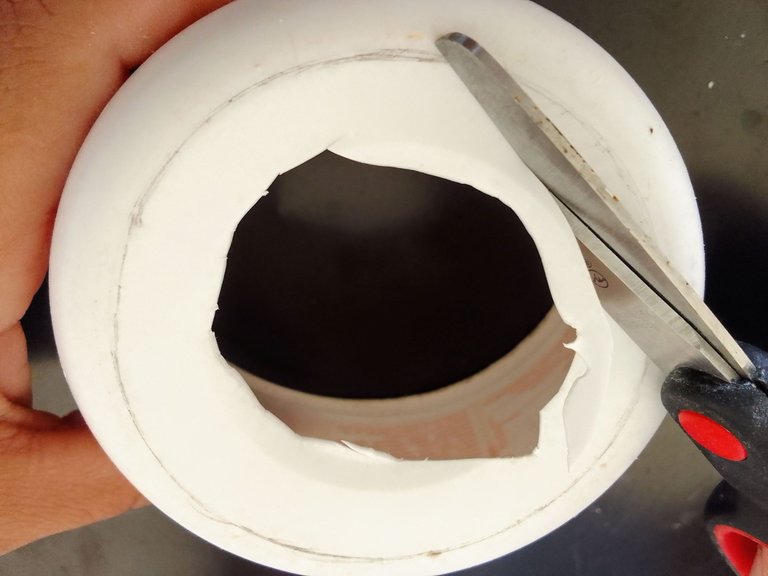
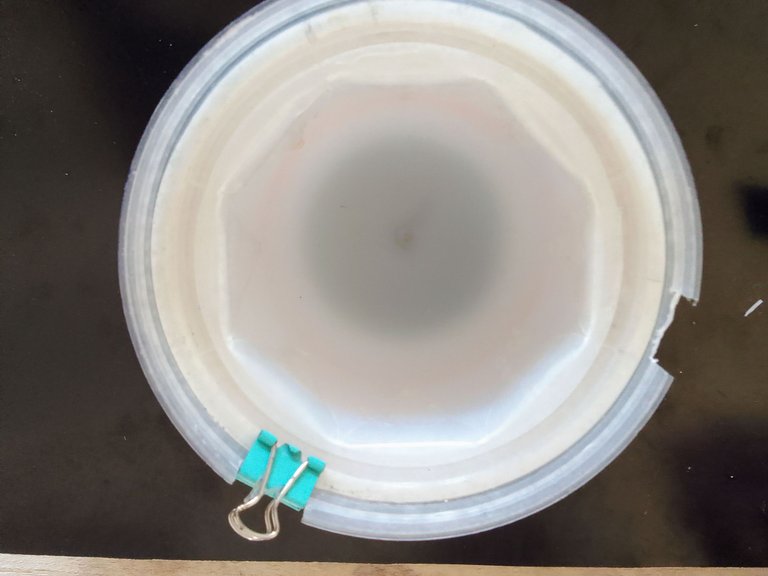
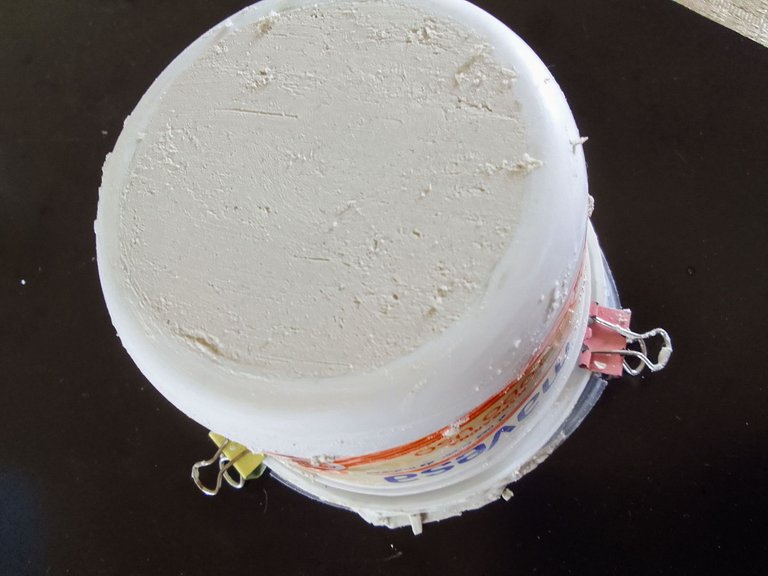
Siempre debe existir un espacio a través del cual podamos agregar la mezcla y asi elaborar el matero, en este caso, con ayuda del exacto realicé una pequeña incisión para luego introducir la tijera y recortar la base del envase de margarina justo donde empieza la curvatura, con la finalidad de que el matero tenga una forma curva en la base, para finalizar realice tres cortes en la tapa para colocar clips binder y evitar que el líquido salga del molde.
There must always be a space through which we can add the mixture and thus develop the Pot, in this case, with the help of the exact made a small incision and then insert the scissors and cut the base of the margarine container just where the curvature begins, in order that the Pot has a curved shape at the base, to finish make three cuts in the lid to place binder clips and prevent the liquid from escaping from the mold.

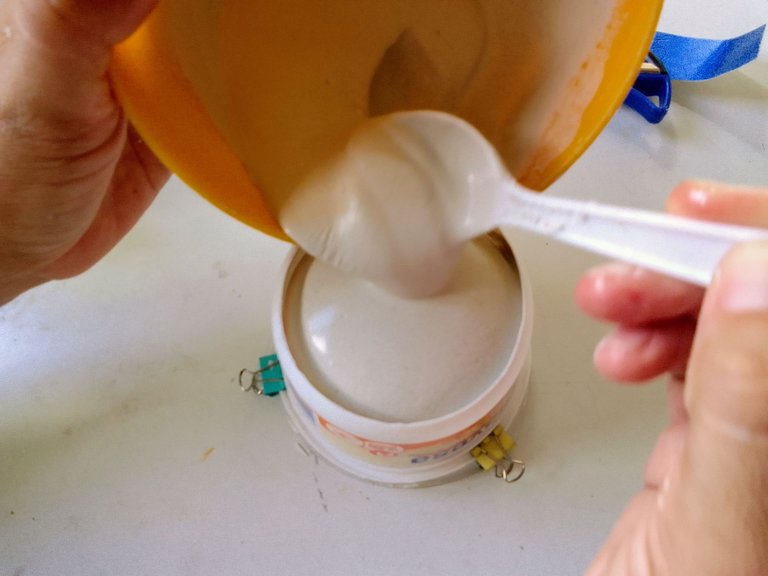
Antes de agregar la mezcla en el molde me aseguré de lubricar con aceite las paredes del envase de mantequilla y la superficie del difusor del bombillo esto facilitará el desmolde de la pieza, fijé mediante clips binder la tapa con el envase de margarina, después agregué la mezcla. Dejé secar por 2 horas, desmolde la pieza y lije para quitar las imperfecciones, espero sea de provecho así como lo ha sido para mí.
Before adding the mixture in the mold I made sure to lubricate with oil the walls of the butter container and the surface of the diffuser of the bulb, this will facilitate the unmolding of the piece, I fixed with binder clips the lid with the margarine container, then I added the mixture. I let it dry for 2 hours, unmolded the piece and sanded it to remove the imperfections, I hope it will be as useful as it has been for me.
Que la bendición de Dios nos acompañe siempre. Gracias por leer...!
May God's blessing be with us always. Thank you for reading.

Las fotos de esta publicación son de mi propiedad y fueron tomadas desde mi celular Realme C11.
Las ediciones de Foto y el Banner lo realice con las aplicaciones: Poster Maker, Text Art e in shot descargadas desde Play Store.
Textos traducidos en deepL
The photos in this publication are my property and were taken from my cell phone Realme C11.
The photo editions and the banner were made with the following applications: Poster Maker, Text Art and in shot downloaded from Play Store.
Translated texts in deepL.
Waooo me parece excelente tu ingenio. Me da mucha curiosidad saber con qué materiales preparas tu mezcla.
Este matero me puede servir para sembrar suculentas?
Hola @kattycrochet muchas gracias. ☺️ la mezcla la preparo con cemento blanco y yeso. En una proporción 2 medidas de yeso y 1 de cemento, para que la maceta no quede tan pesada.
Si son ideales para suculentas y cactus.☺️
Muchas gracias por responder, me encantó tu emprendimiento.
Saludos 🤗
🤗
¡Que bueno!. Yo estoy intentando hacer unos. Me gustó mucho tu post. Gracias por compartir.. Saludos.
Me alegra mucho que te guste. Espero te queden muy bellas tus macetas. Gracias por leer...!☺️
Quedo bello
Muchas gracias @jorgelissanchez. Y gracias por leer..🤗🤗
vaya qué increible idea, es bastante práctica y con materiales que se tienen en casa, gracias por el dato!
Holaaa @pannavi si en realidad es algo bastante práctico y sencillo de hacer. Gracias por leer..!🤗
Oye muy creativa excelente así hacemos nuestros materos te felicito feliz tarde.
Muchas gracias, así es, siempre hay que buscar una solución. Feliz tarde🤗
Tienes mucha razón amiga siempre buscar como solventar feliz noche bendiciones.
Esto está fenomenal!!! Me encanta esta idea para moldes de macetas. Explicaste todo muy bien. Gracias por compartir. Excelente trabajo.
Muchas gracias. ☺️ La verdad ha sido una excelente herramienta mientras llegan los moldes que le pedí a mi hermana, han tenido una recepción muy buena de parte de mis clientes. Y lo mejor son muy fáciles de hacer y con materiales que tenemos en casa. Gracias por leer..!
Fue una forma bastante ingeniosa para hacer el molde, le felicito por eso.
Me recuerda, en parte, el trabajo con los moldes de cerámica para hacer tazones y jarrones.
Gracias!!! Tengo el gran consejo de mi padre que hay que trabajar con lo que se tiene, y eso a permitido desarrollar mi creatividad para solucionar con los recursos que tengo en casa. ,😁💪