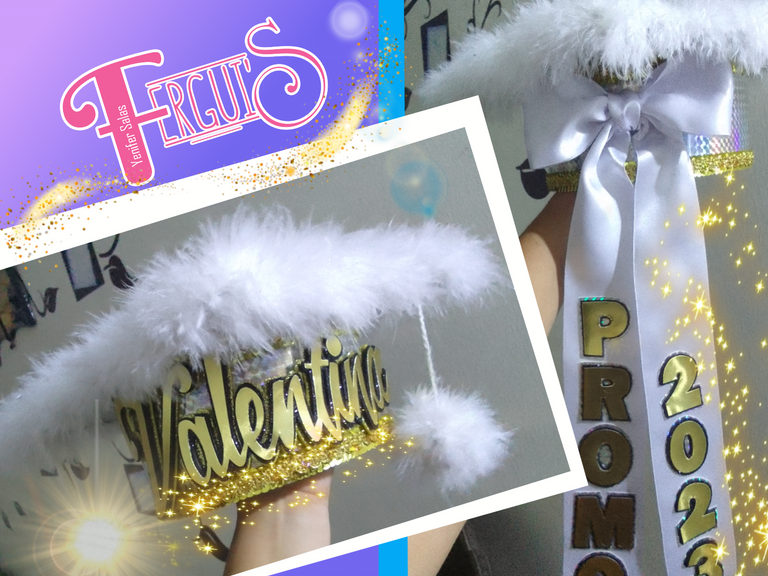
✨👩🏼🎓[ESP/ENG] Como hacer un birrete de graduación y no morír en el intento.👩🏼🎓✨
Hola Hola amigos creativos de HIVEDIY que la bendición de Dios nos acompañe siempre, hace pocos días me escribió una clienta para preguntarme si podía realizar un trabajo en solo 3 días, teniendo en cuenta que de esos 3 días al menos medio día lo gastaría buscando y comprando los materiales necesarios para la elaboración de dicho encargó, sin embargo por el significado que tiene y lo que representa no pude negarme hacer parte de esta hermosa etapa de nuestras vidas y a su vez quiero compartir con ustedes este proyecto tan lindo, que trae recuerdos inolvidables. Sin más preámbulo les enseñaré como elaborar y personalizar un birrete de graduación.
Hello Hello creative friends of HIVEDIY may God's blessing be with us always, a few days ago a client wrote me to ask me if I could do a job in just 3 days, taking into account that of those 3 days at least half a day would be spent searching and buying the necessary materials for the development of this order, however for the meaning it has and what it represents I could not refuse to be part of this beautiful stage of our lives and in turn I want to share with you this beautiful project, which brings unforgettable memories. Without further ado, I will show you how to make and personalize a graduation cap.
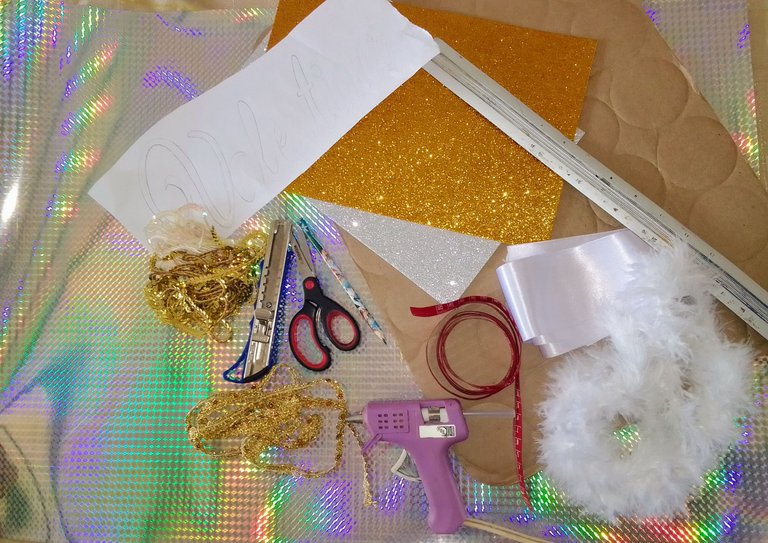
• Caja de cartón.
• Cartulina metalizada.
• Foami
• Silicón líquido y en barra.
• 3 metros de lentejuela
• 1.5 metros de pasamaneria.
• 1.5 metros de cinta blanca gruesa.
• 1.5 metros de marabu.
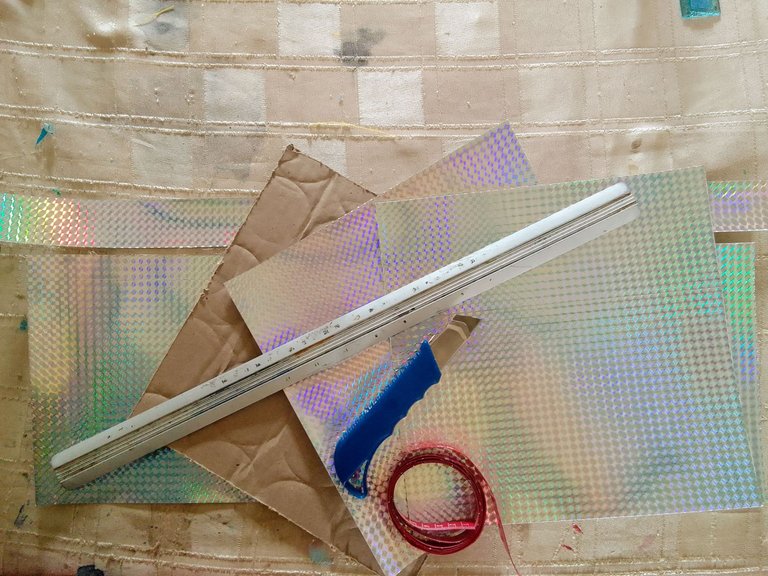
• Cinta métrica.
• Regla.
• Cortador exacto.
• Pistola de silicón.
• Tijera.
• Cardboard box.
• Metallic cardboard.
• Foami
• Liquid and stick silicone.
• 3 meters of sequins
• 1.5 meters of trimmings.
• 1.5 meters of thick white ribbon.
• 1.5 meters of marabu.
• Tape measure.
• Ruler.
• Exact cutter.
• Silicone gun.
• Scissors.
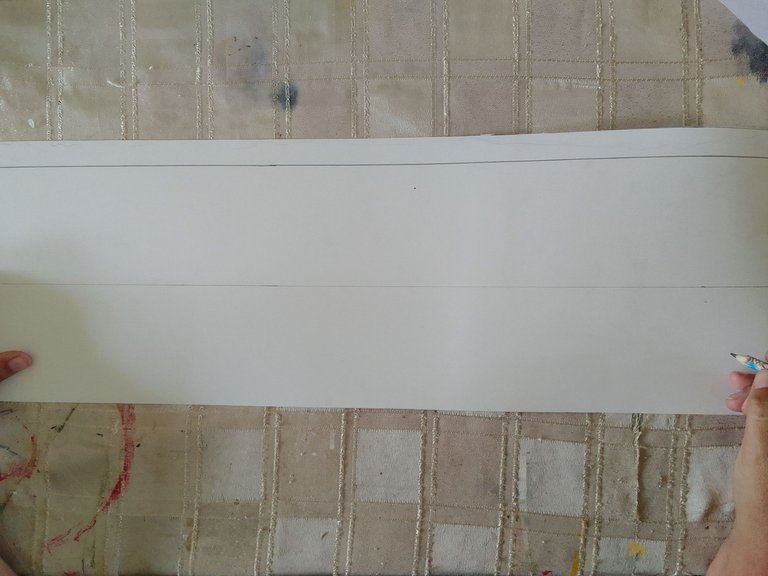
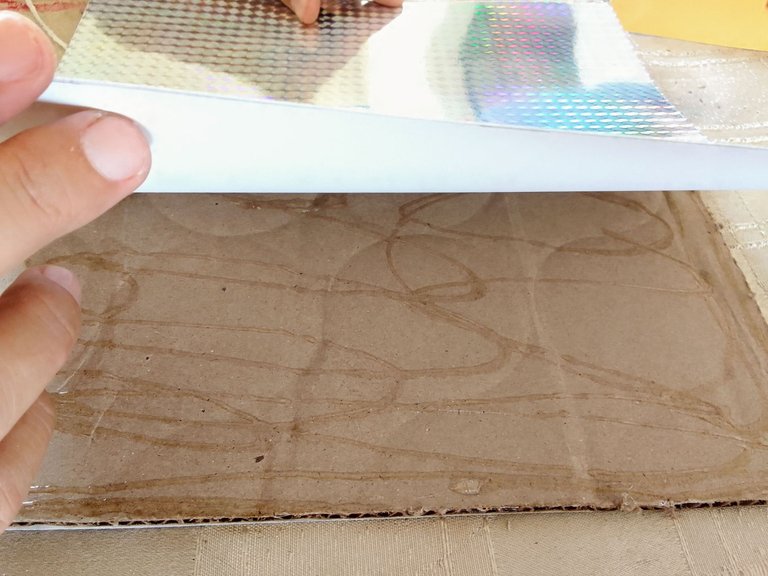
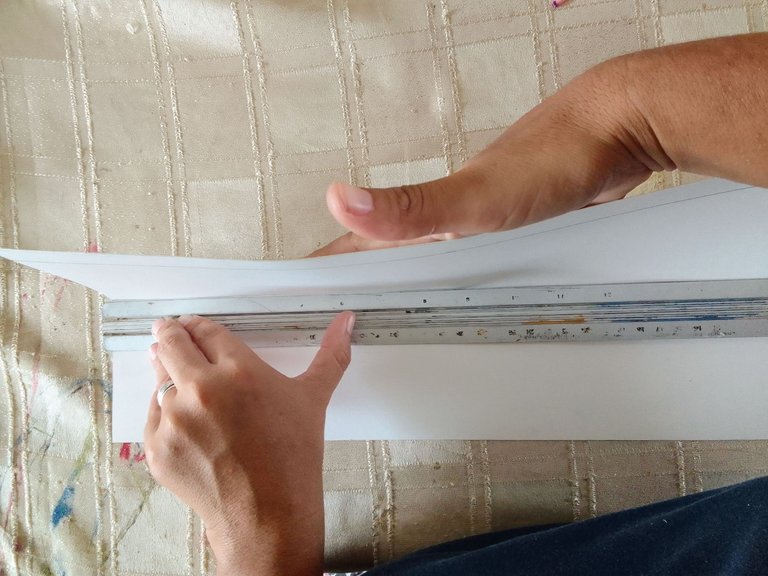
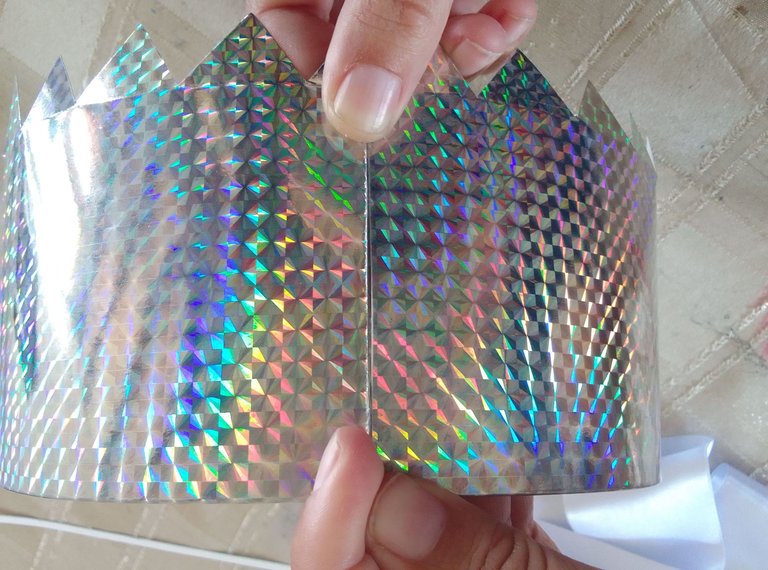
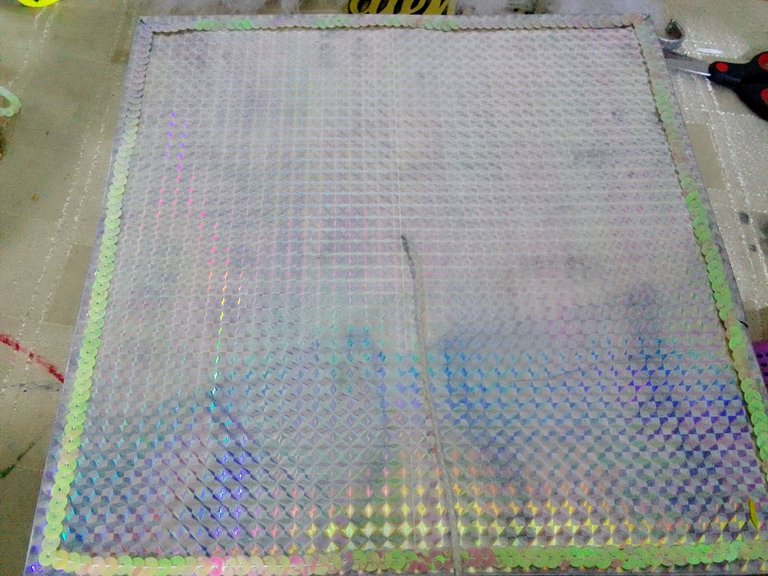
Primero medí y corté una figura cuadrada de 27 centímetros en cartón, a partir de esta medí y corte 2 cuadrados con las mismas medidas del cartón, pues, estos serán utilizados para cubrir ambas caras del cartón (estos cuadrados representan el tope del birrete). Luego medí y corte dos listones en cartulina metalizada el más delgado de 2 centímetros de ancho y el siguiente de 20 centímetros. Este último lo dividí mediante líneas (sin cortar) en 2 rectángulos de 9 centimetros de alto por 53 centímetros de largo, quedando una pestaña de 2 centimetros.
First I measured and cut a 27 centimeters square shape in cardboard, from this I measured and cut 2 squares with the same measures of the cardboard, these will be used to cover both sides of the cardboard (these squares represent the top of the biretta). Then I measured and cut two strips in metallic cardboard, the thinner one of 2 centimeters thick and the next one of 20 centimeters. The latter I divided by lines (without cutting) in 2 rectangles of 9 centimeters high by 53 centimeters long, leaving a tab of 2 centimeters.
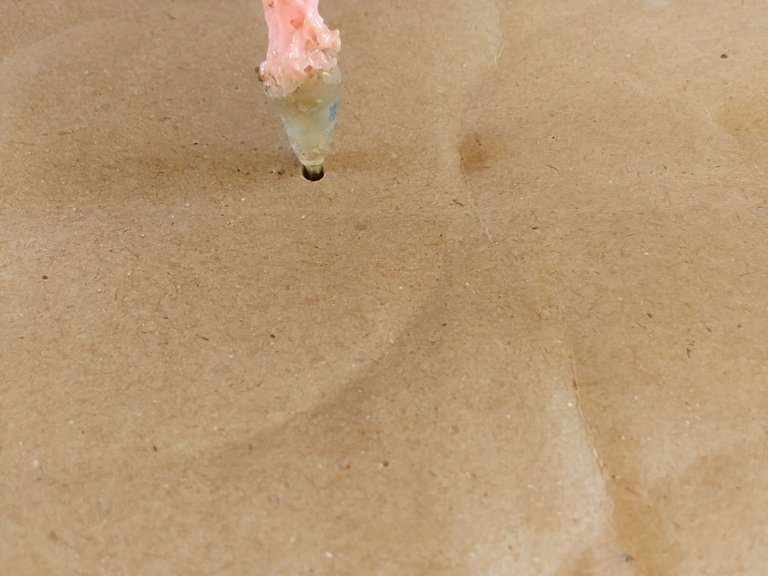
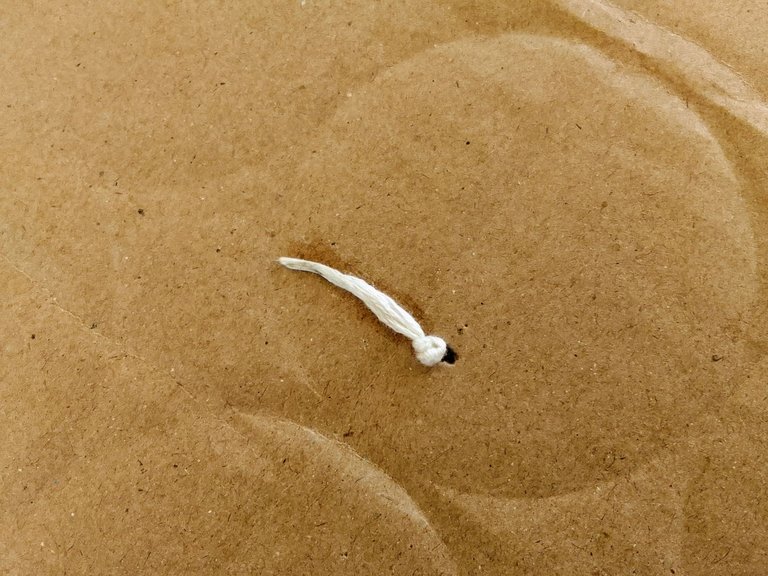
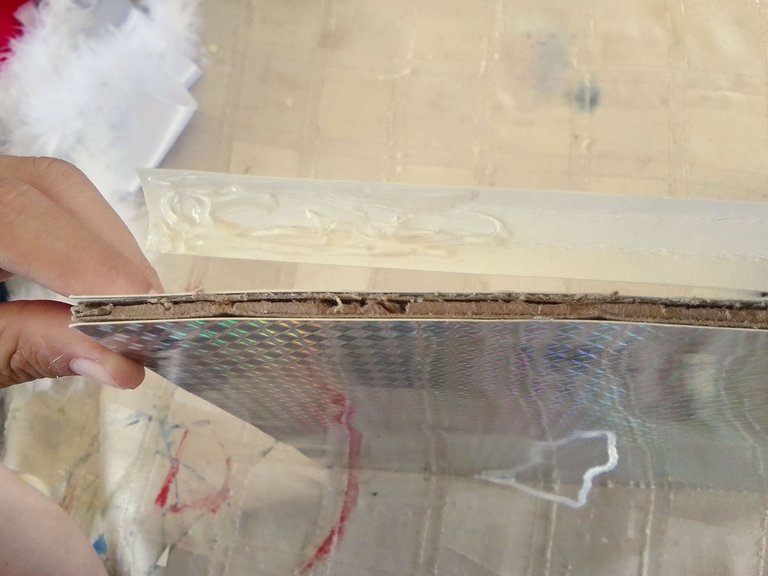
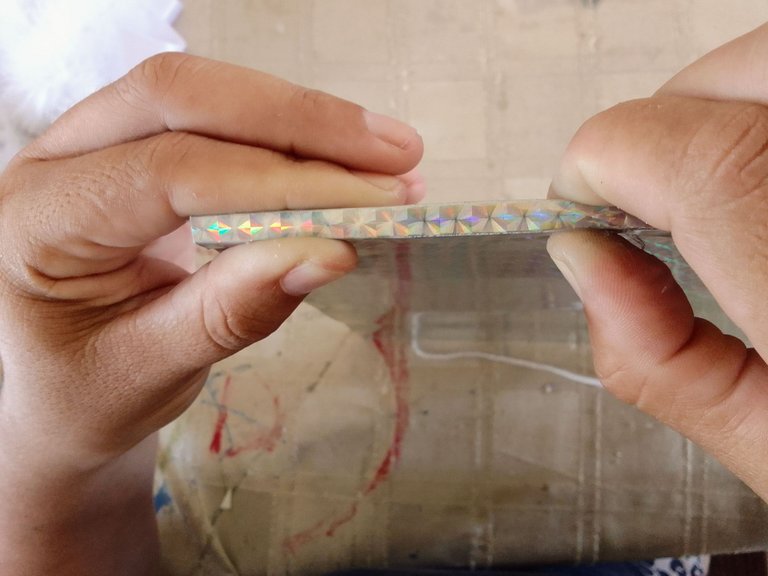
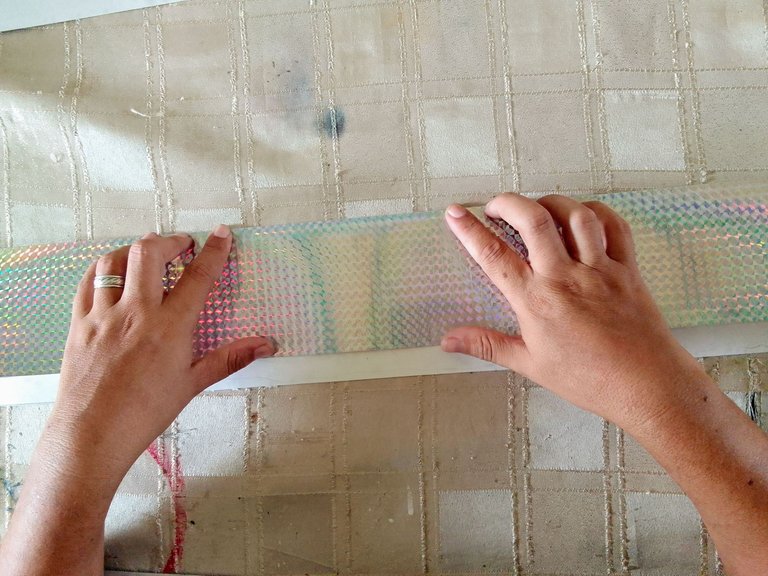
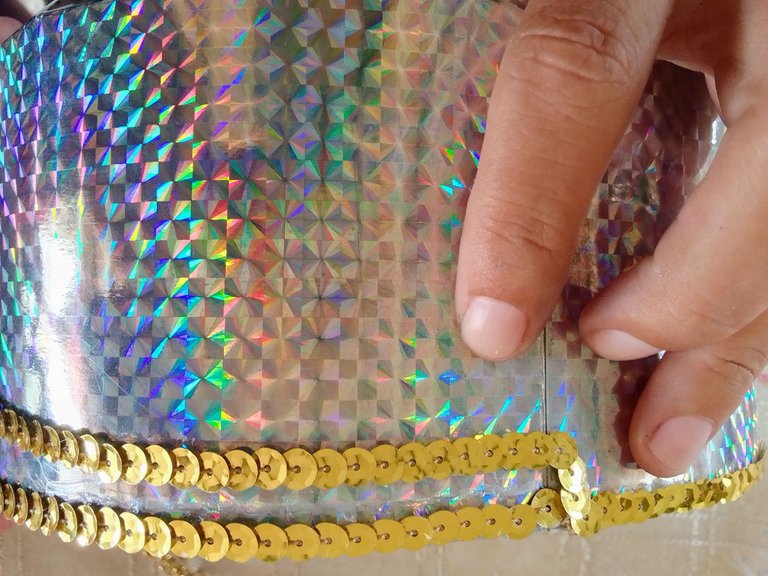
Con los materiales cortados procedi a ensamblar el birrete, primeramente realice un agujero en el centro del cuadrado de cartón y en uno de los cuadrados en cartulina holografica en los que inserte un cordón luego lo anude y fijé con silicón. Posteriormente pegué los cuadrados de cartulina metalizada sobre ambas caras del cartón quedando un espacio de 1 centímetro entre ellos, este espacio por fines estético lo cubrí con el listón de 2 centímetros que cortamos en el primer paso, pero antes doblé sus bordes formando 2 pestañas de 0.5 centímetro de ambos lados para poder fijarlos a la superficie.
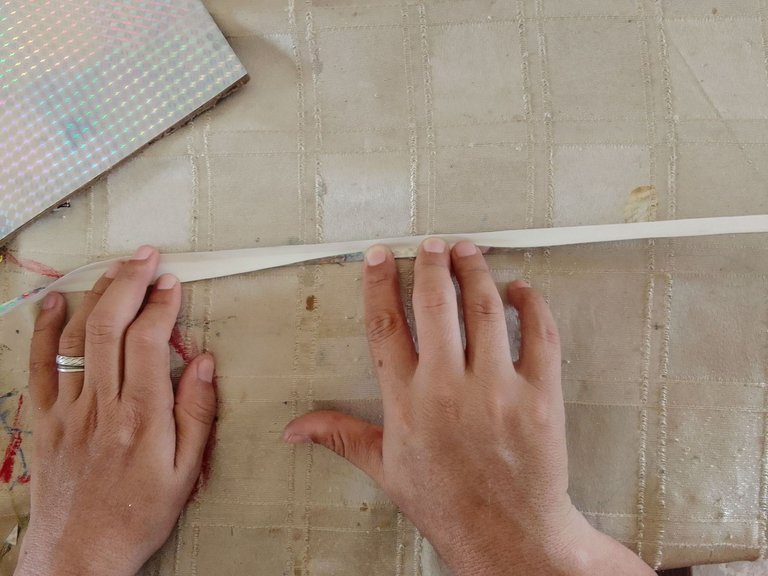
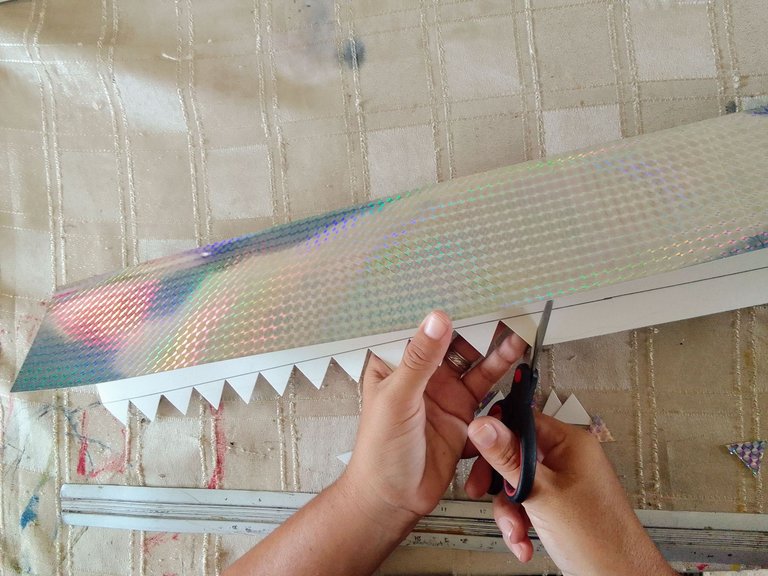
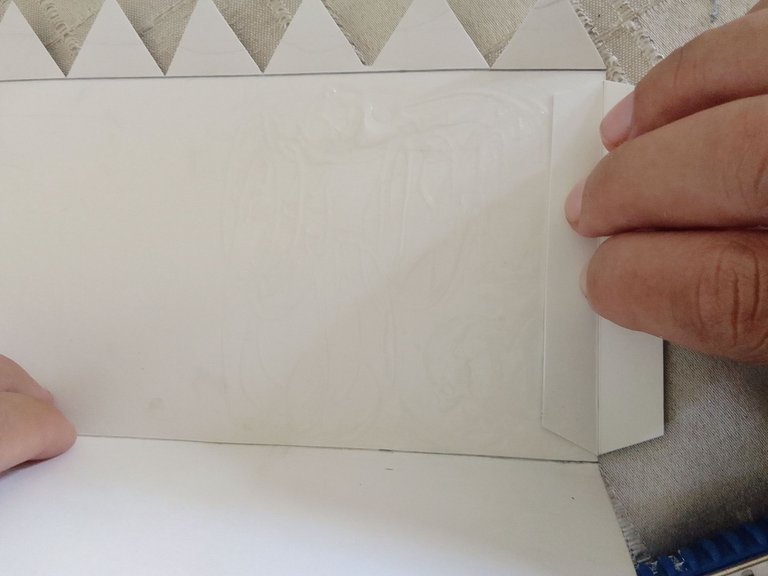
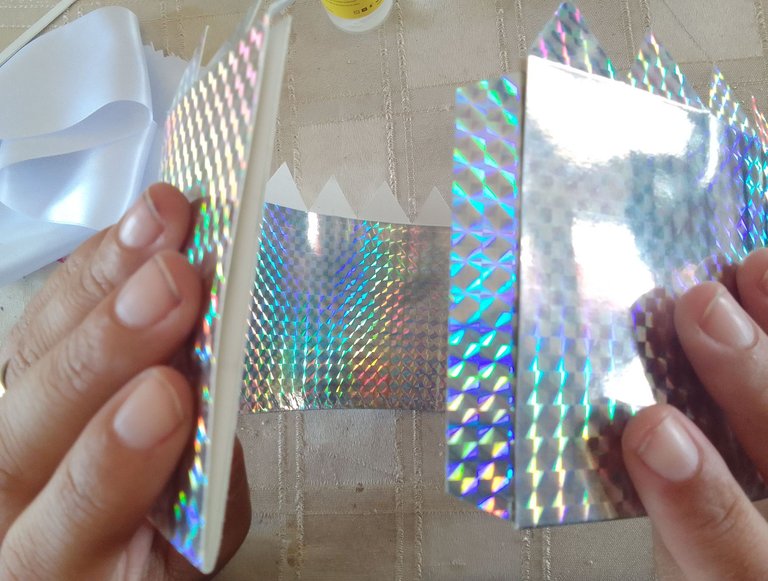
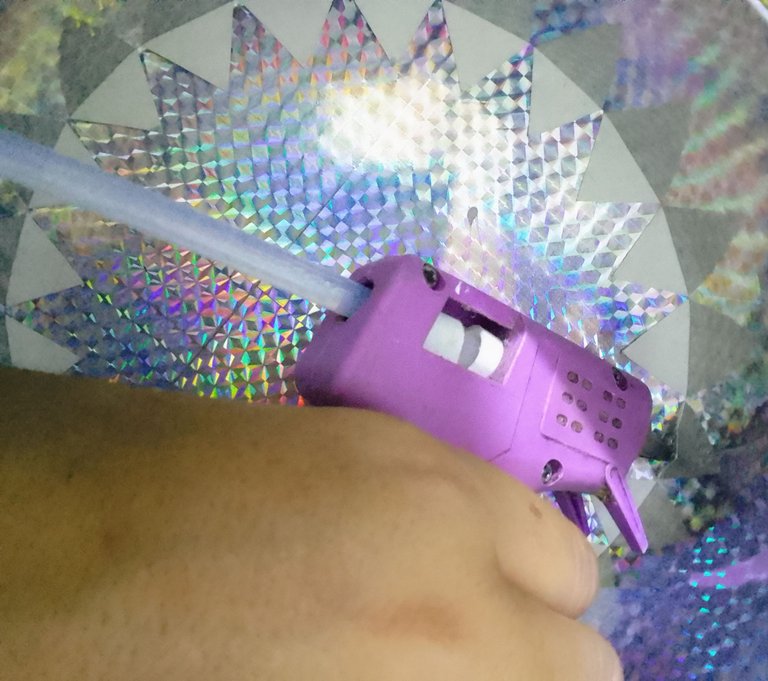
Para este paso hice uso del liston de 20 centímetros de cartulina metalizada previamente subdividido mediante líneas. Con la ayuda de una regla doblé la cartulina justo sobre la línea de 9 centimetros quedando una pestaña de 2 centímetros, esta, la corte en picos o pequeños triángulos que posteriormente fijé al tope.
With the materials cut I proceeded to assemble the cap, first I made a hole in the center of the cardboard square and in one of the holographic cardboard squares in which I inserted a cord, then I knotted it and fixed it with silicone. Then I glued the metallic cardboard squares on both sides of the cardboard leaving a space of 1 centimeter between them, this space for aesthetic purposes I covered it with the 2 centimeter ribbon that we cut in the first step, but before I folded its edges forming 2 tabs of 0.5 centimeter on both sides to be able to fix them to the surface.
For this step I made use of the 20 centimeter strip of metallic cardboard previously subdivided by lines. With the help of a ruler I folded the cardboard just over the 9 centimeters line leaving a 2 centimeters flange, this, I cut it into peaks or small triangles that later I fixed to the top.
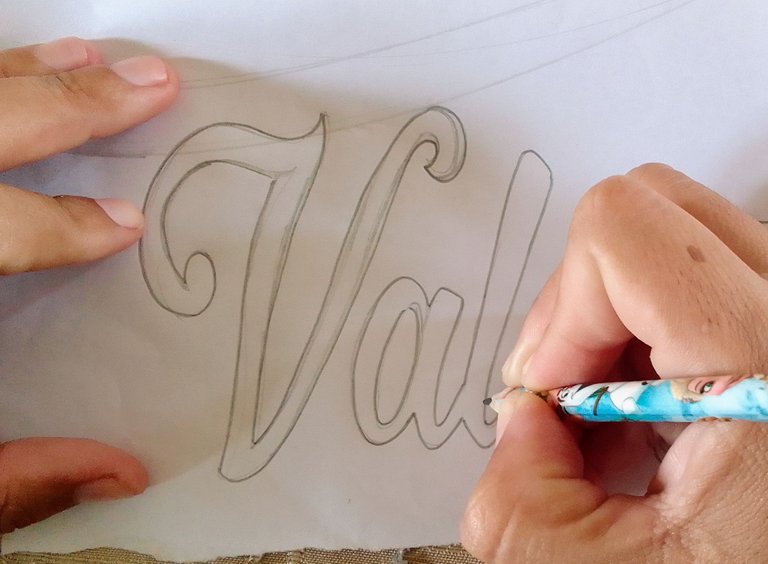
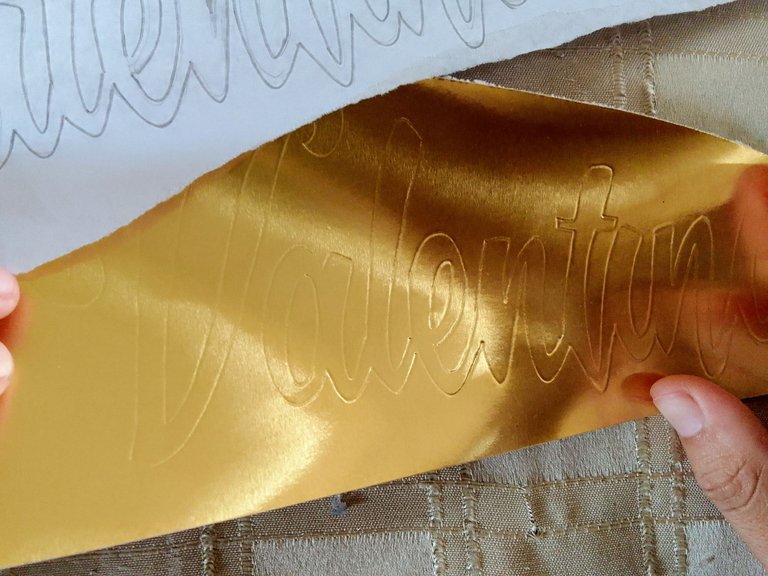
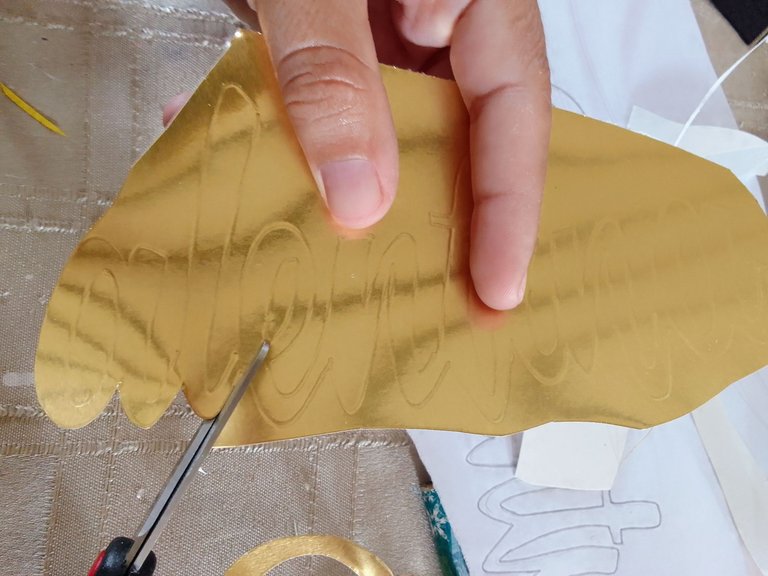
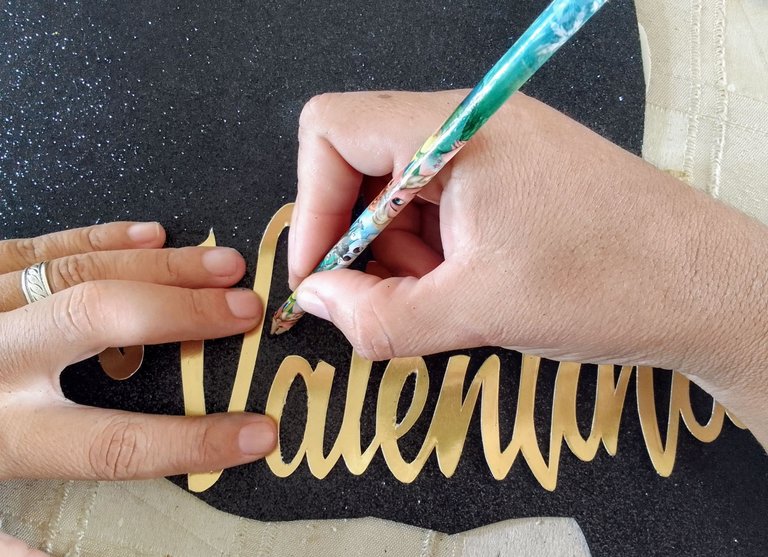
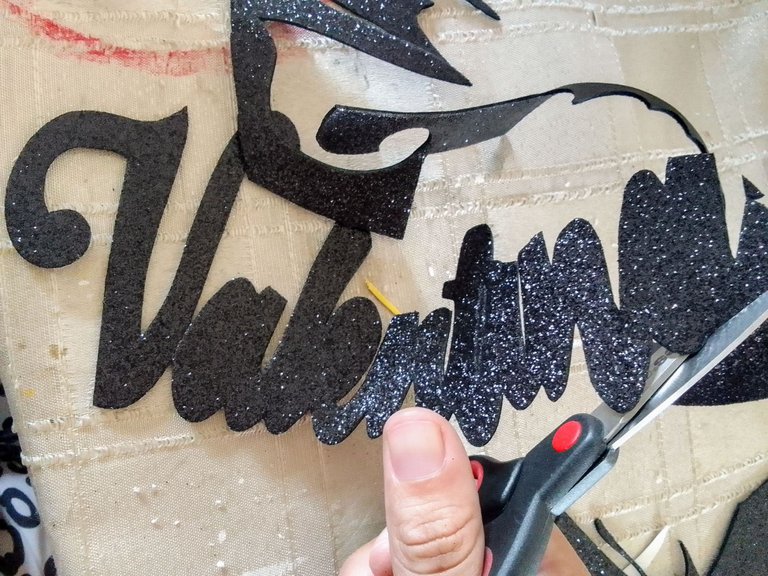
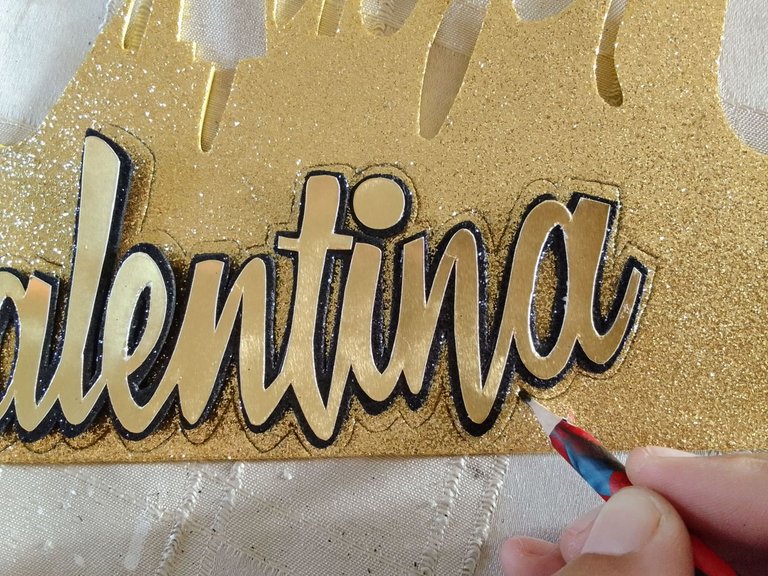
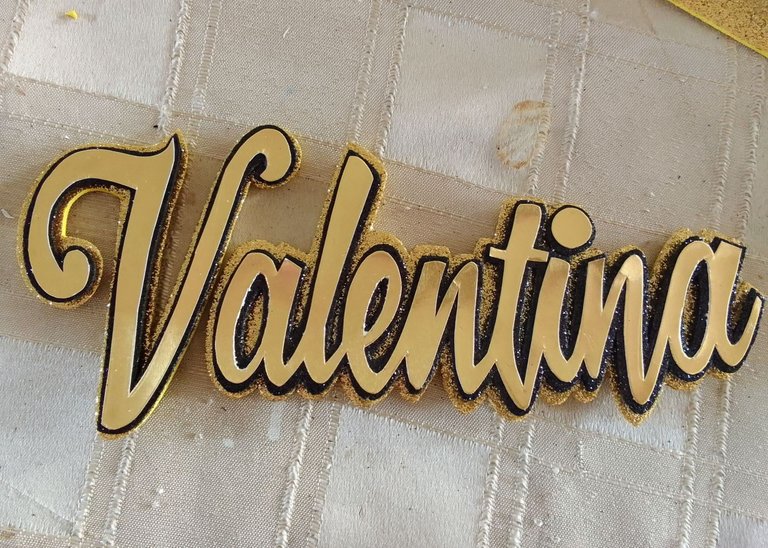
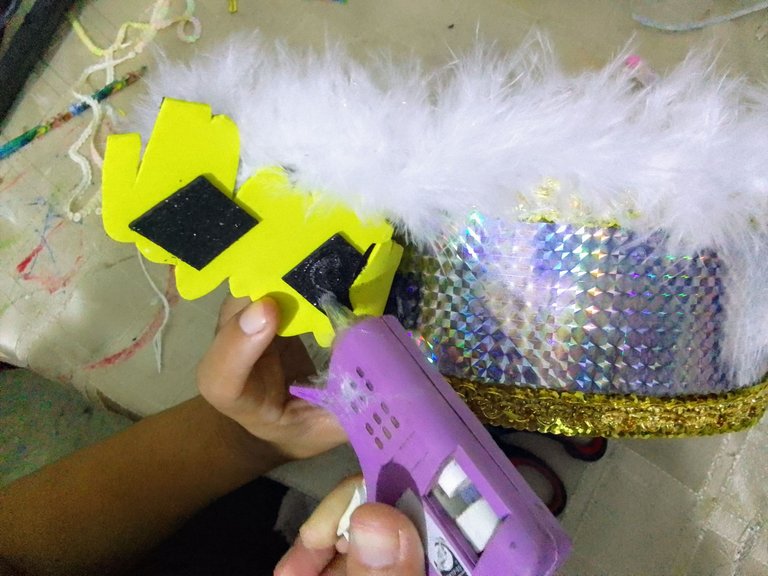
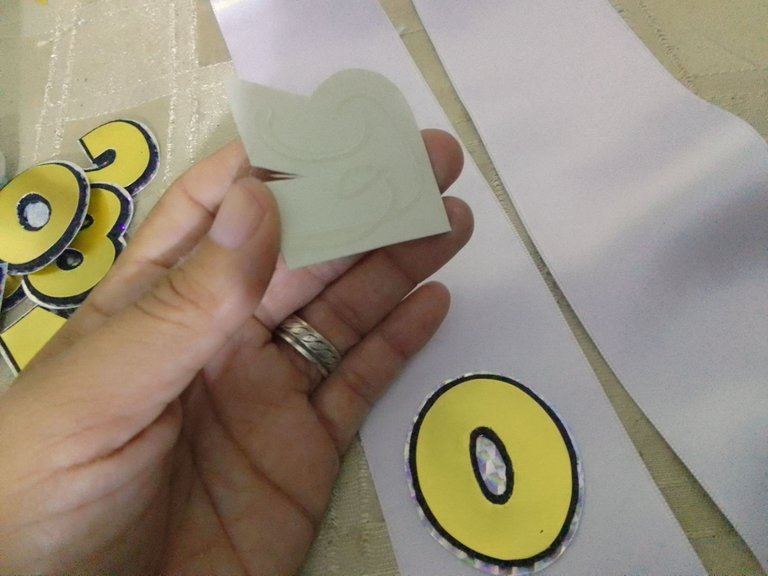
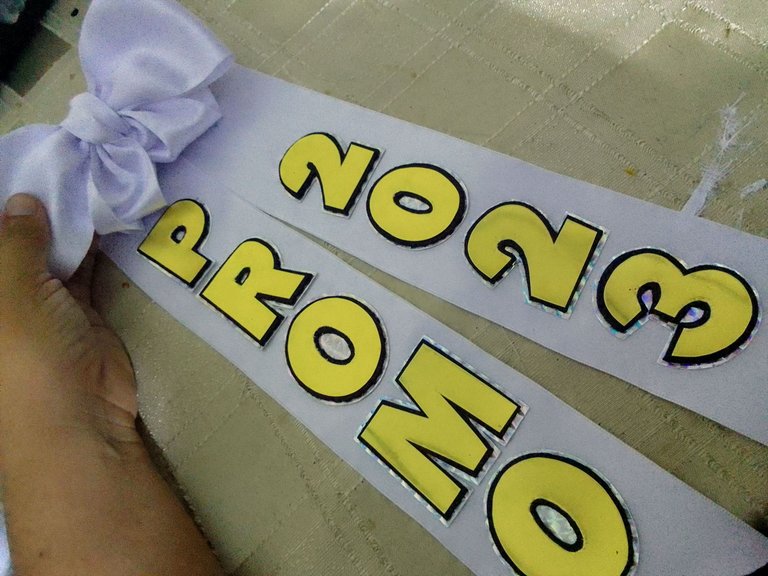
Para este paso hice uso de mis famosos patrones ☺️ una recomendación muy importante, utilicen cartulina metalizada para las letras que van al frente y las capas completarlas con foami escarchado, ya que, con la cartulina metalizada el resultado es más elegante. Con patrón en mano solo tuve que remarcarlo sobre la cartulina metalizada y cortar, después estás letras en cartulina las coloque sobre un foami negro escarchado y remarque a pulso creando la primera capa. Por último la capa en foami negro la coloqué sobre foami dorado y repetí la acción anterior, obteniendo así el nombre con 2 capas.
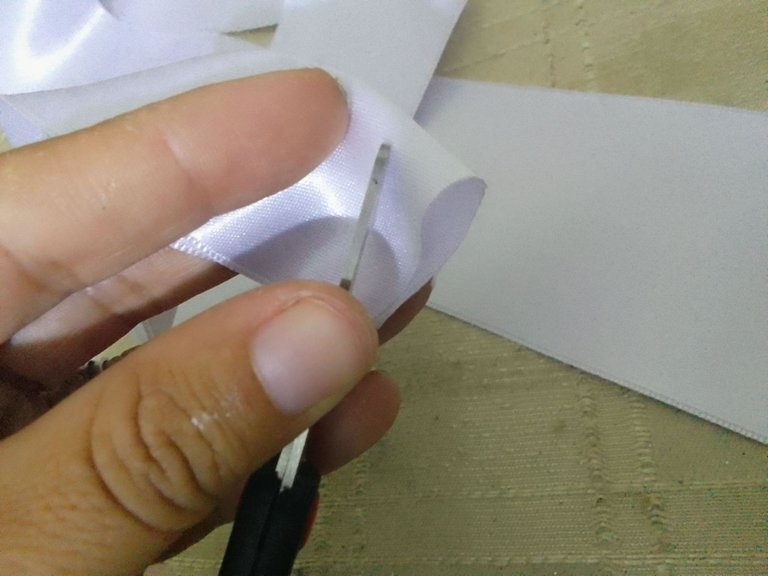
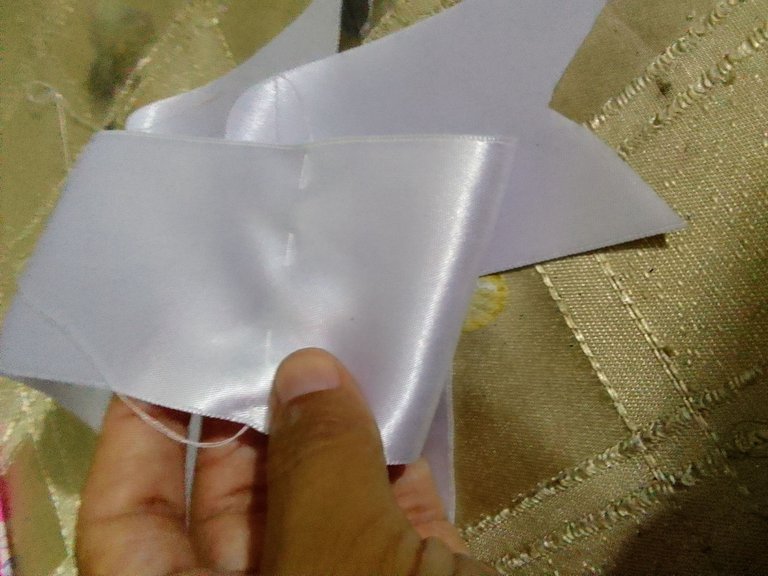
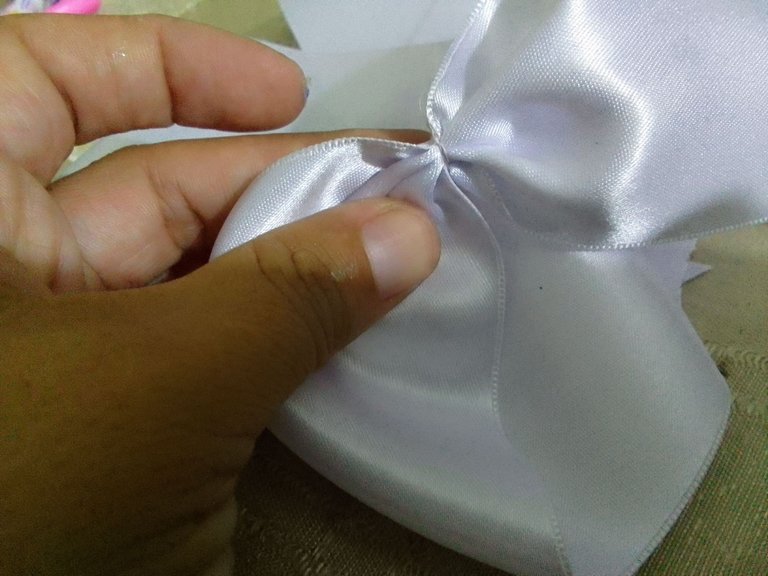
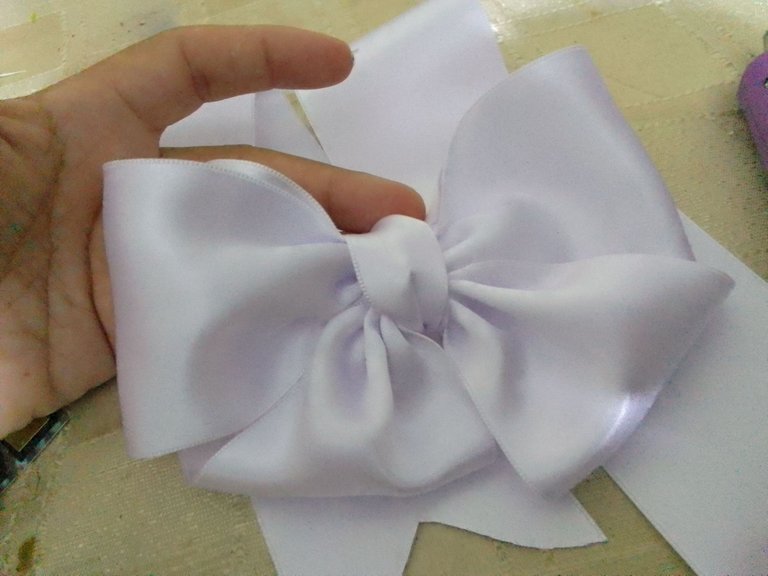
Primero junté los 2 extremos de la cinta y realice un corte en "V" en las puntas, luego con aguja e hilo hice una costura simple en el centro de la cinta, luego hale y obtuve el arruche esperado. Para finalizar con uno de los pedacitos de cinta que quedó del corte en "V" cubrí la costura y lo fijé con silicón esto con el fin de dar más elegancia y limpieza al trabajo.
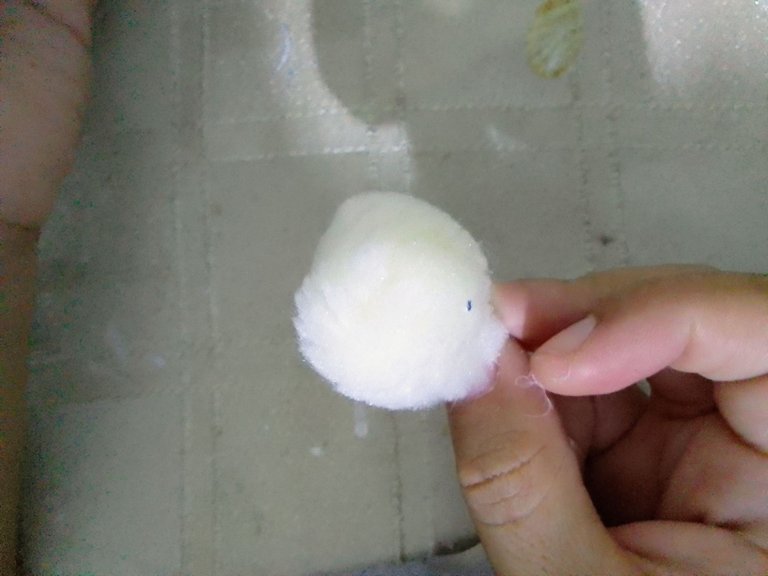
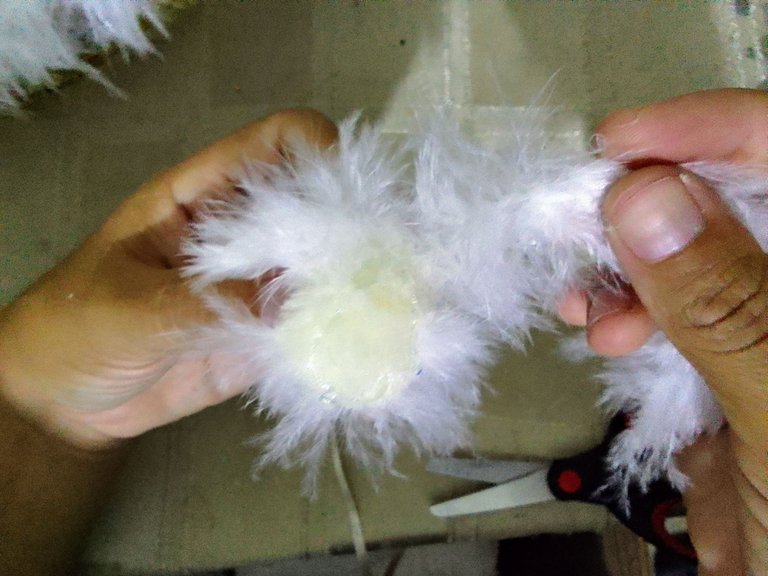
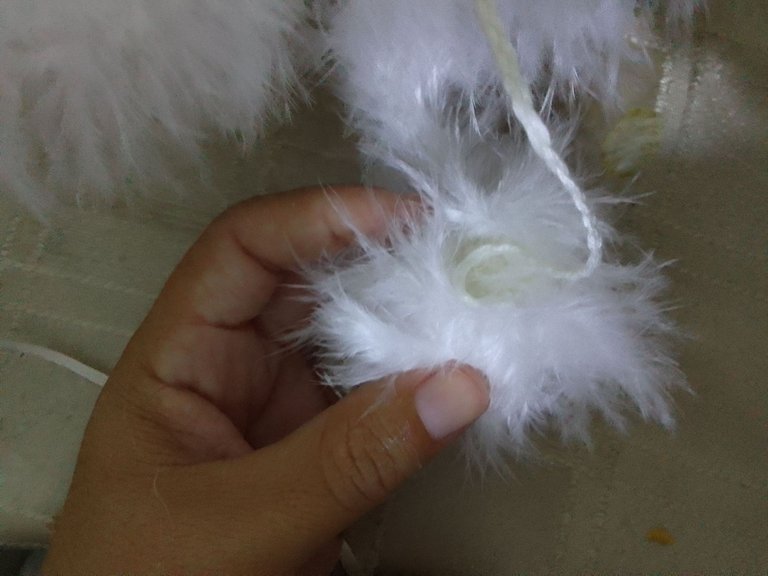
Por lo general son hechos con un hilo grueso parecido al estambre solo que un poco más resistente y liso, pero en miras de hacer un birrete original elabore mi propia borla a partir de una esfera de tela blanca rellena la cuál recubri con silicón y luego sobre ella un pequeño trozo de marabu blanco. Cabe destacar que estás piezas las venden ya listas pero yo quise hacerla😁.
For this step I made use of my famous patterns ☺️ a very important recommendation, use metallic cardboard for the letters that go to the front and the layers complete them with frosted foami, since, with the metallic cardboard the result is more elegant. With the pattern in hand I only had to mark it on the metallic cardboard and cut it, then I placed these letters on cardboard on a frosted black foami and marked them by hand creating the first layer. Finally I placed the black foami layer on gold foami and repeated the previous action, thus obtaining the name with 2 layers.
First I joined the 2 ends of the ribbon and made a "V" cut at the ends, then with needle and thread I made a simple stitch in the center of the ribbon, then I pulled and obtained the expected ruche. Finally, with one of the pieces of ribbon that remained from the "V" cut I covered the seam and fixed it with silicone, this in order to give more elegance and cleanliness to the work.
Usually they are made with a thick yarn similar to worsted but a little more resistant and smooth, but in order to make an original biretta I made my own tassel from a white fabric sphere filled with silicone and then covered it with a small piece of white marabu. It should be noted that these pieces are sold ready-made but I wanted to make it😁.

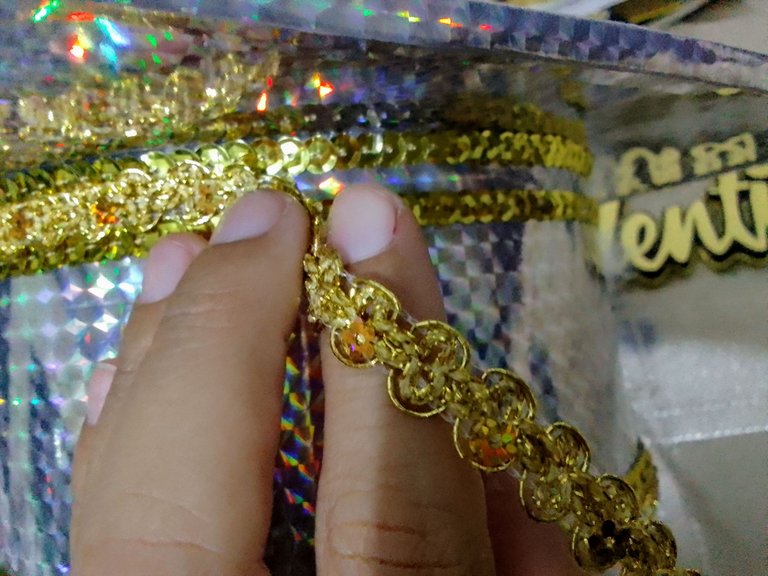
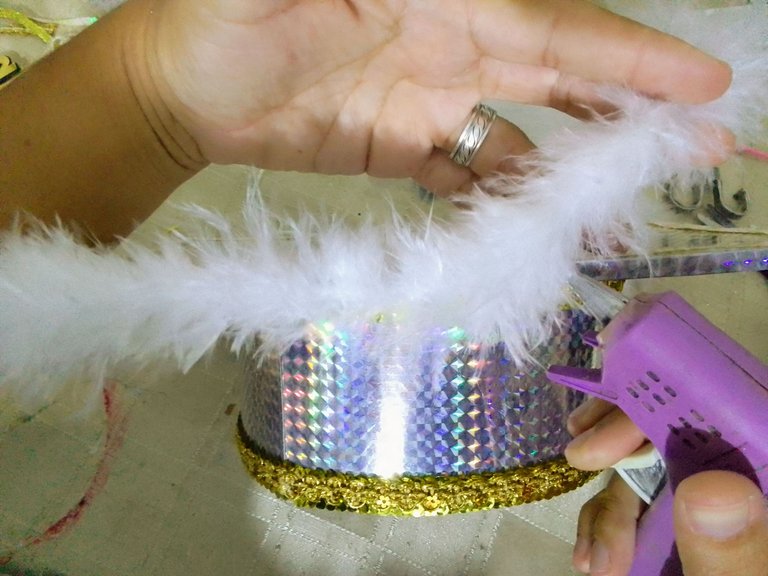
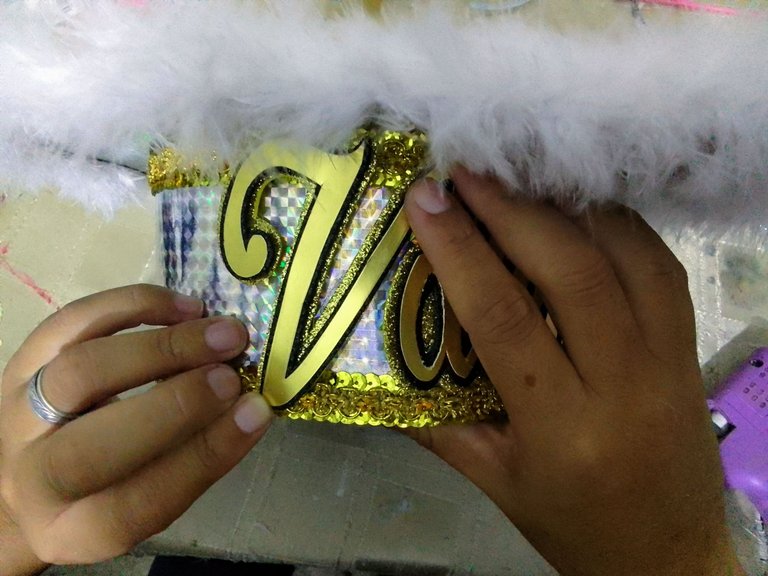
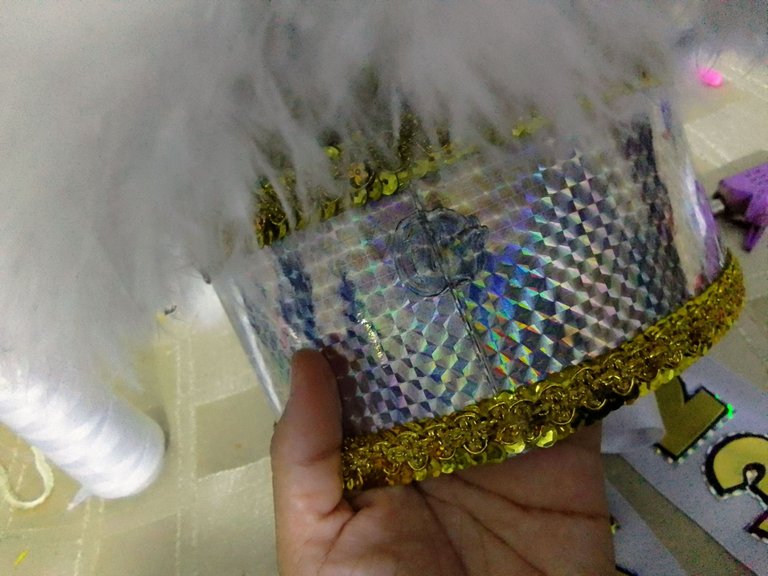
Con los accesorios listos lo primero que hice fue aplicar silicón en la parte inferior de la base y fijar una línea con lentejuela dorada alrededor circunsferencia luego corté la línea y realice el mismo paso 1 centímetro por arriba dejando espacio suficiente para fijar la pasamaneria, esto lo repetí en la parte superior de la base del birrete. Posteriormente apliqué silicón en el tope del birrete exactamente sobre la línea que se formó con el listón que use para tapar el grosor del cartón y fijé a la superficie una línea de lentejuela tornasol esto con un fin estético. Seguidamente fijé con silicón caliente el marabu al contorno del tope del birrete no en la parte superior sino en la lateral.
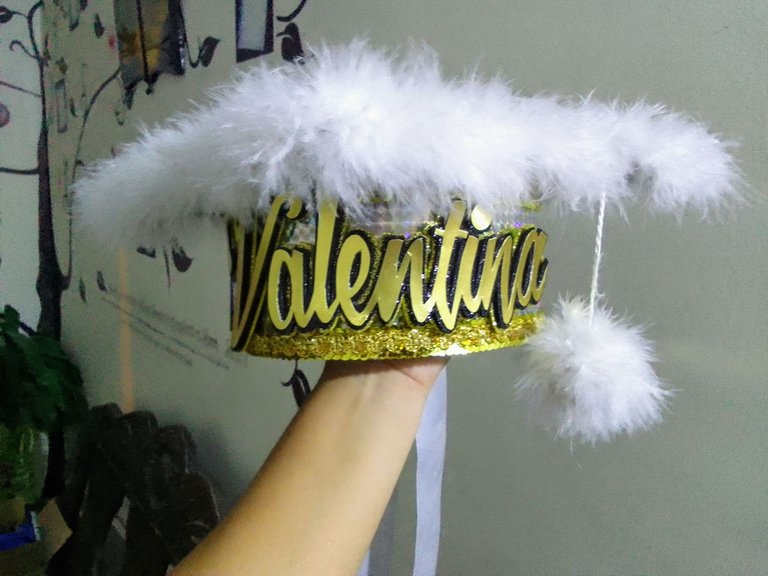
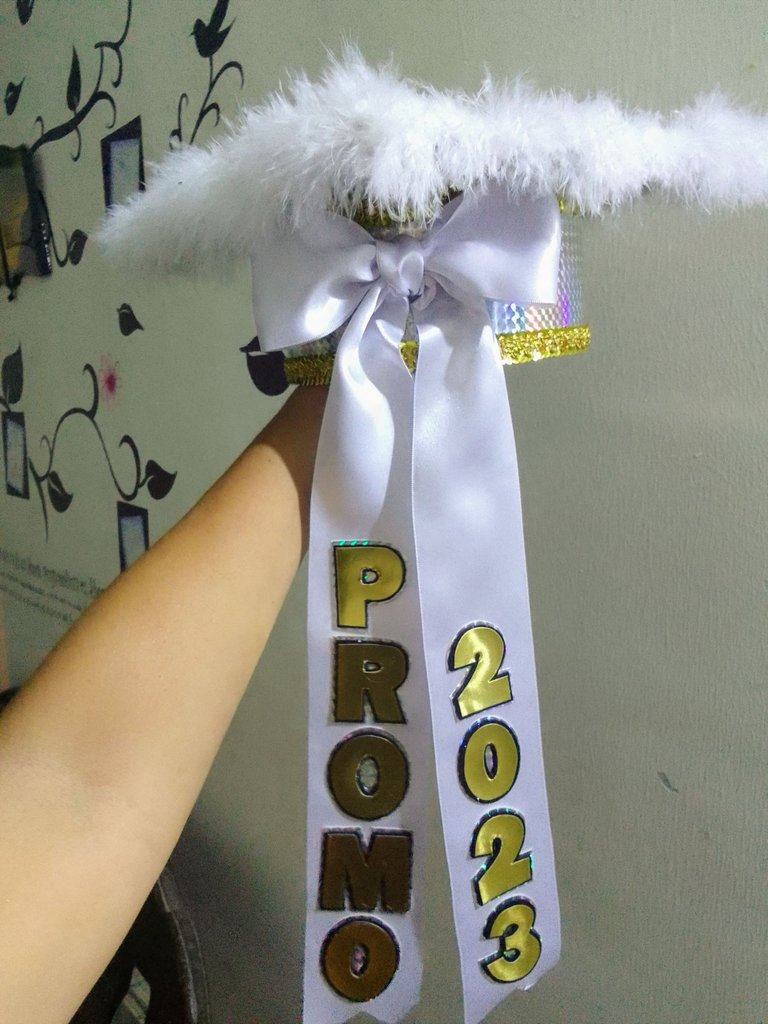
Por último realice unas letras en cartulina dorada e hice 2 capas en foami negro y cartulina holográfica y las pegué en la parte inferior del lazo. Luego fijé el lazo al Tope del birrete y listo!.
With the accessories ready, the first thing I did was to apply silicone on the lower part of the base and fix a line with gold sequins around the circumference, then I cut the line and did the same step 1 centimeter above leaving enough space to fix the trimmings, I repeated this on the upper part of the base of the cap. Then I applied silicone on the top of the cap exactly on the line formed with the ribbon I used to cover the thickness of the cardboard and fixed a line of iridescent sequin to the surface for aesthetic purposes. Then I attached with hot silicone the marabu to the contour of the top of the cap, not on the top but on the side.
Finally, I made some letters in gold cardboard and made 2 layers of black foami and holographic cardboard and glued them to the bottom of the bow. Then I attached the bow to the top of the cap and that was it.


Un hermoso proyecto muy fácil de hacer. Dios nos bendiga siempre. Gracias por leer..!
A beautiful project very easy to make. God bless us always. Thanks for reading!
Las fotos de esta publicación son de mi propiedad y fueron tomadas desde mi celular Realme C11.
Las ediciones de Foto y el Banner lo realice con las aplicaciones: Poster Maker, Text Art e in shot descargadas desde Play Store.
Textos traducidos en deepL
The photos in this publication are my property and were taken from my cell phone Realme C11.
The photo editions and the banner were made with the following applications: Poster Maker, Text Art and in shot downloaded from Play Store.
Translated texts in deepL.
Al ver tantos lindos diseños de birretes, ya me estoy tentando a hacerme uno como este para cuando termine mi curso 👀 el detalle del moño quedo espectacular y el color que elegiste -blanco combinado con dorado- lo hace ver de lujo 😍
Muchas gracias @elbuhito me alegra que te guste, lo que más trabajo me genera es precisamente escoger la combinación de colores. Espero te animes hacerlo quizá en el proceso puedas entenderme cuando tengas que elegir que colores utilizar.😁 Gracias por leer..!
Te quedo demasiado hermoso todos los detalles muy buen cuidados, incluyendo la selección de los colores todos en perfecta armonía con la cartulina metalizada, más el bonito diseño de las letras con el nombre además del lazo blanco qué destaca en la parte de atrás del birrete, la niña que lo llevara debe estar Felizz 😊 🎓🎓 Gracias por compartirlo 💮✨💮✨
Holaaa @marigerp88 muchas gracias por apreciar a detalle mi trabajo, siempre intento dar lo mejor de mi en los proyectos que realizo y cada detalle cuenta😉. No tuve la oportunidad de verlo puesto en la niña pero su mamá quedó encantada😍. Gracias por leer..!☺️
That is nicely executed. I don't think I would have the patience to do it myself though 😃
Hi @erikah thanks so much, yes it is a job that requires a lot of patience but it doesn't take that much time and practice makes perfect. Thanks for reading!☺️
Congratulations @ferguis-ve! You have completed the following achievement on the Hive blockchain And have been rewarded with New badge(s)
Your next target is to reach 3750 upvotes.
You can view your badges on your board and compare yourself to others in the Ranking
If you no longer want to receive notifications, reply to this comment with the word
STOPCheck out our last posts: