Laser Beam Nights - How to lightpaint with lasers
If you know anything about lasers it would be that they aren't very healthy for digital camera sensors. So it would seem counter intuitive to use lasers with lightpainting photography. I've never been one for being over cautious and this is a post with the results from last night's trip in the dark to an abandoned factory.
The laser beams were created using a cheap laser pen you can buy off eBay or similar. The front of the laser has a diffuser which splits the beam. I placed two of the laser atop of a flashgun at the rear of frame and throw in a few smoke pellets. The smoke creates particles in the air with which to capture the laser beams. The more smoke the better, pellets work for smaller rooms or buildings but for bigger venues such as tunnels it's necessary to use smoke grenades!
For the record, after last night, my sensor remains intact!
Laser Beam Nights
A lightpainting image is generally shot in one photographic exposure (and there's a whole debate about that amongst lightpainting circles). I prefer to shoot in one take and at first glance the viewer would be forgiven to think this was Photoshopped. But it isn't, it's all done in camera.
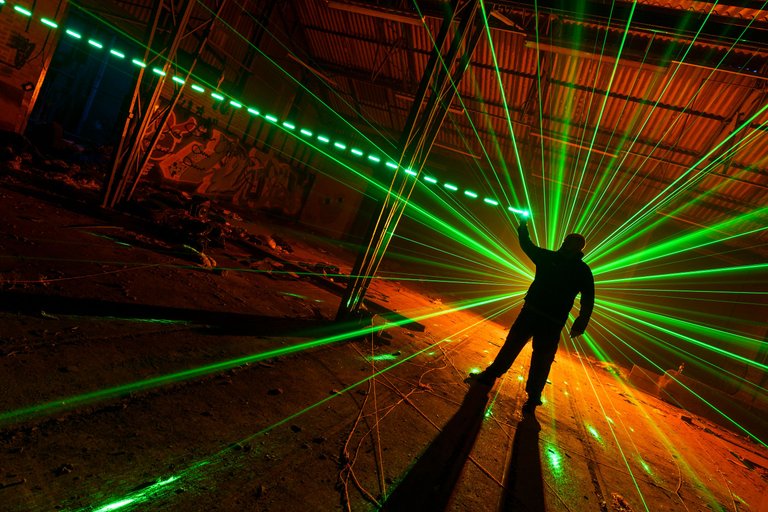
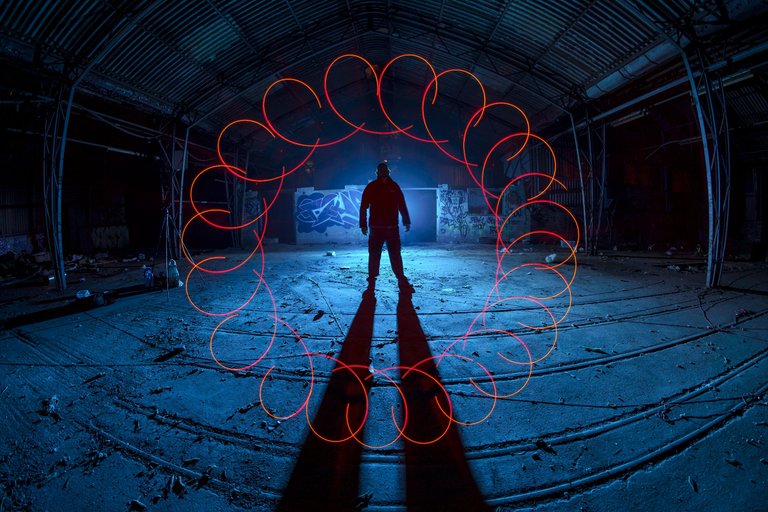
I placed a series of lens filter adapters on my 67mm diameter filter ring and adapted down to 32mm meaning the camera could only see a small hole in the middle of the frame. I then shot @neilru75 in silhouette with lasers and smoke pellets. Once happy with the contents of the centre circle, I very carefully removed the filter adapters and lit the rest of the scene. It's necessary in these shots for the subject to remain prefectly still for around a minute.

Getting Kinetic
I placed the subject holding a flashlight in the air but the light isn't initially turned on at first. I fired a flashgun with lasers to create background seperation on the silhouette. Then, just before I ended the exposure, the model switches on the flashlight while I simultaneously pan the camera over to the right (or left if you want the beam to go the other way).
All shot in one exposure and easy to nail with a little practice.
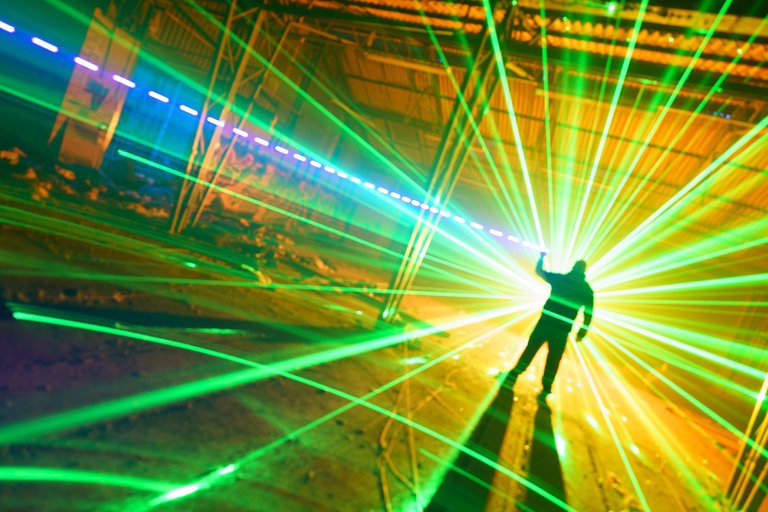
The Laser Beam Fail Shot
Sometimes it's good to show that not all images I take are perfect. In fact, this is terrible because I forgot to change the aperture from f1.8 to f5.6 meaning the whole result is overexposed and the lasers left an unwanted trail as I panned the camera across the frame. I also seemed to have forgotten to refocus! But I like though....
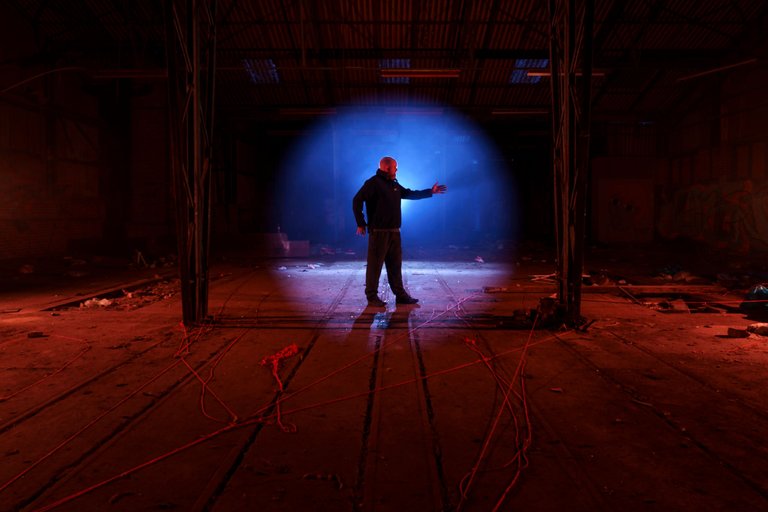
Impossible Spotlight
Using the lens filter adapters again, this is a simple test shot. To create images in one exposure, it's necessary to rehearse each element before going for the big bang!
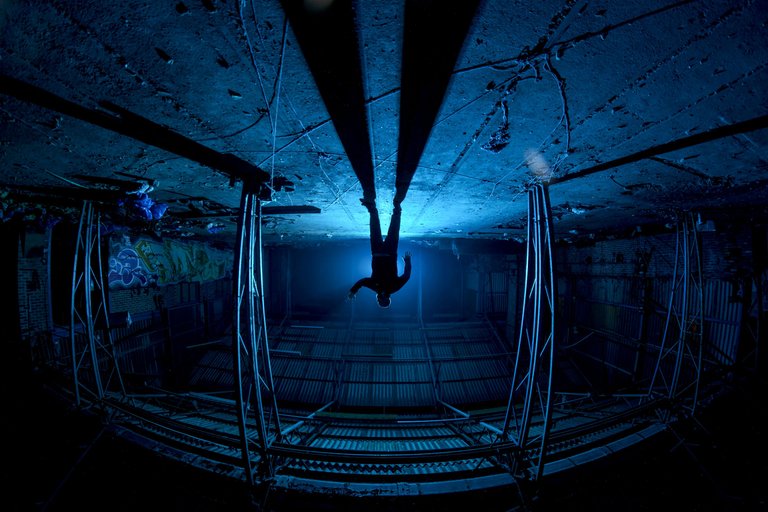
Just Hangin'
I switched lenses to my trusty old Samyang 12mm full frame fisheye lens. I seemed to have forgotten my camera was still upside down from the last shot. Hey ho, it's OK though!
Circles with the wrong tools
I have two different types of camera rotation tool and for this shot I was using the wrong one! My home made tool has a windy handle which would have created better circles with more consistency.
But I had to settle for a freehand spin of the camera using the tool I had. Not too shabby.
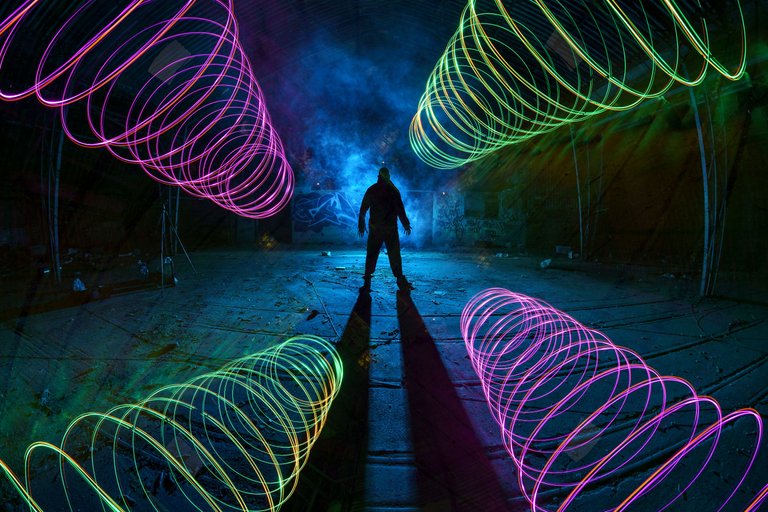
The Marmite OCD Shot
I've used this colour combination before and for some it's probably a "Marmite" shot. It's also tweaking my fake OCD because of the alignment of the spinning stuff.
For the this image I shot the silhouette first then rotated the camera to a 45 degree angle. I then spun a @theballoflight tool first starting at the back of the frame walking towards camera. I repeated the process four ways with two colours.
Despite starting from the exact same position with the spinny stuff, it's still tweaking my OCD!
About me:
I usually specialise in shooting lightpainting images but occasionally dabble in urbex and artistic model photography. I'm always on the lookout for someone to collaborate with; please don't hesitate to get in touch if you'd like to create art.
Social Media
https://www.facebook.com/fastchrisuk
https://www.flickr.com/photos/fastchris/

Lightpainting is a photographic technique in which exposures are made by moving a hand-held light source while taking a long exposure photograph, either to illuminate a subject or to shine a point of light directly at the camera, or by moving the camera itself during exposure. Nothing is added or removed in post processing.
If you would like to see more lightpainting please give the Lightpainters United Community a follow and you will be introduced into the illuminating world of light painting!
If you want to see more examples of lightpainting, feel free to check out these guys:
Mafu Fuma | Oddballgraphics | FadetoBlack | DAWN | Mart Barras | Stefan Stepke | Nikolay Trebukhin | Lee Todd | Stabeu Light | Maxime Pateau | Stephen Sampson | lightandlense | Neil Rushby | L.A.C.E.
Join us at Discord

https://twitter.com/oscarpsaa/status/1571765999422029824
The rewards earned on this comment will go directly to the people( @oscarps ) sharing the post on Twitter as long as they are registered with @poshtoken. Sign up at https://hiveposh.com.