My first piñata 🩷 made from recycled materials.🩷✨ [ENG/ESP]
ENGLISH🇺🇲
🩷HELLO FRIENDS🩷
Welcome to a new post! I hope everyone is very well .
On this occasion I bring you with great excitement the process of my first time making a piñata for my daughter's birthday.
The idea came about when they quoted me a pineapple for $14 😱 and I said, it seems excessive to me so I'll try to make one. After many tutorials on YouTube, I looked for the materials and got to work.
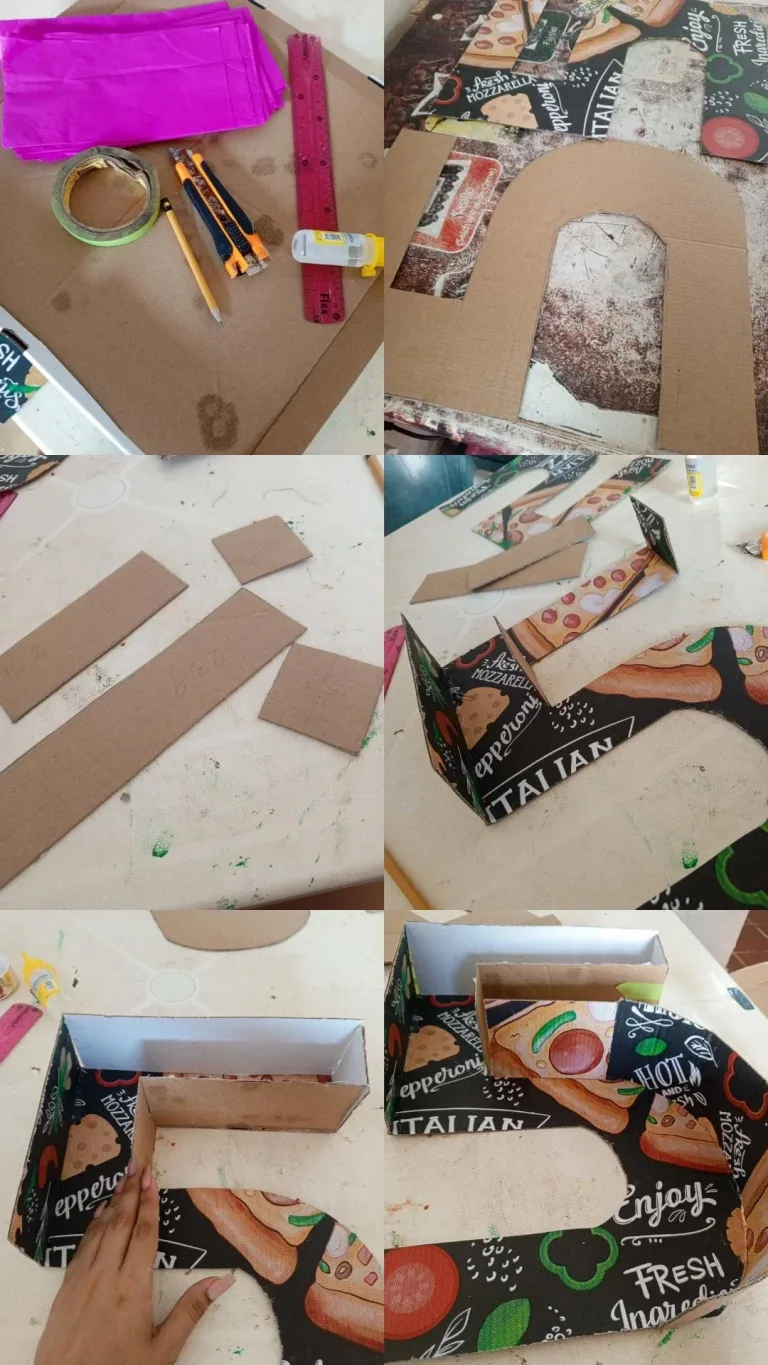
🩷MATERIALS TO USE🩷
•Pizza boxes to recycle or cardboard.
• Scissors.
• White glue or Silicon.
• crepe paper or tissue paper.
• foami.
• ruler.
• recycling sheets.
• Pencil.
• Exacto or precision knife.
🩷STEP BY STEP PROCESS🩷
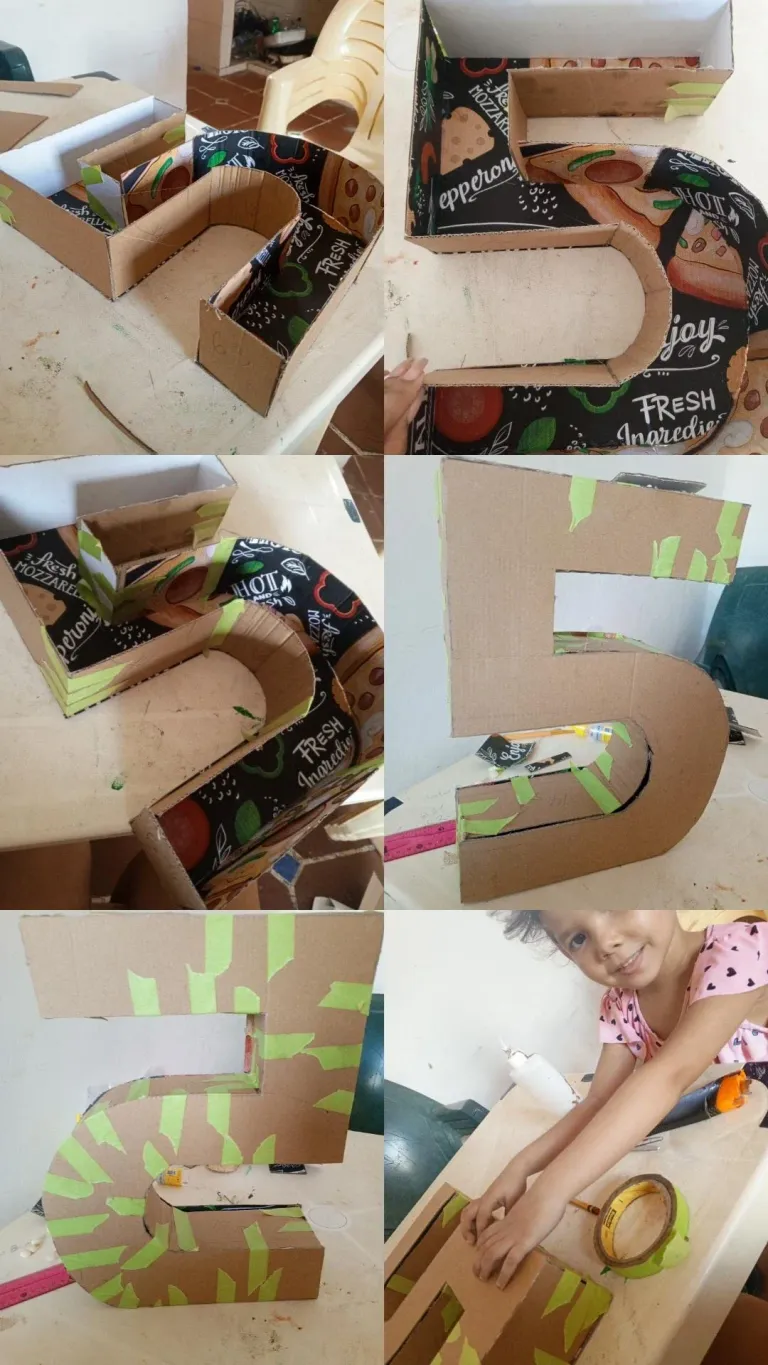
First I started doing number 5 using a lid, a ruler and a plate. (I confess that I also did it a little by eye, so I can't say measurements).
Then I cut the first 5 and copied it on another cardboard, so I would have two. Then with the help of a ruler I began to work out what would be the "parales" that would close the piñata.
Once all the "parales" or "walls" were ready, I began to glue them one by one, and then close, that way we would have the body of the assembled piñata.
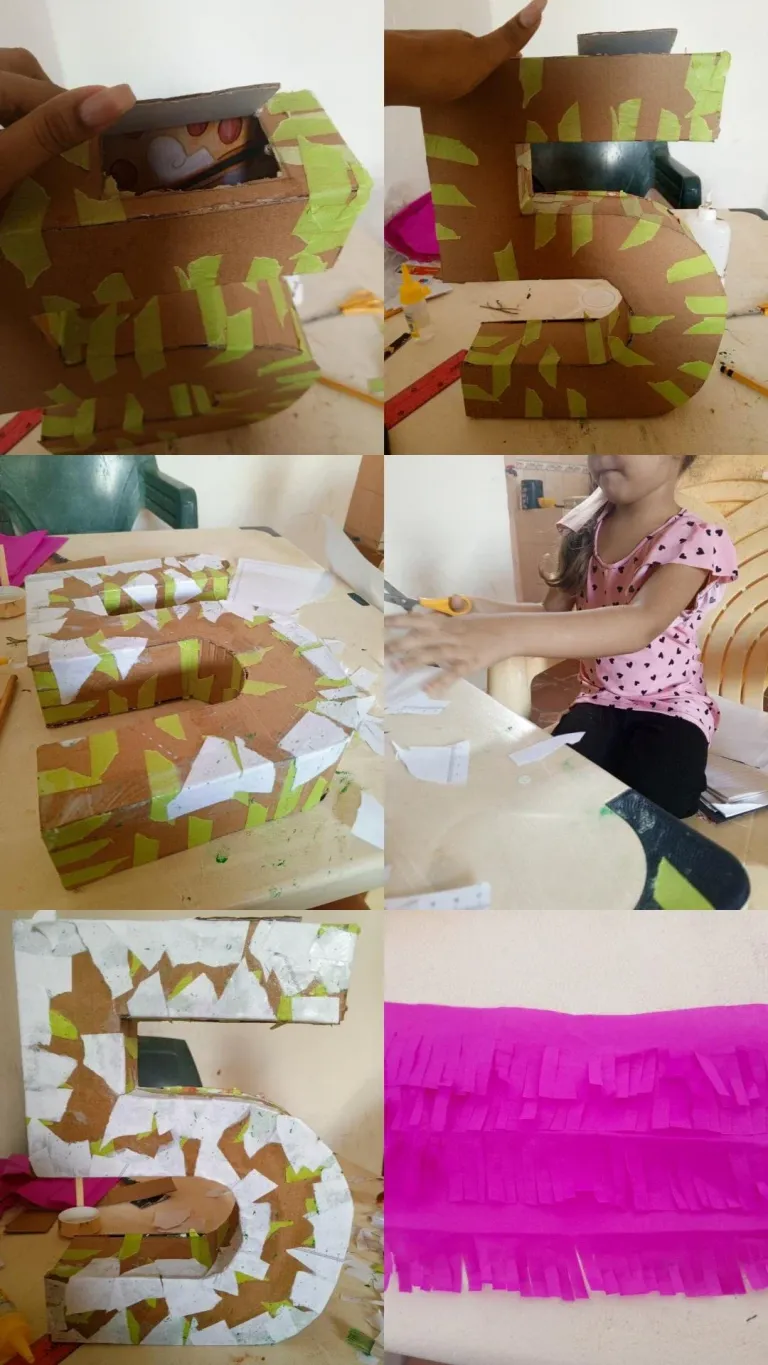
With a green shot I began to reinforce all the joints of the piñata, and then go over with paper mache, that will give it a little more resistance. While the paper mache was drying very well, we began to cut the tissue paper. I did the traditional cutting, which is small strips and on one side I made precise cuts to create a "skirt" of paper.
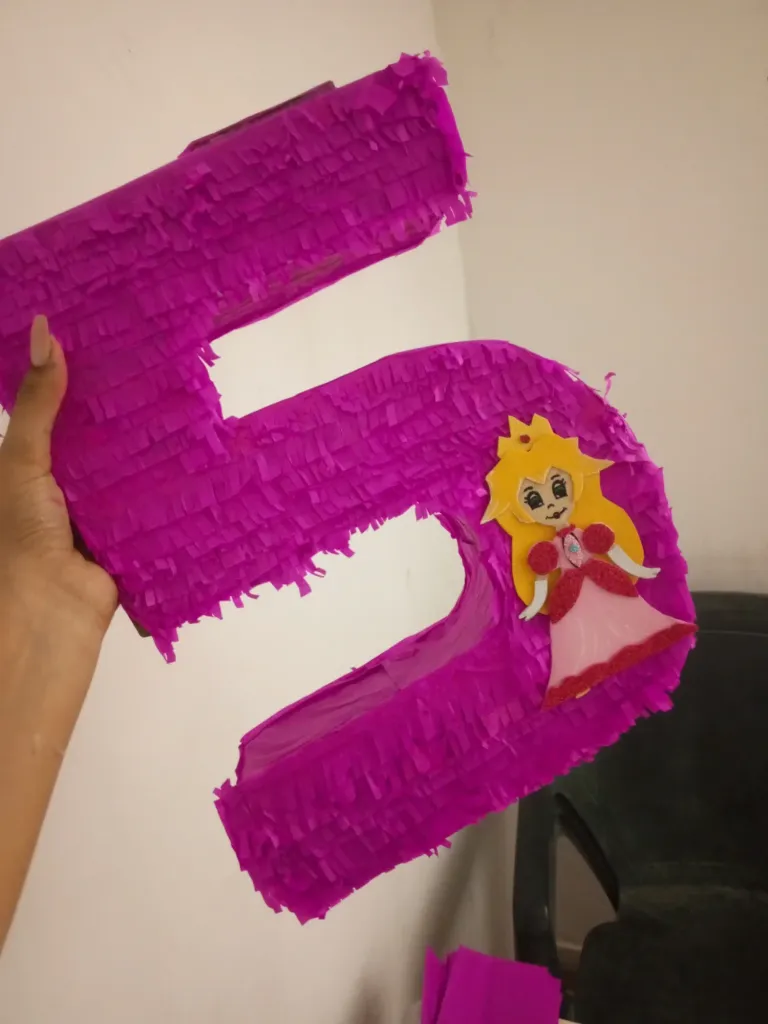
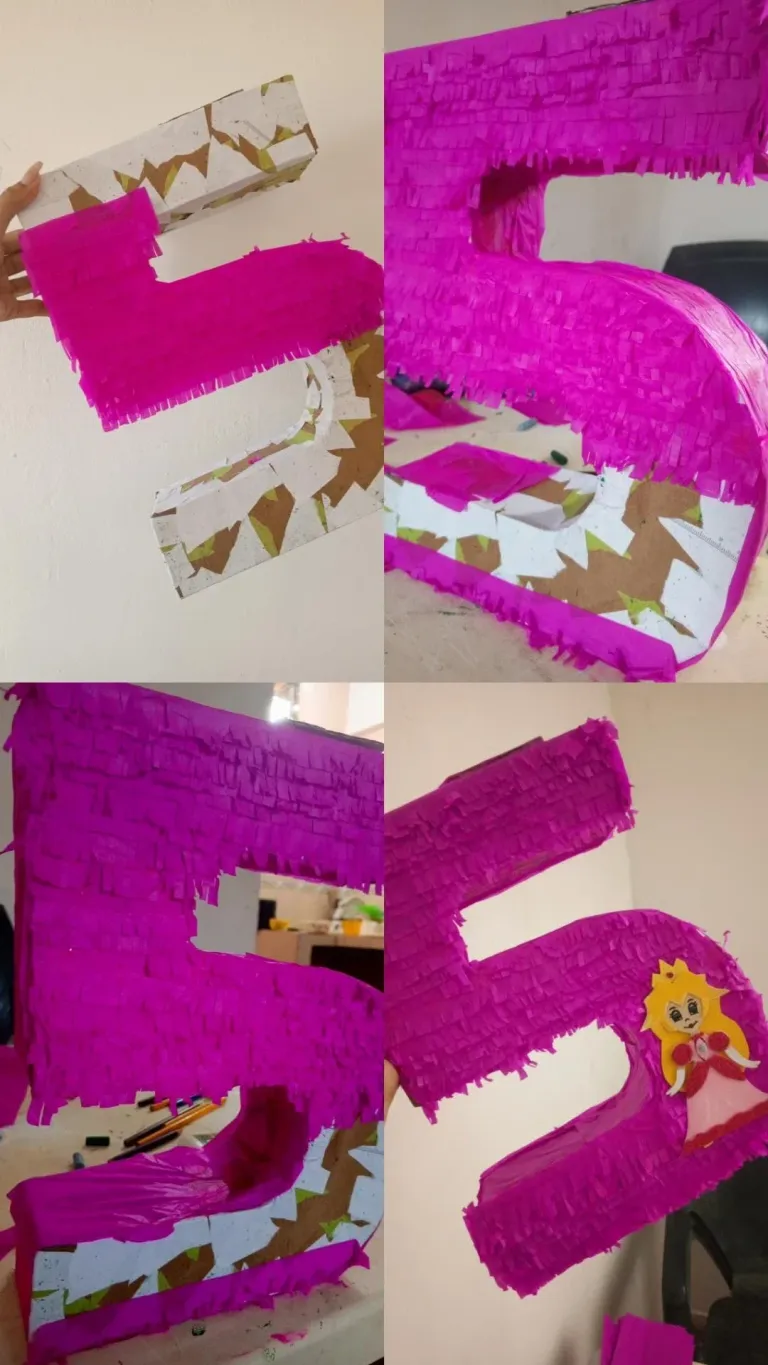
Once everything is dry, we begin to line the piñata. I think this is a longer process and one in which you must be very careful.
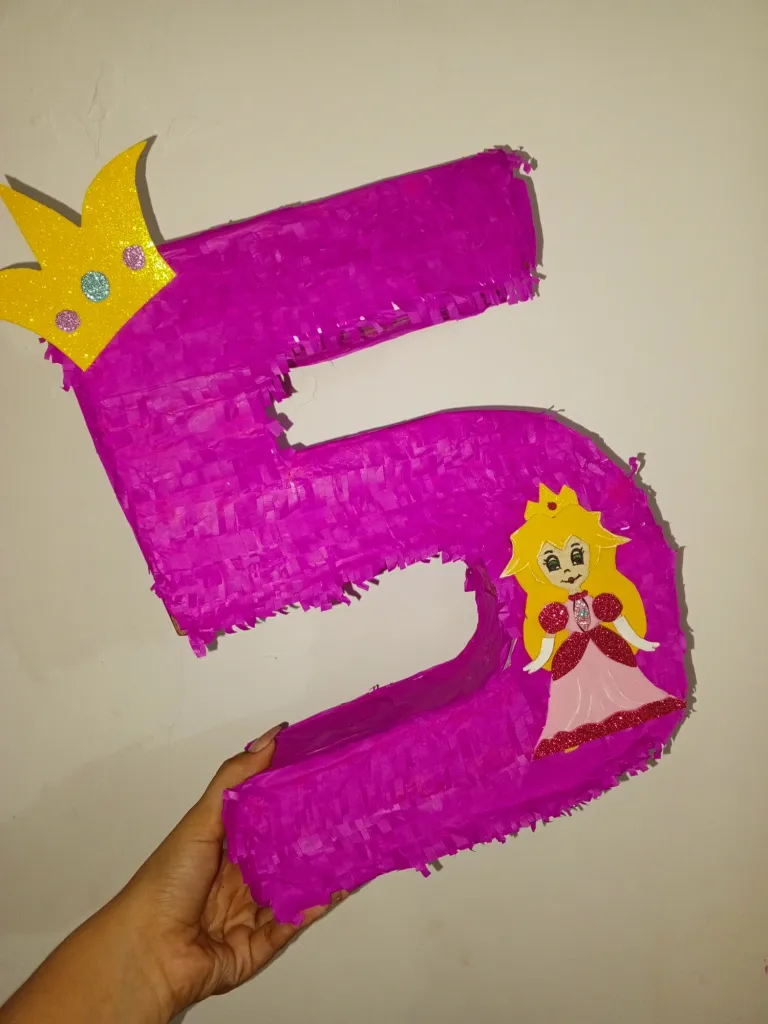
With all the strength, I decided to give it a few touches, which was adding Princess Peach made with Foami, and a crown.
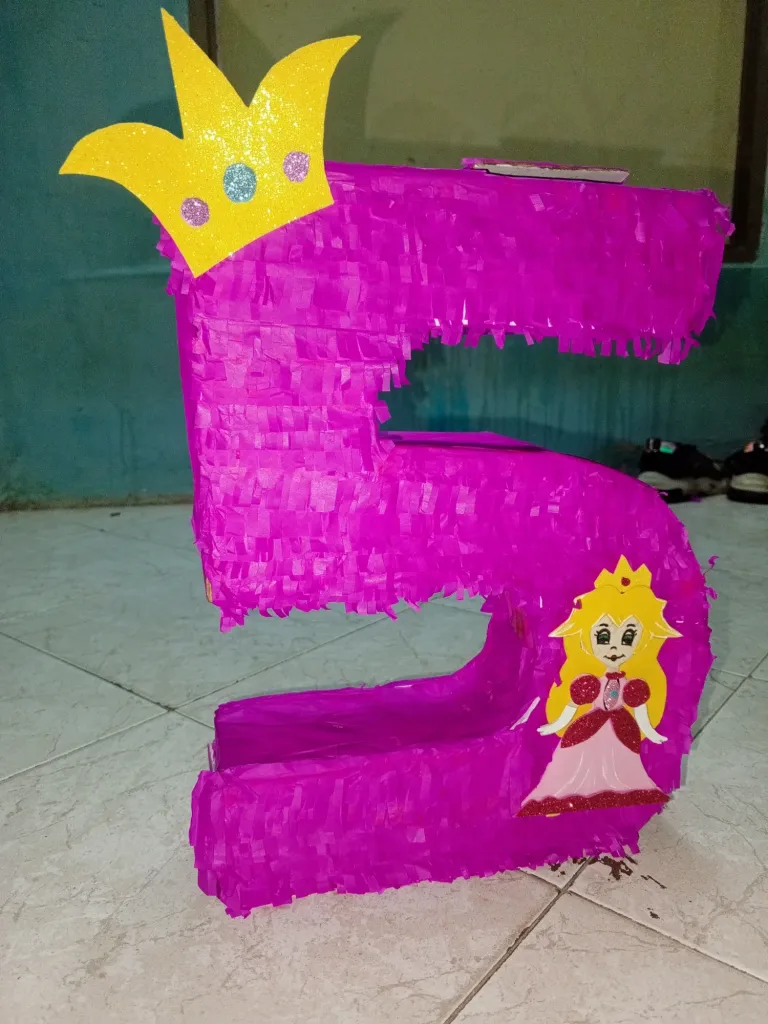
With this we finish our piñata!
I hope you like it as much as I do, I think it exceeds my expectations since I didn't have any faith in it hahaha. Soon I will upload how I made Princess Peach in foam.
See you in the next post
PS: VERY VERY important, do not forget to make the strip to decorate, I overlooked this step, so now I must modify the piñata a little.😅😩.
ESPAÑOL🇪🇦
🩷HOLA AMIGOS🩷
Bienvenidos a un nuevo post! Espero todos estén muy bien🩷.
En esta oportunidad les traigo con mucho emoción el proceso de mi primera vez haciendo una piñata para el cumpleaños de mi hija.
La idea surgió cuando me cotizaron una piña en 14$ 😱 y yo dije, me parwce excesivo así que yo intentaré hacer una. Después de muchos tutoriales en Youtube, busque los materiales y me puse manos a la obra.
🩷MATERIALES A USAR🩷
•Cajas de Pizza para reciclar o cartón.
• Tijeras.
• Pega blanca o Silicon.
• papel crepe o papel de seda.
• foami.
• regla.
• hojas de reciclaje.
• Lápiz.
• Exacto o cuchillo precisador.
🩷PROCESO PASO A PASO🩷
Primero inicié haciendo el número 5 ayudándome de una tapa, regla y un plato. (Confieso que también lo hice un poco al ojo por ciento, por lo cual no puedo decir medidas).
Luego corte el primer 5 y en otro cartón lo copié, para así tener dos. Luego con ayuda de una regla empecé a tratar lo que serían los "parales" que cerrarían la piñata.
Ya listo todos los "parales" o "paredes", empecé a pegarlos uno por uno, para seguido cerrar, de esa manera ya tendríamos el cuerpo de la.piñata armada.
Con un tirro verde empecé a reforzar todas las uniones de la piñata, para luego pasar con papel maché, eso le dará un poco más de resistencia. Mientras el papel maché secaba muy bien, empezamos a cortar el papel de seda, yo hice el.corte tradicional que son tiras pequeñas y de un lado realizarle cortes y precisos para crear una "falda" de papel.
Ya todo seco, empezamos a forrar la piñata, este creo que es proceso más largo y en el que debes tener mucho cuidado.
Con todo forrazo, decidí darle unos toques, que fue agregándole la princesa Peach realizada con Foami, y una corona.
Con esto ya terminamos nuestra piñata!
Espero que les guste tanto como a mí, creo que supere mis expectativas ya que no me tenía nada de fé jajajaj. Pronto les subiré como realicé la princesa Peach en foami.
Nos vemos en el próximo post🩷
Pd: MUY MUY importante, no olvidar hacerle la tira para guindar, este paso yo lo pasé por alto, por lo cual ahora debo modificar un poco la piñata.😅😩
For the best experience view this post on Liketu
Que lindoo .Me encanta ese color fucsia tan brillante😌
Que pases una lindo día🤗
Gracias! Igualmente🩷
Congratulations @elyyr! You have completed the following achievement on the Hive blockchain And have been rewarded with New badge(s)
Your next target is to reach 1250 upvotes.
You can view your badges on your board and compare yourself to others in the Ranking
If you no longer want to receive notifications, reply to this comment with the word
STOP