More than a look: The power of multi-cut makeup (Eng/Esp)

Hello my dear Hive friends!
Welcome to a new makeup tutorial. On this occasion, I wanted to get out of my comfort zone and experiment with a trend that fascinates me: multi-cut makeup.
¡Hola mis queridos amigos de Hive!
Bienvenidos a un nuevo tutorial de maquillaje. En esta ocasión, he querido salir de mi zona de confort y experimentar con una tendencia que me fascina: el maquillaje multi-cortes.
This style allows us to express our creativity to the fullest, playing with an explosion of colors, shapes and textures. It's as if my face becomes a blank canvas where I can give free rein to my imagination.
Este estilo permite expresar nuestra creatividad al máximo, jugando con una explosión de colores, formas y texturas. Es como si mi rostro se convirtiera en un lienzo en blanco donde puedo dar rienda suelta a mi imaginación.
If you dare to try this trend, I promise you that you will have a lot of fun and discover a new way to express your unique personality.
Si te animas a probar esta tendencia, te prometo que te divertirás muchísimo y descubrirás una nueva forma de expresar tu personalidad única.
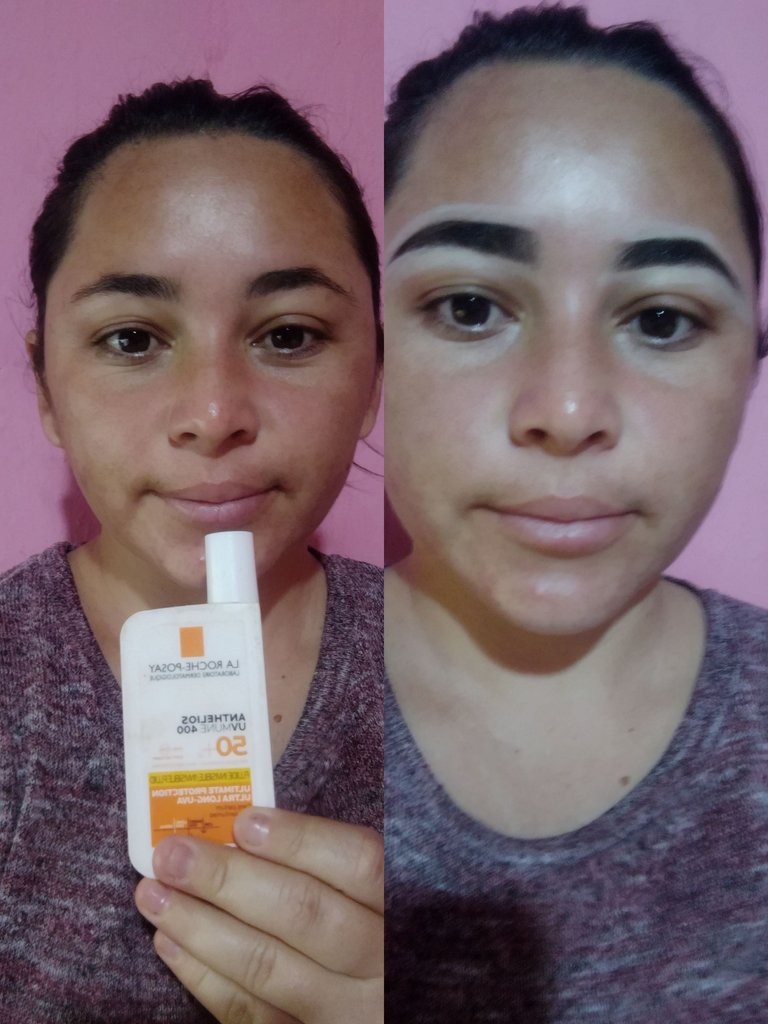
To start with this wonderful makeup, it is essential to prepare the skin, I apply a moisturizing cream all over your face, massaging gently until it is completely absorbed. This will ensure a uniform and smooth surface for makeup, in addition to keeping the skin hydrated and protected. Then, with a special pomade and an angled brush, define the eyebrows, then to finish, apply concealer to the edges to remove excess product.
Para comenzar con este maravilloso maquillaje, es fundamental preparar la piel, yo aplique una crema hidratante en todo tu rostro, masajeando suavemente hasta que se absorba por completo. Esto asegurará una superficie uniforme y tersa para el maquillaje, además de mantener la piel hidratada y protegida, luego con una pomada especial y un pincel angular pase a definir las cejas, luego para terminar aplique corrector en los bordes para quitar exceso de producto.
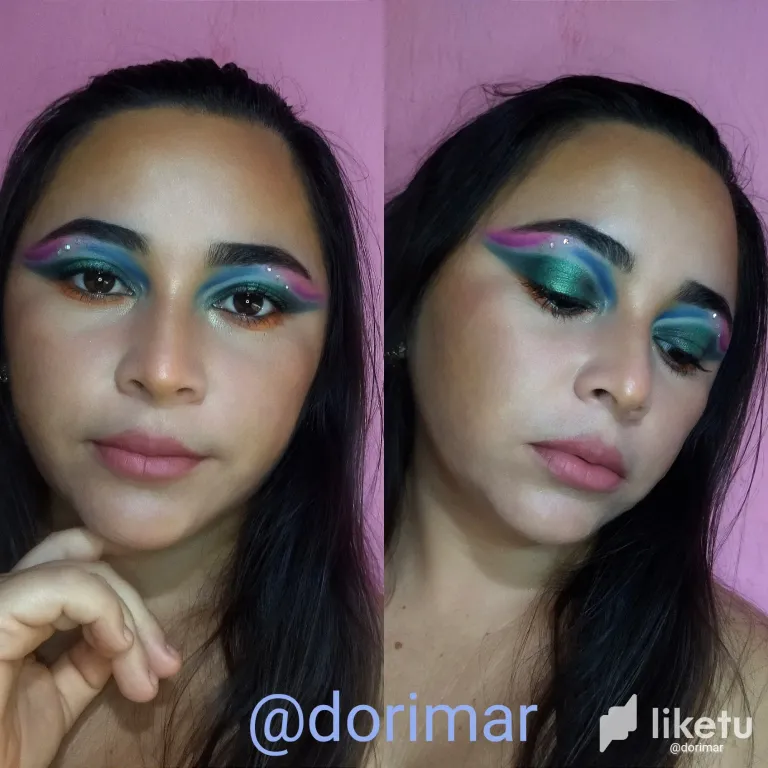
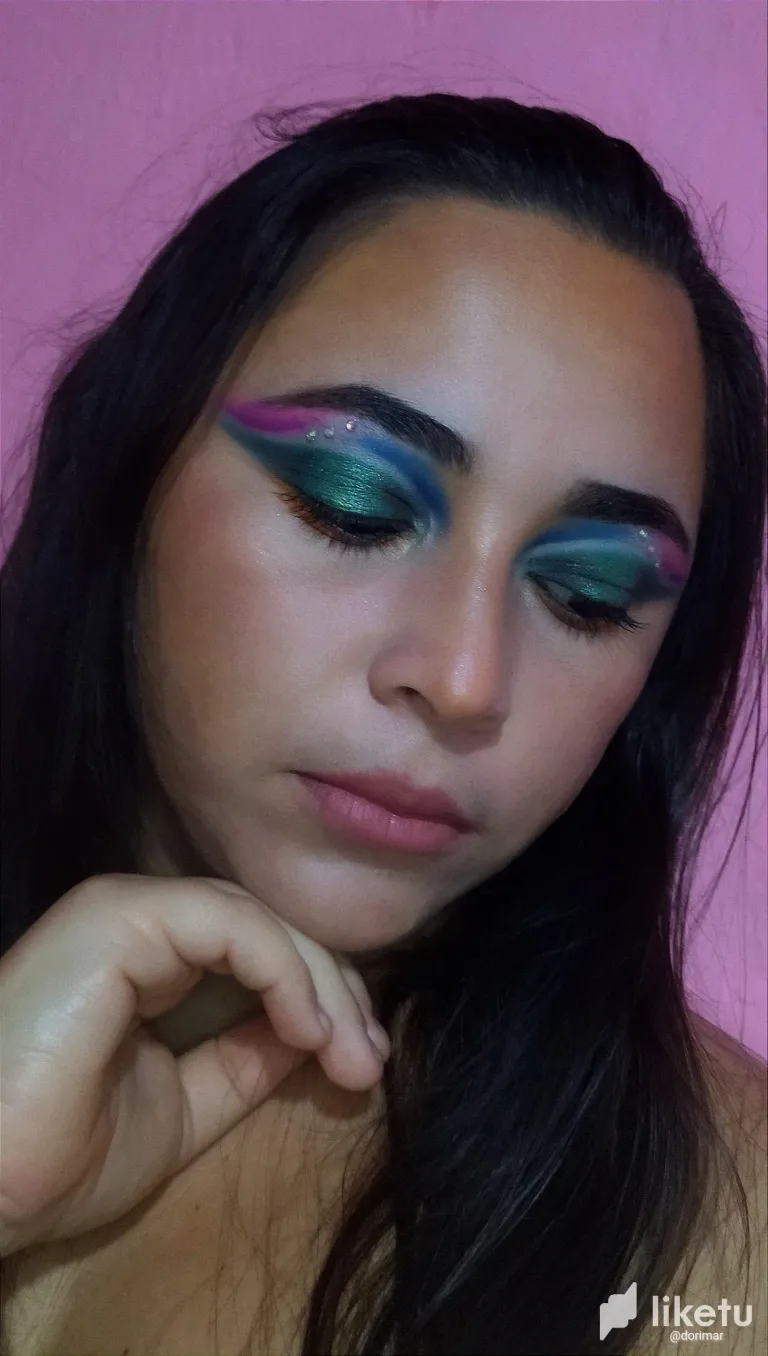
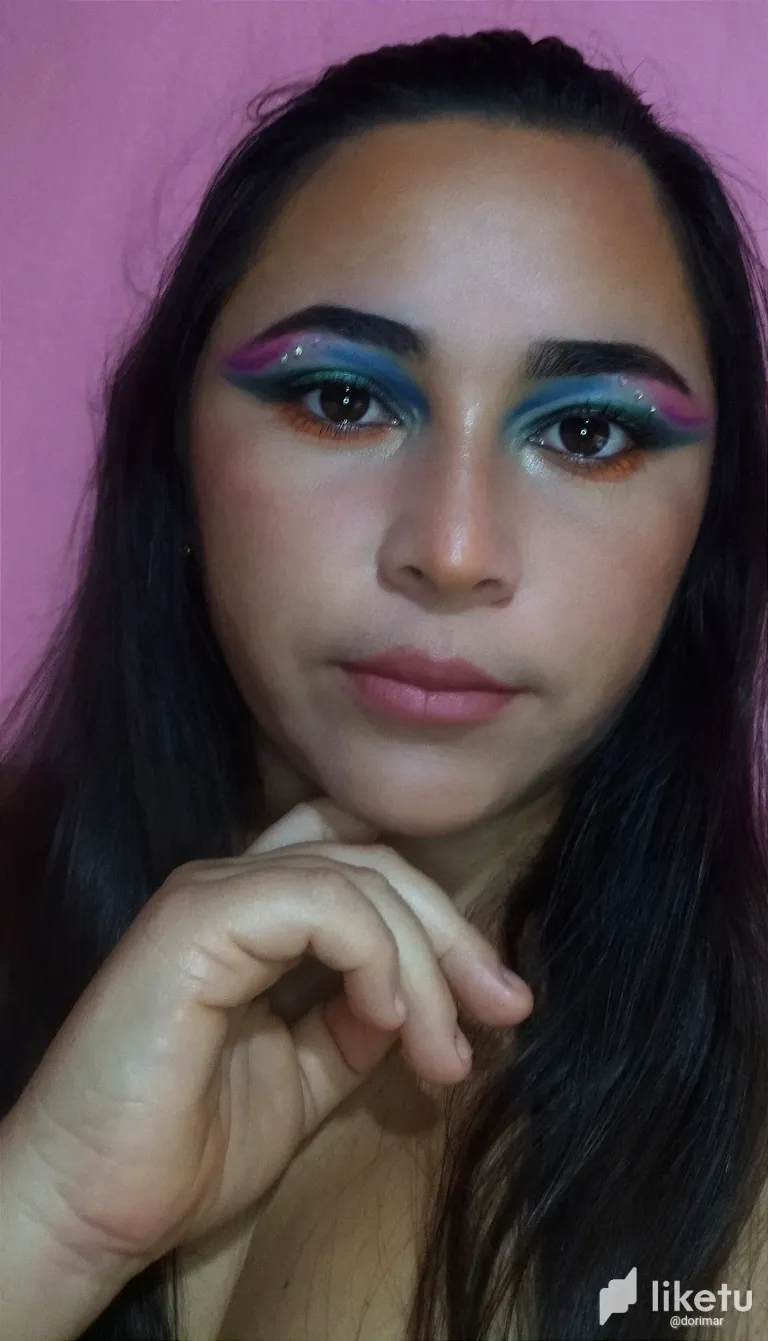
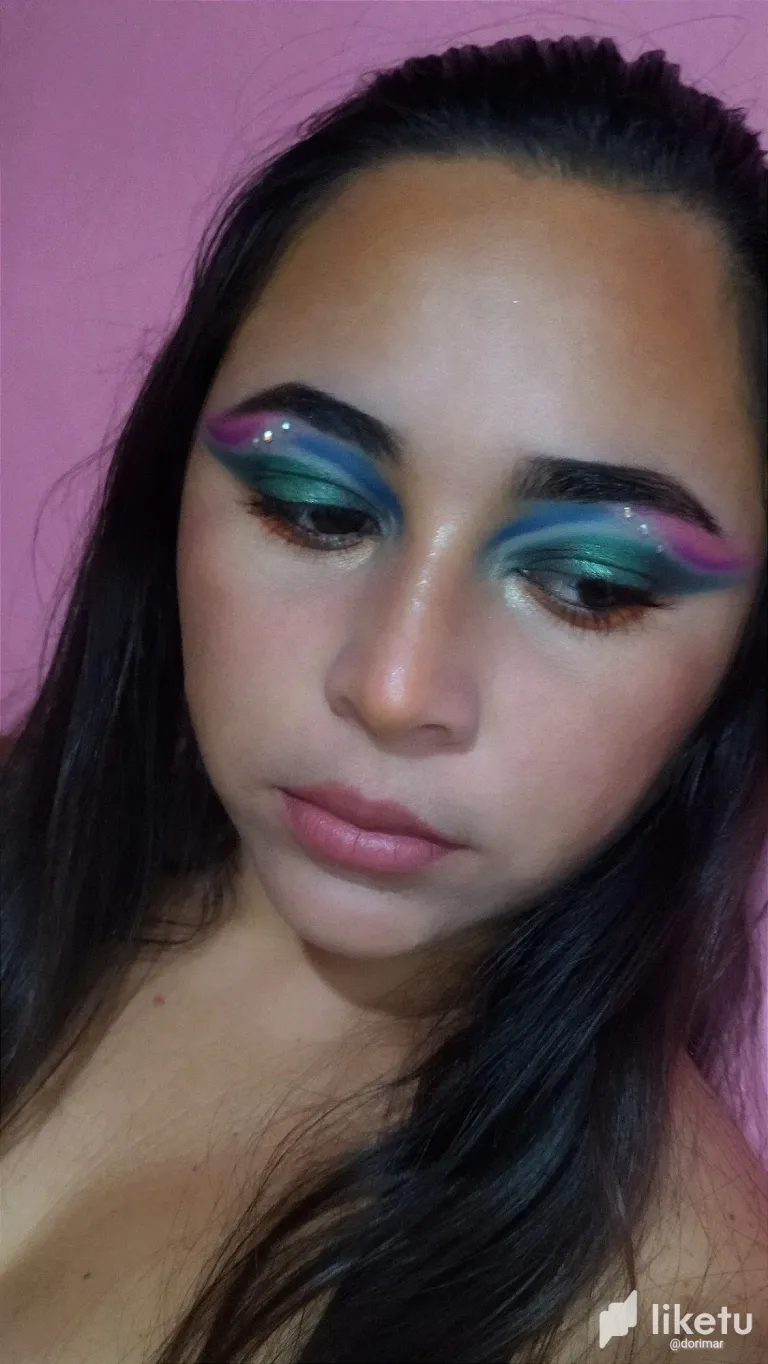
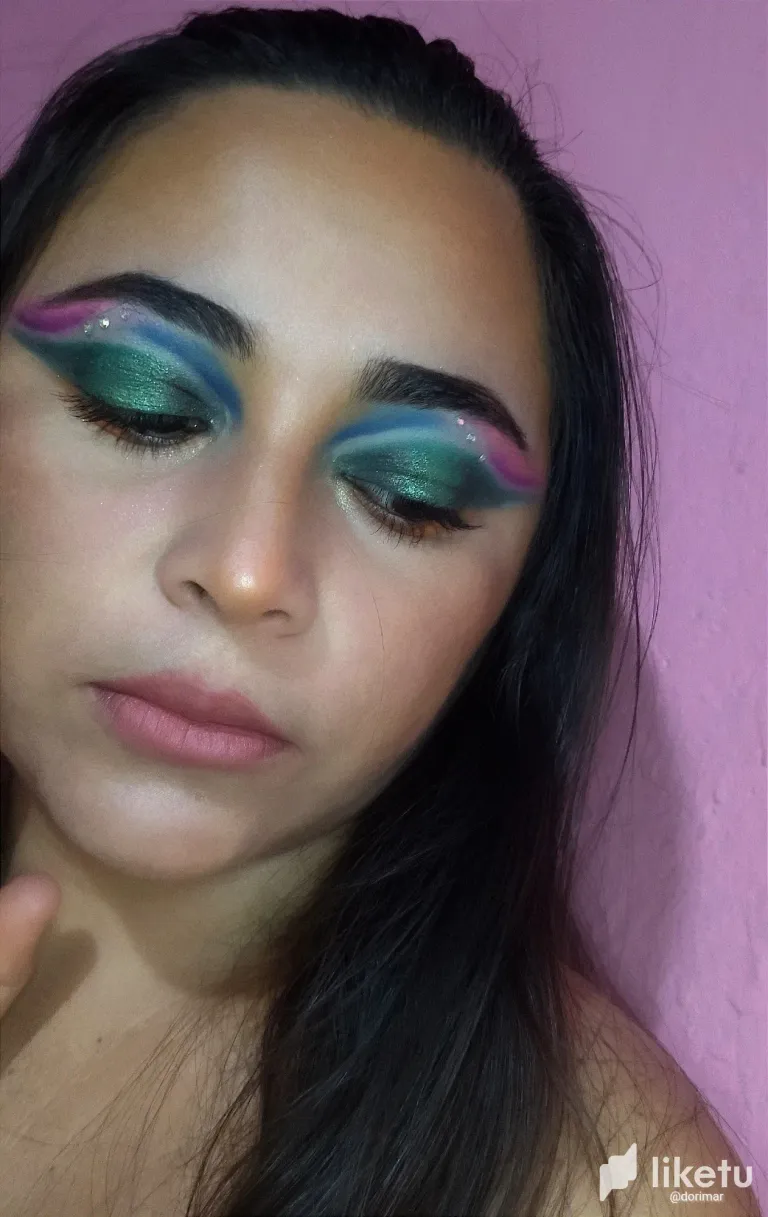
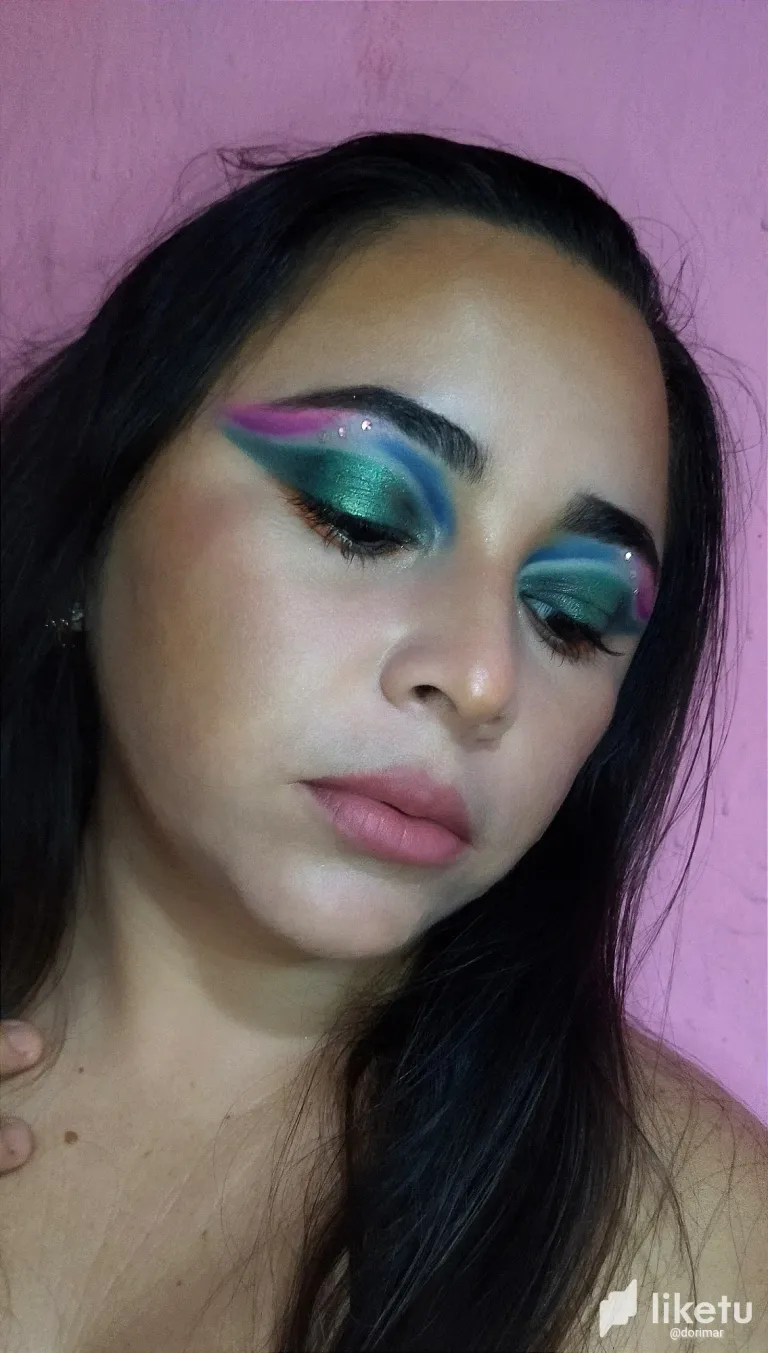
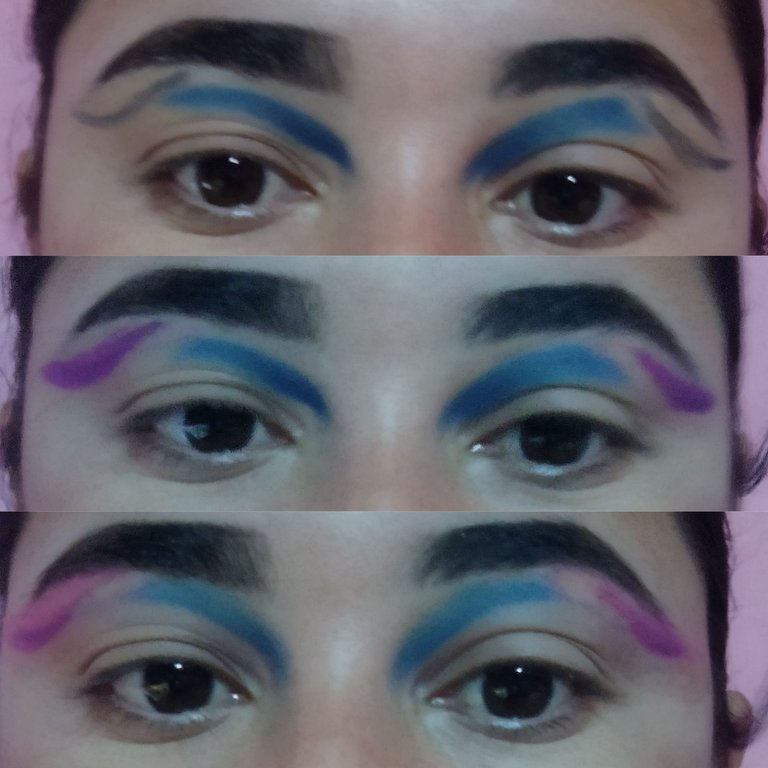
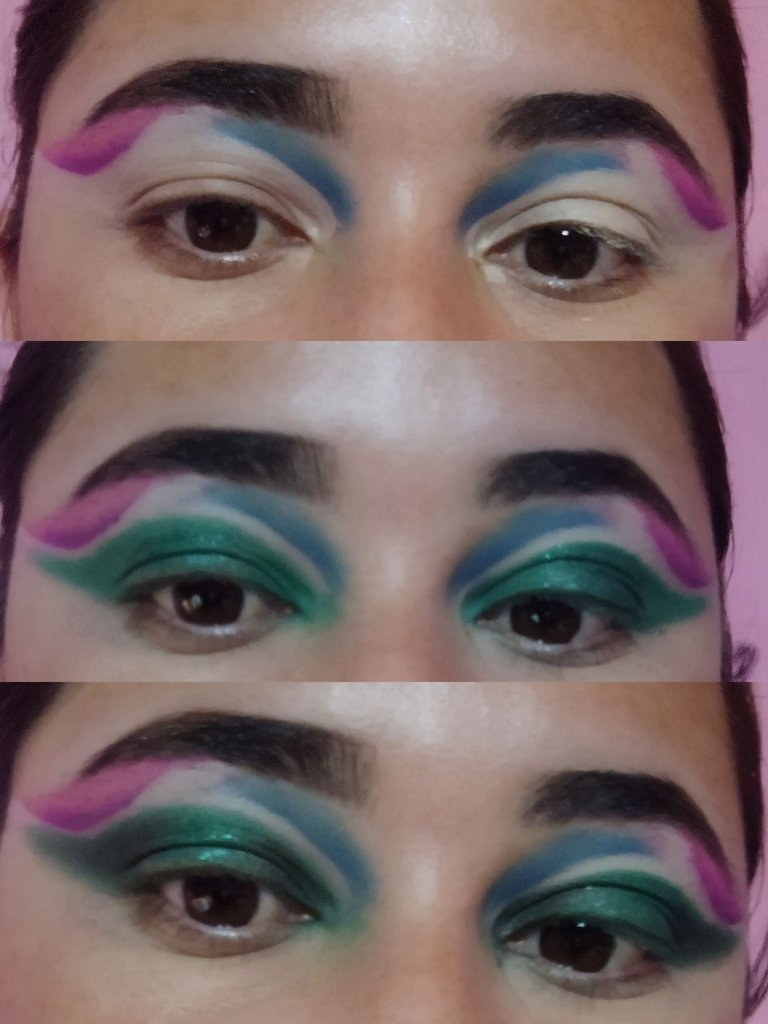
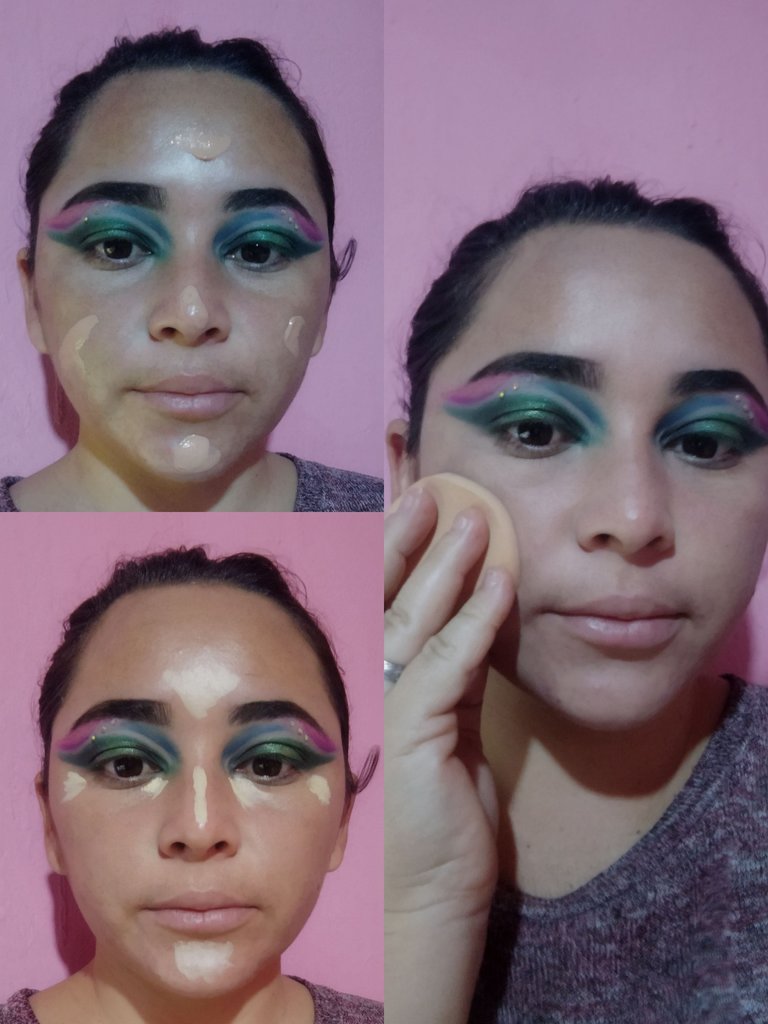
Apply concealer all over the eyelid to create a uniform canvas and cover any imperfections, blend the concealer well so that the lines are not noticeable, with a black eye pencil, I made two lines: one at the beginning of the eye socket and another from the half to the end of the eyebrow, then apply dark blue shadow on the first line and purple shadow on the second, blend the most natural finish, then to clean grab micellar water and a cotton swab, to clean the eye socket making two cuts, then I followed the shape of the cut and applied concealer to create a "blank canvas", then I applied a green shadow all over the mobile eyelid, and to complement the look I applied glitter in the center of the mobile eyelid and rhinestones in the blank space of the eye socket.
Aplique corrector en todo el párpado para crear un lienzo uniforme y cubrir cualquier imperfección, difumine bien el corrector para que no se noten las líneas, con un lápiz de ojos negro, hice dos líneas: una en el inicio de la cuenca y otra desde la mitad hasta el final de la ceja, luego aplique sombra azul oscuro en la primera línea y sombra morada en la segunda está la difumine acabado más natural, luego para limpiar agarre agua micelar y un hisopo, para limpiar la cuenca del ojo haciendo dos cortes, luego seguí la forma del corte y aplique corrector para crear un "lienzo en blanco", luego aplico una sombra verde en todo el párpado móvil, y para complementar el look aplique glitter en el centro del párpado móvil y pedrería en el espacio en blanco de la cuenca el ojo.
To unify the skin tone, I start by applying a makeup base of the same tone as my face, blending well with a special sponge until it is completely covered. Next, I apply concealer to the T zone (forehead, nose and chin) to camouflage imperfections and blend with the same sponge for a natural finish. Finally, I seal the makeup with translucent powder.
Para unificar el tono de la piel, comienzo aplicando una base de maquillaje del mismo tono de mi rostro, difumino bien con una esponja especial hasta cubrirlo por completo. A continuación, aplico corrector en la zona T (frente, nariz y barbilla) para camuflar las imperfecciones y difumina con la misma esponja para un acabado natural. Finalmente, sello el maquillaje con polvo traslúcido.
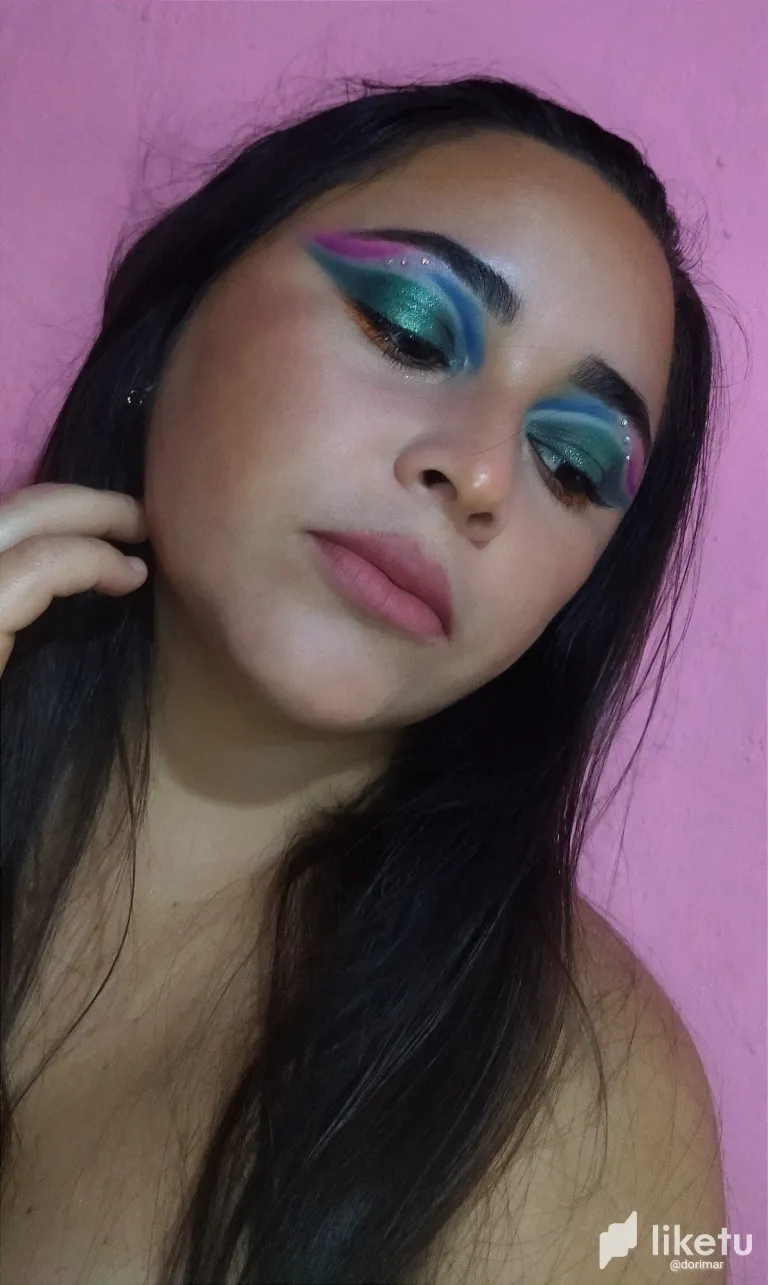
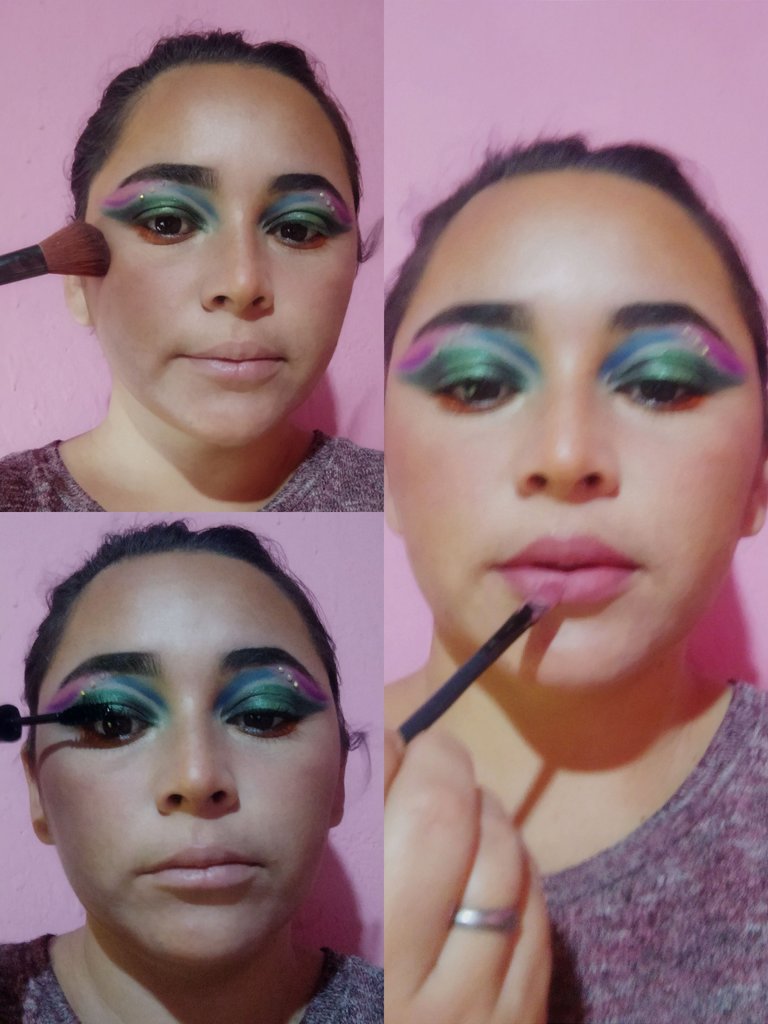
To finish this makeup I take a contour one tone darker than my skin, to mark the cheeks, jaw and sides of the nose. To finish, I applied blush on the cheeks to give a touch of color and luminosity, I also applied mascara to intensify the look and a lipstick in a nude tone to complete the look.
Para finalizar este maquillaje agarro un contorno un tono más oscuro que el de mi piel, para marcar las mejillas, la mandíbula y los lados de la nariz. Para finalizar, apliqué rubor en las mejillas para dar un toque de color y luminosidad, también apliqué máscara de pestañas para intensificar la mirada y un labial en un tono nude para completar el look.
And this is how this beautiful makeup turned out, remember that the most important thing is that you feel comfortable and confident with your look. Goodnight.
Y es así como quedó este lindo maquillaje, recuerda que lo más importante es que te sientas cómoda y segura con tu look. Feliz noche
For the best experience view this post on Liketu
!LOL
Posted using Hive Images
lolztoken.com
I understand they're really marking headlines.
Credit: reddit
@dorimar, I sent you an $LOLZ on behalf of hivephoto
(6/10)
Delegate Hive Tokens to Farm $LOLZ and earn 110% Rewards. Learn more.