HOW I MADE A BLOUSE WITH 720° PEPLUM FLARE FOR A CUSTOMER
Hey lovelies ❤️
It's your favorite girl @debbie-ese 😍
Welcome to my blog 🤗
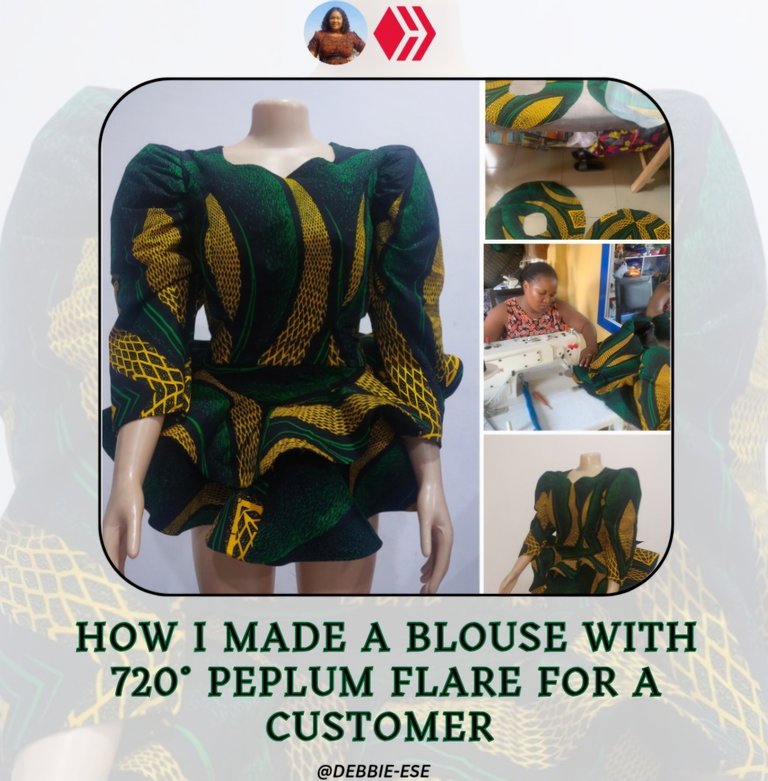
In today's post I will be sharing with you how I made a Peplum blouse for a customer. The full outfit is a peplum blouse and a mermaid skirt but the focus of this post will be on the blouse only.
The customer that owns the outfit made something similar sometimes last year but she complained that the peplum effects on the blouse was not the same as when she first made it after she washed the outfit like two to three times. In other words, the peplum style on the blouse was standing firm before she washed it but later lost that struture afterwards.
So, I told her that I made use of gumstay for the previous outfit but if she wants the one that the peplum effects will be somewhat permanent we would use a peplum stay. However, I made her understand the major reason why I opted for gumstay at first which is because of the price of peplum stay. 1 yard of peplum stay is about #2,000 while 1 yard of gum stay is about #300 - so considering the price most people opt for the cheaper one but as she has requested for the peplum stay I will do it for her, at extra cost.
Before we continue, let's take a moment to define peplum. According to Merriam-Webster Dictionary, Peplum is a short section attached to the waistline of a blouse, jacket, or dress. In short, peplum is a trendy blouse that is mostly worn by women that has a gathered extension, not really ruffles but looks more like flares around the waistline.
Materials Needed (to make a peplum blouse)
- 2 yards of fabrics (ankara)
- 1½ yards of lining
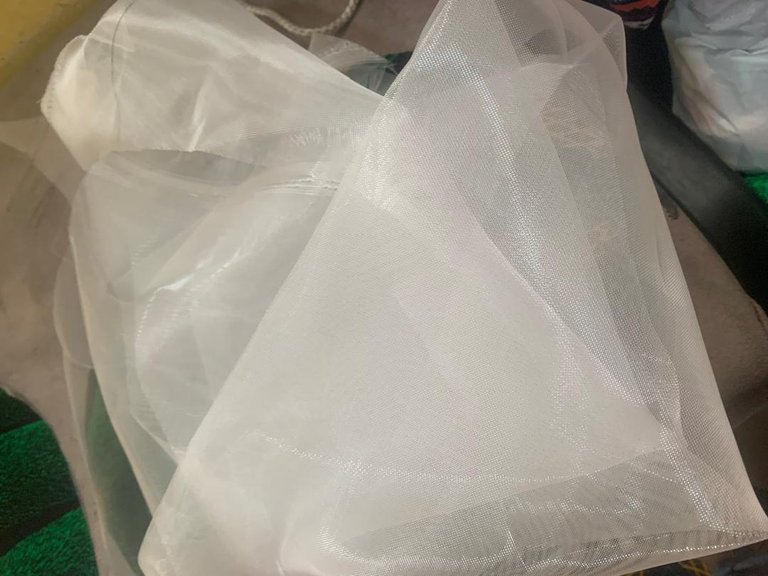
- 1½ yard of peplum stay
- Hemming gum
- Matching thread
- Tailoring chalk
Step by Step
Remember that this tutorial is just for the peplum flare.
The measurements I used for the peplum is the waist (40") and the length of the blouse (28"), length of peplum flare is the full length of the blouse minus the full length of the bustier. That is, 28" - 19" = 9".
Now that the measurements is in place, we will move to cutting the fabric by folding the fabric into four layers. Bearing in mind that her waist is 40", we will divide it by 4 which will give us 10". If we were doing a 360° flare we would have used the 10" for the round circumference of the flace but we are doing a 720° flare, so the 10" will be divided by 2 which is 5".
Now, at the top edge of the folded fabric place your tape rule in a C-curve shape and ensure that it is up to 5", then use your chalk to trace out the C-curve shape.
To get the length of the peplum flare, at that line that you traced use your measuring tape to measure 9" round each side of the line (from one end to the other) and add extra 1" for seam allowance. So you end up having a large C at the down part and a small C at the upper part.
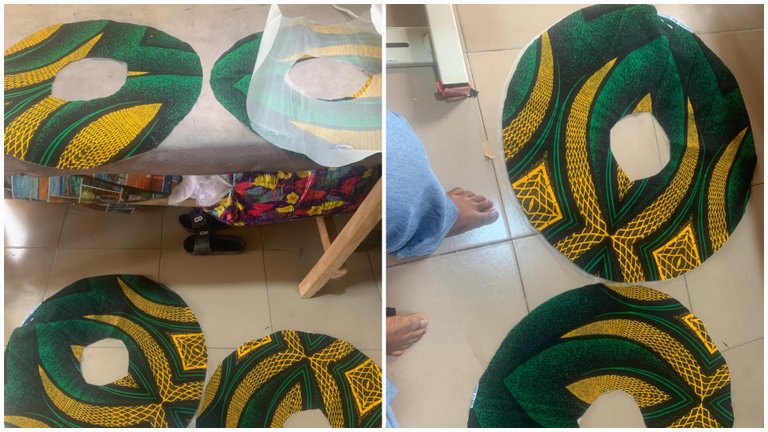
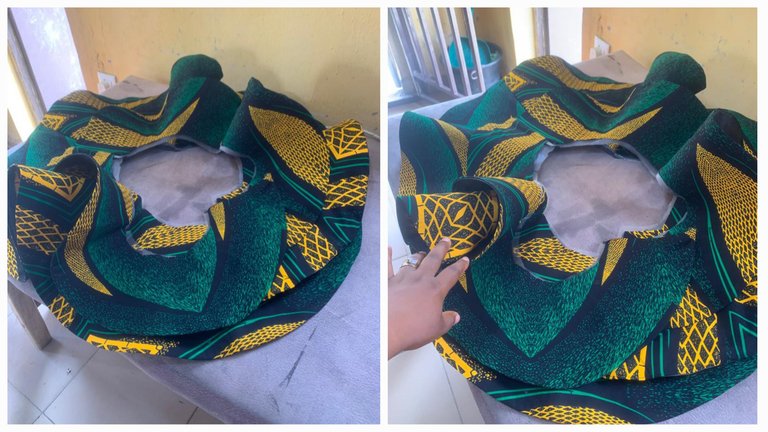
So, you cut it out. By the time you open up the flare you have a round circle with a round small hole in the middle.
Next, use this flare to cut out another flare. Then in cutting the third and fourth flare we will be using the same waist measurement but the length will be different - we will be using 6".
So use the flare that you have cut to replicate on your lining and peplum stay.
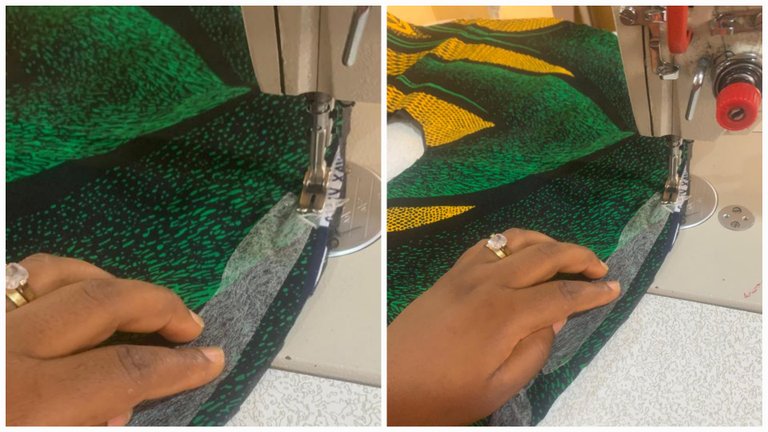
Now place the right side of the fabric on your cutting table and place the lining on it and place the peplum stay on the lining and use your pins to hold it so that it won't shift.
Then head to your sewing machine and place your Hemming gum on the part you will stitching on the pinned fabric, lining and peplum stay. Then, sew it round.
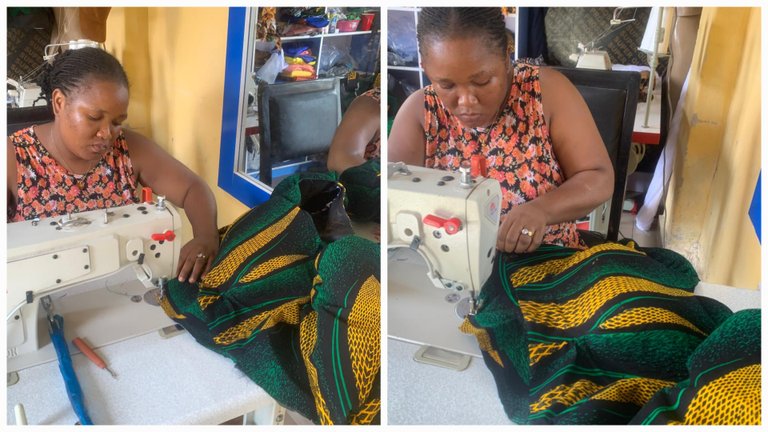
Afterwards, turn it to the right side and iron it properly.
So find a way to open one side of each circle then attach the two big flare together to make one big circle, repeat the process for the two small flare too. Ensure to give it a good press.
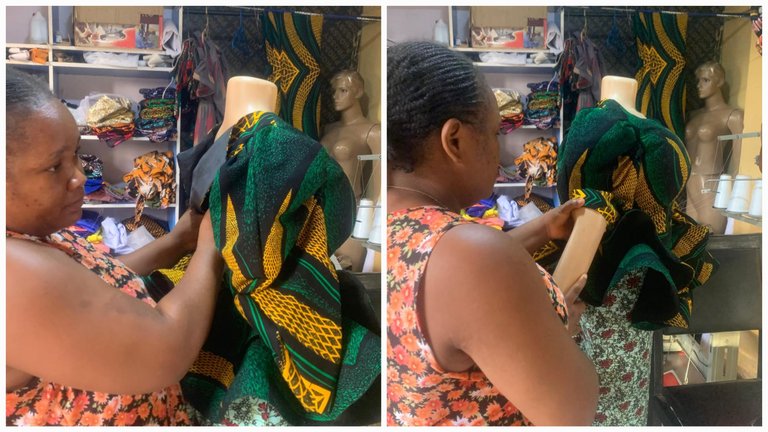
Then attach to the waistline of the blouse.
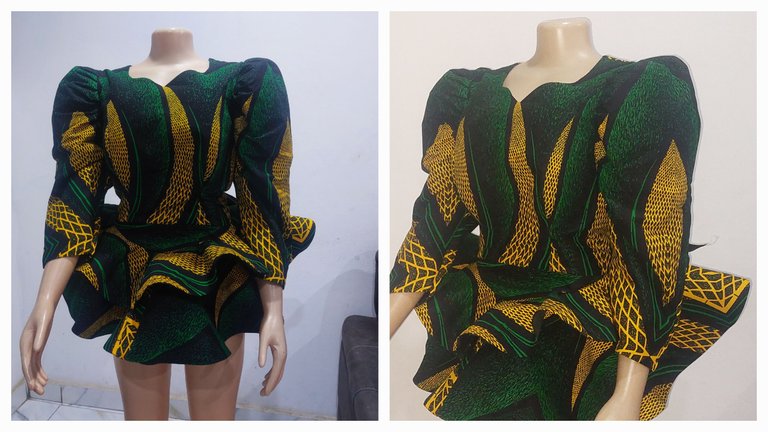
Your peplum blouse is ready.
- The picture of the blouse
Thanks for reading and see you in my next one.
ABOUT ME
Just a quick reminder:
The text and photos on this blog was created by me, unless I state otherwise.
The cover images are designed using Canva with strict adherence to elements that are licenced for use under their terms.
Photographs are taken with my Samsung Galaxy A52 - 64MP Camera and other amazing features that absolutely capture the moment in high quality.
Lastly, do not use any of my content either text or image without asking me for authorisation. In other words, unauthorised used of my content is highly prohibited.
View or trade
LOHtokens.@debbie-ese, You have received 1.0000 LOH for posting to Ladies of Hive.
We believe that you should be rewarded for the time and effort spent in creating articles. The goal is to encourage token holders to accumulate and hodl LOH tokens over a long period of time.
Amazing!. I love the colors combinations.
Thank you.
The fabric is beautiful and you made an elegant style with it, I love the beautiful outcome and the structure of the flare. Thanks for sharing.
Thanks so much @bimpcy