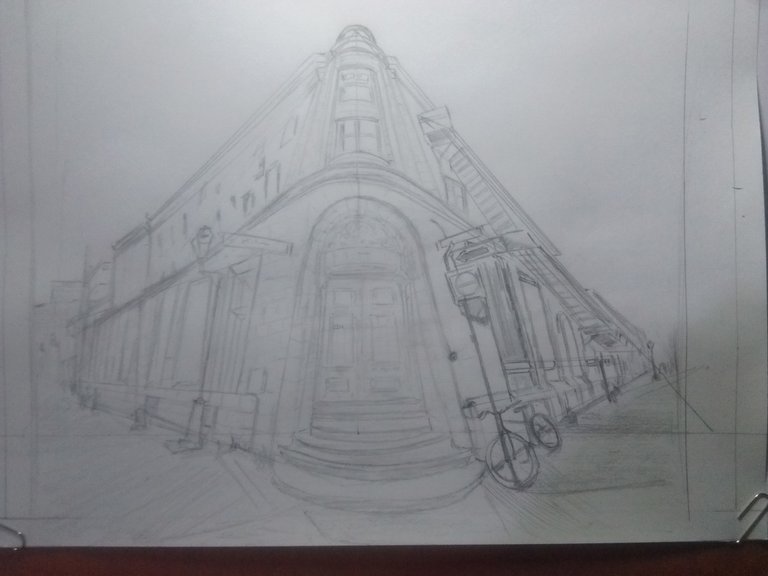
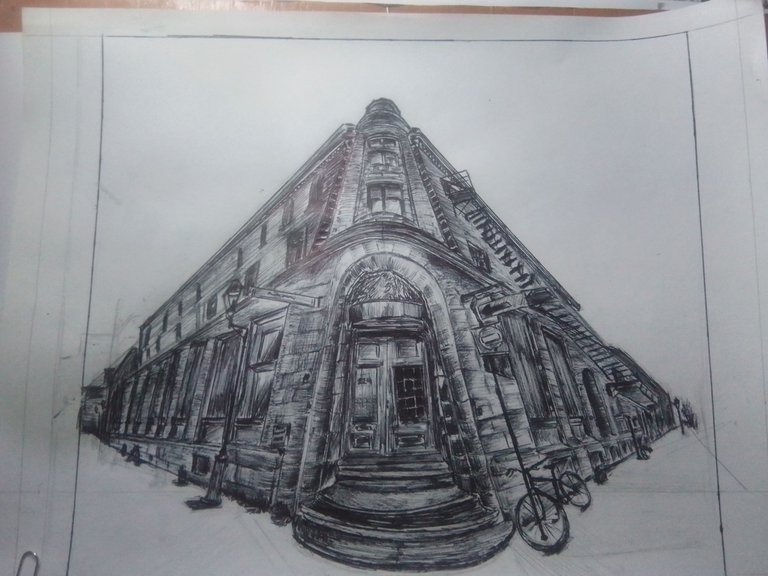
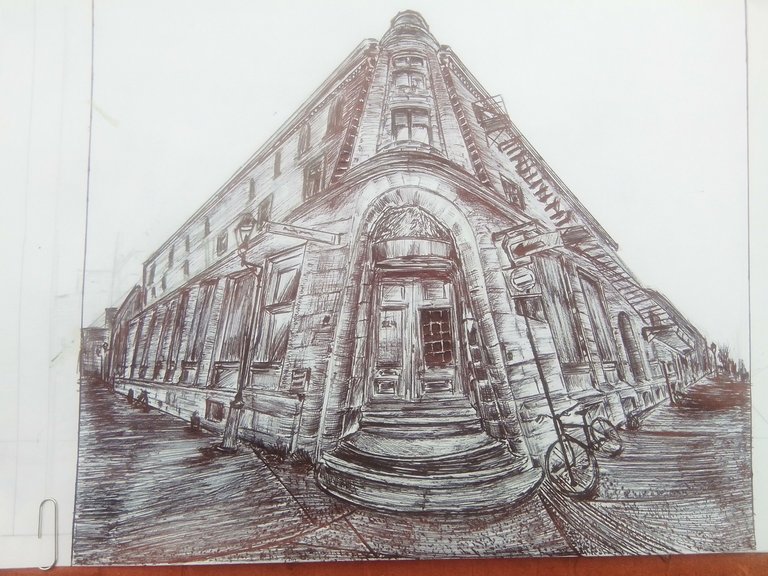
 Hola de nuevo, comunidad de HiveDiy, soy yo nuevamente, Cristhenos. En esta ocasión les presento mi último post dibujando paisajes, ya que por el momento quiero reenfocarme en el realismo con lápiz y volver a retomar mis prácticas de anatomía. Pero, como siempre, les estaré dando algunos consejos y explicando cómo logré ciertas texturas en el dibujo. Esta vez me tocó dibujar un paisaje con 3 puntos de fuga, el cual es muy parecido a tener 2 puntos de fuga, con la diferencia de que al tener 3 puntos de fuga da esa sensación de estar mirando la estructura o el paisaje desde abajo y mirar hacia arriba. Bueno, no los entretengo más, así que los dejo con el resto del post.
Hello again, HiveDiy community, it's me again, Cristhenos. This time I present you my last post drawing landscapes, since for the moment I want to refocus on pencil realism and go back to resume my anatomy practices. But, as always, I will be giving you some tips and explaining how I achieved certain textures in the drawing. This time I had to draw a landscape with 3 vanishing points, which is very similar to having 2 vanishing points, with the difference that having 3 vanishing points gives that feeling of looking at the structure or landscape from below and looking up. Well, I won't keep you any longer, so I'll leave you with the rest of the post.
Materiales
Los materiales que utilicé para este dibujo fueron:
1 hoja blanca común
1 lápiz H o 2H
1 regla y un lapicero
Materials
The materials I used for this drawing were:
1 common white sheet of paper
1 H or 2H pencil
1 ruler and a pencil
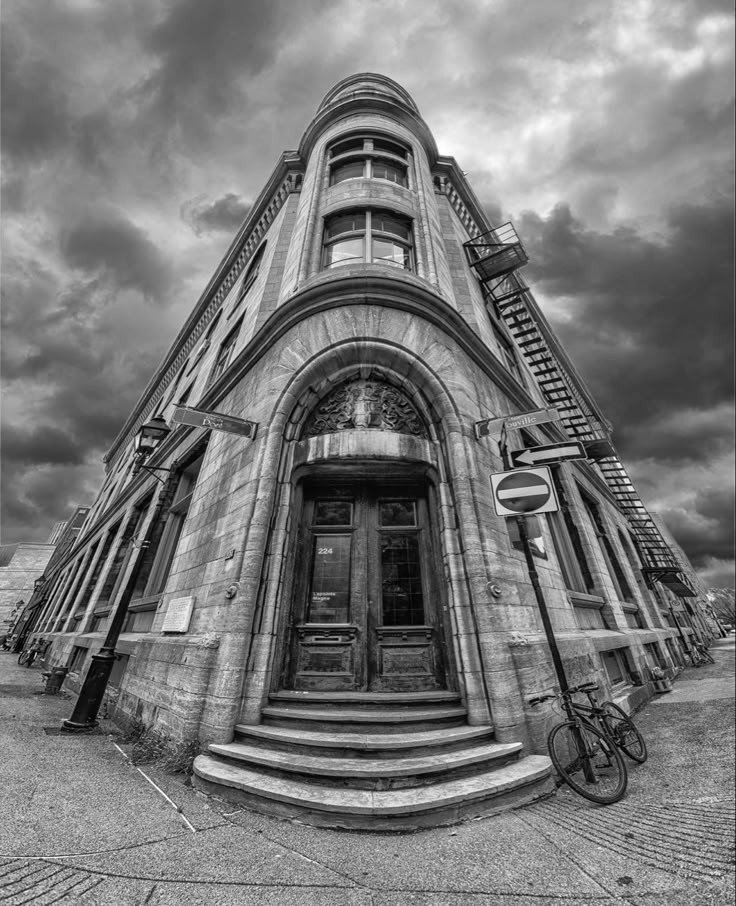
Lo primero será encontrar una imagen como referencia; les recomiendo bastante la app de Pinterest, ya que la mayoría de mis referencias las encuentro de allí. Así que para este dibujo utilizaré esta imagen como referencia:
The first thing will be to find an image as a reference; I highly recommend the Pinterest app, as I find most of my references from there. So for this drawing I will use this image as a reference:
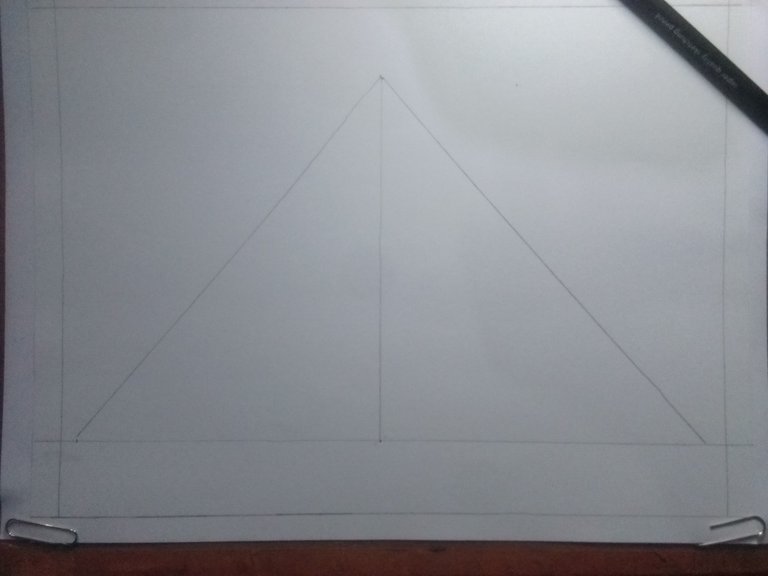
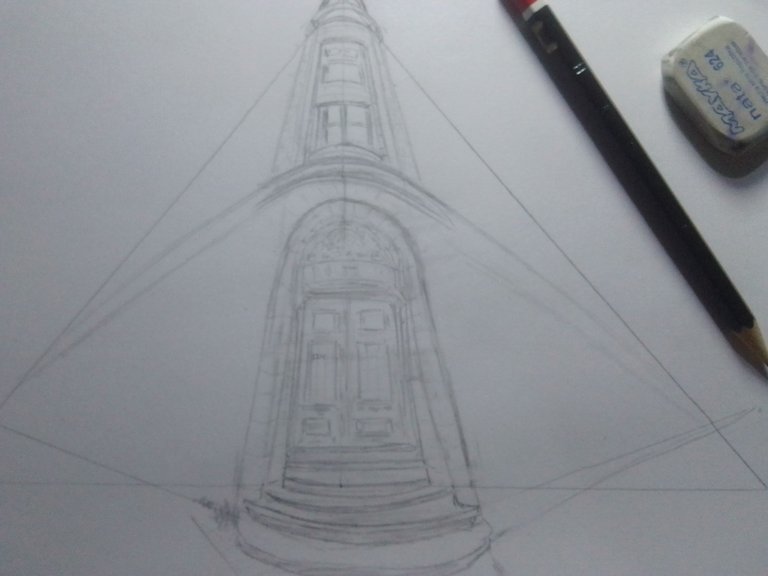
Una vez ya mentalizado de lo que quería dibujar, pasamos a trazar la línea de horizonte, la cual servirá para tener en cuenta la dimensión de la estructura. También vamos a trazar una línea en el centro de nuestra línea de horizonte, esta con el fin de determinar la altura de nuestro dibujo, y después vamos a agregar dos líneas verticales que se van a conectar con los extremos de la línea de la línea de horizonte y de esta manera queda una especie de triángulo.
Once we have the idea of what we want to draw, we will draw the horizon line, which will serve to take into account the dimension of the structure. We are also going to draw a line in the center of our horizon line, this in order to determine the height of our drawing, and then we are going to add two vertical lines that will connect with the ends of the horizon line and in this way we have a kind of triangle.


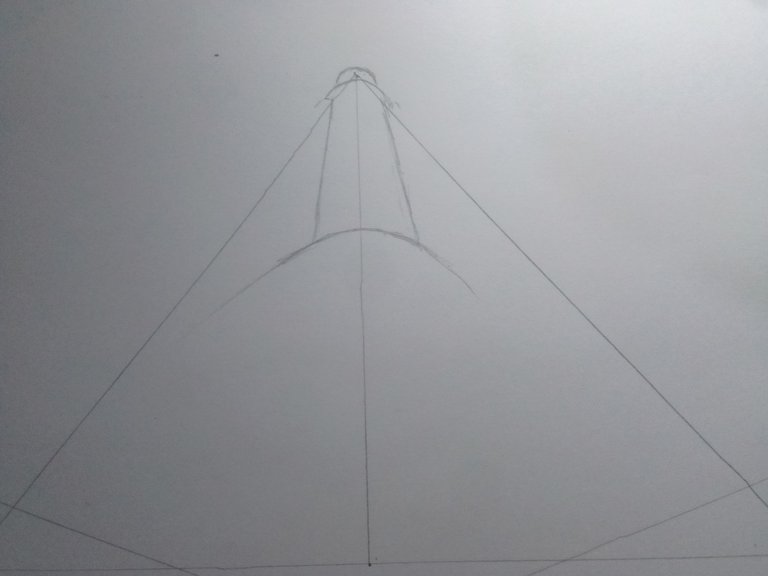
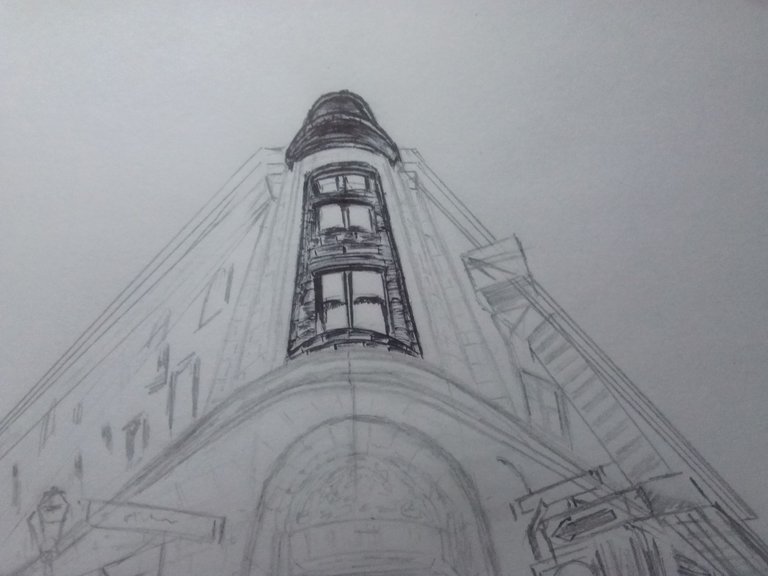
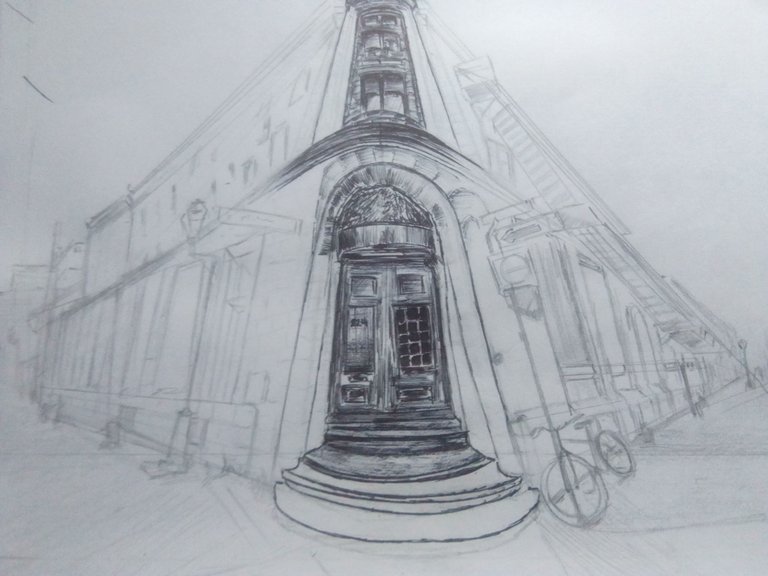
Una vez tengamos la estructura lista, pase a dibujar el bosquejo inicial, empezando por la parte del en medio de la fachada. Esta parte es bastante importante, ya que es la responsable, desde mi punto de vista, de lograr la sensación de altura que posee esta estructura. Al principio simplemente la dibujé lo más simple posible para luego agregar más detalles, tanto en la parte de arriba como en la puerta de abajo.
Once we have the structure ready, let's draw the initial sketch, starting with the middle part of the facade. This part is quite important, since it is responsible, from my point of view, for achieving the sensation of height that this structure has. At the beginning I just drew it as simple as possible and then I added more details, both in the upper part and in the door below.
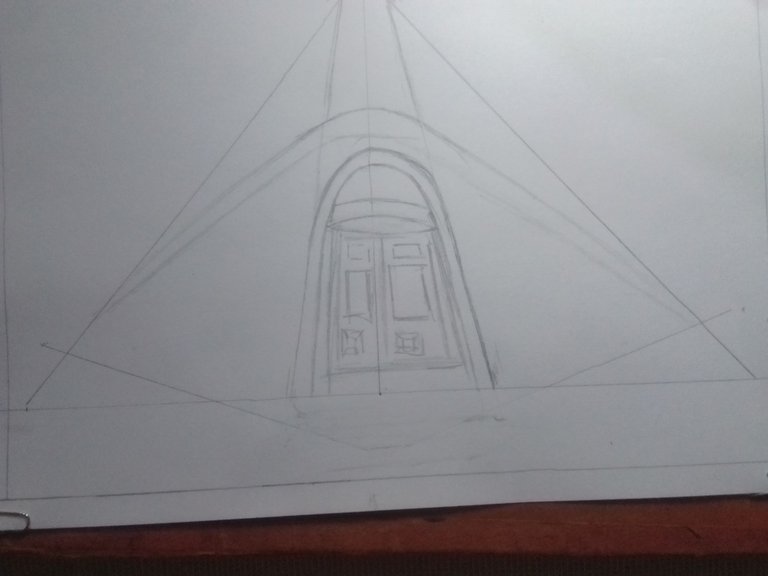
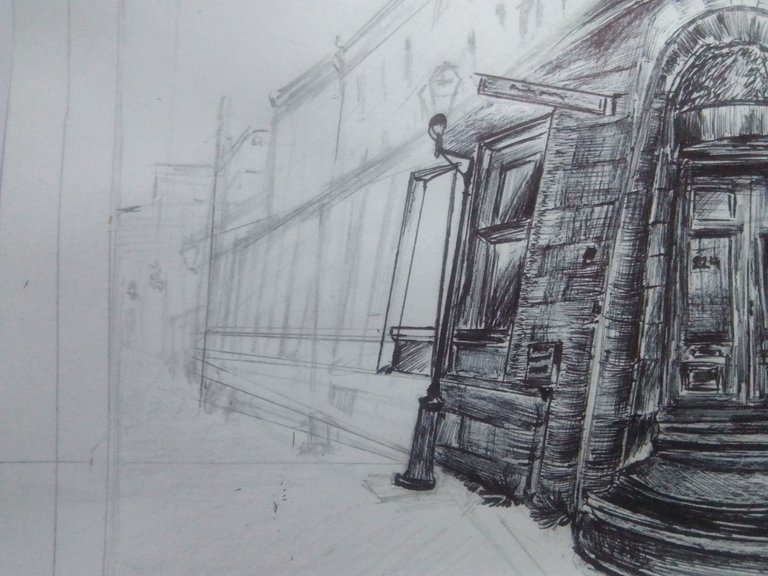
Ya con este punto de partida empecé con la parte izquierda, la cual es un poco más sencilla que la parte derecha. Aquí podemos ver algunas estructuras bastante básicas como ventas, unos faroles, un cartel y algunos diseños que no son tan visibles por el lápiz. Una cosa de la que me percaté fue que no incliné mucho esta parte y quedó un poco dispareja a diferencia de la parte derecha, pero este fue un error que más adelante voy a corregir.
With this starting point I started with the left part, which is a bit simpler than the right part. Here we can see some fairly basic structures such as sales, some street lamps, a sign and some designs that are not so visible by the pencil. One thing I noticed was that I didn't tilt this part much and it was a little uneven unlike the right part, but this was a mistake that I will correct later.
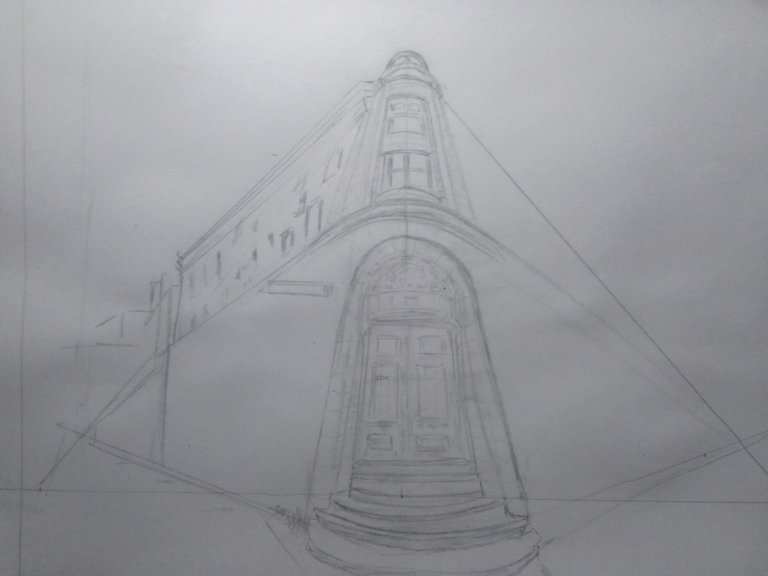
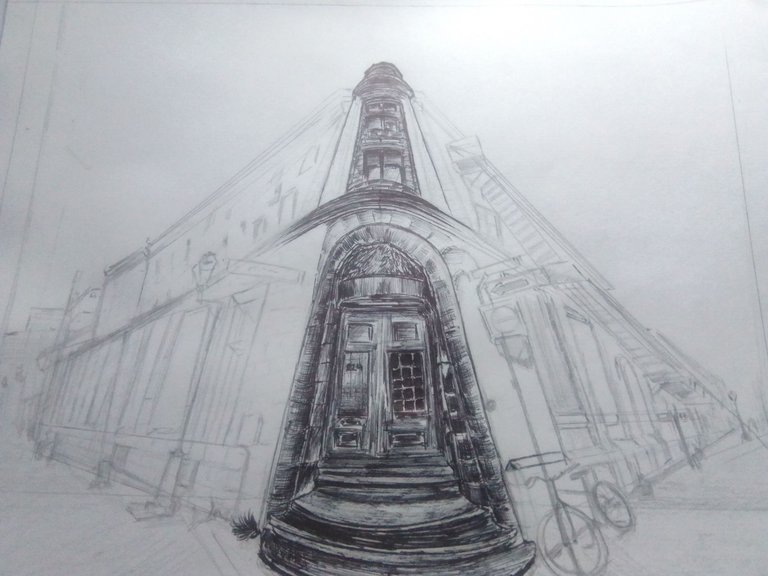
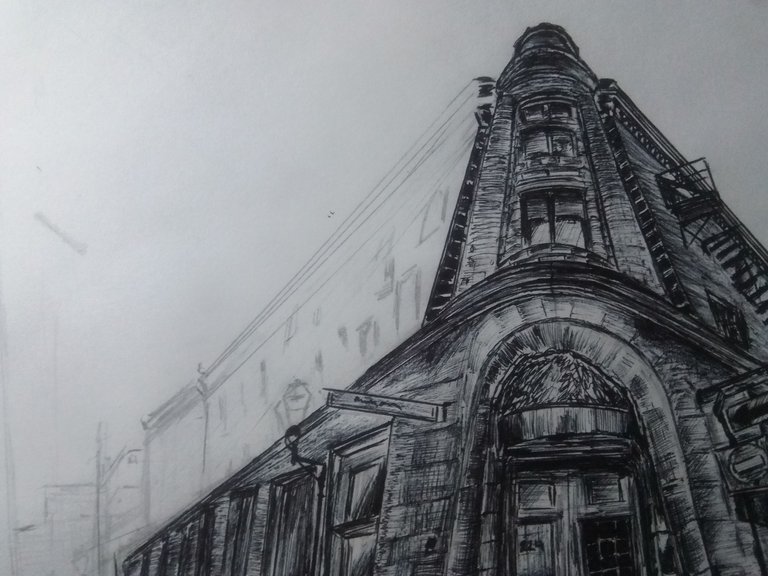
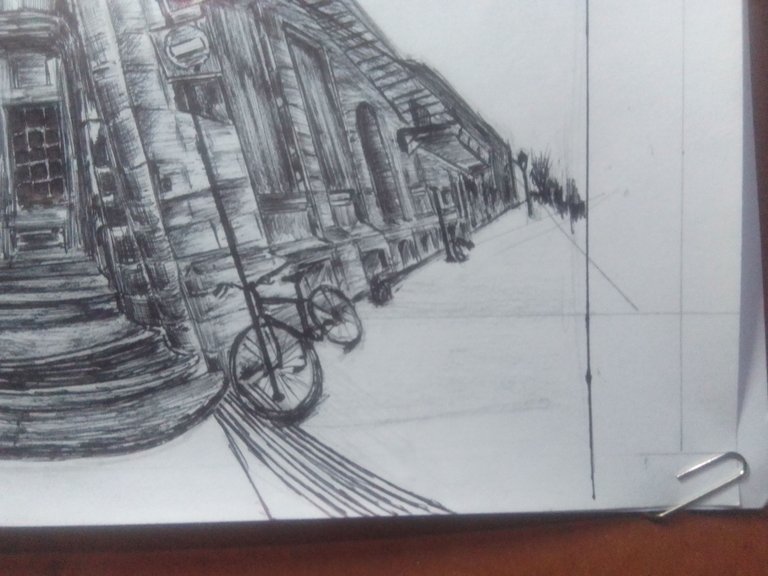
Con la parte izquierda terminada, pasé a la parte derecha. Lo primero que hice fue empezar desde arriba, desde esa parte que parece un mirador, la cual tiene una conexión de escaleras. Desde ahí fui agregando poco a poco más detalles como las señales, ventanas y una que otra bicicleta que estaba por ahí y listo.
With the left part finished, I moved on to the right part. The first thing I did was to start from the top, from that part that looks like a viewpoint, which has a stairs connection. From there I added little by little more details such as signs, windows and a bicycle that was lying around and that was it.

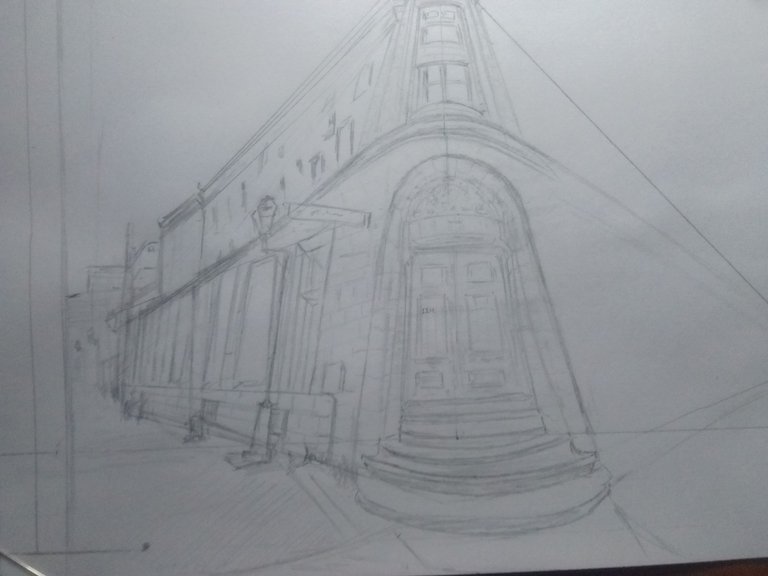
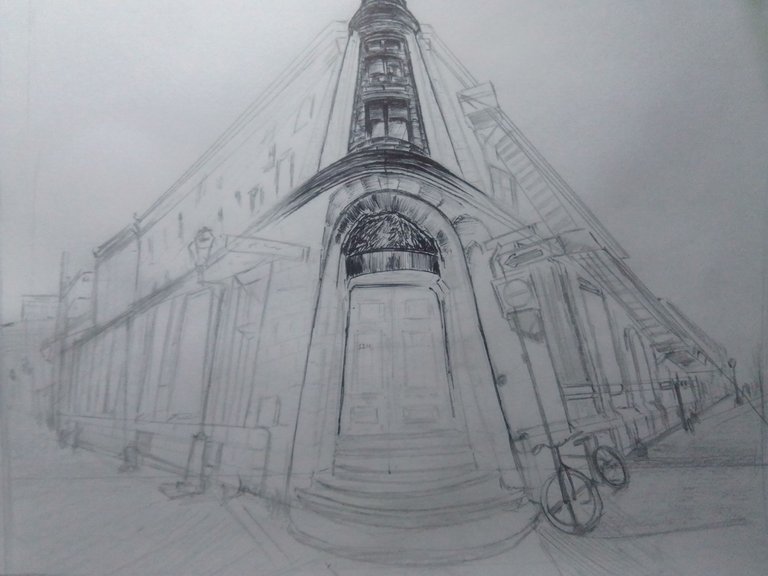
Ya con todo el boceto listo, paso a la mejor parte: el coloreado con el lapicero, empezando desde el centro de la estructura.
Now that the sketch is ready, I move on to the best part: coloring with the pencil, starting from the center of the structure.

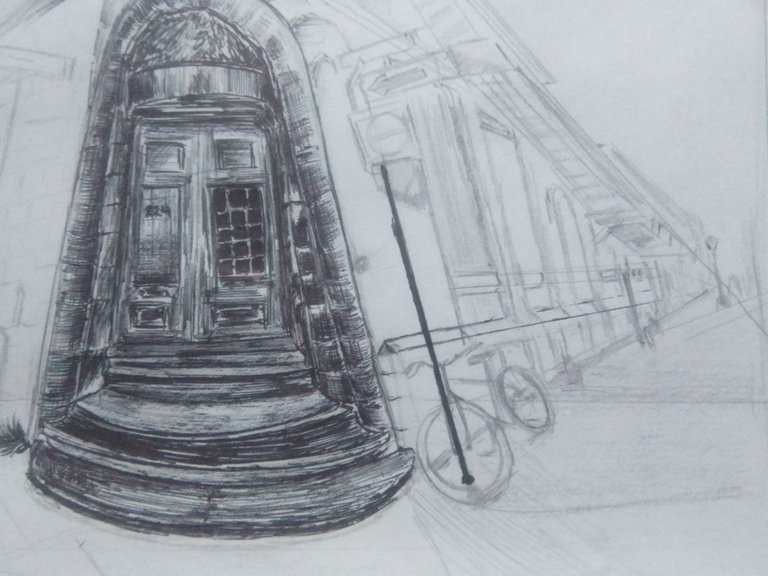
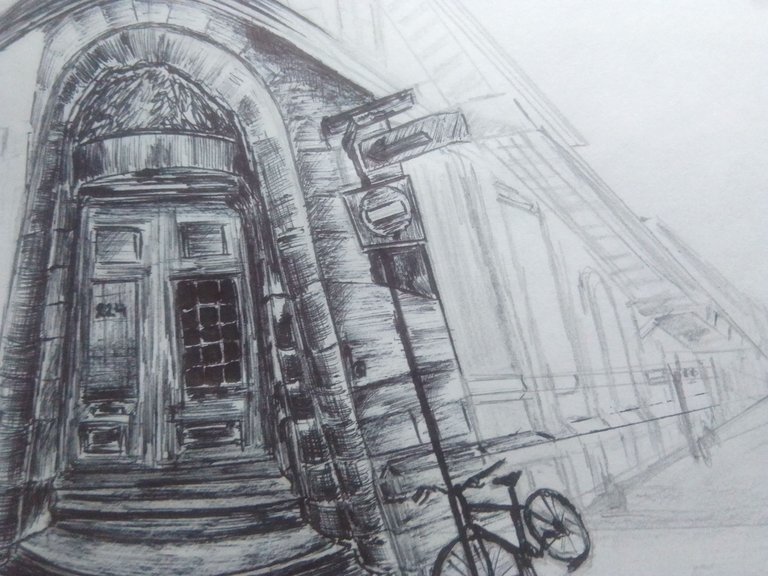
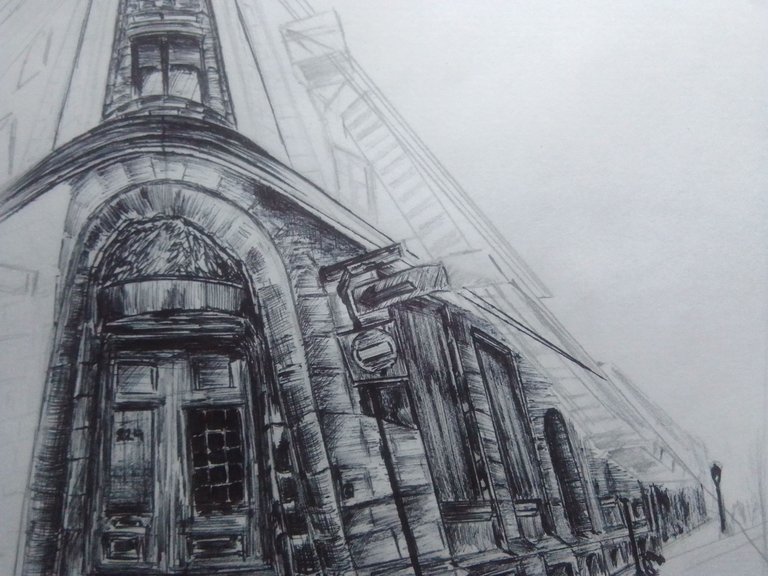
Solamente me enfoqué en crear líneas muy juntas y bien marcadas para simular la distancia a la que se encontraban, a diferencia de la puerta de enfrente. Aquí sí tardé un buen rato creando detalles bastante visibles, ya que es la parte más cercana de la imagen. Son detalles bastante simples, solamente son líneas finas en los lugares con poca sombra e ir oscureciendo cuando sea necesario. También tuve un patrón específico para ciertas zonas, como las columnas, donde solo utilizo líneas menos marcadas que van de derecha a izquierda y para oscurecer hago líneas más oscuras de arriba abajo.
I only focused on creating very close and well marked lines to simulate the distance between them, unlike the front door. Here I spent a long time creating quite visible details, since it is the closest part of the image. The details are quite simple, just thin lines in the places with little shadow and darken when necessary. I also had a specific pattern for certain areas, like the columns, where I only use less marked lines that go from right to left and to darken I make darker lines from top to bottom.
Con toda la zona central casi lista, podemos pasar a la parte derecha, empezando principalmente por esos objetos más visibles, tratando de simular para no entrar en tanto detalle.
With the entire central area almost ready, we can move on to the right side, starting mainly with those objects that are more visible, trying to simulate so as not to go into so much detail.
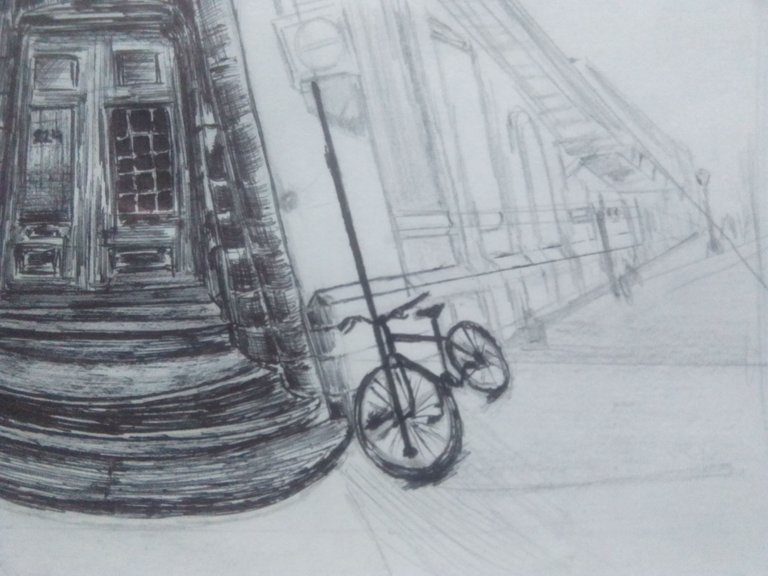
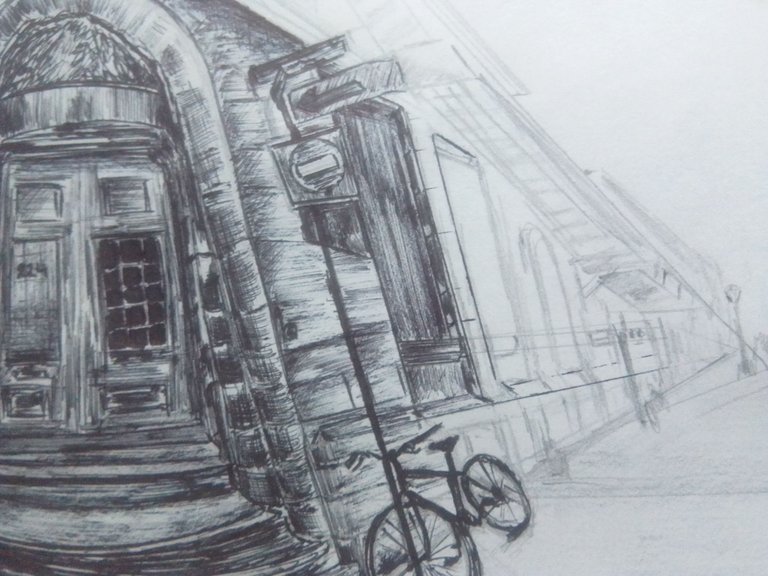
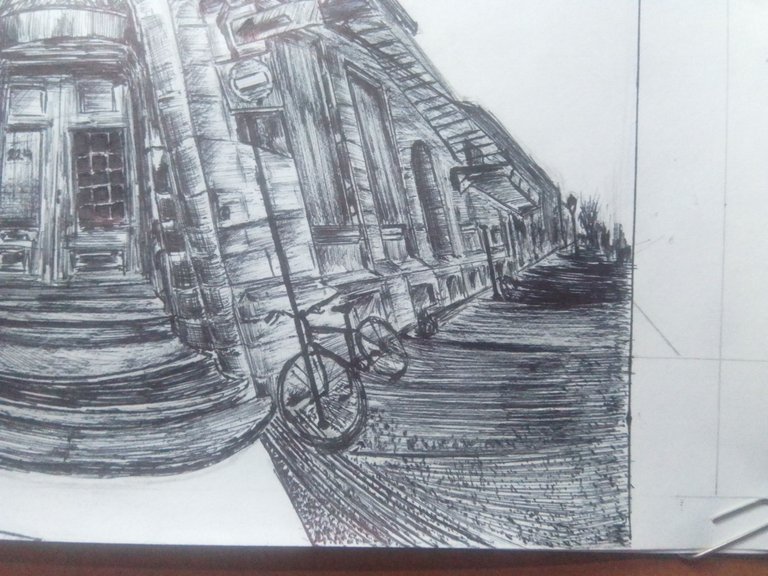
Después pasé a los ladrillos de la pared, haciendo líneas en una sola dirección para simular esta textura, así como remarcar esos carteles de señalización que están presentes en el poste.
I then moved on to the bricks on the wall, making lines in one direction only to simulate this texture, as well as highlighting those signposts that are present on the post.
Para las ventas seguí un patrón igual al anterior, o sea, líneas hacia la derecha para las paredes y para las ventanas que poseen profundidad, líneas hacia abajo y más oscuras y de esta manera poder diferenciar entre partes superficiales y partes con profundidad.
For the sales I followed the same pattern as before, that is, lines to the right for the walls and for the windows that have depth, lines to the bottom and darker, in order to differentiate between superficial parts and parts with depth.
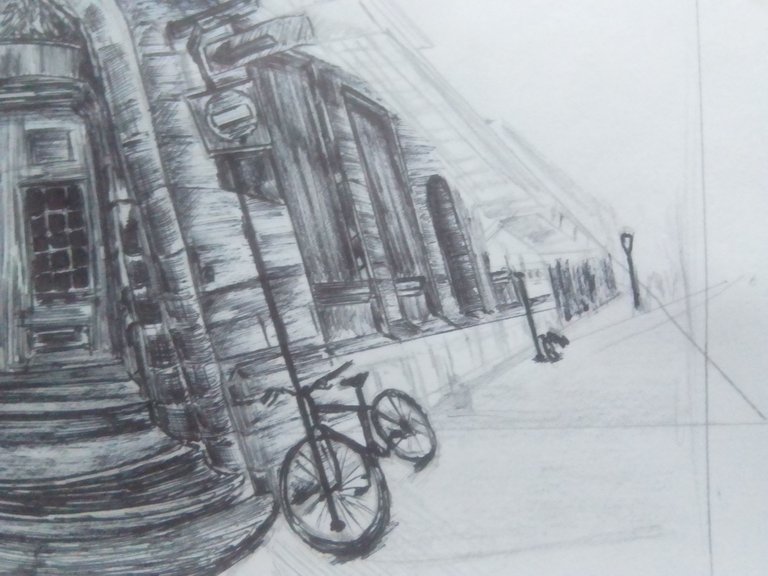
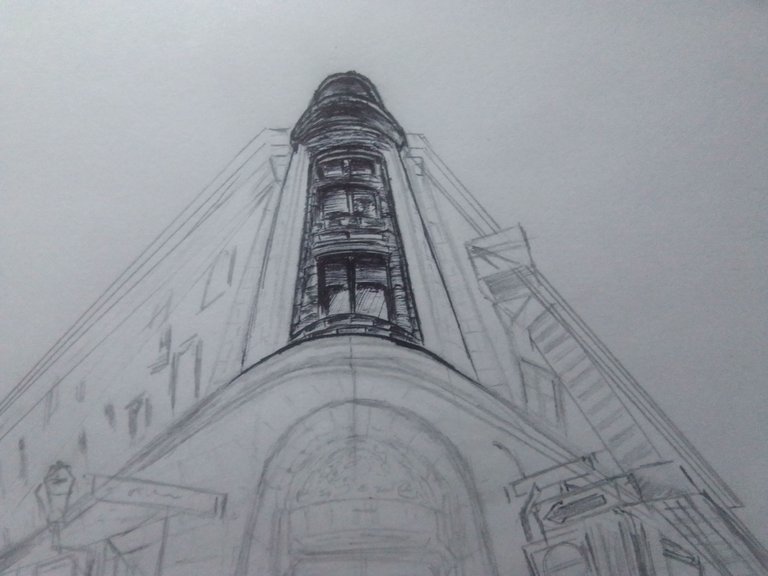
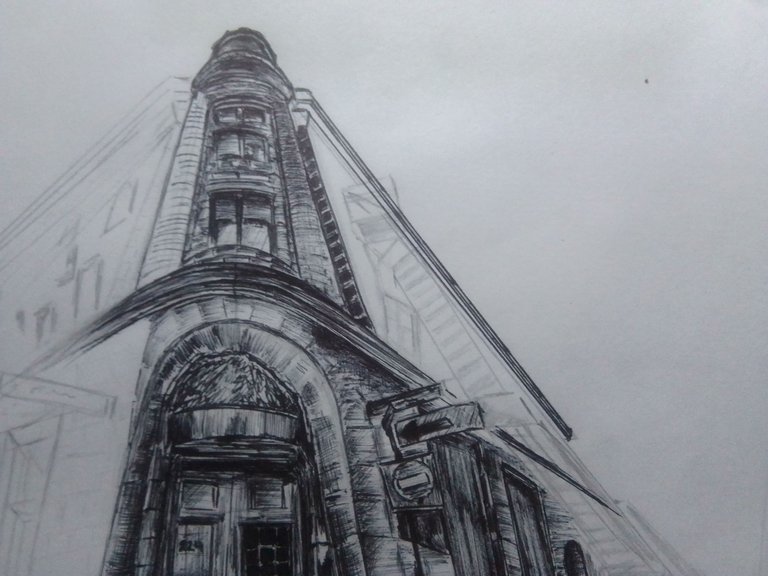
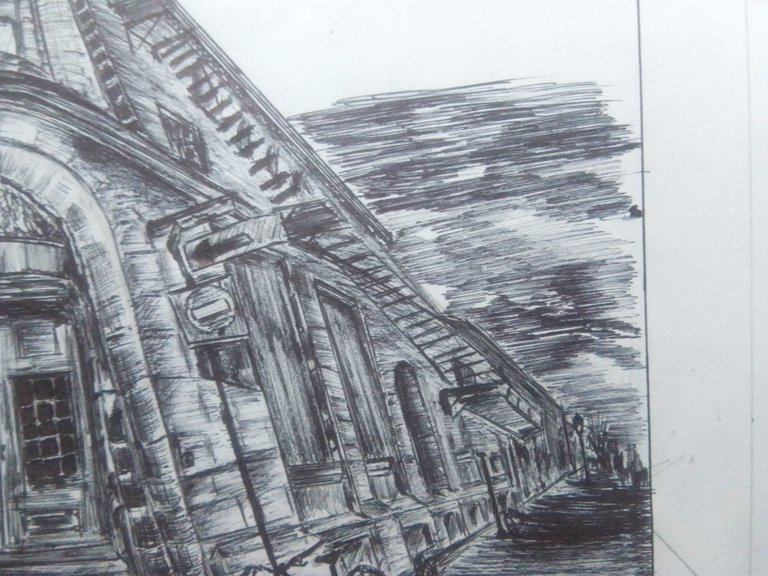
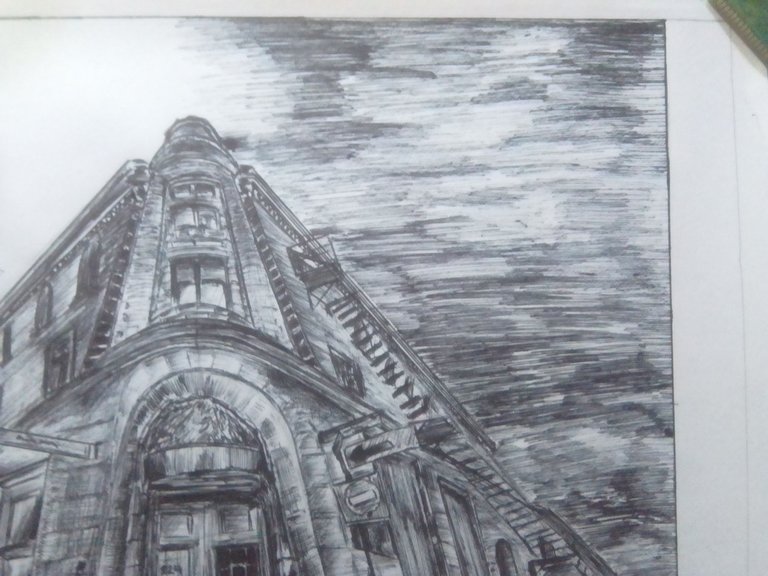
Una vez terminada esta parte, pasamos a la zona de arriba; esta fue un poco más sencilla, ya que al estar más elevada se aprecian menos detalles que en partes más cercanas a simple vista y de esta manera lo único relevante dentro de esta zona son esas escaleras y listo.
Once this part was finished, we moved on to the upper area; this one was a little simpler, since being higher up, less details can be appreciated than in parts closer to the naked eye, and in this way the only relevant thing in this area are those stairs and that's it.
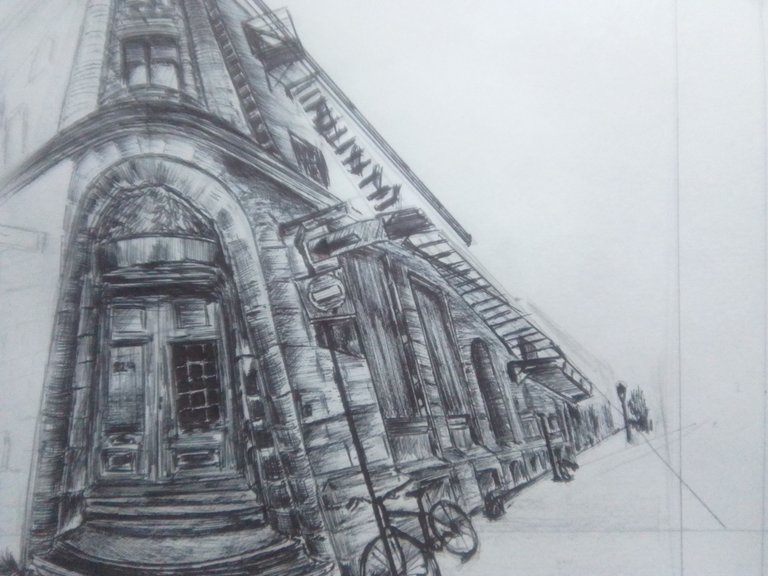
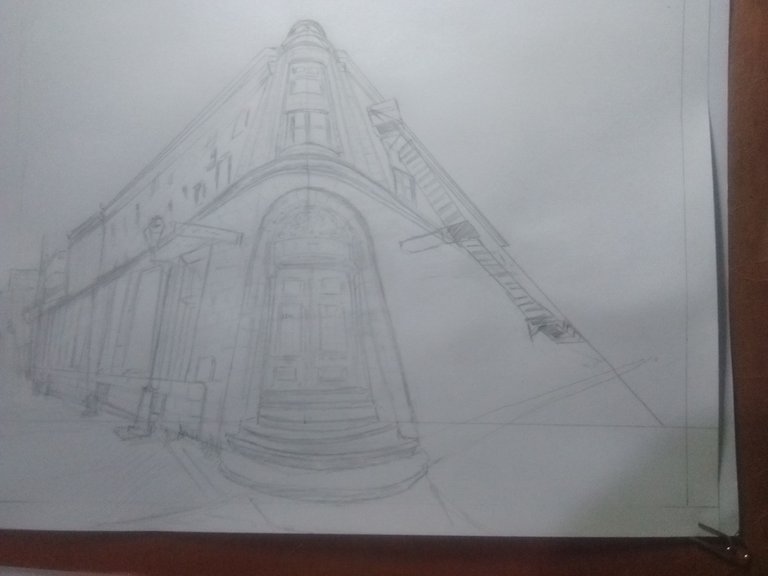
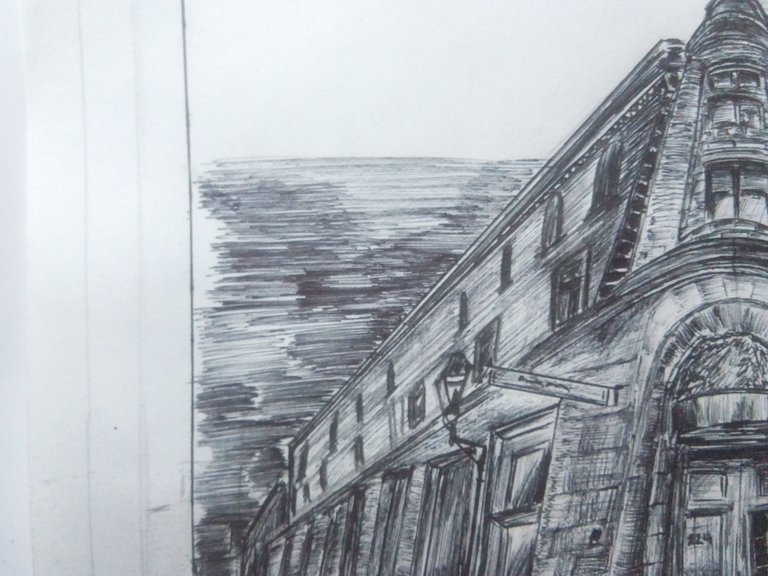
Ya con toda la parte derecha lista, pasamos a la zona izquierda. Aquí es básicamente lo mismo que en la parte derecha; el único cambio fue que tuve que corregir la zona de arriba, inclinándola un poco más y dándole más perspectiva a las ventanas, y tendríamos toda la fachada lista.
With the right side ready, we move on to the left side. Here it is basically the same as on the right side; the only change was that I had to correct the top area, tilting it a little more and giving more perspective to the windows, and we would have the whole facade ready.


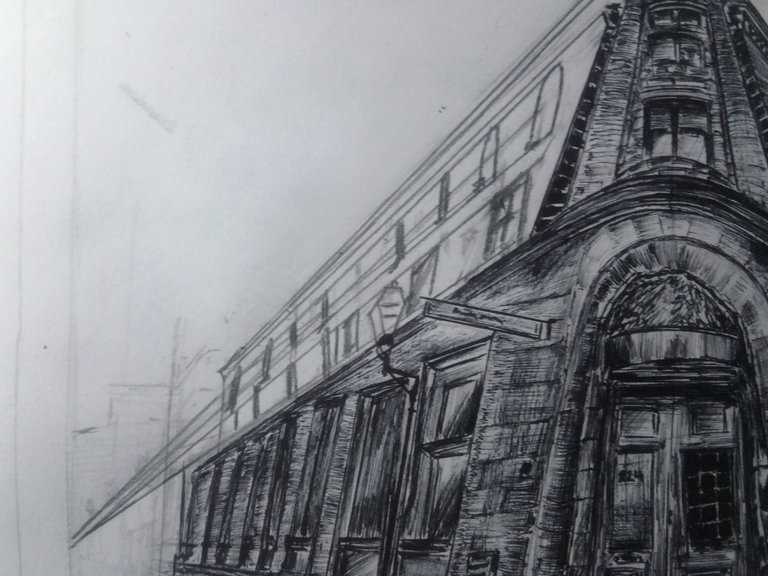
Lo siguiente que hice después fue crear un marco para darle un toque estético al momento de terminar el dibujo.
The next thing I did after that was to create a frame to give it an aesthetic touch when finishing the drawing.
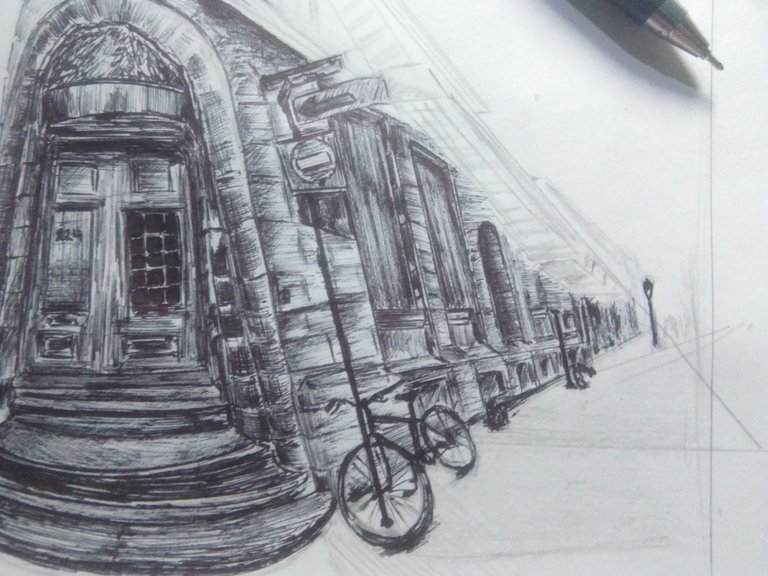
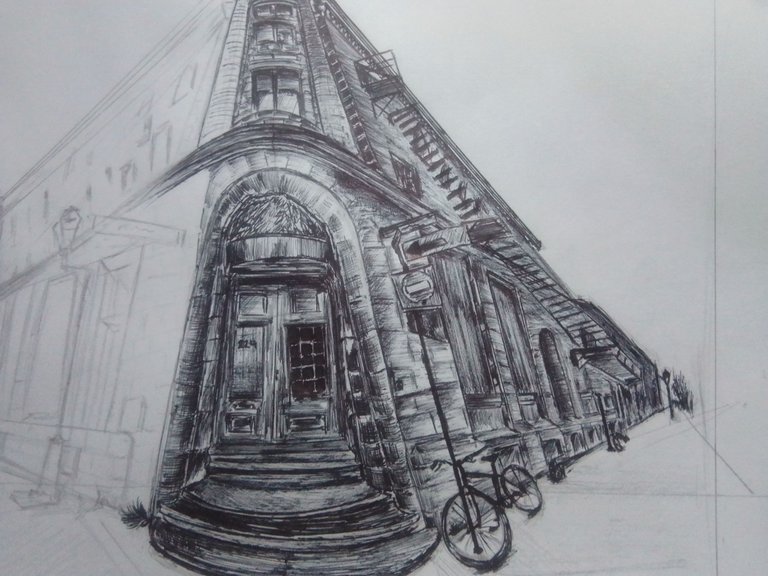
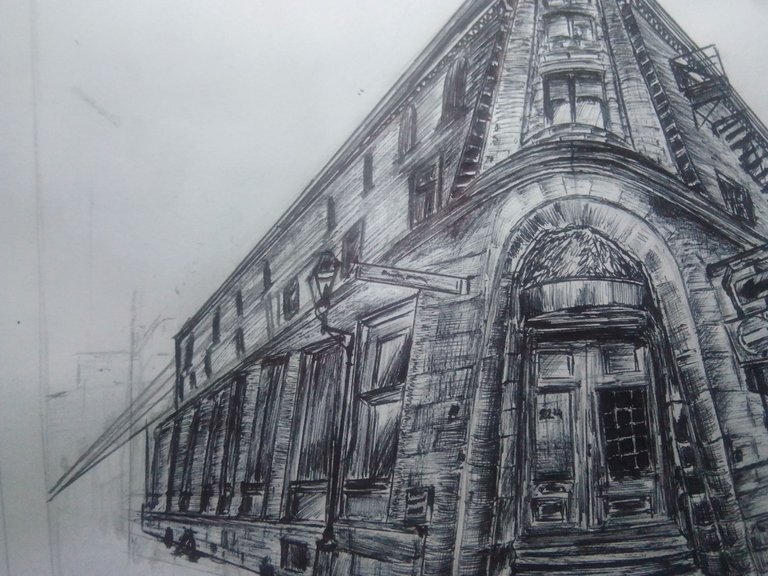
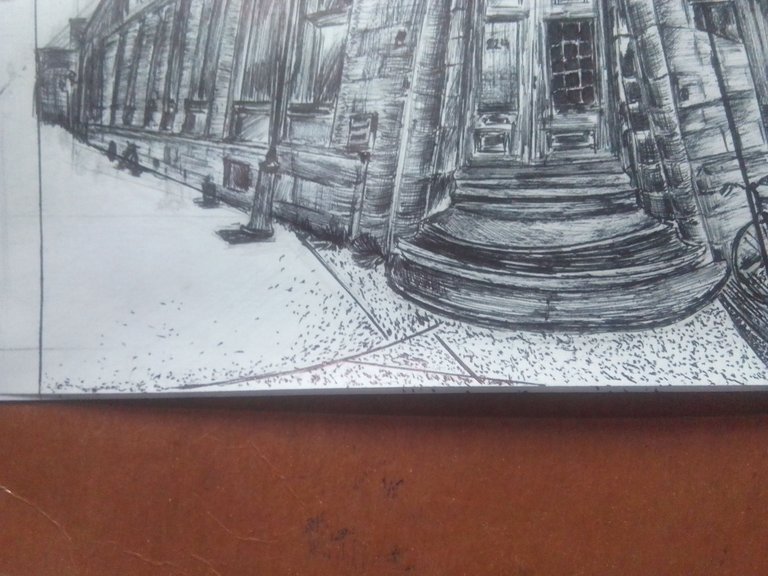
Al momento de hacer el suelo, noté que era una especie de granito, así que para las partes más cercanas agregué unos puntos que, conforme se fueran alejando, fueran disminuyendo su cantidad hasta el punto de no verse ninguno. Luego agregue líneas en una sola dirección, respetando las tonalidades y ya.
At the moment of making the floor, I noticed that it was a kind of granite, so for the closest parts I added some dots that, as they were moving away, were decreasing in quantity to the point of not seeing any. Then I added lines in only one direction, respecting the tonalities and that's it.
Para las nubes el procedimiento fue igual; solamente hice líneas en una dirección, oscureciendo en los lugares con más sombras y listo.
For the clouds the procedure was the same; I only made lines in one direction, darkening in the places with more shadows and that was it.
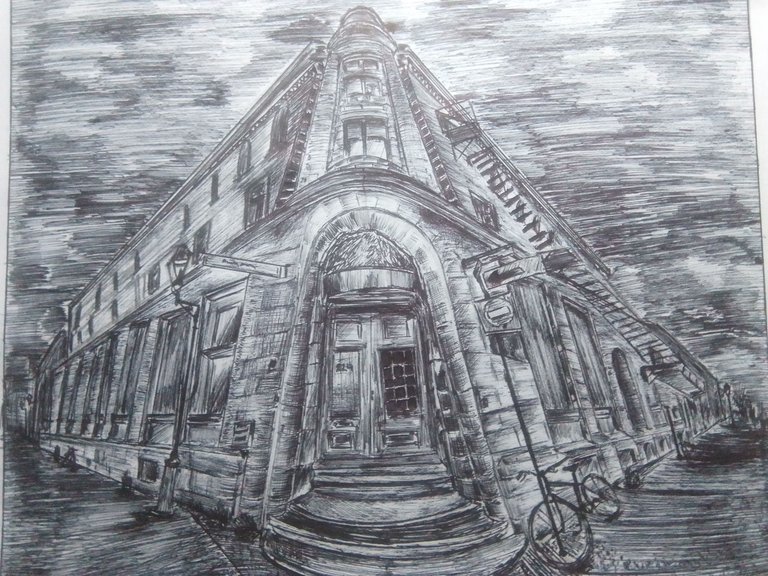
Muchas gracias por haber llegado hasta aquí; espero les haya gustado mi trabajo. Nos vemos hasta la siguiente publicación.
Thank you very much for having come this far; I hope you liked my work. See you until the next publication.
todas las fotos fueron tomadas con mi telefono Yezz art 2 pro/all photos were taken with my Yezz art 2 pro phone.
Las fotos editadas en este post fueron gracias a la aplicación para móviles InShot./ The photos edited in this post were thanks to the mobile application InShot.
link de la imagenes utilizadas en este post/link to the images used in this post👇
https://pin.it/2KyAKmNT0
| Muchas gracias por leer mi publicación! | Thank you very much for reading my post! |
|---|
| Redes Sociales | Social Network |

your drawing skills are amazing my friend👍 the details are very neat.
The reference image looks complicated but you did it pretty well!
However, I think you need to practice more to get a smoother background.
keep it up!
Thank you very much for the advice
Esta muy bueno el dibujo, se nota que tienes una buena tecnica de dibujo, siempre me gustaron los dibujos a lapiz en blanco y negro jeje se me hace que le dan un toque mas elegante 😊
Congratulations @cristhenos! You have completed the following achievement on the Hive blockchain And have been rewarded with New badge(s)
Your next target is to reach 4750 upvotes.
You can view your badges on your board and compare yourself to others in the Ranking
If you no longer want to receive notifications, reply to this comment with the word
STOPCheck out our last posts:
Bastante hermoso este dibujo.
buen trabajo, sigue adelante logrando mas metas.
Me encanto mucho la perspectiva en la que hiciste este dibujo, te ha quedado demasiado genial, excelente trabajo
Muchas gracias