Construction of a Small Hedge made of Living Woven Willow
Good morning dear friends and Hivers ! We're back in the garden for a little living construction using a weaving technique that I've always wanted to try and that I'll reproduce if it works this time.
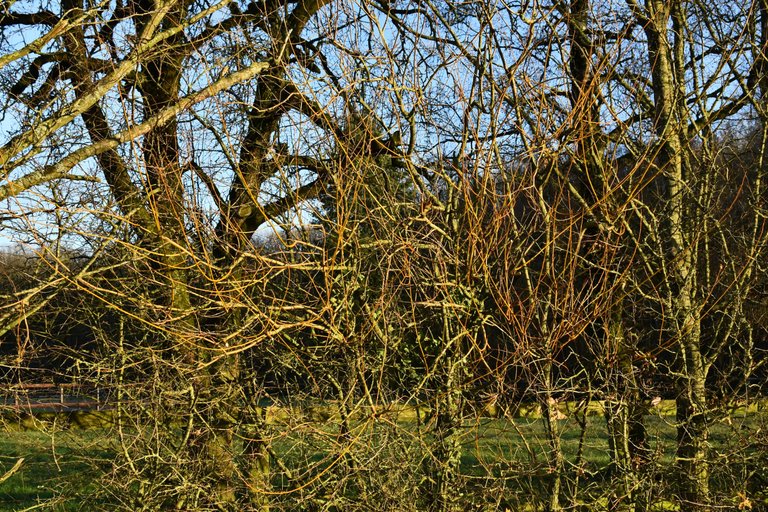
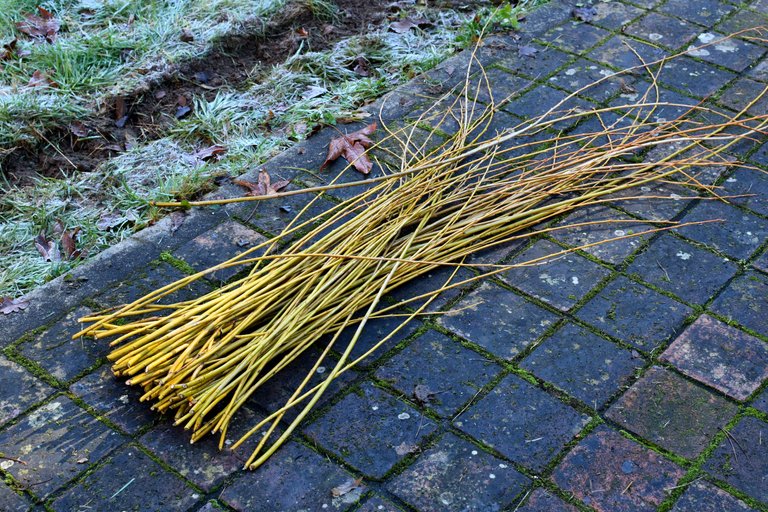
This is the willow we found on a walk and from which we collected around a hundred sprigs. It's Salix purpurea, one of the many varieties of willow also known as the basket willow because it's the same one used to make baskets.
Willow is one of the best plants for taking cuttings, and we even use it to make homemade cuttings hormone for use with other plants and to encourage root development.
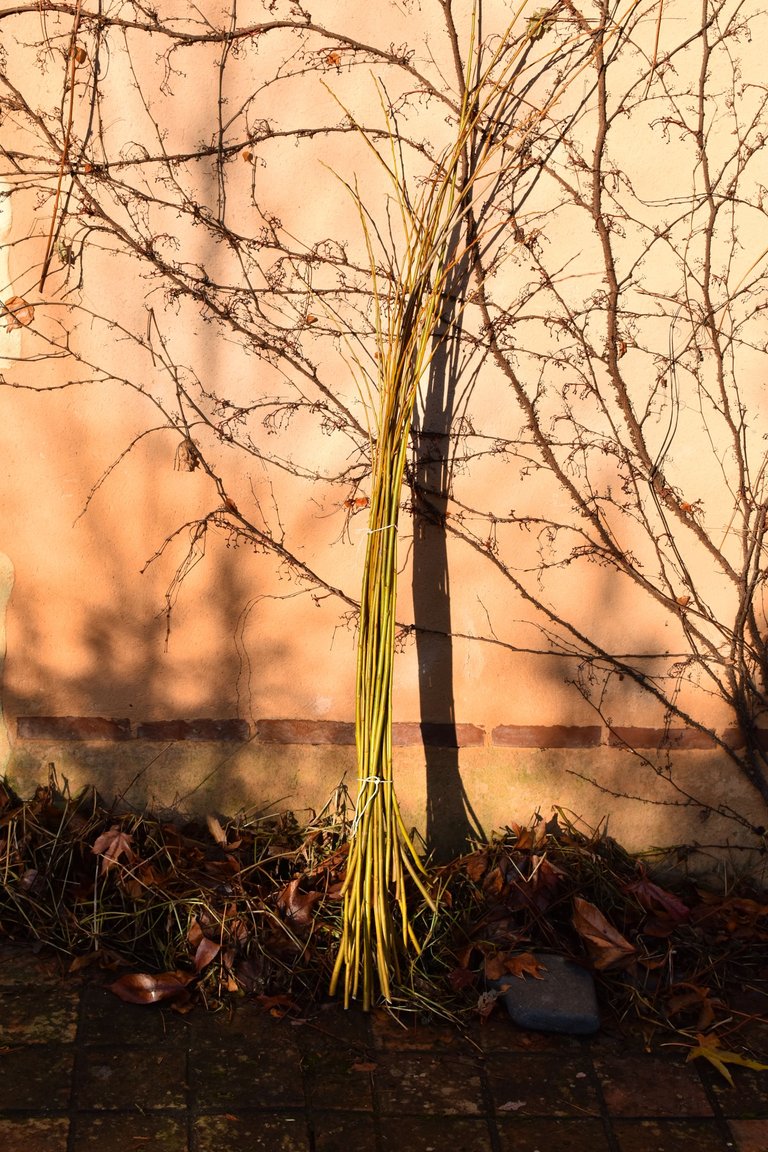
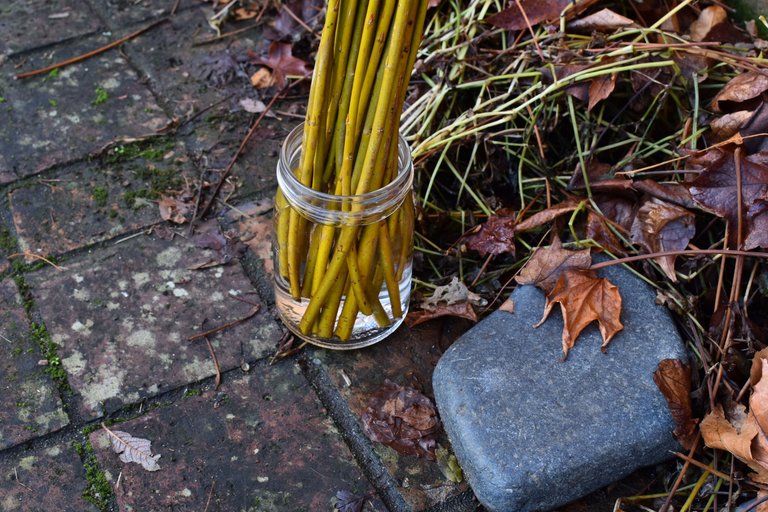
Here, we placed them in water to prepare the ground a little...
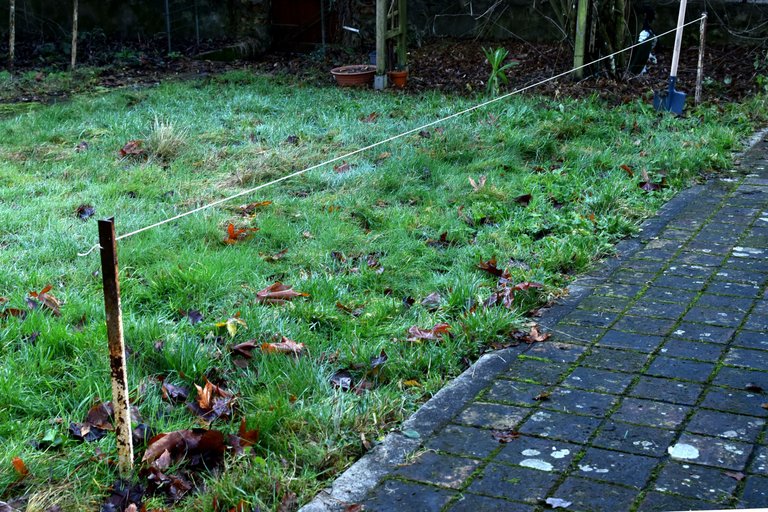
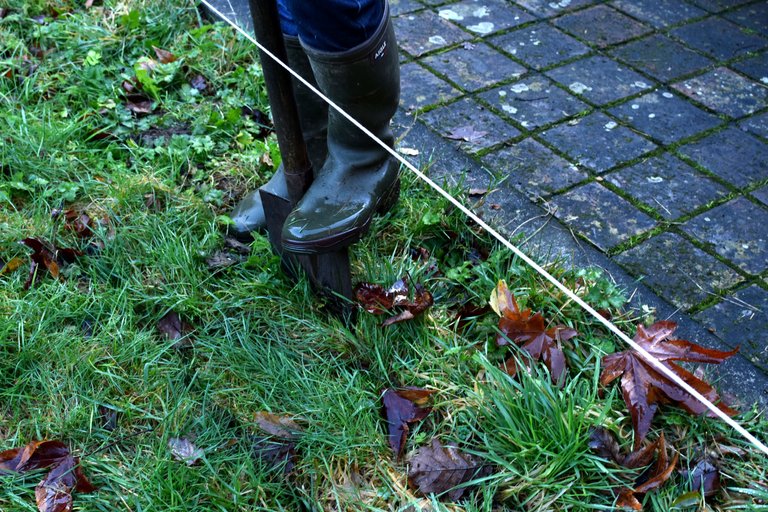
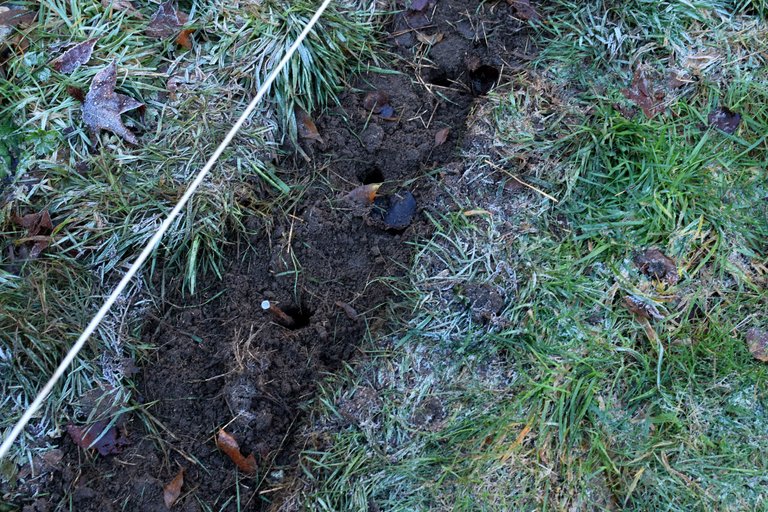
Stakes are planted, a rope tightened and off you go ! We dig and clear all the clumps of grass along our route. You also need to aerate the soil to ensure it is loose...
Now we're ready to plant !
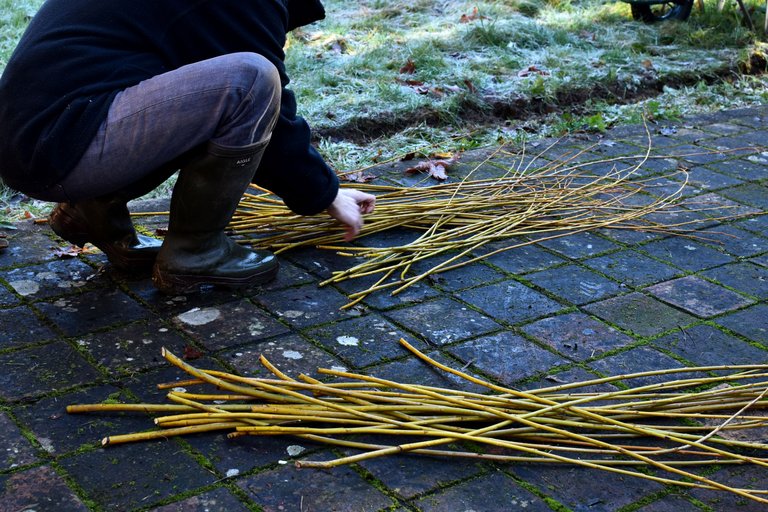
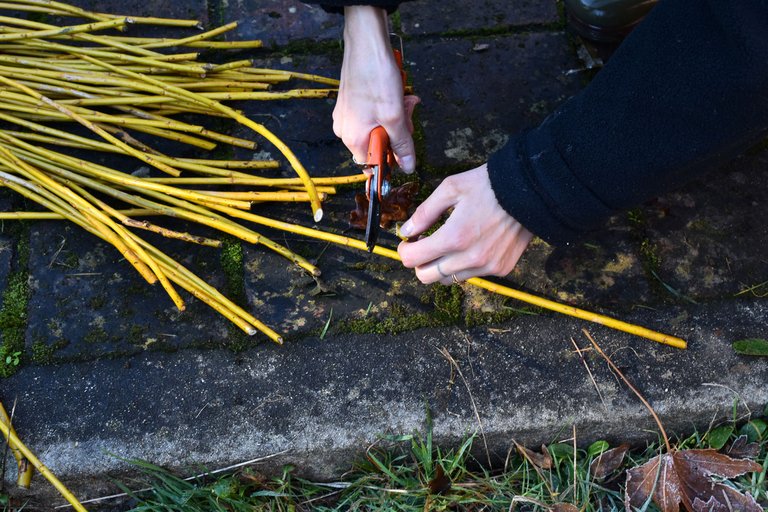
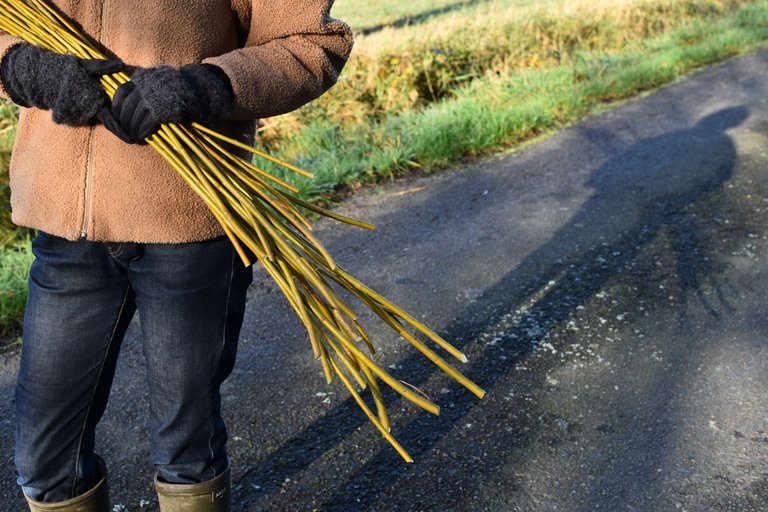
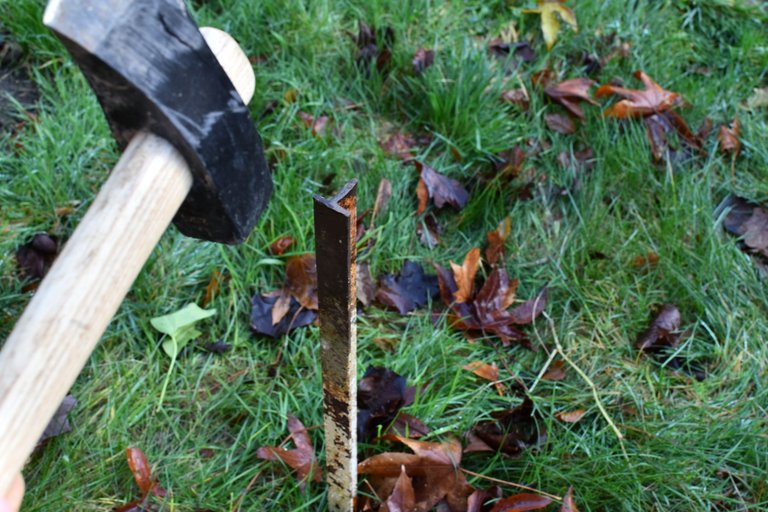
The stems are sorted according to their respective sizes and the ends are trimmed to ensure a clean cut !
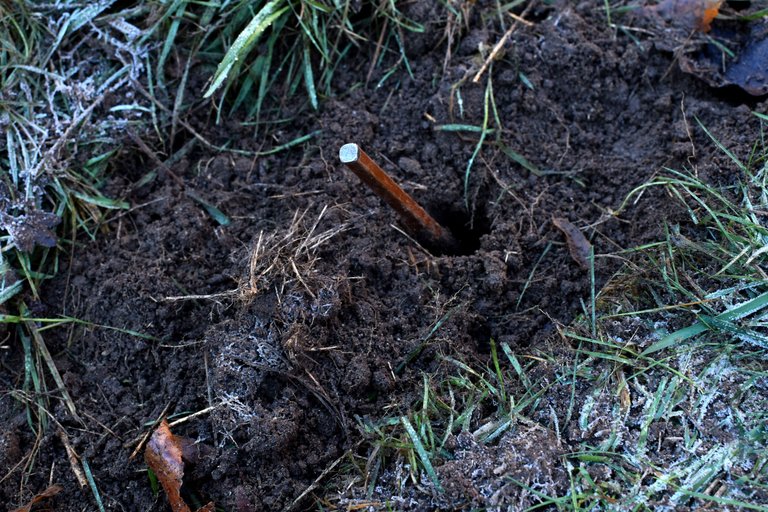
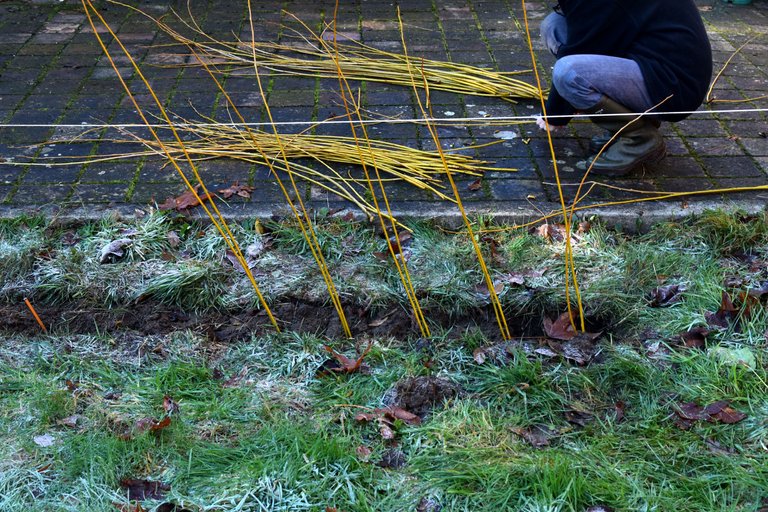
With a fairly long burin, you make holes for the stems that come afterwards. The idea is to make these holes at an angle to make braiding easier. I'd say about 30/35° in one direction and then offset in the other direction so that the willow strands intertwine.
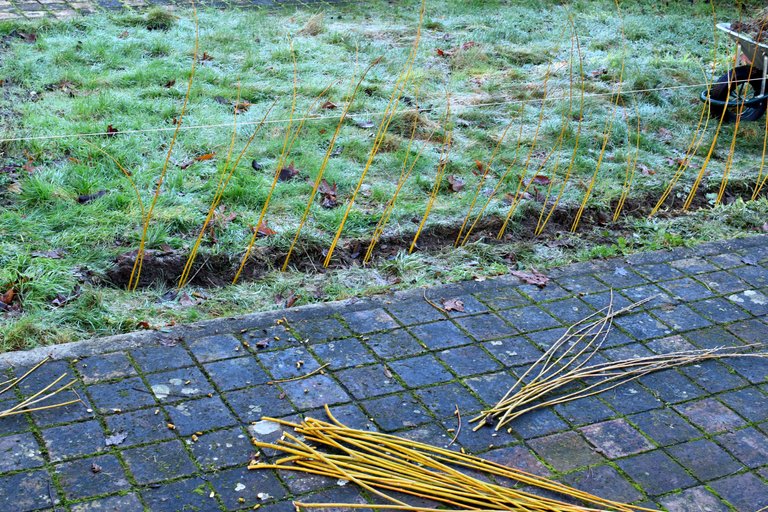
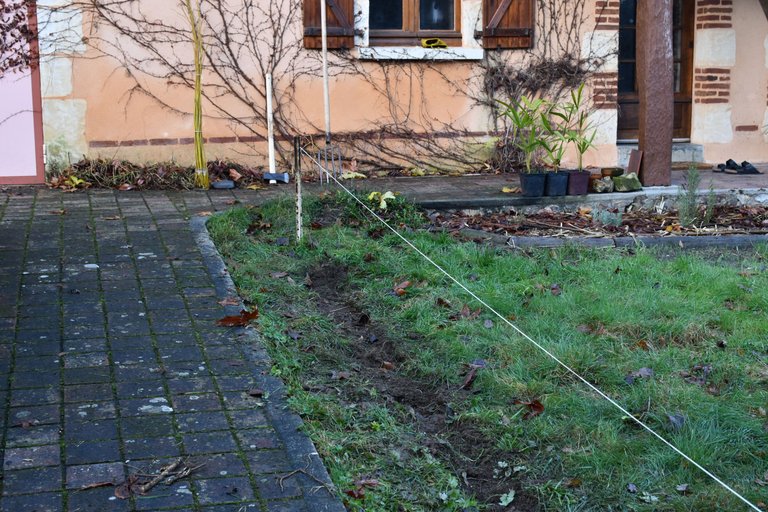
Now all the stems are well planted ! We pack the soil around them a little and then we can start braiding...
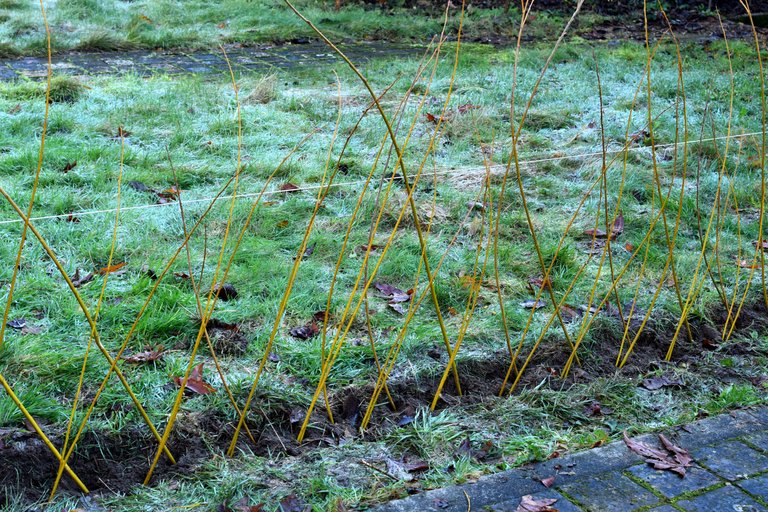
You simply pass one shoot over another, then underneath, then on top and so on. In the end, it's quite simple ! You just have to stick to the rhythm you've chosen...
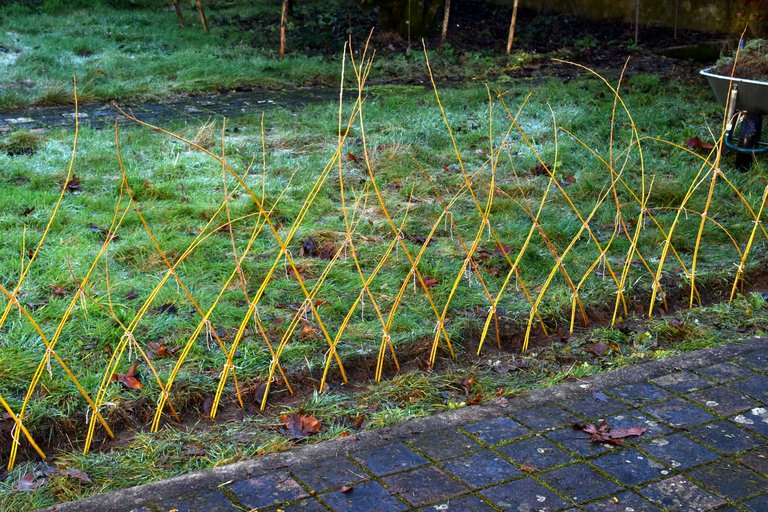
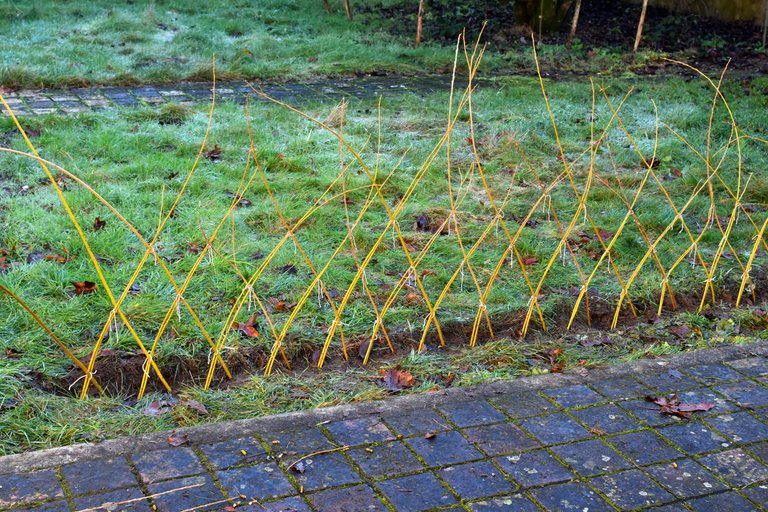
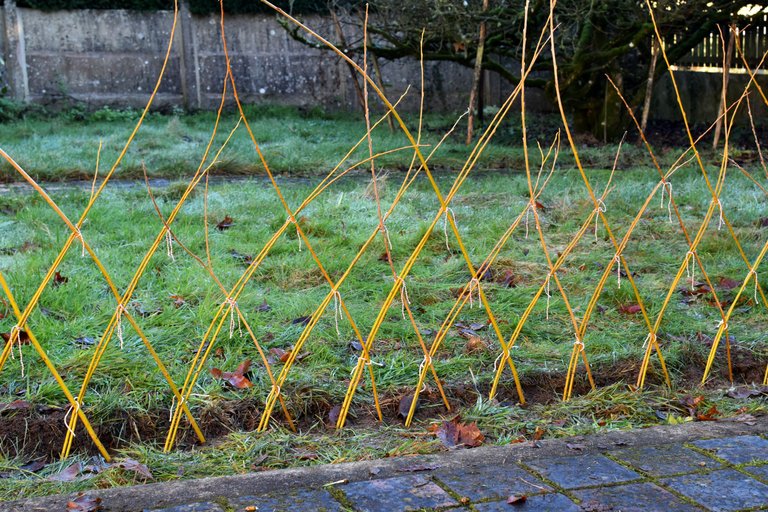
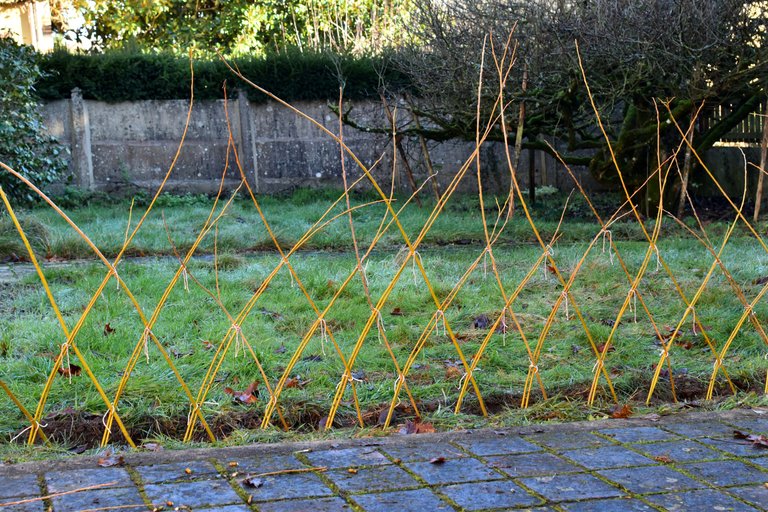
Here's the result after half an hour's braiding! It's more or less regular and there's an important little detail: try to put in more than one stem depending on their size and also so that the plant barrier is dense enough afterwards !
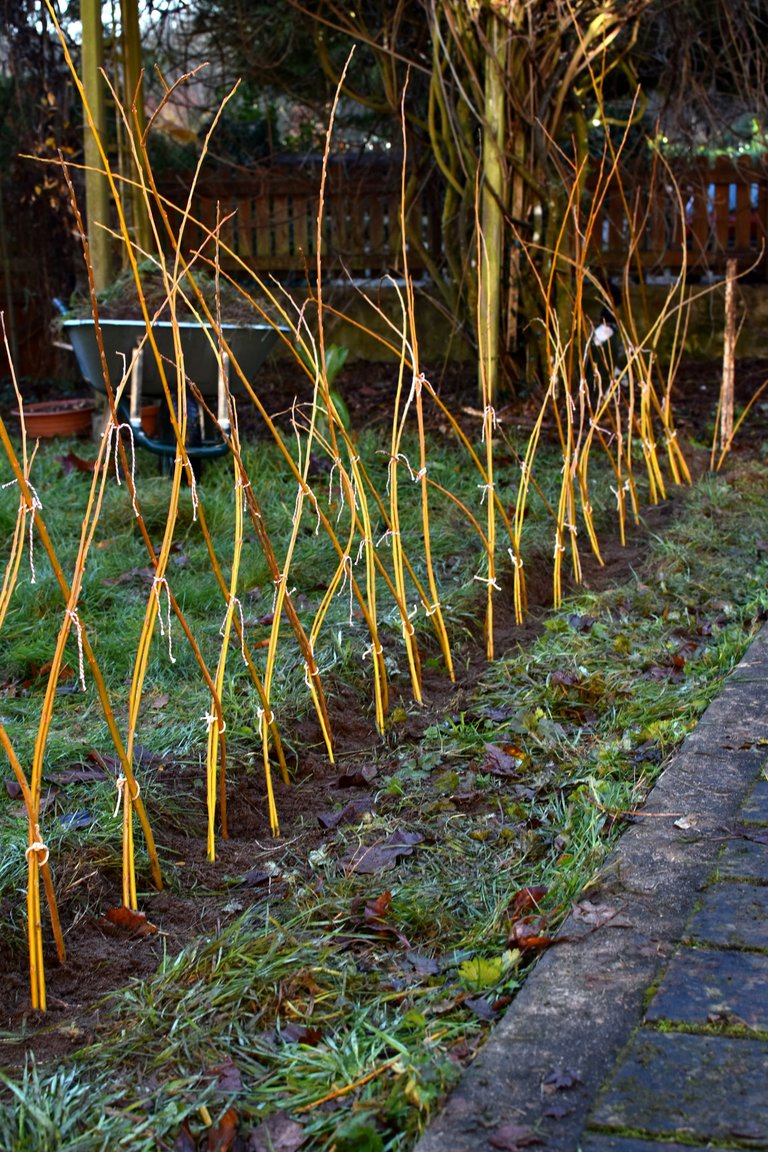
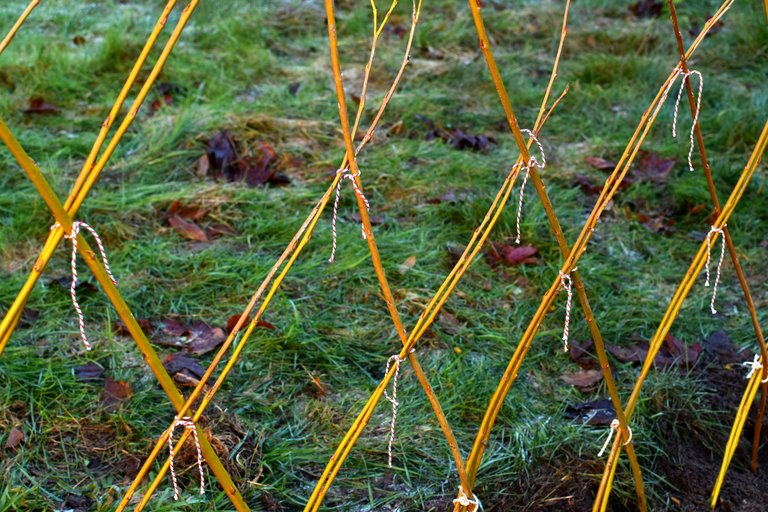
Putting little knotted strings at each intersection was the longest part of the whole operation, but already in this form, we really like the result !
We can't wait to see how well it holds up in the spring !
I hope you've found this article and technique inspiring, and I'd be delighted if you had any advice or feedback to share with us !
Thank you for visiting and I hope you have a lovely day,
<3
All texts and images presented here are my own.
Bonjours chers amis et Hivers ! Nous voilà de retour au jardin pour une petite construction vivante avec une technique de tressage que j'ai toujours voulu essayer et que je reproduirai si cela fonctionne cette fois-ci.
Voici le saule que nous avons trouvé lors d'une balade et dont nous avons récolté une centaine de brins environ. Il s'agit de Salix purpurea une des nombreuses variétés de saules qui s'appelle aussi le saule des vanniers car c'est le même qui est utilisé pour faire des paniers.
Le saule est une des plantes qui se bouture le mieux et on l'utilise même pour fabriquer de l'hormone de bouturage maison à utiliser avec d'autres plantes et pour favoriser la reprise des racines.
Là, nous les avons placé dans l'eau le temps d'un peu préparer le terrain...
On plante des piquets, on tend une corde et c'est parti ! On creuse et dégage toutes les mottes d'herbe le long de notre tracé. Il faut aussi bien aérer la terre pour que celle-ci soit bien meuble...
Nous voilà prêts à planter !
On trie les tiges suivant leurs tailles respectives et on en profite pour couper l'extrémité afin que la coupe soit nette et bien propre !
Avec un burin assez long, on aménage des trous pour les tiges qui viennent ensuite. L'idée est de déjà faire ces trous avec un angle pour que le tressage soit plus facile. Je dirai environ 30/35° dans un sens et puis en décalé, dans l'autre sens pour que les brins de saule s'entrecroisent.
Voilà, toutes les tiges sont bien plantées ! On tasse un peu la terre tout autour et nous pouvons dès lors passer au tressage...
Il suffit de passer une pousse sur une autre, puis en dessous, puis au dessus et ainsi de suite. C'est assez simple au final ! Il faut juste respecter le rythme que l'on a choisi...
Voilà le résultat après une petite demi-heure de tressage ! C'est plus ou moins régulier et petit détail important, c'est qu'il faut essayer de mettre plus d'une tige suivant leurs tailles et aussi pour que la barrière végétale soit assez dense par la suite !
Mettre des petites ficelles nouées à chaque intersections aura finalement été le plus long dans toute cette opération, mais déjà sous cette forme, nous aimons beaucoup le résultat !
On a encore plus hâte de voir si cela aura bien pris au printemps !!
J'espère que vous aurez trouvé cet article et cette technique inspirants et je serai ravi si vous aviez des conseils ou des retours d'expériences à partager avec nous !
Merci pour votre visite, je vous souhaite une très belle journée,
<3
Tous les textes et images présentés icic sont les miens.
!PIZZA
!LOL
!ALIVE
@anttn! You Are Alive so I just staked 0.1 $ALIVE to your account on behalf of @ cryptoyzzy. (2/10)
The tip has been paid for by the We Are Alive Tribe through the earnings on @alive.chat, feel free to swing by our daily chat any time you want, plus you can win Hive Power (2x 50 HP) and Alive Power (2x 500 AP) delegations (4 weeks), and Ecency Points (4x 50 EP), in our chat every day.

lolztoken.com
He doesn’t want to be spotted.
Credit: reddit
@anttn, I sent you an $LOLZ on behalf of cryptoyzzy
(1/8)
NEW: Join LOLZ's Daily Earn and Burn Contest and win $LOLZ
$PIZZA slices delivered:
@cryptoyzzy(1/5) tipped @anttn
Lovely article. U really worked hard for this wonderful article. Someday, i will try to follow the steps u provided n may be i too will get success to make Hedge as u made.
Full of information too.
I can't recall ever seeing such a method. I look forward to seeing the end result.
This post has been manually curated by @steemflow from Indiaunited community. Join us on our Discord Server.
Do you know that you can earn a passive income by delegating to @indiaunited. We share more than 100 % of the curation rewards with the delegators in the form of IUC tokens. HP delegators and IUC token holders also get upto 20% additional vote weight.
Here are some handy links for delegations: 100HP, 250HP, 500HP, 1000HP.
100% of the rewards from this comment goes to the curator for their manual curation efforts. Please encourage the curator @steemflow by upvoting this comment and support the community by voting the posts made by @indiaunited.
Thank you very much dear @steemflow, how have you been doing lately ?
!PGM
Your post has been manually reviewed for curation.
Principality of Bastion's Tavern - Our Leit Motiv? Let's Grow Together.
Discord | ECU | Site | Twitch | Donations | Paypal via Streamlabs
One click delegations: 500 HP | 1500 HP | 5000 HP |25000 HP | 100000 HP
Or delegate the amount you decide to @hive-143869, using peakd's wallet, for example.
BUY AND STAKE THE PGM TO SEND A LOT OF TOKENS!
The tokens that the command sends are: 0.1 PGM-0.1 LVL-0.1 THGAMING-0.05 DEC-15 SBT-1 STARBITS-[0.00000001 BTC (SWAP.BTC) only if you have 2500 PGM in stake or more ]
5000 PGM IN STAKE = 2x rewards!
Discord
Support the curation account @ pgm-curator with a delegation 10 HP - 50 HP - 100 HP - 500 HP - 1000 HP
Get potential votes from @ pgm-curator by paying in PGM, here is a guide
I'm a bot, if you want a hand ask @ zottone444
That looks really good. Very cool to make a beg like that. I must remember 😎
Your so creative❤️, but I'm curious, will the willow still grow?
!LOL
lolztoken.com
but I’ve quit smoking loads of times.
Credit: marshmellowman
@anttn, I sent you an $LOLZ on behalf of phillarecette
(3/10)
NEW: Join LOLZ's Daily Earn and Burn Contest and win $LOLZ
I hope the willow grows fast
Kudos to you!
Congratulations, your post has been upvoted by @dsc-r2cornell, which is the curating account for @R2cornell's Discord Community.
Thank you very much @jasonmunapasee and @dsc-r2cornell ✌️ !
It is an impressive job and very well done. Congratulations, a natural fence.
!LOL
lolztoken.com
He's working in the crust station.
Credit: reddit
@anttn, I sent you an $LOLZ on behalf of nialalolleur
(4/6)
Farm LOLZ tokens when you Delegate Hive or Hive Tokens.
Click to delegate: 10 - 20 - 50 - 100 HP
lolztoken.com
Thank you for being an !LOLZ supporter.
You must be killin' it out here!
@lolz.pimp just slapped you with 20.000 PIMP, @nialalolleur.
You earned 20.000 PIMP for the strong hand.
They're getting a workout and slapped 4/4 possible people today.
Read about some PIMP Shit or Look for the PIMP District
A big job, but it looks very good to me. !LOL
lolztoken.com
When it gets bad I have to take something for it.
Credit: reddit
@anttn, I sent you an $LOLZ on behalf of papilloncharity
(6/10)
Delegate Hive Tokens to Farm $LOLZ and earn 110% Rewards. Learn more.
For me too :))
Now, every weekend, I'm searching for signs of growth hehe !
Have a good day and weekend in advance @papilloncharity ✌️😘
Hahaha, I know that feeling so well. One plants something and then every day one goes to peep to hopefully see some growth. Then one only peeps occasionally and still nothing. Then what a surprise, as one morning by chance one goes to look, and voila, the growth has started. Big smiles all around. !LOL
May you also have a good weekend @anttn
lolztoken.com
The Dim Reaper?
Credit: reddit
@anttn, I sent you an $LOLZ on behalf of papilloncharity
(1/10)
NEW: Join LOLZ's Daily Earn and Burn Contest and win $LOLZ
I really amazed of this unique garden construction. This is the first time I saw this kind of plant. The weaving method or techniques is really good, I have gained lots of ideas in this article. Thank you for sharing this my Friend.
Congratulations @anttn! You have completed the following achievement on the Hive blockchain And have been rewarded with New badge(s)
Your next target is to reach 83000 upvotes.
You can view your badges on your board and compare yourself to others in the Ranking
If you no longer want to receive notifications, reply to this comment with the word
STOP