DIY: How To Fix A Hard Disk Drive.
Good day to you all here in the DIYhub community. It’s always a pleasure to be among people with a creative mindset. Every day would always be a day to learn something and gain additional knowledge to what one has learned before.
Today I would be sharing with the community HOW TO FIX IN A HARD DIST TO YOUR PC.
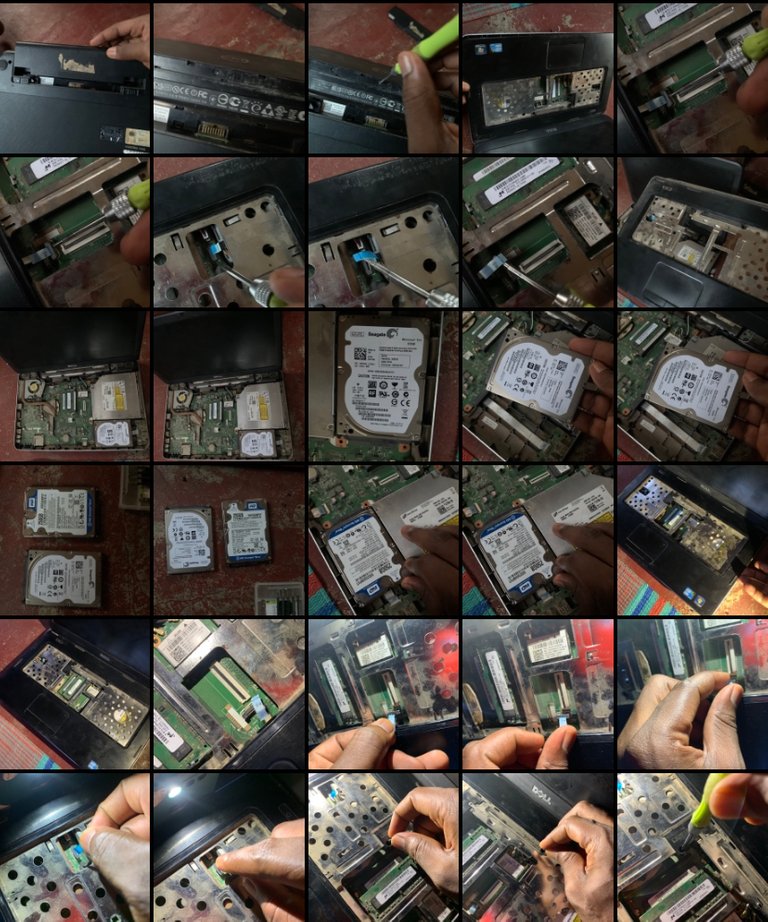
Group screenshot of my captures. All images are mine.
Follow me as we learn how it works.
MATERIALS
- P.C or LAPTOP 💻
- HARD DISK DRIVE
- SCREW DRIVERS

STEP-BY-STEP PROCESS
STEP 1: SHUTDOWN AND DISCONNECT POWER
The first step to take while trying to make sure one successfully fix the hard drive is to shutdown. This shutdown processs is common and know my most if not all. It is done in the software part of the computer. The windows option is selected and then from the pop up, you click “shutdown”. After clicking on shutdown the system automatically powers off after closing all files and documents.
Disconnecting the power is by removing the charging cable from the electrical source. You can unplug it from the socket or you just remove the connection from your pc.
STEP 2: REMOVE BATTERY

After a successfully shutting down, then next think I’d to removed the pc battery. How do you remove the battery? Different system has different ways their battery is connected to the system. So all you have to do is to check for how your pc battery is connected, there is either a lock 🔒 and unlock slide where you can get to push the system battery.
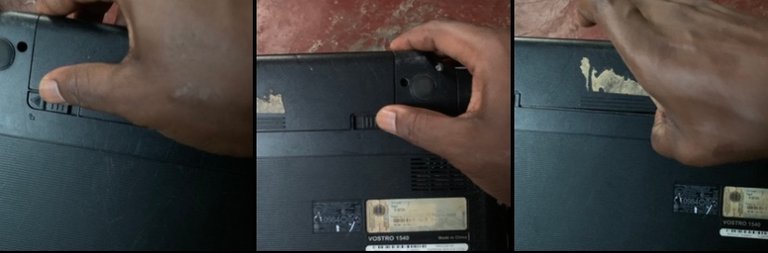
For mine there is a slide unlock option where I slide and then pull out the battery.

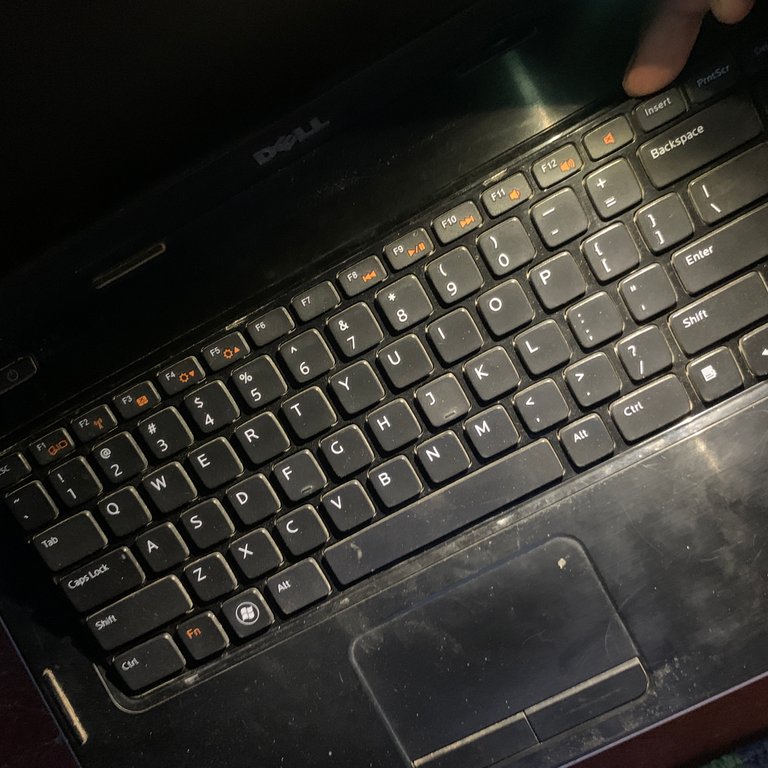
STEP 3: REMOVE KEYBOARD
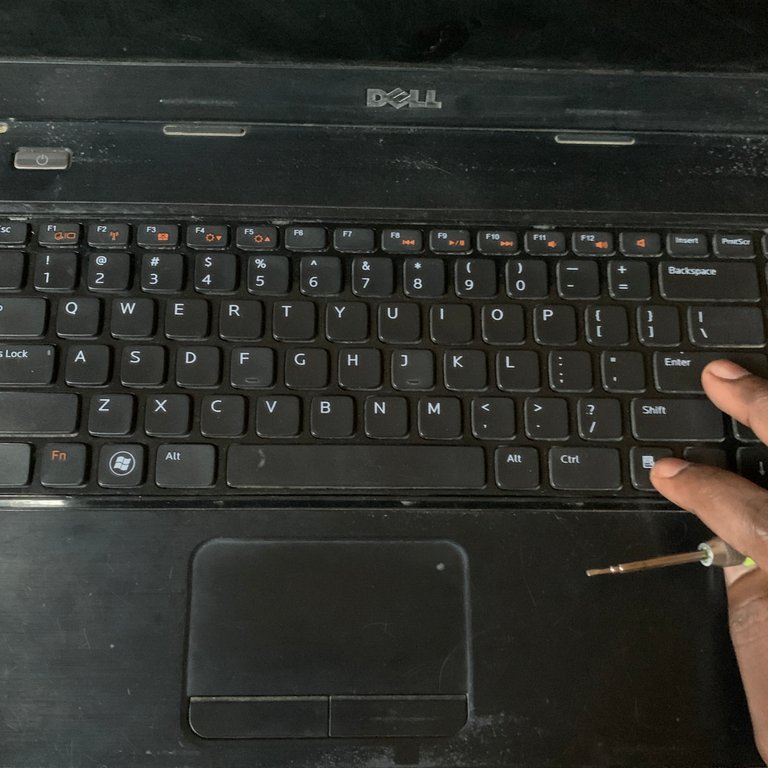
To do this, you have to study the type of keyboard ⌨️ your pc comes with. Is ot a removable one or a static one that is directly connected to the pc case. For my system it has the removable keyboard and that’s why I had to remove it first.

Removing it won’t cost much. There is a lock that keys the keyboard to the system case. Detect those key and unlock them gently. There are four keys holding my system and I gently removed them. After the removal then you will see a connection between the keyboard and the motherboard.
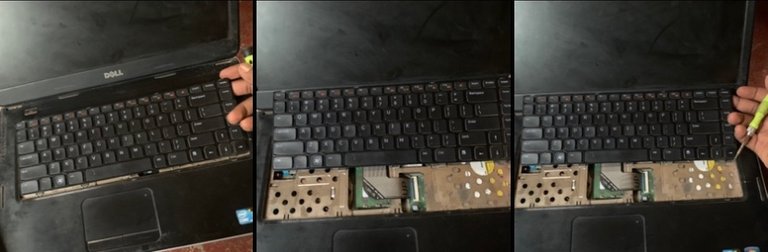
Carefully unlock the cable from the motherboard and remove the keyboard.
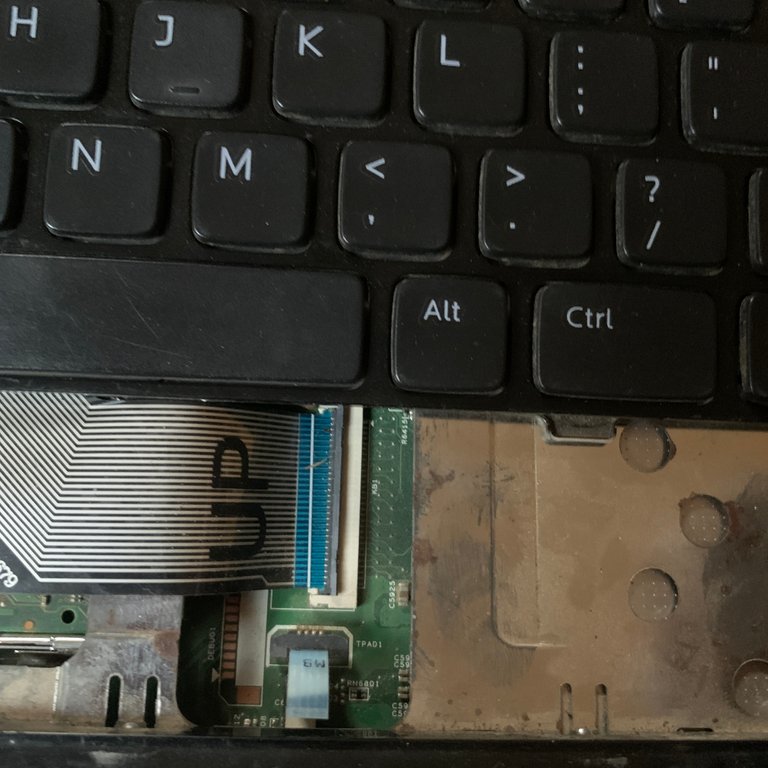
STEP 4: LOCATE EXISTING DRIVE OR STORAGE LOCATION
This is where the work is, at this point you have to Lacoste where your system hard disk drive is placed for some systems it might be much easier than for others. There might be an easy opening where you can just get to loose few screws and then you see the drive straight away.
But for some you have to go a hard way towards changing the hard drive. You might have to loose all the screw attached to the pc and then open it up halfway before you could get to it. Either way just make sure you are careful while handling
STEP 5: SCREWING AND FIXING
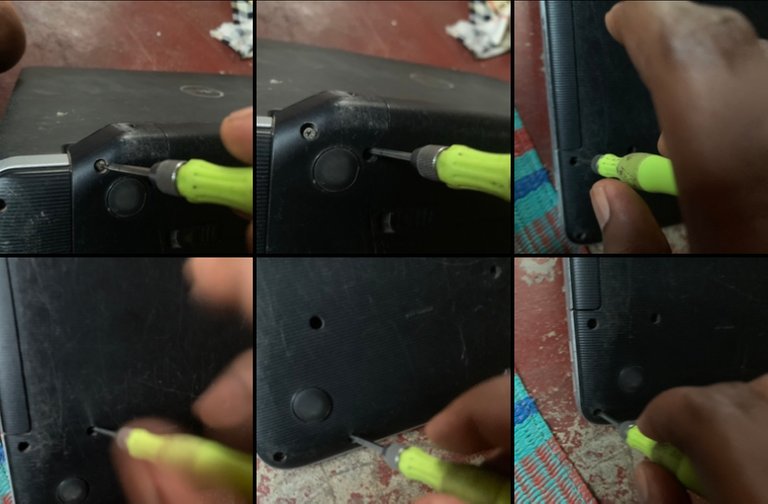
There is no open door or easy way to tire move my pic harddrive than to loosen all the screws and open up the motherboard. There is a screw below the keyboard that tightened the upper part of the system to the motherboard and there are up to ten screws beneath the keyboard, and the last screw under the battery.

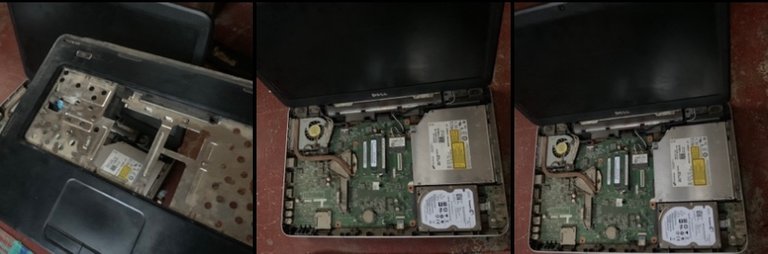
After successfully loosening all the screw, there are also some cables I need to unlock from the motherboard so I can be able to remove the casing. After unlocking those cables then I was able to remove the casing and get my hands on the hard disk drive.
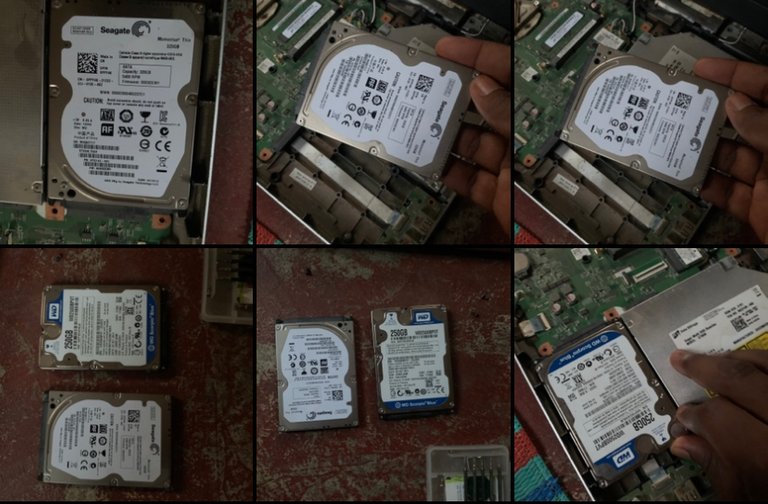
The hard disk drive in the pc was 320gb, so I gently removed it from the motherboard and then attached the new hard disk to it. The new hard disk was 250gb storage.
STEP 5: COUPLING
After successfully replacing, the next thing which is the last thing is to couple the pc. I did that by locking those cables first then after wards I returned the screws and tightened them to their various spots. After tightening the next thing is to fix the keyboard and the cable. It was don’t the way I loosened it. So after that lock it with the system case and that’s all.

I connected the pc to the electricity and it successfully booted. So the hard disk drive swap was a success.
Finally! My PC Is Back Again. 😃

Thank you for sharing this post in the DIYHUB Community!
Your content got selected by our fellow curator ashikstd & you just received a little thank you upvote from us for your great work! Your post will be featured in one of our recurring compilations which are aiming to offer you a stage to widen your audience within the DIY scene of Hive. Stay creative & HIVE ON!
Please vote for our hive witness <3
Thank you
Congratulations @abdul-qudus! You have completed the following achievement on the Hive blockchain And have been rewarded with New badge(s)
Your next target is to reach 8000 upvotes.
You can view your badges on your board and compare yourself to others in the Ranking
If you no longer want to receive notifications, reply to this comment with the word
STOPTo support your work, I also upvoted your post!
Check out our last posts:
Support the HiveBuzz project. Vote for our proposal!
My PC should be afraid of me right now because if it's hard drive gets faulty, I know how to fix it😅
Can you do a tutorial on how to fix a fan. My standing fan has gone bad🤧
Heheh. 😂 you pc should. Just like mine was. But now it’s happy with me.
And yeah I already make a tutorial on coupling a new fan but I never made on for a repair. My fan isn’t faulty yet.
Okay then, I'd be patiently waiting for your fan to get faulty (in a good way I mean😅)
😂 😂. No problem. Hopefully I might get a damaged one even before then.