DIY: How I recycled some wastes to a decorative pen and pencil holder.
Good day to you all here in the DIYhub community. It’s always a pleasure to be among people with a creative mindset. Every day will always be a day to learn something and gain additional knowledge to what one has learned before.
Today I will be sharing with the community HOW I MADE A PEN HOLDER FROM WASTES
It is said that some of these wastes are not so good to be dumped just anywhere because most of them don't decay over decades. It could be buried but not decaying. Plastic and some other metals are good examples.
Nowadays due to advanced technology all of these plastic and other wastes are being recycled and also used to produce some other stuff that would be so useful to humanity.
I feel it's great to even utilize them if possible and be used as some sort of useful indoor tool. So this made me think and made this pen holder.
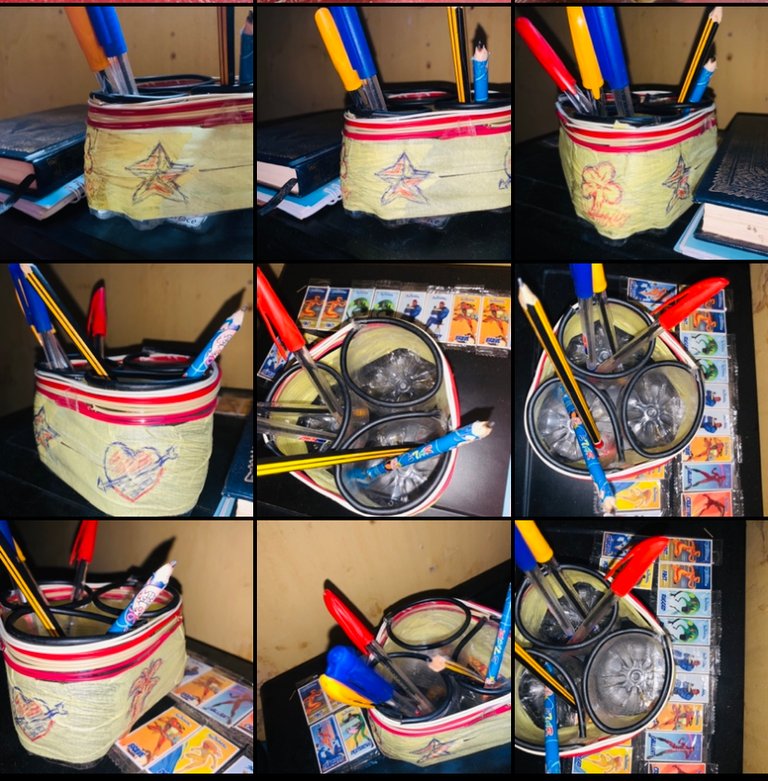
Group screenshot of my captures. All images are mine.
TOOLS/MATERIALS
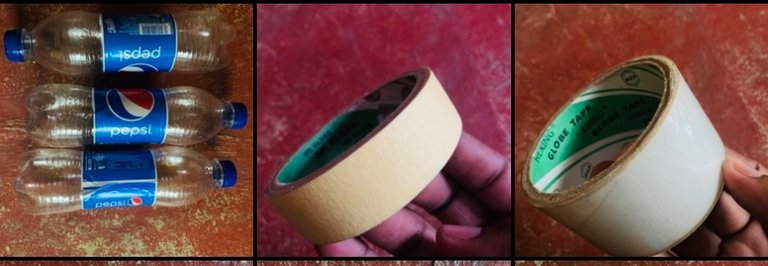
- PLASTIC BOTTLES
- BLADE
- NYLON TAPE
- PAPER TAPE

- DAMAGED WIRES
- PEN AND PENCILS
STEP-BY-STEP PROCESS
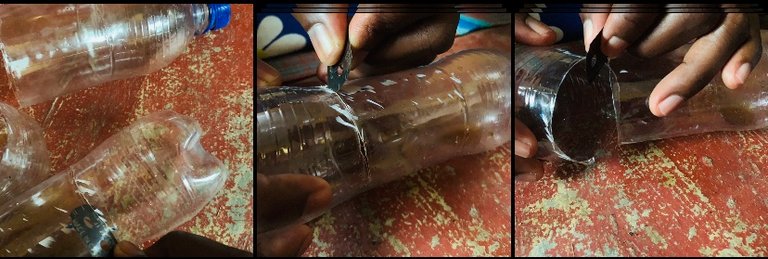
STEP 1: CUTTING THE PLASTIC BOTTLES.
The first thing to do was to cut the plastic bottles into sizes and that was done using a blade. I cut off the upper part of the bottle and used the lower part of it so it could sit and have a balance.
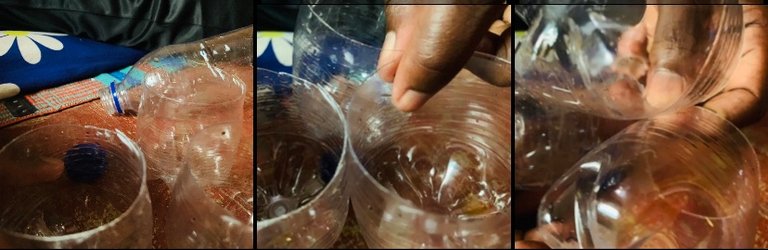
STEP 2: WRAP UP
The next process after cutting the bottle top was to get the transparent nylon tape and wrap the three bottles together. I used the tape to hold the three bottles together since there was no way I could get them glued together.
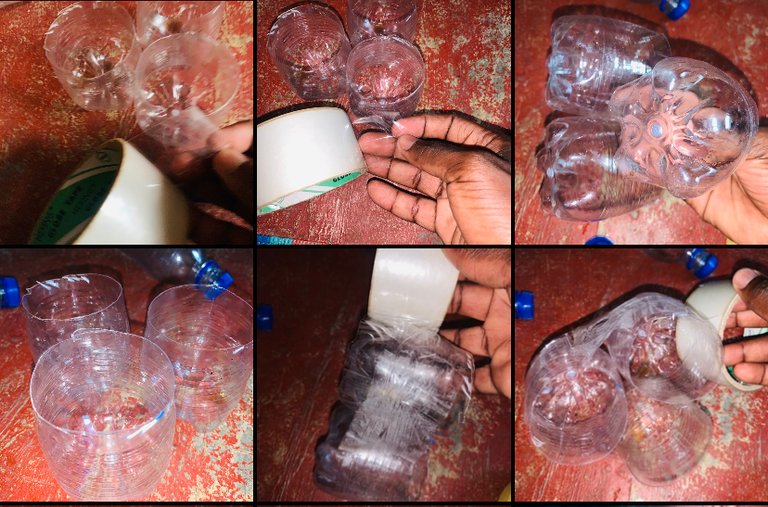
Glue would work fine if there is glue available. But I used transparent tape and it worked out fine.
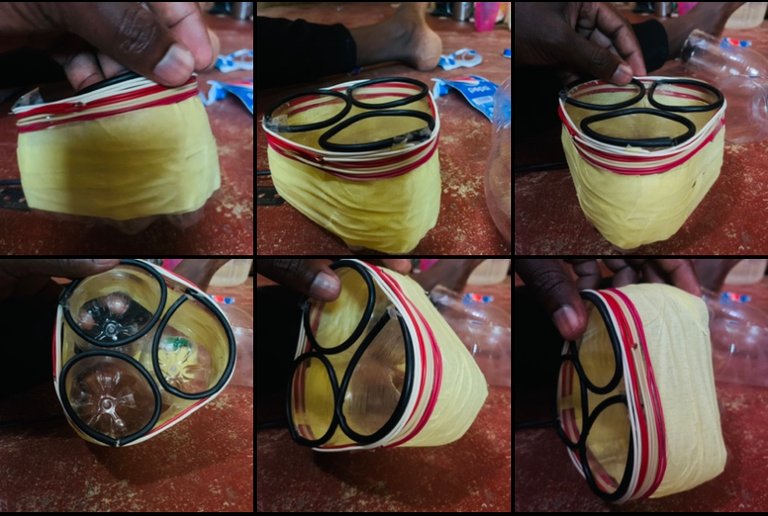
STEP 3: TAPING THE CUT OUT

The next step I took was to tape the areas I cut. And this is for it to look more beautiful and a little attractive to the eyes. How do I get to do that? I was almost out of ideas because I thought I should just tape it with the paper tape before I realized I could even use the black wire.
The red and white wires were extracted from the black wire as the coating. So there is a thin cutout on the black wire and that was how it fitted well into the cutouts. I love the result. The edges where the wire met were later glued to the plastic to avoid several removals.
STEP 4: WIRED DESIGN
The next step was to give it a little design to make it look more fancy and not just the transparent plastic alone. So I tried making some wrappings.

I joined the wires together using the copper that was coated. I joined them alternating with each other. The red wire joins the white.

After which I started wrapping up from the edges till it finished. At least not cover up some part of it and also give it an amazing look.

STEP 5: FINAL WRAPPING
I had no choice but to cover the remaining part with the paper tape and that was just way easier because I just had to wrap it around the remaining part of the plastic that never got wired.
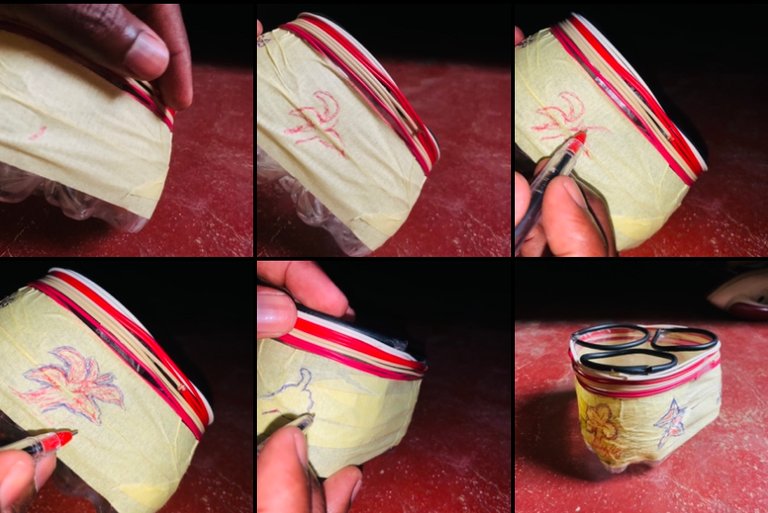
STEP 6: THE ARTWORK
At this point, it is time to almost round-up with the job done. I felt like making some sketches on the paper tape to give it some kind of special appearance. I sketched some artwork on it as presented in the capture.

I felt those captures even gave it a better look than the plain tape.
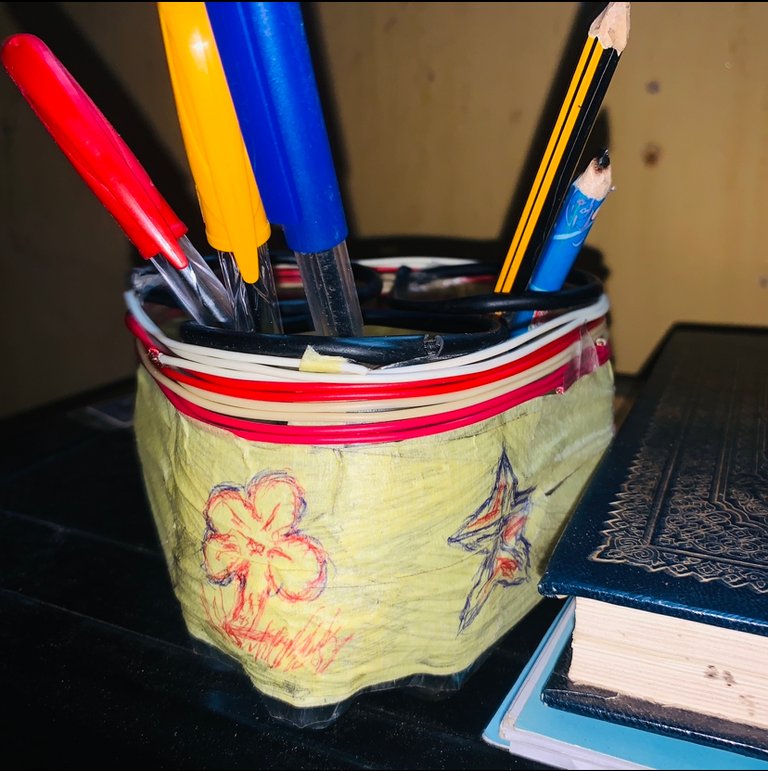
##THE PREVIEW
Finally!! The job was done.

After the sketch, I had to take captures of it from different angles. I placed it on a shelf and served its purpose.
This is all about today's DIY experience. See you again next time.

Wow! I'm always impressed by the thoughts that was born before the actual creation, this is creative.
I guess I know where to send my empty nutri milk and la casera cans to now 😂
This pen and pencil holder looks great. You're right. The materials we usually throw away can be used to make something beautiful like the one you made. Well done! Keep up the good work!
Your level lowered and you are now a Red Fish!